
How to Make Your Own Charcuterie Board
This is a simple DIY Guide to make your own charcuterie board.

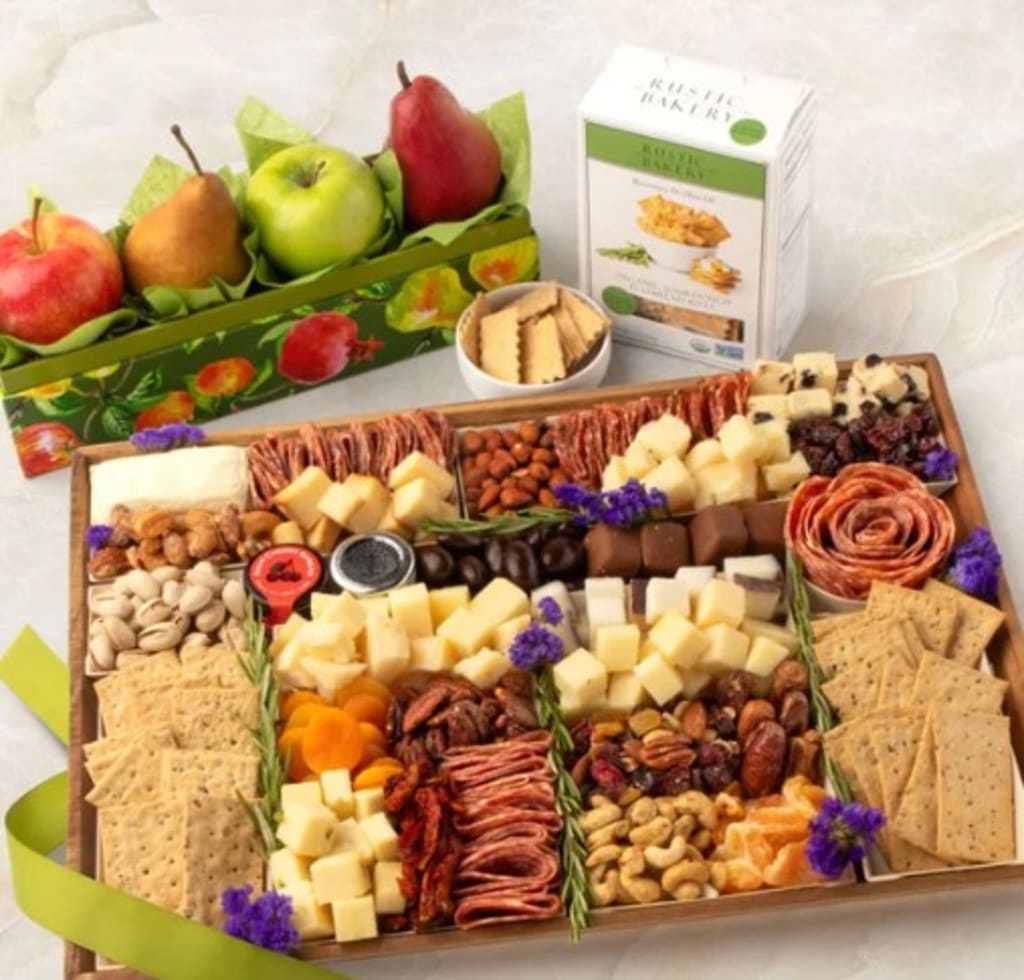
What is a “Charcuterie Board”?
The name “charcuterie board” comes from the French word charcuterie (pronounced shahr-KOO-tuh-ree).
Originally, a charcuterie platter would have contained only cured meats. Over time — especially in the United States — the concept expanded.
Restaurants began serving cured meats arranged on wooden boards, often paired with cheese, bread, pickles, and mustards.
Eventually, the cheese and accompaniments became just as important as the meat. The term “charcuterie board” stuck, even though many modern versions include far more than cured meats.
Today, the phrase typically describes a curated board of meats, cheeses, fruits, nuts, crackers, and spreads, even though technically the word charcuterie refers only to the meat portion.
How to Make Your Own Charcuterie Board
Charcuterie boards are visually appealing, practical, and perfect for a DIY project. They have become the centerpiece of everything from holiday gatherings to casual movie nights.
A homemade charcuterie board is easy to make. You don’t need to be a professional chef or spend a fortune. (The ready-made board shown above costs $249.99). With a little planning and creativity, you can design a beautiful board that looks straight out of a magazine. They are popular, flexible, and customizable. The best part is that there are no strict rules. With a few simple guidelines, you can create a stunning, crowd-pleasing spread right at home.
Step 1: Start with the Right Board
First, choose your base. A wooden cutting board is classic, but marble slabs, slate trays, or even a large serving platter work just as well. Choose a size that fits your group. Small boards work for two to four people, while larger boards are better for parties. Make sure you have enough space to arrange items without overcrowding.

Step 2: Select a Variety of Cheeses

Cheese is the star of any charcuterie board. Aim for three to five types with different textures and flavors. A good mix might include:
- Soft cheese: Brie or goat cheese
- Semi-soft cheese: Havarti or fontina
- Hard cheese: Aged cheddar or parmesan
- Bold option: Blue cheese or gorgonzola
Pre-slice hard cheeses for easy grabbing, and leave soft cheeses whole with a small knife for spreading. Variety keeps the board interesting and ensures there’s something for everyone.
Step 3: Add Cured Meats

Choose two to four types of cured meats for balance. Popular options include prosciutto, salami, soppressata, and chorizo. When arranging, don’t just lay them flat. Fold salami into halves or quarters, or gently ribbon prosciutto to add height and visual texture. This makes your board look abundant and thoughtfully styled.
Step 4: Include Crunchy

Now it’s time to build around your main ingredients. Add crackers, sliced baguette, or breadsticks for crunch. Try to offer a few different textures—some sturdy crackers for hard cheese and lighter ones for spreads.
Step 5: Add Sweet Elements
Fresh fruit, such as grapes, apple slices, or berries, adds color and freshness. Dried fruits such as apricots or cranberries provide concentrated sweetness. For added depth, use small piles of nuts like almonds or cashews.

Step 6: Add Tangy or Briny
Don’t forget something tangy or briny. Olives, pickles, or cornichons help cut through rich cheeses and meats.

Step 7: Add Spreads
Finally, include one or two bowls of spreads—honey, fig jam, whole-grain mustard, or fruit preserves are excellent choices.

Step 8: Arrange Like a Pro

To assemble your board, start by placing small bowls for dips and olives. Next, position your cheeses evenly around the board. Add meats nearby, creating folds or loose piles for visual interest. Then fill in large gaps with crackers and bread. Finally, tuck fruits, nuts, and smaller items into any remaining spaces.

Think about color balance as you arrange—spread bright fruits and darker items evenly across the board. The goal is to make it look full and inviting.
Fill the board out with extras: crackers, bread, fresh and dried fruit, nuts, olives, pickles, and spreads (honey, jam, mustard).
Conclusion
Whether you’re hosting a party, having a date night, or treating yourself to a cozy night in, making your own board is fun and creative.
With a little planning and a mix of flavors, textures, and colors, you’ll have a charcuterie board that looks impressive and tastes delicious.
The key is filling in gaps. A full board looks abundant and inviting. Distribute colors evenly, so all the reds, greens, and neutrals are balanced across the board.
Keep in mind that there is no right or wrong way to make your charcuterie board. People who often make them say they have never made two that look the same. However, every one they make is beautiful to see and delicious to eat.
About the Creator
Margaret Minnicks
Margaret Minnicks has a bachelor's degree in English. She is an ordained minister with two master's degrees in theology and Christian education. Thanks for reading and sending TIPS her way.
Enjoyed the story? Support the Creator.
Subscribe for free to receive all their stories in your feed. You could also become a paid subscriber, letting them know you appreciate their work.
Comments
There are no comments for this story
Be the first to respond and start the conversation.