
Yoga for Beginners: Basic Poses and Benefits
Introduction to Yoga: Essential Poses for Beginners and their Benefits

Yoga is a great way to start your day off on the right foot. It can help you wake up your body, clear your mind, and set an intention for the day ahead. If you're new to yoga or looking for some new poses to add to your routine, here are 10 yoga poses to start your day off right:
1.Mountain Pose (Tadasana):

Mountain Pose (Tadasana) is a foundational yoga pose that is often used as a starting point for many other poses. It is a simple standing pose that can be practiced by anyone, regardless of their fitness level or yoga experience. Here are the benefits of practicing Mountain Pose and how to do it:
Benefits of Mountain Pose:
Improves posture: By standing tall with your shoulders back and chest open, Mountain Pose helps to improve your posture.
Increases body awareness: Practicing Mountain Pose helps you become more aware of your body and how it is aligned.
Reduces stress: Standing tall in Mountain Pose can help to reduce stress and tension in the body.
Improves balance: Practicing Mountain Pose helps to improve your balance and stability.
Strengthens the legs and core: Standing in Mountain Pose engages your legs and core muscles, helping to strengthen them.
How to do Mountain Pose:
1.Stand with your feet together or hip-distance apart.
2.Spread your toes and press them down into the ground.
3.Engage your leg muscles and lift your kneecaps up towards your hips.
4.Draw your tailbone down towards the ground and engage your core muscles.
5.Roll your shoulders back and down away from your ears.
6.Lengthen your neck and keep your chin parallel to the ground.
7.Bring your hands together at your heart center, or reach your arms up overhead.
8.Breathe deeply and hold the pose for 5-10 breaths.
Mountain Pose is a great way to start your yoga practice or to simply take a moment to stand tall and connect with your breath. By practicing this simple pose regularly, you can reap the benefits of improved posture, body awareness, and reduced stress.
2.Downward-Facing Dog (Adho Mukha Svanasana):

Downward-Facing Dog, or Adho Mukha Svanasana in Sanskrit, is a foundational yoga pose that is often practiced in many styles of yoga. It is a standing pose that stretches the entire body, with the hands and feet on the ground and the hips lifted toward the ceiling. Here are some of the benefits of practicing Downward-Facing Dog and instructions on how to do it properly:
Benefits:
1.Stretches the hamstrings, calves, and arches of the feet
2.Strengthens the arms, shoulders, and core
3.Relieves tension in the neck, shoulders, and back
4.Improves circulation throughout the body
5.Calms the mind and relieves stress and anxiety
Instructions:
1.Begin on your hands and knees in a tabletop position with your wrists under your shoulders and your knees under your hips.
2.Spread your fingers wide and press your palms into the mat.
3.Tuck your toes under and lift your hips up and back, straightening your legs and coming into an inverted V-shape.
4.Lengthen through your spine and keep your head and neck relaxed.
5.Press your heels toward the ground and actively engage your quadriceps.
6.Stay in the pose for 5-10 deep breaths, then release and come back to the tabletop position.
Modifications:
1.If you have tight hamstrings, you can bend your knees slightly to make the pose more accessible.
2.If you have wrist pain, you can try coming onto your forearms instead of your hands.
3.If you have neck or shoulder pain, you can look between your knees or place a blanket under your head for support.
Downward-Facing Dog is a powerful pose that can help you build strength, improve flexibility, and calm your mind. As with any yoga pose, it's important to listen to your body and modify the pose as needed to avoid injury.
3.Cat-Cow (Marjaryasana/Bitilasana):

The Cat-Cow pose is a gentle yoga movement that involves alternating between two poses, the cat pose and the cow pose, while synchronizing the breath with the movement. Here's how to perform it:
1.Start on your hands and knees, with your wrists directly under your shoulders and your knees directly under your hips.
2.Inhale as you arch your back, dropping your belly towards the floor, and lift your head and tailbone up towards the ceiling. This is the cow pose.
3.Exhale as you round your spine towards the ceiling, tucking your chin towards your chest, and drawing your navel in towards your spine. This is the cat pose.
4.Repeat the movement, flowing smoothly between the two poses, with each inhale and exhale.
The Cat-Cow pose has several benefits, including:
1.Stretching and strengthening the spine: The alternating movement between the two poses helps to stretch and strengthen the muscles of the spine, which can improve posture and reduce back pain.
2.Stimulating the digestive system: The gentle massage of the internal organs can help to improve digestion and relieve constipation.
3.Reducing stress and tension: The synchronized breath and movement of the Cat-Cow pose can help to calm the mind and reduce stress and tension in the body.
4.Improving flexibility: The Cat-Cow pose stretches and strengthens the muscles of the back, hips, and abdomen, which can improve overall flexibility and range of motion.
Overall, the Cat-Cow pose is a simple yet effective yoga movement that can be practiced by yogis of all levels to improve spinal health, digestion, and overall well-being.
4.Sun Salutation (Surya Namaskar):

The Sun Salutation is a popular yoga sequence that involves a series of poses performed in a flowing sequence, while synchronizing the breath with the movement. The sequence consists of 12 poses, which can be repeated several times in a row. Here's how to perform it:
1.Begin standing at the front of your mat, with your feet hip-width apart and your hands in prayer position at your heart center.
2.Inhale as you raise your arms up overhead, reaching towards the sky.
3.Exhale as you fold forward, bending at the hips and bringing your hands down to the mat.
4.Inhale as you lift your torso halfway, bringing your hands to your shins and lengthening your spine.
5.Exhale as you step or jump back into plank pose, with your wrists under your shoulders and your body in a straight line.
6.Lower down to the floor, with your elbows close to your sides, and then inhale as you lift your chest into upward-facing dog pose.
7.Exhale as you lift your hips up and back into downward-facing dog pose.
8.Inhale as you step or jump your feet forward to the front of your mat and lift your torso halfway.
9.Exhale as you fold forward over your legs.
10.Inhale as you rise up to standing, sweeping your arms overhead.
11.Exhale as you bring your hands back down to prayer position at your heart center.
12.Repeat the sequence, starting with the opposite leg.
The Sun Salutation has several benefits, including:
1.Improving overall flexibility: The Sun Salutation sequence involves a variety of poses that stretch and strengthen the muscles throughout the body, which can improve overall flexibility and range of motion.
2.Stimulating the circulatory and respiratory systems: The flowing movement of the Sun Salutation, combined with the synchronized breath, can help to increase circulation and oxygenation throughout the body, improving cardiovascular and respiratory health.
3.Reducing stress and anxiety: The Sun Salutation can be a meditative and calming practice, which can help to reduce stress and anxiety and promote relaxation.
4.Building strength: The sequence includes several poses that build strength in the arms, legs, and core muscles.
Overall, the Sun Salutation is a dynamic and energizing yoga sequence that can be practiced by yogis of all levels to improve physical and mental health.
5.Warrior I (Virabhadrasana I):

The Warrior I pose is a standing yoga posture that is named after the fierce warrior Virabhadra. It is a strong and grounding pose that helps to build strength and stability in the legs, while also opening up the chest and shoulders. Here's how to perform it:
1.Begin standing at the front of your mat, with your feet hip-width apart and your arms at your sides.
2.Step your left foot back about three to four feet, turning it out to a 45-degree angle, and ground your back foot firmly into the mat.
3.Bend your right knee, keeping it in line with your ankle, and lift your arms up overhead, bringing your palms together if possible.
4.Keep your shoulders relaxed and your gaze forward, or if it's comfortable, lift your gaze up towards your hands.
5.Hold the pose for several breaths, focusing on grounding through your feet and lifting through your chest.
6.To release the pose, lower your arms and straighten your right leg, stepping your feet back together at the front of your mat. Repeat the sequence on the other side.
The Warrior I pose has several benefits, including:
1.Building strength and stability in the legs: The Warrior I pose strengthens the muscles of the legs, including the quadriceps, hamstrings, and glutes, which can improve overall stability and balance.
2.Opening up the chest and shoulders: The pose stretches and opens up the chest and shoulders, which can improve posture and respiratory function.
3.Increasing focus and concentration: The strong and grounding nature of the Warrior I pose can help to increase focus and concentration, improving mental clarity and reducing stress and anxiety.
4.Building confidence and empowerment: The pose is named after a fierce warrior, and practicing it can help to build a sense of inner strength and empowerment.
Overall, the Warrior I pose is a powerful and energizing yoga posture that can be practiced by yogis of all levels to build strength, stability, and confidence.
6.Triangle Pose (Trikonasana):

The Triangle Pose is a popular standing yoga posture that involves a lateral stretch and extension of the spine, while also engaging the muscles of the legs and core. It is a great pose for improving overall flexibility, balance, and stability. Here's how to perform it:
1.Begin standing at the front of your mat, with your feet about hip-distance apart.
2.Step your left foot back about three to four feet, turning it out to a 90-degree angle.
3.Align your front heel with the arch of your back foot, and bring your arms out to shoulder height, parallel to the floor.
4.Extend your torso out over your front leg, placing your left hand on your left hip and reaching your right hand down towards your right ankle.
5.Keep your torso extended and your gaze up towards your right hand, or down towards the ground if it's more comfortable.
6.Hold the pose for several breaths, focusing on lengthening through the spine and engaging the muscles of the legs and core.
7.To release the pose, inhale as you lift your torso back up to standing, and exhale as you lower your arms and step your feet back together. Repeat the sequence on the other side.
The Triangle Pose has several benefits, including:
1.Stretching and strengthening the legs: The Triangle Pose engages the muscles of the legs, including the quadriceps, hamstrings, and calves, while also stretching and opening up the inner thighs and hips.
2.Improving flexibility and range of motion: The lateral stretch of the spine in the Triangle Pose can help to improve overall flexibility and range of motion, especially in the spine and hips.
3.Engaging the core muscles: The pose requires a strong engagement of the core muscles, which can improve overall stability and balance.
4.Improving posture and alignment: The Triangle Pose encourages a lengthening and opening of the spine, which can improve posture and alignment over time.
Overall, the Triangle Pose is a great yoga posture for improving overall flexibility, balance, and stability, while also promoting better posture and alignment in the body.
7.Bridge Pose (Setu Bandha Sarvangasana):
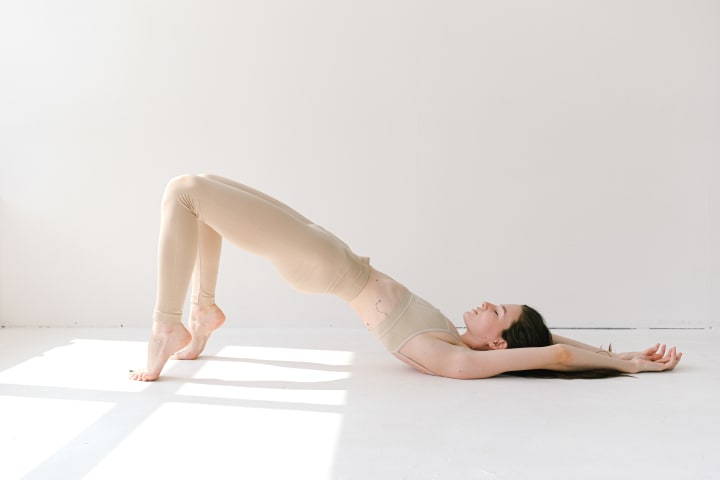
The Bridge Pose is a backbend that helps to open up the chest and shoulders, while also strengthening the muscles of the legs and core. It is a gentle and accessible pose that can be modified to suit the needs of different bodies and levels of experience. Here's how to perform it:
1.Lie on your back with your knees bent and your feet hip-distance apart.
2.Place your arms at your sides, with your palms facing down.
3.Press down into your feet and lift your hips up towards the ceiling, keeping your feet and shoulders grounded.
4.Interlace your fingers underneath your back, and press your arms and shoulders into the ground to lift your chest up towards your chin.
5.Keep your thighs and glutes engaged, and breathe deeply into your chest and belly.
6.Hold the pose for several breaths, focusing on opening up the chest and shoulders and engaging the muscles of the legs and core.
7.To release the pose, gently roll your spine back down onto the mat, one vertebra at a time.
The Bridge Pose has several benefits, including:
1.Stretching and opening up the chest and shoulders: The Bridge Pose helps to stretch and open up the chest and shoulders, which can improve posture and respiratory function.
2.Strengthening the muscles of the legs and core: The pose engages the muscles of the legs and core, which can improve overall stability and balance.
3.Relieving tension and stress: The gentle backbend of the Bridge Pose can help to relieve tension and stress in the spine and hips, promoting relaxation and calmness.
4.Improving flexibility and range of motion: The pose can help to improve overall flexibility and range of motion in the spine, hips, and legs.
Overall, the Bridge Pose is a gentle and accessible yoga posture that can be practiced by yogis of all levels to open up the chest and shoulders, strengthen the muscles of the legs and core, and promote relaxation and calmness.
8.Seated Forward Fold (Paschimottanasana):

The Seated Forward Fold is a yoga pose that stretches the hamstrings, lower back, and spine while also calming the mind and promoting relaxation. It is a gentle and accessible pose that can be modified to suit the needs of different bodies and levels of experience. Here's how to perform it:
1.Sit on the floor with your legs extended out in front of you.
2.Sit up tall and extend through the crown of your head.
3.Inhale and raise your arms overhead.
4.Exhale and slowly fold forward from the hips, keeping your spine long and your shoulders relaxed.
5.Reach for your feet or ankles, or hold onto your shins if you can't reach.
6.Gently pull yourself forward using your arms and breathe deeply into your hamstrings and lower back.
7.Hold the pose for several breaths, relaxing your shoulders and neck as you deepen the stretch.
8.To release the pose, slowly roll up through your spine, lifting your head last.
The Seated Forward Fold has several benefits, including:
1.Stretching and opening up the hamstrings: The pose helps to stretch and lengthen the muscles of the hamstrings, which can improve flexibility and range of motion in the legs and hips.
2.Relieving tension in the lower back: The gentle forward bend of the pose can help to relieve tension and discomfort in the lower back, promoting relaxation and calmness.
3.Calming the mind and reducing stress: The pose can help to calm the mind and reduce stress and anxiety, promoting a sense of peace and wellbeing.
4.Improving digestion and circulation: The pose can stimulate digestion and improve circulation, promoting overall health and wellbeing.
Overall, the Seated Forward Fold is a gentle and accessible yoga posture that can be practiced by yogis of all levels to stretch and lengthen the hamstrings, relieve tension in the lower back, promote relaxation and calmness, and improve digestion and circulation.
9.Cobra Pose (Bhujangasana):

The Cobra Pose is a yoga posture that helps to strengthen the muscles of the back, neck, and shoulders while also increasing flexibility and promoting relaxation. It is a beginner-friendly pose that can be practiced by yogis of all levels. Here's how to perform it:
1.Lie on your stomach with your hands placed under your shoulders and your elbows close to your sides.
2.Press the tops of your feet and thighs into the floor.
3.Inhale and slowly lift your chest off the floor, keeping your elbows close to your sides and your shoulders away from your ears.
4.Use your hands to lift your upper body, pressing into the floor with your palms.
5.Keep your gaze forward and your neck long, and breathe deeply as you hold the pose.
6.To release the pose, exhale and slowly lower your chest back down to the floor.
The Cobra Pose has several benefits, including:
1.Strengthening the muscles of the back, neck, and shoulders: The pose helps to strengthen the muscles of the upper body, which can improve posture and reduce the risk of injury.
2.Stretching the chest and lungs: The pose can help to open up the chest and lungs, improving breathing and promoting relaxation.
3.Relieving tension in the back: The gentle backbend of the pose can help to relieve tension and discomfort in the back, promoting relaxation and calmness.
4.Increasing flexibility: The pose can help to increase flexibility and range of motion in the spine, promoting overall health and wellbeing.
Overall, the Cobra Pose is a beginner-friendly yoga posture that can be practiced by yogis of all levels to strengthen the muscles of the back, neck, and shoulders, stretch the chest and lungs, relieve tension in the back, and increase flexibility.
10.Child's Pose (Balasana):

Child's Pose, also known as Balasana, is a gentle yoga posture that is often used as a resting pose in between more challenging asanas. The pose can be performed by yogis of all levels, making it a great option for beginners or those looking for a calming and restorative pose. Here's how to perform it:
1.Start on your hands and knees with your palms and knees placed on the ground.
2.Slowly lower your hips back towards your heels, keeping your arms extended in front of you.
3.Rest your forehead on the mat or a prop such as a blanket or pillow.
4.Relax your entire body, taking deep breaths as you hold the pose.
5.To release the pose, gently lift your torso back up and come back to a seated position.
The Child's Pose has several benefits, including:
1.Relieving stress and anxiety: The gentle stretch of the pose can help to calm the mind and promote relaxation, reducing stress and anxiety.
2.Stretching the hips, thighs, and ankles: The pose can help to stretch and lengthen the muscles of the hips, thighs, and ankles, promoting flexibility and range of motion.
3.Improving digestion: The gentle compression of the abdomen in the pose can help to improve digestion and relieve digestive discomfort.
4.Restoring energy: The pose is a restorative posture that can help to restore energy levels and reduce fatigue.
Overall, the Child's Pose is a gentle and calming yoga posture that can be performed by yogis of all levels to relieve stress and anxiety, stretch the muscles of the hips, thighs, and ankles, improve digestion, and restore energy levels.
These 10 yoga poses can help you start your day off on the right foot, no matter your level of experience with yoga. Remember to listen to your body and move at your own pace, and always consult with a qualified yoga instructor if you have any questions or concerns.
About the Creator
Keep reading
More stories from murat çapuk and writers in Longevity and other communities.
Unlocking Your Potential: Practical Tips for Personal Growth and Motivation
In today's fast-paced world, it's easy to get bogged down by the pressures of work and daily life. However, taking the time to invest in your personal growth and motivation can help you unlock your full potential and achieve greater success. In this blog post, we'll explore some practical tips for personal development and motivation that you can apply to your life.
By murat çapukabout a year ago in Motivation
Pints & Parkruns: Jubilee, Spennymoor
If MC Escher created a parkrun, it might look a bit like Jubilee. Based in a compact – but surprisingly lovely – park in the small County Durham town of Spennymoor, it twists and turns its way up repeated hills. Although basic physics says it must come down again, somehow this route never feels like it gives runners a proper descent.
By Andy Potts5 days ago in Longevity
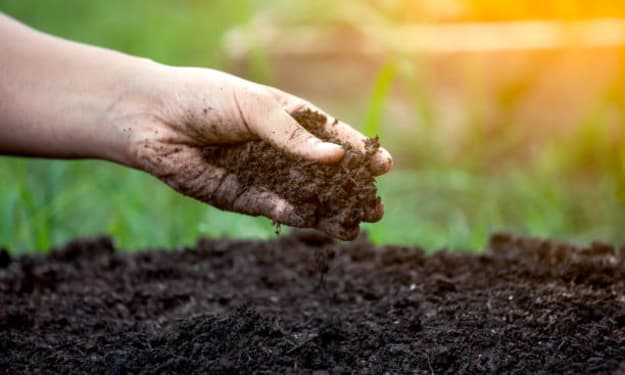
The Dirt on Health: Why Some Exposure to Germs Is Essential
Experts say that normal contact with healthy soil has physical and mental advantages for grown-ups as well as kids. Researchers have long realized that somewhat soil can be great for you. Research has proposed that individuals who experience childhood with farms, for example, have lower rates of Crohn's illness, asthma, and allergies, prob, able due to their openness to a different exhibit of organisms.
By shanmuga priya7 days ago in Longevity

Comments
There are no comments for this story
Be the first to respond and start the conversation.