how to
Learn how to do anything in the Feast, food, and recipe scope.
CLASSIC AFTERNOON TEA
Finger sandwichs, fresh scones , berry cake , here is how to make the perfect af.... There is something about a three-tiered cake stand, a cup of freshly brewed tea, and a table set with small, carefully made things that feels genuinely special — the kind of slow, intentional eating that most of us rarely make time for. The good news is that an afternoon tea this beautiful doesn't require a hotel kitchen or a professional pastry chef. It requires a plan, a few good recipes, and an afternoon worth protecting. Here is everything you need to build a proper afternoon tea from scratch, tier by tier. The Bottom Tier: Finger Sandwiches Finger sandwiches are the savoury foundation of afternoon tea and should be made last — no more than two hours before serving — to prevent the bread from drying out. Ingredients (makes 24 fingers, serves 4): 12 slices of thin white sandwich bread 12 slices of thin wholemeal sandwich bread 120g cream cheese, softened 1 small cucumber, peeled and thinly sliced 150g smoked salmon 2 tbsp fresh dill, finely chopped 80g unsalted butter, softened 1 tsp lemon juice Salt and white pepper to taste Steps: Mix the cream cheese with dill, lemon juice, salt, and white pepper until smooth. Spread generously onto 6 slices of white bread, layer with cucumber, and top with the remaining white slices. Spread softened butter onto the wholemeal slices. Layer smoked salmon evenly across 6 slices and close with the remaining wholemeal bread. Trim all crusts using a sharp serrated blade. Cut each sandwich into 3 equal fingers with clean, decisive cuts — do not saw back and forth or the filling will compress. Cover with a slightly damp clean cloth and refrigerate until ready to serve. The Middle Tier: Classic Scones A properly made scone should be tall, light, and just barely sweet — a vehicle for clotted cream and jam rather than a statement on its own. Ingredients (makes 8 scones): 350g plain flour, plus extra for dusting 1 tbsp baking powder 85g cold unsalted butter, cubed 3 tbsp caster sugar 175ml whole milk, plus extra for brushing 1 tsp vanilla extract Pinch of salt Steps: Preheat the oven to 220°C. Sift the flour, baking powder, and salt into a large bowl. Add the cold cubed butter and rub it into the flour using your fingertips until the mixture resembles breadcrumbs. Work quickly — warm hands melt the butter and produce dense scones. Stir in the sugar, then add the milk and vanilla. Mix with a flat-bladed spatula until the dough just comes together. Do not overwork it. Turn onto a lightly floured surface, pat to a thickness of 2.5cm, and cut using a 6cm round cutter. Press straight down — do not twist the cutter, as this seals the edges and prevents rising. Brush the tops with milk and bake for 12 to 14 minutes until well risen and deep golden. Serve with clotted cream and strawberry jam. The Top Tier: Berry Sponge Squares These are the visual centrepiece of the stand — small, elegant squares of vanilla sponge layered with cream and fresh berries. Ingredients (makes 9 squares): 3 large eggs 150g caster sugar 150g self-raising flour 150g unsalted butter, softened 1 tsp vanilla extract 200ml double cream, whipped to soft peaks Fresh raspberries and blueberries for topping Icing sugar for dusting Steps: Preheat the oven to 180°C. Beat butter and sugar together until pale and fluffy. Add eggs one at a time, beating well after each addition, then fold in the flour and vanilla. Pour into a lined 20cm square tin and bake for 22 to 25 minutes until a skewer comes out clean. Cool completely before cutting. Slice the cooled sponge horizontally and spread whipped cream across the bottom layer. Replace the top layer, dust generously with icing sugar, and press fresh raspberries and blueberries into the cream at the edges. Cut into 9 equal squares using a sharp cutter wiped clean between each cut for neat edges. The Tea: Getting It Right The tea matters as much as the food. A bright, fruity blend — such as a raspberry leaf or hibiscus infusion — pairs beautifully with the sweetness of the cakes. For a classic pairing, a good quality Darjeeling or Earl Grey brewed at 90°C for three minutes delivers the clean, floral note that afternoon tea demands. Always warm the teapot first with a splash of hot water, discard it, then brew directly in the teapot. A note on assembly: Build the stand from the bottom up — sandwiches on the lowest tier, scones in the middle, cakes on top. This mirrors the traditional order of eating and keeps the heavier items stable at the base. An afternoon tea made by hand carries something no restaurant version ever quite can — the knowledge of every ingredient, the warmth of a kitchen that smelled of vanilla and warm butter for an hour. Once you've made one yourself, the three-tiered stand stops being a luxury and starts being something you want to do again. Perhaps that's the real tradition worth keeping.
By Muhammad Talha6 months ago in Feast
EASY CUPCAKE
Start writing...These vanilla cupcake stay soft , light and fluffy! Follow these step by step recip..... Have we ever wanted to bake something simple yet impressive at home? Vanilla cupcakes are a perfect choice. They are soft, light, and gently sweet, making them ideal for daily treats, gatherings, or special moments. Today, we will walk through a very detailed, step-by-step recipe so we can easily achieve a smooth texture and rich vanilla aroma. What We Are Making? We are making classic vanilla cupcakes with a soft crumb and delicate flavor. These cupcakes are lighter than many traditional versions and stay moist for several days when stored properly. The inside texture is smooth and airy, while the top turns lightly golden during baking. We can enjoy them plain or decorate them with cream, fruit, or jam. Ingredients (Makes 12 Cupcakes) We prepare all ingredients in advance for better results: 1 cup (125 g) all-purpose flour 1 1/4 teaspoons baking powder 1/8 teaspoon salt 2 large eggs (about 50–55 g each, room temperature) 3/4 cup (150 g) superfine sugar 60 g unsalted butter (cut into small cubes) 1/2 cup (120 ml) whole milk 2 teaspoons vanilla extract 1 1/2 teaspoons vegetable oil Step 1: Prepare the Oven and Tools We preheat the oven to 180°C (350°F), or 160°C if using a fan oven. Let it heat for at least 20 minutes to ensure stable temperature. Place a rack in the middle of the oven. Line a 12-cup muffin tray with paper liners. Step 2: Mix the Dry Ingredients In a large mixing bowl, we add: 1 cup flour 1 1/4 teaspoons baking powder 1/8 teaspoon salt We whisk them together evenly for about 20–30 seconds, then set the bowl aside. Step 3: Heat Milk and Butter In a heatproof container, we combine: 60 g butter 1/2 cup milk We heat this mixture until the butter fully melts. The liquid should be very warm but not boiling. Keep it warm for later use. Step 4: Beat Eggs and Sugar In a separate bowl, we add 2 eggs. Using a hand mixer, we beat them for 30 seconds at medium speed. Then we slowly add 3/4 cup sugar while mixing. After that, we increase to high speed and beat for about 6 minutes. At this stage, the mixture becomes pale, thick, and airy. This step is very important because it creates the light texture of the cupcakes. Step 5: Add Dry Ingredients Gradually We add the flour mixture in three parts: Add one-third of the flour, mix on low speed for about 5 seconds. Add another portion, mix again briefly. Add the final portion and mix just until smooth. We stop mixing as soon as no dry flour is visible. Overmixing may make the cupcakes dense. Step 6: Combine Warm Milk Mixture In the bowl that held the flour, we pour the warm milk-butter mixture. Then we add: 2 teaspoons vanilla extract 1 1/2 teaspoons vegetable oil Next, we take about 3/4 cup of the egg batter and mix it into the warm milk. We whisk it well until smooth and slightly foamy. Then we slowly pour this mixture back into the main batter while mixing on low speed for about 15 seconds. Finally, we scrape the sides and mix for another 10 seconds until smooth and pourable. Step 7: Fill the Cupcake Liners We pour the batter into each liner, filling about two-thirds full. Using an ice cream scoop helps keep the portions even. Avoid filling too much, as it can affect the final shape. Step 8: Bake the Cupcakes We place the tray in the oven and bake for 22 minutes. The cupcakes are ready when: The tops are lightly golden A toothpick inserted in the center comes out clean Step 9: Cool and Decorate We remove the tray from the oven and let it rest for 2 minutes. Then we transfer the cupcakes to a cooling rack. Once completely cool, we can decorate them with cream, fresh fruit, or jam. This step allows us to customize the flavor and presentation. Step 10: Storage Tips To keep the cupcakes fresh: Store them in an airtight container at room temperature for up to 4 days. In warm weather, store in the fridge but bring to room temperature before serving. For longer storage, freeze up to 3 months and thaw before eating. Let’s Bake and Share Now we have a clear, step-by-step guide to making soft and delicious vanilla cupcakes at home. The process may look detailed, but once we try it, it becomes simple and enjoyable. Why not give it a try today? We might be surprised at how easy it is to create bakery-style cupcakes right in our own kitchen!
By Muhammad Talha6 months ago in Feast
Mushroom Filled Dumplings
As you probably know from my Facebook story, I have been infinite yoghurt glitching (where basically you save a bit of your yoghurt before it finishes, you boil milk and then add the yoghurt to it, wrap the pot in a towel for five or six hours and you'll have more yoghurt) and I'm also trying to keep everything as processing-free as possible. These dumplings have no ultra-processed ingredients in them and when I tried them (as someone who actually hates dumplings) I almost cried - they were so damn good. So I'm going to be feeding them to my mother for lunch today!
By Annie Kapur6 months ago in Feast
Vegan Burger Patties
I'm not a vegan but my mother is and I'm not a fan of her getting her vegan patties from outside the house since there's a whole bunch of chemicals in them. My homemade ones might take you some time but they are very tasty and they don't have any of those nasty ingredients you can't pronounce. Of course, I don't just bake if that's what you think of me. I'm dipping my feet into cooking as much as I can at home rather than buying out. Let's take a look at what goes into these patties then...
By Annie Kapur6 months ago in Feast
MISSO RAMEN BLESS
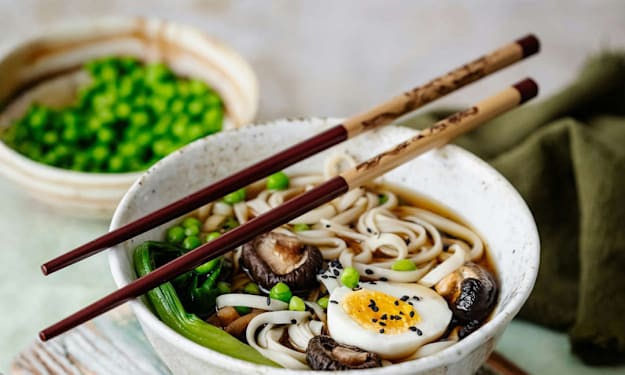
Discover how we make restaurant style misso ramen at home in just 15 minutes..... Miso ramen is one of those Japanese dishes that feels both comforting and exciting. Its signature miso flavor is savory, slightly sweet, and full of depth. Every spoonful of miso broth is warming and rich, while the fresh vegetables and tender noodles give it a satisfying bite. Not only is it delicious, but it’s also healthy, packed with nutrients, and gentle on our digestion. Today, we’re going to show how we can make this classic ramen at home, step by step, without spending hours in the kitchen. Ingredients We’ll Need (For 1 Serving) Here’s the list for a single serving. You can scale it up easily for more people: 1 tablespoon miso paste 100–120g ramen noodles 1 large egg 3–5 small pieces dried wakame seaweed 2 tablespoons fresh green peas 2 medium fresh shiitake mushrooms, sliced 1 sheet nori (seaweed) 2 cups water This combination keeps the dish light yet flavorful. It works perfectly for vegetarians or anyone who wants a quick, healthy meal. Step 1: Prep the Ingredients Soak the dried wakame in a small bowl of water for 5–10 minutes until soft, then drain. Rinse the green peas and set aside. Slice the shiitake mushrooms thinly. Boil the egg in a small saucepan with enough water to cover it for about 10 minutes. After boiling, cool the egg in cold water, peel it, and cut it in half. These small prep steps may seem simple, but they make the final bowl look and taste amazing. Step 2: Cook the Noodles Bring a saucepan of water to a rolling boil. Add the ramen noodles and cook for 3–4 minutes (or follow package instructions). Drain the noodles and rinse under cool water to stop cooking. Set aside to prevent them from becoming too soft when we add the broth later. Perfectly cooked noodles are essential—they should be tender yet slightly firm. Step 3: Make the Broth In a fresh saucepan, bring 2 cups of water to a gentle boil. Add the sliced mushrooms and green peas first, letting them cook for about 3 minutes. Add the soaked wakame and cook for another 1–2 minutes. In a small bowl, dissolve 1 tablespoon miso paste in 2 tablespoons of hot water. Slowly stir the miso mixture into the simmering saucepan. Keep the broth at a gentle simmer after adding miso to preserve its delicate flavor. The broth will become slightly creamy, aromatic, and full of umami—this is what makes miso ramen so irresistible. Step 4: Assemble the Ramen Bowl Pour some hot miso broth into a serving bowl—enough to cover the bottom but not overflow. Add the cooked noodles on top. Place the boiled egg halves neatly on the noodles. Garnish with a sheet of nori, either whole or cut into smaller pieces. Optionally, sprinkle extra green peas or mushroom slices for color and texture. The combination of bright green peas, dark nori, tender mushrooms, and golden egg yolk creates a visually appealing, tasty bowl. Tips for the Best Flavor Adjust the miso paste based on how strong we want the flavor. Noodles should remain slightly firm (al dente). Toasting the nori briefly enhances aroma. Using a little soaking water from the mushrooms adds extra umami naturally. Why We Love This Dish Miso ramen is fast, nutritious, and incredibly satisfying. Unlike meat-based broths, miso creates a rich, full-flavored soup in just minutes. Vegetables, seaweed, and eggs make the dish colorful, healthy, and balanced. It’s perfect for weeknight dinners, when we want something comforting without feeling heavy. Time to Enjoy! Lykkers, it’s time to dig in! Slurp the noodles, sip the savory broth, and enjoy the sweet pops of peas and the deep flavor of mushrooms and wakame. Making this ramen at home doesn’t have to be complicated, and every bowl is like a mini Japanese feast. Next time, we can experiment with different vegetables or toppings to make it uniquely ours. Final Thoughts With just a few ingredients and easy steps, we’ve created a delicious, healthy bowl of miso ramen. This dish reminds us that quick meals can still be flavorful and satisfying. Sharing it with friends or family makes it even more special—we get to enjoy the warmth and magic of miso together!
By Muhammad Talha6 months ago in Feast
CREAMY SEA FOOD COMPORT
A restaurant quality creamy soup that you can easily make at home Hey! So, you know those days when you just need something comforting and super flavorful? Well, I’ve got just the thing for you today—Seafood Soup with Cream! Seriously, if you’re into seafood (or even if you just love delicious food), this soup is going to hit all the right spots. It’s like a cozy, creamy hug in a bowl. Let’s be real for a second : homemade soup is basically the ultimate comfort food. And when you add seafood into the mix, you’ve just reached a whole new level of goodness. The best part is, it’s way easier to make than you might think. So grab your apron (or don’t—let’s keep it casual), and let’s get started! Why This Seafood Soup Stands Out Okay, before we dive into the recipe, here’s why you’re going to love this soup. First off, it’s creamy, hearty, and packed with all the seafood goodness you could want. Plus, you can totally customize it to your liking! What You Need for This Seafood Magic 1 lb mixed seafood (such as shrimp, fish, and scallops) 1 medium onion, chopped 2 cloves garlic, minced 2 tablespoons olive oil 2 cups vegetable broth 1 cup heavy cream 1 medium potato, diced 1 tablespoon flour (helps thicken the soup) Salt and pepper to taste Fresh herbs (parsley or thyme) for garnish A couple of lemon wedges Let’s Make This Soup Together Prepare the base Heat the olive oil in a large pan over medium heat. Add the chopped onion and garlic, and cook for a few minutes until they’re soft and fragrant. The aroma will make you want to dive right in! Add potatoes and flour Add the diced potato and cook for about a minute. Sprinkle in the flour and stir well—it helps thicken the soup and gives it that velvety texture. Add broth Add the vegetable broth and let it simmer for about 10–15 minutes, until the potatoes are tender. By now, your kitchen will smell amazing. Add seafood Add the seafood and stir gently. Let it cook for about 5–7 minutes. Don’t overcook it—you want everything tender, not rubbery. Add cream Pour in the heavy cream, stir well, and let it simmer for a couple more minutes. Season with salt and pepper to taste. Garnish and serve Spoon the soup into bowls, sprinkle fresh herbs on top, and serve with a wedge of lemon. Squeeze the lemon over the soup for a fresh, zesty finish. Why You’re Going to Make This Again This seafood soup is rich, comforting, and full of flavor. Whether enjoyed on a chilly day or whenever you’re craving something warm and satisfying, it delivers consistently delicious results. The versatility of this recipe allows you to customize it to your preference—add more seafood, adjust the seasoning, or enjoy it exactly as it is. Its simplicity is another reason it stands out. Easy to prepare and reliably satisfying, this is a dish you’ll likely return to time and time again. This Seafood Soup with Cream is a well-balanced combination of flavor, comfort, and simplicity. With its creamy texture and fresh seafood elements, it makes an excellent choice for both everyday meals and special occasions. Give this recipe a try and experience its appeal firsthand—it’s a dish that is sure to become a favorite.
By Muhammad Talha6 months ago in Feast
Strawberry Chia Seed Pudding
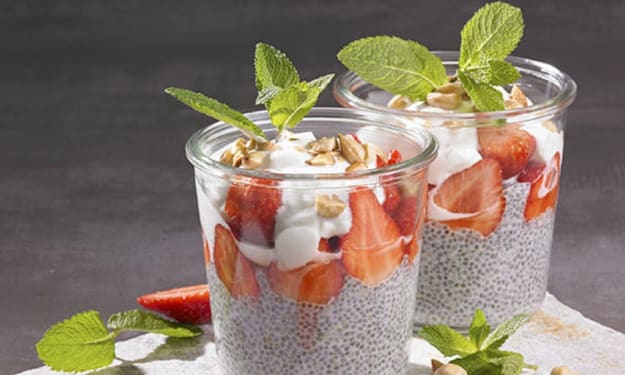
Strawberry chia seed pudding is a delightful combination of creamy texture, fresh berries, and nutrient-packed chia seeds. This dessert or breakfast option is not only visually appealing but also packed with fiber, protein, and antioxidants.
By Muhammad Talha6 months ago in Feast
REFRESHING BERRY SMOOTHIE & RASP BERRY FETA SALAD
A vibrant nutrients-rich smoothie to refresh your day There's something magical about blending frozen berries into a creamy, refreshing smoothie. It's like capturing summer in a glass, with every sip bursting with flavor.
By Muhammad Talha6 months ago in Feast
What Makes a Great Pizza Starts with the Base
When it comes to pizza, toppings often get the most attention, but the foundation of any great pizza is the base. The texture, flavour, and structure all begin with the dough, shaping the overall experience from the first bite. Whether you’re making pizza at home or ordering from a local favourite, quality pizza bases play a crucial role in delivering a balanced and satisfying result. A well-made base not only supports the toppings but enhances them, creating a better overall flavour and texture.
By Elliot Dean6 months ago in Feast
Lemon and Blueberry Cupcakes
Today, I've done quite a bit - I've also learned some stuff about myself that I didn't know. For example: I baked my mother an afternoon tea with these cupcakes involved but a couple of days ago, I learned that there is something quite wrong with my left shoulder and back which means I am having difficulty lifting it and we can forget raising the arm all the way. Physiotherapy seems to be somewhere on the horizon, so we'll see how that goes. But for now, the lemon and blueberry cupcakes are still going down a treat with my mother.
By Annie Kapur6 months ago in Feast
How to Write About a Winery for a Fiction Story
Incorporating Wine into a Story Wineries and vineyards make for incredible settings for stories. The setting is rich with visuals, scents, tastes, and sounds. To really capture the beauty of a winery in story form, you'll need to do some research. Rely on experts like sommeliers, archaeologists, and academics. When you write, you never want to assume. You want your writing to have authority; you can do that by having a strong knowledge base supported by research.
By Andrea Lawrence6 months ago in Feast