how to
Learn how to do anything in the Feast, food, and recipe scope.
Vanilla Raspberry Cake
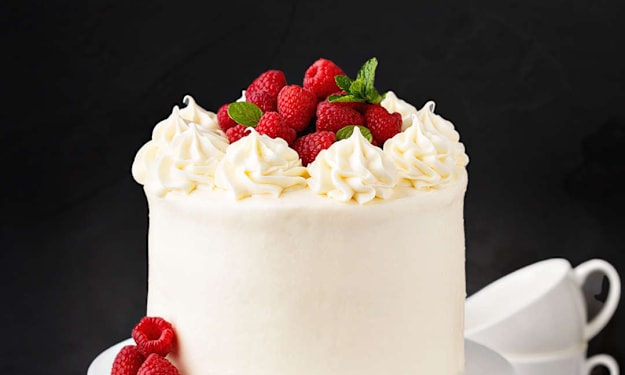
Vanilla Raspberry Cake Learn how to make delightful vanilla raspberry cake . The vanilla raspberry cake is a soft, layered dessert made with fluffy vanilla sponge, fresh raspberries, and a creamy frosting. It has a light texture, gentle sweetness, and a refreshing fruity flavor that makes it suitable for celebrations or simple homemade treats. We love this cake because it is easy to assemble, visually beautiful, and balanced in taste. The vanilla base brings softness, while raspberries add a natural fresh note that keeps every bite interesting. Ingredients We Need For The Vanilla Sponge Let’s prepare everything clearly before starting :- 3 large eggs 1.5 cups sugar (300g) 3 cups all-purpose flour (375g) 1 tablespoon baking powder 1/4 teaspoon salt 3/4 cup unsalted butter (170g, softened) 1 cup milk (240ml, divided) 2 teaspoons vanilla extract These ingredients help us create a soft sponge that is stable enough for layering. Step-By-Step Vanilla Sponge Preparation Preheat the oven to 350°F (175°C). Prepare two 8 or 9–inch round cake pans. Grease them lightly, line the bottom with baking paper, grease again, then dust with flour. In a large bowl, mix flour, sugar, baking powder, and salt evenly. Add softened butter and half of the milk (120ml). Mix on low speed first, then increase to medium until the texture becomes smooth and creamy. In another bowl, whisk eggs, vanilla extract, and the remaining milk until combined. Add the egg mixture into the batter in three portions. Each time, mix for about 20 seconds before adding more. Scrape the sides of the bowl to ensure even mixing. Divide the batter evenly into the prepared cake pans. Baking And Cooling The Cake Layers We bake the cakes for 25 to 35 minutes. To check if they are ready, insert a toothpick into the center. If it comes out clean, the cakes are fully baked. After baking, let the cakes rest in the pans for 10 minutes. Then carefully remove them and place them on a cooling rack. We wait until they are completely cool before adding frosting to avoid melting or sliding. Ingredients For Raspberry Cream Frosting 2 cups fresh raspberries 3 cups powdered sugar 1.5 cups unsalted butter (room temperature) 8 oz cream cheese (softened) 2–3 tablespoons lemon or lime juice 1/2 teaspoon salt This frosting is creamy, slightly tangy, and naturally fruity. Step-By-Step Raspberry Frosting Preparation Add 1 cup raspberries and citrus juice into a small saucepan. Heat on low for 6–7 minutes until raspberries soften. Mash the mixture and strain it through a fine sieve to remove seeds. Let the raspberry puree cool completely. In a mixing bowl, beat butter, powdered sugar, and salt until fluffy (about 2–3 minutes). Add cream cheese and continue mixing until smooth. Slowly add raspberry puree, one spoon at a time, while mixing. Continue beating until the frosting becomes light pink, smooth, and creamy. How We Assemble The Vanilla Raspberry Cake? Slice each cake layer horizontally to create thinner layers for better texture. Cut the remaining fresh raspberries in half for filling. Place the first layer of sponge on a serving plate. Spread a thin layer of frosting evenly on top. Add a layer of raspberries. Place the next sponge layer on top and repeat the process until all layers are stacked. Cover the entire cake with remaining frosting, smoothing the top and sides evenly. For decoration, place frosting into a piping bag and create simple swirls on top. Finish by placing fresh raspberries in the center for a clean and natural look. Final Thoughts On Our Baking Moment This vanilla raspberry cake is soft, creamy, and refreshing, with a perfect balance between sweetness and fruity freshness. Every layer brings a different texture, and every bite feels light but satisfying. When we follow each step carefully, we can create a homemade cake that feels special without being complicated. Lykkers, this is the kind of dessert that makes simple moments feel a little more joyful.
By Muhammad Talha5 months ago in Feast
MULBERRY MILK SHAKE
This mulberry milkshake has a creamy and soft texture that feels smooth with every sip. The natural sweetness of mulberries blends perfectly with the milk, creating a balanced flavor that is not too heavy. The gentle fruity freshness makes it easy to enjoy, whether we are starting the day or taking a break. What Is a Mulberry Milkshake? A mulberry milkshake is a blended drink made by combining fresh mulberries with milk and a touch of sweetness. The result is a silky and flavorful beverage that balances creaminess with a gentle fruit freshness. Compared to other fruit drinks, this milkshake feels richer but still light enough to enjoy anytime. Its natural color and smooth texture make it both visually appealing and enjoyable to drink. Image 3: Ingredients Ingredients We Need To make one to two servings, we prepare the following ingredients carefully: Fresh mulberries: 150 grams Milk: 250 ml Honey: 15 ml (about 1 tablespoon) Ice cubes: 3 to 4 pieces (optional, for a chilled texture) If we want to make more servings, we can simply double these amounts while keeping the same ratio. Image 4: Instructions (Steps 1–3) Step-by-Step Detailed Instructions Let’s go through each step slowly to make sure the milkshake turns out smooth and delicious. Step 1: Cleaning the mulberries Place the mulberries in a bowl and rinse them gently under clean running water. Move them lightly with our hands to remove any dirt. Then drain the water and remove any small stems. This step helps keep the final texture soft and clean. Step 2: Preparing the blender Make sure the blender is clean and dry. This ensures the flavor stays pure and fresh. Step 3: Adding the ingredients Put all the cleaned mulberries into the blender first. Then pour in 250 ml of milk. After that, add 15 ml of honey. If we like a less sweet drink, we can reduce the honey slightly. Image 5: Instructions (Steps 4–7) Step 4: Adding ice (optional) If we prefer a cooler and more refreshing milkshake, add 3 to 4 ice cubes. This step is optional but recommended on warm days. Step 5: Blending the mixture Close the blender lid securely and start blending. Blend for about 30 to 40 seconds until the mixture becomes smooth and even. We should not see large fruit pieces at this stage. Step 6: Checking the texture Stop the blender and check the consistency. If it feels too thick, we can add 20–30 ml more milk and blend again for a few seconds. Step 7: Serving the milkshake Pour the finished milkshake into a glass. It is best enjoyed immediately while fresh and smooth. Image 6: Tips for Improvement Tips to Make It Even Better We can adjust this recipe in simple ways to suit our taste. Adding more mulberries will give a stronger fruit flavor and a deeper color. If we want a lighter drink, we can increase the amount of milk slightly. For a naturally cool result, we can chill the mulberries in the refrigerator before blending instead of using ice. We can also try adding a small piece of banana for extra smoothness and a slightly richer texture. These small changes can bring new variations while keeping the recipe simple. Image 7: Final Conclusion Perfect Moments to Enjoy This milkshake fits into many parts of our day. We can enjoy it as a quick breakfast drink when time is limited, or as a refreshing option during a break. It also works well as a light dessert after a meal, offering a gentle sweetness without feeling too heavy. Let’s Enjoy This Simple Homemade Drink Lykkers, making a mulberry milkshake at home is easy, quick, and rewarding. With just a few ingredients and simple steps, we can create a drink that looks beautiful and tastes amazing. It’s a small way to bring more freshness and joy into our daily life. Next time we find fresh mulberries, let’s try this recipe together and enjoy every smooth and refreshing sip!
By Muhammad Talha5 months ago in Feast
Kidney and Butter Bean Curry with Roasted Aubergine
You've probably already seen my mixed bean curry with cauliflower rice recipe around and I'll attach it if you haven't... Of course, everything I make is vegan and I'm looking primarily at getting a good amount of vegetables into things. This bean curry is different to the other one as it only uses two beans and the flavour is actually different too. With a bit more of a kick and some different herbs involved, you can definitely show off things in the kitchen if you've got some spare stuff lying around such as parsley.
By Annie Kapur5 months ago in Feast
Mixed Bean Curry and Cauliflower Rice
Total Cooking Time: 30-45 Minutes Serves: 2-3 People This recipe is not only vegan but it's a great healthy way to eat rice if you're diet doesn't specifically allow for the grain version. It's also packed with nutrients and flavour. As someone who's mother is not in the greatest health, I often concentrate on giving her healthy and tasty meals that she can eat and feel better and fuller afterwards. I enjoy cooking and baking and then feeding things to my mother and I think that this one is definitely a win because she absolutely loved it. So, let's talk about how to make it!
By Annie Kapur6 months ago in Feast
My Homemade Bread
As you've probably seen from my Facebook, I've been baking bread at home lately despite not actually eating bread. What is this all about then? Well, it's therapeutic. Yes, it takes a long time but there are some fun things involved with making bread. I always think that someone who likes to bake should have three things: a good cake recipe, a good cookie recipe and finally, a good bread recipe. These are best memorised so that you can whip something up if people are coming over or if you need something for a gathering. Bread though is not something you can whip up quickly. I'm going to split this up into two days so that you can see how we make our bread. Yes, it takes two days. Take your time, this is meant to be calming.
By Annie Kapur6 months ago in Feast
Cheese, Honey and Thyme
It's been a while since the last episode of 'cake vs cookie' because (and I'm going to be honest here) I just haven't been feeling it lately. I wanted to do something small and something that didn't require me to do a lot of decorating. This resulted in me making an orange and ginger cake topped with fruit the other day and spending this morning making some famed biscuits of mine for my mother. I had a burst of energy and so I decided to give cake vs cookie another go. So welcome to the flavour profile: cheese, honey and thyme!
By Annie Kapur6 months ago in Feast
CHOCOLATE DREAM CAKE
This ultra-moist chocolate cake uses one bowl and simple steps-we'll be surprised.... There are times when we simply want a dessert that feels comforting, rich, and easy to prepare. This chocolate cake is exactly that kind of treat—soft, moist, and filled with deep chocolate flavor. The texture is light yet tender, and every bite feels smooth and satisfying. What makes this cake special is how simple it is. We only need one bowl, a whisk, and basic ingredients. Even if we are new to baking, we can still achieve a bakery-style result at home. This cake is perfect for sharing, small celebrations, or simply enjoying a sweet moment. Ingredients We Need (Exact Measurements) Let’s prepare everything before we start. This helps us stay organized and makes the process smoother. This recipe makes about 8–10 slices. Dry Ingredients: 1 3/4 cups (220g) all-purpose flour 3/4 cup (75g) unsweetened cocoa powder 1 1/2 teaspoons baking powder 1 1/2 teaspoons baking soda 2 cups (400g) white sugar 1 teaspoon salt Wet Ingredients: 2 eggs (about 55–65g each) 1 cup (240ml) milk 1/2 cup (120ml) vegetable oil 2 teaspoons vanilla extract 1 cup (240ml) hot water For Frosting: About 1.5 batches of chocolate buttercream (enough to cover and layer the cake) Step 1: Prepare the Oven and Pans We start by preheating the oven to 180°C (350°F), or 160°C for a fan oven. Next, prepare two 9-inch (22 cm) round cake pans: Lightly grease the inside with butter or oil. Cut baking paper to fit the bottom and place it inside. This step ensures the cake releases easily after baking. Step 2: Mix the Dry Ingredients In a large mixing bowl: Sift in the flour, cocoa powder, baking powder, and baking soda. Add the sugar and salt. Use a whisk to gently mix everything together for about 20 seconds. Sifting helps remove lumps and creates a smoother batter later. Step 3: Add Wet Ingredients and Mix Now we add the wet ingredients into the same bowl: Add the 2 eggs. Pour in the milk (240ml). Add the vegetable oil (120ml). Add vanilla extract (2 teaspoons). Whisk everything together for about 30–40 seconds until the batter becomes smooth and slightly thick. Make sure there are no dry pockets left. Step 4: Add Hot Water (Key Step) Slowly pour in 1 cup (240ml) of hot water while mixing. At this stage, the batter will become very thin. This is completely normal and is the secret to a soft and moist cake. Keep mixing until everything is fully combined. Step 5: Pour and Bake Divide the batter evenly between the two cake pans. Gently tap the pans on the counter to remove air bubbles. Place them in the middle rack of the oven. Bake for about 35 minutes. To check doneness: (Text ends here) To check doneness: Insert a toothpick into the center. If it comes out clean, the cake is ready. Step 6: Cool the Cake Properly Remove the cakes from the oven. Let them cool in the pans for 10 minutes. Carefully turn them out onto a wire rack. Let them cool completely before frosting. Tip: Turn the cakes upside down so the flat bottom becomes the top. This makes decorating easier and neater. Step 7: Frost and Assemble Once the cakes are fully cooled: Place one cake layer on a plate. Spread a thick layer of chocolate buttercream evenly on top. Place the second cake layer on top. Cover the entire cake with frosting, smoothing the sides and top. If we want a cleaner look, we can gently level the top with a serrated tool before assembling. Helpful Tips for Success If using a springform pan, seal the edges well to prevent batter from leaking. Do not place the pan directly on a tray in the oven, as it may affect baking. Use room-temperature eggs and milk for better mixing. If baking multiple pans on different racks, rotate them for even baking. Let’s Enjoy This Sweet Moment Together Now our chocolate cake is ready! The texture is soft, the flavor is rich, and the process is simple enough to repeat anytime. Lykkers, have we ever made a cake this easy yet so satisfying? This recipe shows us that great baking doesn’t need to be complicated. Let’s slice it, share it, and enjoy every bite together—we might just fall in love with baking after this!
By Muhammad Talha6 months ago in Feast
How to Explore Sri Lankan Cuisine on a Trip to Kandy
As the second largest city in Sri Lanka, Kandy is not only a cultural epicentre synonymous with the Temple of the Tooth but a holiday destination every tourist should visit at least once during a tour of the island. Home to some of the country’s finest natural wonders and botanical gardens, the hill station is also the perfect place to uncover the flavours of Sri Lankan cuisine. Here are 6 signature dishes every traveller should sample during a sojourn in the sacred city.
By ameliarosanna6 months ago in Feast
How To Plan Restaurant Reservations in Hatta for Peak Season Visits
Hatta is a popular mountain retreat for locals and visitors alike who want to escape the hustle and bustle of the city. During peak times, especially in the cooler months, many people visit the area for outdoor activities and stunning scenery. Restaurants can fill quickly because there are fewer dining options, and planning ahead allows you to enjoy your meals without waiting.
By Aurora Gianna6 months ago in Feast
Homemade Peanut Butter Guide
A simple creamy treat made with just few ingredient. When it comes to spreads, few things are as comforting and versatile as peanut butter. Whether you're spreading it on toast, dipping fruits into it, or using it in baking, peanut butter is a staple in many kitchens. While store-bought versions are readily available, making homemade peanut butter is not only incredibly easy but also allows you to control the ingredients for a cleaner, healthier option. In this guide, I'll show you how to make your very own creamy peanut butter in just a few simple steps. 1. Ingredients You'll Need Before you start, make sure you have the following ingredients: Peanuts: 2 cups, unsalted, dry roasted (you can use pre-roasted peanuts or roast them at home). Salt: 1/4 teaspoon, to enhance flavor. Honey or Sugar: 1–2 teaspoons (optional, depending on your sweetness preference). Peanut Oil: 1–2 tablespoons (you can substitute it with vegetable oil if preferred). Vanilla Extract: 1 teaspoon (optional for extra flavor). These ingredients are all you need to make delicious, creamy peanut butter that’s free from unnecessary preservatives. Now, let's get started! 2. Preparing the Peanuts Roasting the Peanuts: If you are using raw peanuts, you can easily roast them yourself. Spread the peanuts in a single layer on a baking sheet and roast them in a preheated oven at 350°F (175°C) for about 10 minutes, or until golden brown. Roasting will bring out their natural flavor and aroma. After roasting, let them cool to room temperature. Skin Removal (optional): You can choose to remove the skins from the peanuts if you want a smoother peanut butter. Gently rub the roasted peanuts between your hands or use a cloth to remove the skins. This step is optional; some people prefer to leave the skins on for added texture and fiber. 3. Blending the Peanuts Add Peanuts to a Food Processor: Place the roasted peanuts into a food processor or high-powered blender. Pulse a few times to break the peanuts into smaller pieces. Start Blending: Turn the food processor on and let it run for 2–3 minutes. The peanuts will first become crumbly, then slowly begin to turn into a thick paste. Scrape down the sides of the processor to ensure even blending. Adjust the Consistency: As the peanuts continue to blend, you'll notice them releasing their natural oils. If the mixture is too thick, slowly add peanut oil (1 tablespoon at a time) until the consistency becomes smooth and creamy. You can also add a bit of honey or sugar at this stage if you prefer a sweeter peanut butter. 4. Seasoning the Peanut Butter Add Salt and Sweetener: Once the peanut butter has reached your desired consistency, add a pinch of salt for flavor. If you like your peanut butter sweet, add a teaspoon or two of honey or sugar. Blend again for another 30 seconds to incorporate everything thoroughly. Taste and Adjust: Taste your homemade peanut butter. If it's too thick, add a little more oil. If it's not sweet enough, you can add a bit more honey or sugar until it suits your taste. 5. Storing and Using Your Peanut Butter Store Properly: Transfer the homemade peanut butter into a clean, airtight jar or container. Keep it in the refrigerator to maintain freshness. It should last for up to 2–3 weeks, though you'll likely finish it long before that! Serving Ideas: Spread it on toast, pancakes, or waffles. Use it as a dip for fruits like apples and bananas, or add it to smoothies for a creamy texture. It also makes a great ingredient in baking recipes, such as cookies and brownies. 6. Tips for the Best Homemade Peanut Butter Here are a few tips to help you create the perfect peanut butter every time: Choose Quality Peanuts: The quality of the peanuts you use will greatly affect the flavor of your peanut butter. Opt for dry-roasted peanuts that have no added salt or sugar for the best results. Experiment with Add-ins: If you like different flavors, try adding a little cinnamon, cocoa powder, or even a touch of maple syrup for a unique twist. Adjust the Texture: If you prefer crunchy peanut butter, pulse the peanuts less and leave some small peanut chunks in the mixture. Alternatively, you can stir in some chopped peanuts after blending for added texture. Consistency Matters: Peanut butter can get thicker over time as it sits in the fridge. To make it easier to spread, just stir in a bit of oil or let it sit at room temperature for a few minutes before use. Enjoy Your Homemade Peanut Butter! Making your own peanut butter is simple, fun, and rewarding. The best part is that you can customize it to your liking by adjusting the sweetness and texture. With just a handful of ingredients and a few minutes of your time, you can have a fresh, creamy spread ready to enjoy. Whether you're making a snack, adding it to a recipe, or simply eating it by the spoonful, homemade peanut butter is a tasty and healthy alternative to store-bought varieties. So, why not try making your own today and taste the difference?
By Muhammad Talha6 months ago in Feast
Easy Lemon and Basil Vegan Loaf Cake
It's warm outside so yes, I'm baking and even though I don't really eat cake, this one was actually really tasty. It wasn't too sweet and it wasn't too over the top (which seems to be the issue I have with cakes, I hate anything sickly sweet). This one is quite simple and I'll also post some adjustments you can make to the recipe for different flavours. So, let's take a look...
By Annie Kapur6 months ago in Feast