
Reviving Midge
How to get started with dehydrated starter

I call her Midge, but you don't have to. You can choose what to name your sourdough starter, but names are a must. An unnamed starter is doomed to fail! Just kidding, but it's a lot more fun to care for Phoebe, Carter the Starter, or DoughBoy than a nameless jar of sludge. Got a name in mind? Then let's get started!
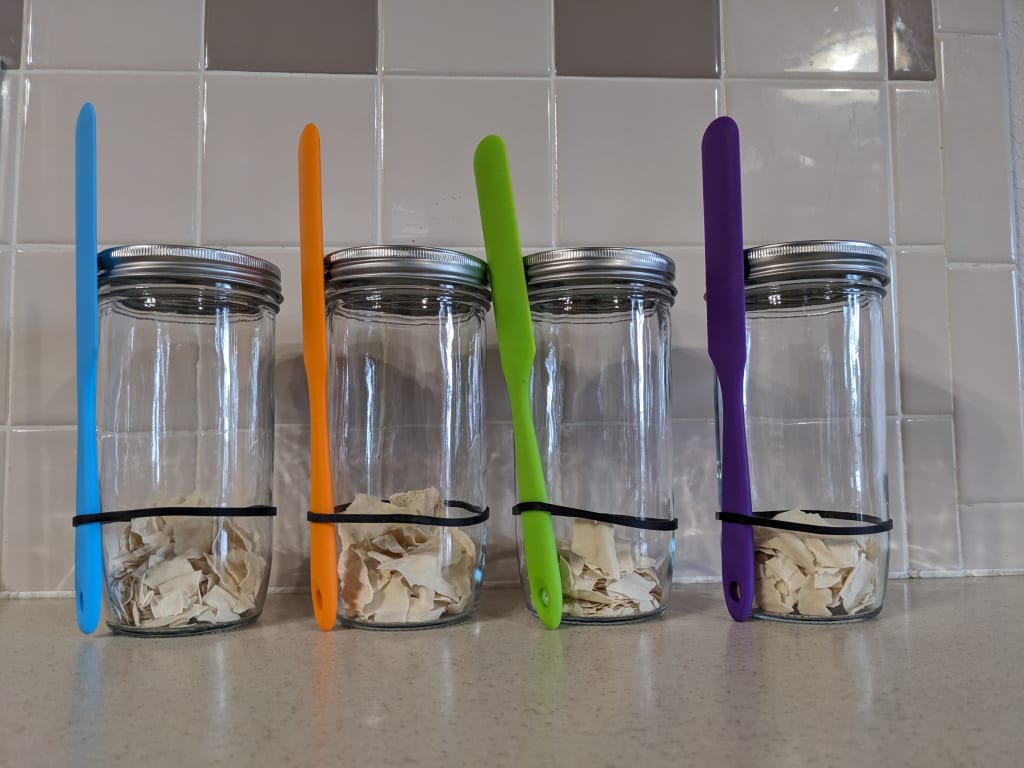
If you bought a starter kit, you should have a jar, a spatula, a rubber band, and enough starter to try again if your first attempt goes south or your starter dies for any reason. If you just bought the starter, there will still be enough for two attempts, along with a rubber band for marking your jar. You'll also want a food scale on hand once you're ready to start baking, but it's not a necessity for starter care. Oh, and you'll see lots of recommendations for bread flour, but all-purpose flour works just fine.
Now, reviving your starter to a thriving state will take at least a few days, so be patient and don't get discouraged. If it's in a cold environment, it may need a bit longer. Just like using instant yeast, the yeast in a sourdough starter works faster when it's warm. Sourdough is fermented, so it takes time for the yeast and bacteria to come "back to life" and begin to feed on the sugars you provide with flour and water. Your goal is to routinely feed your starter and trust that you'll see a fair amount of bubbles and height (roughly double) in a 6-12 hour span as the starter creates carbon dioxide, lactic acid, and ethanol from those simple carbs.
When you're ready to dive in, you'll add up to a quarter cup of water to the jar. Avoid the urge to use filtered water since that may reduce the available nutrients and make it more difficult for your starter to activate and thrive. I advise adding the water in one tablespoon at a time. You'll likely need to let it sit for a while as the flakes soften and absorb the water. When you're satisfied that there aren't any dry flakes left, add flour - one tablespoon less than the number of tablespoons of water you used. Stir, then put the lid loosely on the jar and let it sit for about a day.
On day 2, you'll start a more normal feeding cycle. A good rule of thumb is a 1:1 ratio of flour to water. Here's where it can be helpful to use a kitchen scale until you get more comfortable. You can start small with 50 grams of each. Stir until the flour, water, and starter are mixed, then cap loosely and wait another day.
For day 3, you'll hit a huge milestone. You get to toss your first discard! Discard is just starter that gets removed from the jar after the cycle of a feed has ended to make room for a new feed. If you don't want to waste it, just save it in the fridge and keep an eye out for my cracker recipe! Either way, discard about 75% of the starter, then feed like you did on day 2. This time, situate the rubber band at the top of where the freshly fed starter sits.
Day 4, same as day 3. You may be seeing some bubbles by this time, so keep adjusting the rubber band to sit at the top of the freshly fed starter to keep track of how much it rises.
Day 5. If your starter doubled after the day 4 feed, congratulations! You did it! If not, repeat the same feed you've been doing and you should be good to go in a day or two.
Once you've seen doubling, you can do full feeds of 100+ grams each of flour and water when you want to bake. Some recipes will tell you how much to feed your starter to produce the necessary amount of active starter. You can continue to discard and feed every 1 to 3 days if you're actively baking and do smaller feeds for maintenance. I prefer to feed based off of a texture preference that I've heard be compared to a muffin or brownie mix. Over time, you'll get a feel of what works best for your environment.
Now that you've got a thriving starter, the possibilities are endless! If you have any questions, want recipe recommendations, or want to share something you've made, find me on Instagram and reach out! Happy baking :)
UglyYummies - Cooking with our minds, our hands, and our hearts to nourish bodies and souls.
About the Creator
UglyYummies
Cooking with our minds, our hands, and our hearts to nourish bodies and souls.
Enjoyed the story? Support the Creator.
Subscribe for free to receive all their stories in your feed. You could also pledge your support or give them a one-off tip, letting them know you appreciate their work.
Keep reading
More stories from UglyYummies and writers in Feast and other communities.
Coconut Water Lemonade Gummies
If your kids are anything like mine, they want gummies all day every day. But many store-bought gummy snacks have dyes, additives, and "natural" flavoring. Thankfully, they love homemade gummies made with fruit juice! You can use any kind of juice or liquid to make gummies, and you'll find different recipes quite easily, but these lemonade gummies have been a hit with even my pickiest guests. You just need 4 ingredients.
By UglyYummies10 months ago in Feast
Discovering the Best Air Fryer for Your Kitchen: A Comparative Guide
In modern kitchens, the rise of air fryers represents a shift towards efficient and healthier cooking methods. Leading the charge are three standout models: the COSORI Air Fryer 9-in-1, known for its spacious 6-quart capacity, rapid cooking capabilities up to 450°F, and ability to achieve crispy results with minimal oil; the Ninja AF150AMZ Air Fryer XL, offering a versatile 5.5-quart capacity, multiple cooking functions like Air Roast and Dehydrate, and a Chef-Inspired Recipe Guide for culinary inspiration; and the VEWIOR 5.3Qt Air Fryer, featuring a smart digital touchscreen, viewing window for real-time cooking monitoring, and 7 custom presets for effortless meal preparation. These appliances not only simplify cooking but also promote healthier eating habits without compromising on taste. Let's explore how each air fryer elevates the cooking experience with its unique features and benefits.
By Mario T. DiLonardo5 days ago in Feast
10 Must-Try Dishes at Your Next Mediterranean Restaurant Visit
Craving a culinary adventure that transports your tastebuds to sun-kissed shores? Look no further than your local Mediterranean restaurant! This vibrant cuisine boasts an array of tantalizing dishes bursting with fresh flavors and unique combinations. But with so many mouthwatering options, where do you even begin?
By Amelia Johnson3 days ago in Feast


Comments
There are no comments for this story
Be the first to respond and start the conversation.