


With Fall beginning and harvests being brought in, it is time to cover some people’s favorite seasonal hobby, canning. Canning is a food preservation technique dating back centuries. It is when food is processed and sealed in glass jars designed for the job. It can extend a food’s shelf life by one to five years, sometimes longer in special cases when done correctly. According to the United States Department of Agriculture (USDA), 39% of those over 50 years old consider themselves regular ‘Canners’, and 31% of those under 35. For a beginner ‘Canner’, the process may look complicated, but it’s easier than you think. There are two main types of canning, so for the article, we will only discuss the most popular method known as Water-Bath Canning.
What Is Water-Bath Canning?

This is the easiest and most simple canning method. It involves placing food in glass jars and then putting them into boiling water in a special type of pot known as a water-bath canner. The pot is quite large, with a rack attachment and a lid. It is a lower-temperature canning process, meaning it’s only good for high-acidic fruits and vegetables such as tomatoes (the most popular canned produce), most types of fruit, cucumbers, and cabbage. When the acidity of the food and the high temperature of the boiling water combine, it allows for food to be safely preserved. The other method known as Pressure Canning requires a unique set of skills and a pot to process food in.
Gathering Your Supplies

Other supplies you’ll need outside of your canner would be glass mason jars (the most popular brand being Ball) with lids. A wide-mouth funnel and a canning scoop, or ladle if one is unavailable, can help you fill the jars easier, keeping the rims clean. You’ll need to do this to ensure a proper seal on jars while canning. Jar lifter tongs let you pick up and remove hot jars from the water to prevent burns. Always use new lids because the seals are stronger, lowering the risk of food spoilage. We can reuse rings unless dented or bent, as this helps the lid from its seal by holding them in place during the process. Finally, invest in pretty labels and a marker so food is properly labeled and dated to ensure proper rotation.
Preparing The Jars
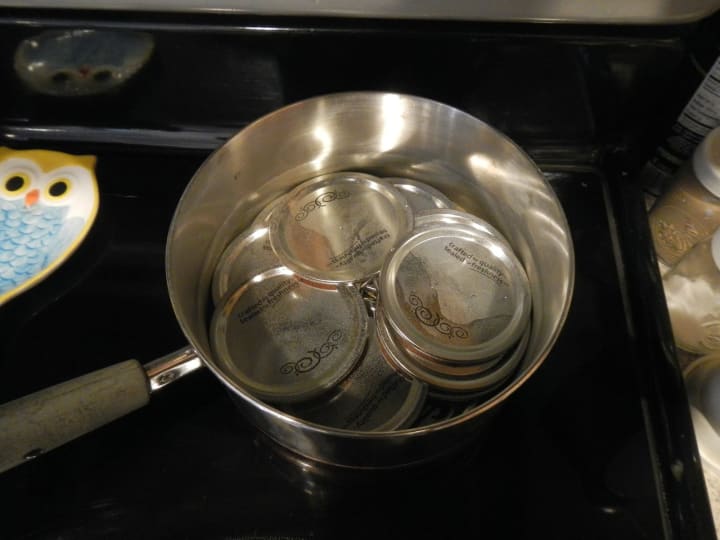
Canning is going to be an all-day affair. To start, you’ll need to sterilize your rings, lids, and jars. First, put the rings and lids in boiling water that is rolling for ten minutes. If using the lids with a rubber sealing ring, remove the ring and put the lid only in water as the rings can break when expose to high temperature. If unsure how to sterilize them, then consult the packaging on the lids as they’ll explain in better detail how to take care of that brand. Next, wash the jars in hot, soapy water and rinse thoroughly. Then add them to the pot while it’s still at a rolling boil. The reason we add them to the water is not for sterilizing, but so the glass doesn’t shatter when you add hot food to them. They are left in there for ten minutes as well. You can do this in an oven by setting it at 200 degrees and warming them for the same amount of time. Leave them stewing in the hot water until ready to use.
Preparing The Food

Use only the freshest produce you can find. You’ll want to use the ones that are at their peak season in your region. Avoid produce that is bruised, discolored, or overripe. If using a recipe, follow it EXACTLY because making any changes can spoil the whole batch in the long run. Tampering with the recipe can throw off a food’s PH balance, affecting its overall safety. Canning is a science, not an art. Only use recipes you have experience with making or you received from a reliable source, like a family member, trusted friend, or a secured website. Some good reliable sources for canning recipes would be the Ball Complete Book of Home Preserving and the National Center for Home Preservation. (https://nchfp.uga.edu/#gsc.tab=0)
Fill Them Up

Once the food is ready, lids and rings sterilized, and jars nice and hot, it is time to fill. First remove, empty, and dry each jar, ring, and lid. Place them on a stable, clean surface with the jars upright. Fill each one, leaving a headspace of a fourth or a half inch from the top. Use the funnel and canning scoop to fill them carefully, trying not to make a mess everywhere. Next, use a rubber spatula or wooden skewer to release trapped air bubbles. When you got all the air bubbles out, wipe the rim with a dump cloth. Put on a clean lid and tighten the ring, but don’t overdo it. You want them to be fingertip tight, meaning tighten them until you feel a slight resistance.
Time For A Bath

Fill your canner halfway with water and bring it to a rolling boil. Make sure it is at a rolling boiling before putting jars into it to ensure proper food preservation. Secure the rack to the pot as the water comes to temperature. Using the rack, if unavailable, use the jar lifter, and slowly lower the jars into the water. The water should cover the tops of the jars by one or two inches. Also, make sure none of the jars are touching each other, so it properly heats them within the canner. Once the water is back at a rolling boil, cover it and leave it alone. Opening and closing the canner will only decrease the temperature, thus increasing the risk of food poisoning. Pint jars require 15 minutes of cook time, half pints require 10 minutes, and quart jars 20 minutes. If the recipe you are using gives a time, then use that to determine how long they should stay in the sealed canner.
Resting

When finished, turn off the heat and leave them in there (still keeping the canner close) for ten minutes. When the time is up, remove them and place the jars on a clean towel two inches apart from each other. The jars should make a ping sound, and the center should concave into itself once out of the water. This is a wonderful sign, as it means your jars are airtight and properly sealed. Let them cool to room temperature. Once cooled, you may test the seals by pressing gently on the center. If it pops, label it, and move it to the fridge so it may be consumed as soon as possible, usually within 3-5 days. If it doesn’t, but it feels like a slight dip, then they are properly sealed. Leave them here for 12-24 hours.
To The Food Pantry

Now take off the rings and put them away for next time. Label each jar with what’s inside of it and an expiration date one year from the day you canned them. Meaning if you can on September 20, 2022, the expiration date should read September 20, 2023. Some foods do have a longer shelf- life and, if you know it, alter the year accordingly. Tomatoes have a two-year shelf life, while sauerkraut has a five-year life. When in doubt, always Google or check the recipe card. Keep them in a dark place, away from direct sunlight. It should also be cool, and usually under 75 degrees F. to prevent bacterial growth within your jars. Avoid stacking the jars as this could break their seal, or topple over getting glass everywhere. If you must stack, only go as high as two rows, putting the lighter ones on top. Rotate them like you would any other food using the FIFO (First In, First Out) method.
Botulism

Botulism is the biggest threat to Home Canners. On average, 110 people will get sick from it each year, with 1 in 20 of them dying from it. 25% of reported cases come from improperly handled or cooked food. Botulism is a serious illness caused by a toxin that attacks the nervous system and brain. Symptoms usually take effect within 18 to 36 hours after consuming the rotten food. Common symptoms include, but are not limited to:
- Muscle weakness
- Blurred or double vision
- Difficulty swallowing and breathing
- Slurred speech
- Vomiting
- Stomach pain
- Diarrhea
If you suspect you or a loved one has Botulism take them to the Emergency Room immediately for treatment. If left untreated, it could lead to paralysis and death.
About the Creator
M.L. Lewis
Welcome to my little slice of pie. This blog will primarily focus on prepping and homesteading skills with a sprinkle of fiction every now and then.
Keep reading
More stories from M.L. Lewis and writers in Feast and other communities.
How To Make
Meals Ready to Eat, or MRE, is a total self-contained complete meal that withstands rough conditions and exposure to the elements. They are the primary main operational food ration for the US Military. Each MRE contains on average 1,250 calories, 13% protein, 36% fat, 51% of carbohydrates, and a third of the average adult’s daily recommended allotment of vitamins and minerals. Someone can safely consume everything inside of it cold, but they contain a flameless ration heater that can warm it up, making them taste better. To make an MRE at home, you’ll need a vacuum sealer, permanent marker, food-grade Mylar bags both large and small, and food to put in it.
By M.L. Lewis2 years ago in Feast
Viral Food Trends
Viral Food Trends: Exploring the Hottest Dishes of 2024 Food trends come and go, but some dishes capture our collective imagination and take the world by storm. In 2024, we're seeing a mix of innovative recipes, global flavors, and health-conscious choices that have everyone talking—and eating! So, grab your forks and knives as we delve into the hottest viral food trends of the year that are not only Instagram-worthy but also incredibly delicious and nutritious.
By Arshad Mecci3 days ago in Feast


Comments
There are no comments for this story
Be the first to respond and start the conversation.