
Recipe | Chocolate Cake With Whipped Orange Filling
A Dark Chocolate Sponge With Whipped Orange Cream Filling, Milk Chocolate Ganache, and Fondant and Royal Icing Decorations

I made this particular cake for Father's Day. But of course you can make this any time and change the decorations. I know that my dad loves chocolate cake, so I was on the hunt for the perfect chocolate cake recipe. In the past, I have always struggled to get a chocolate cake to rise well during the baking process. For the design that I had planned, I needed to have the cake rise whilst baking. But I know that chocolate cakes are notorious for not rising much. You see my problem? I also know that chocolate cakes can be rather dry. So, I had a few different features of chocolate cakes that I wanted to avoid and I think I achieved that with this recipe.
This recipe uses an 8" cake tin with three layers. It serves for about 20.
Ingredients
For the sponge:
- 390g butter, I used baking butter
- 390g dark chocolate
- 6 tsp granulated coffee
- 285ml water
- 225g self-raising flour
- 225g plain flour
- 90g cocoa powder
- 3/4 tsp bicarbonate of soda
- 900g caster sugar
- 6 large eggs, please use free range
- 15 tsp oil, I used sunflower oil
- 210ml sour cream
- 300ml double cream
- 6 tbsp icing sugar
- 1 tsp orange extract
- Orange food colouring. I didn't have any so I mixed red and yellow food colouring
For the ganache:
- 300g milk chocolate
- 100ml double cream
- 1 tbsp milk
For the royal icing:
- 250g royal icing sugar
- 40ml water
Method
For the sponge:
- Preheat the oven to 160ºc or 140ºc fan.
- Line and grease three 8" cake tins with butter and baking paper. The tins need to be a few inches deep because there is a lot of mixture and the layers rise well.
- In a large pan on low heat, gently melt together the butter, chocolate, coffee, and water. Begin to gently stir as they melt together to ensure that they are truly combined. Remove from the heat once everything has melted and combined.
- In the main mixing bowl, sift together the self-raising flour, plain flour, cocoa powder, bicarbonate of soda and caster sugar. Stir together to combine them.
- In a separate bowl, whisk together the eggs, oil, and sour cream.
- Pour the egg mixture into the dry ingredients and mix together.
- Give the chocolate mixture one final stir and pour it into the dry ingredients and egg mix. Combine all of the ingredients together. The mixture should be pourable.
- Beat the mixture evenly between the cake tins. Strongly bang the tins on the surface to allow any air bubbles to the surface.
- Bake for 1 hour and 20 minutes. Check with a skewer or knife. If it comes out clean, then it's done. If not, bake for a further few minutes.
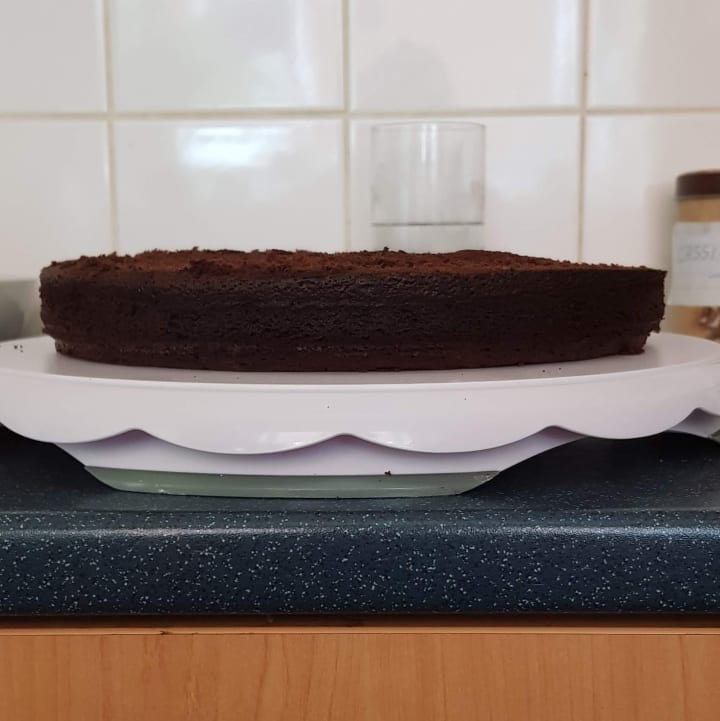
- Allow to cool completely before removing the cakes from the tins. Place the layers onto a cooling rack to ensure they cool completely before decorating.
For the whipped filling:
- In a bowl, pour in the cold double cream, icing sugar and orange extract. Using a whisk or electric whisk (I used a balloon whisk), combine the ingredients.
- Add in the food colouring to create your desired colour. Since I was using red and yellow and wanted a paler orange, I used more yellow than red.
- Once happy with the colour of your filling, whip until the cream reaches stiff peaks. Don't over whip.
For the chocolate ganache:
- Pour the cream over the chocolate in a microwaveable bowl.
- Heat the mixture for 1 minute in the microwave. Mix with a spoon to help the chocolate melt.
- If there are still lumps of chocolate, put it back in the microwave for about 20 seconds and mix again. Repeat until the chocolate has fully melted.
- I added about 1 tbsp of warm milk to get the right consistency to allow me to spread it over my cake once it was assembled.
For the royal icing:
- Create a well in the centre of the royal icing sugar and pour in the water.
- Mix well using a spoon until you reach soft peaks.
To Assemble
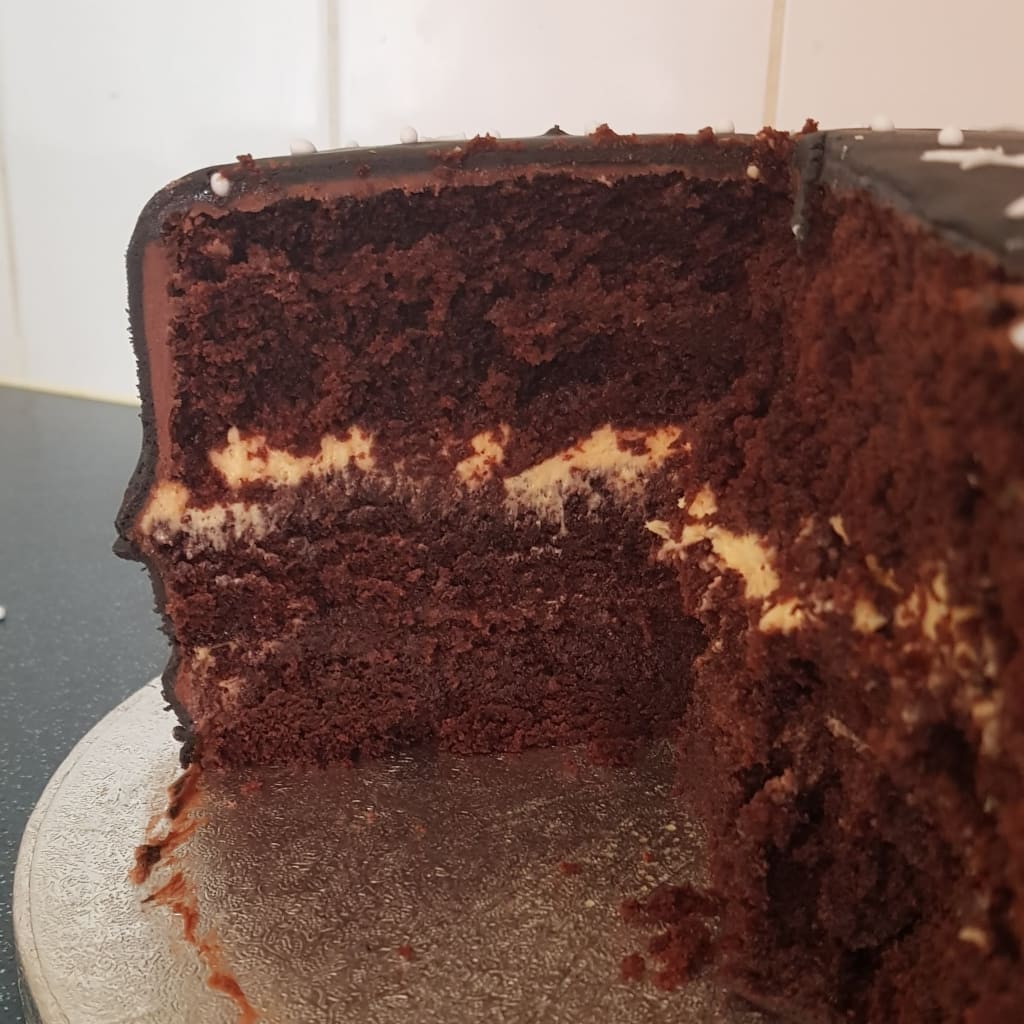
- Ensure that all of your cake layers are completely cool. I didn't. Therefore, I nearly lost the top two layers putting it in the fridge and the first layer of whipped filling is undetectable.
- Level all of your cake layers. I used a bread knife to do this because I find that it cuts the cake layers nicely.
- Place your cake drum on your turn table. I used Blue Tack to keep mine in place because I find that they have a tendency to slide around whilst I am decorating my cakes.
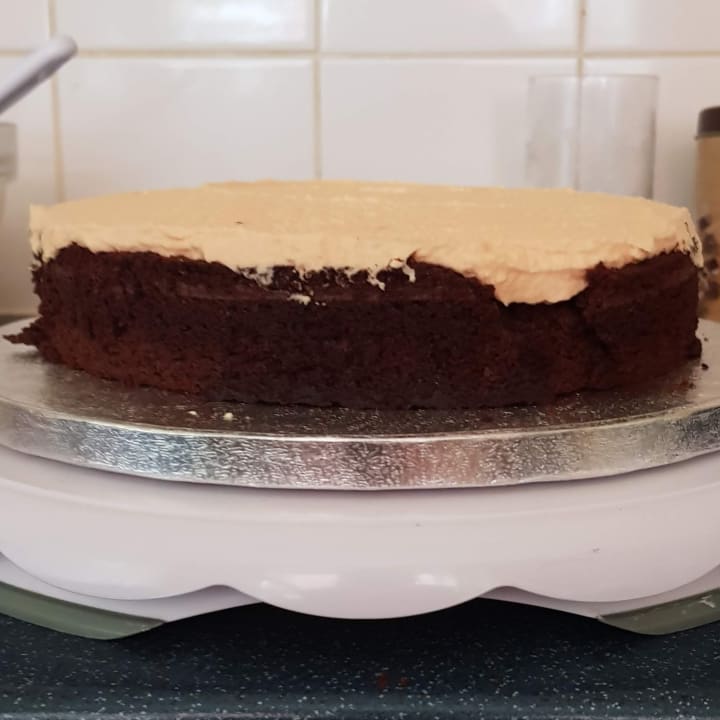
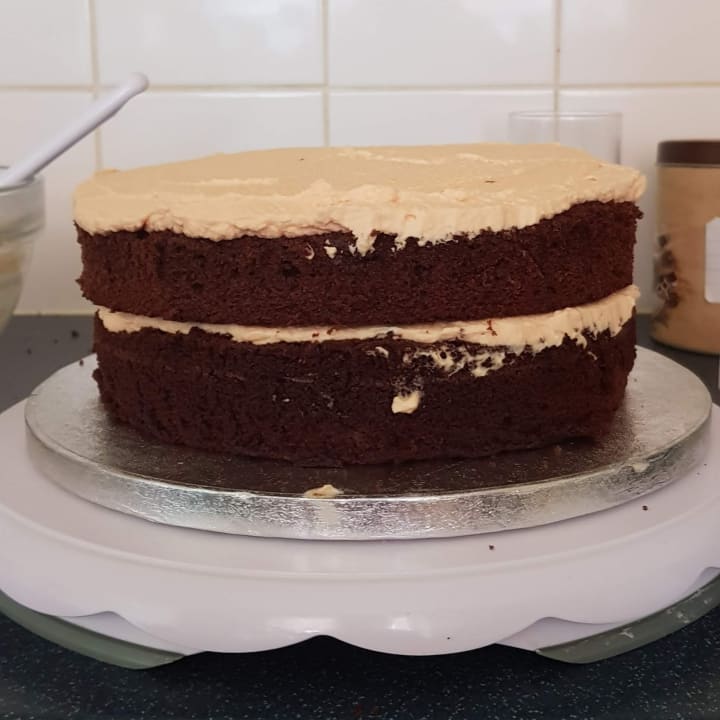
- Smear a small amount of the whipped filling in the centre of your cake drum and place the first cake layer on top. Push down gently the ensure that it is firmly secure.
- Put half of the whipped filling into a piping bag. Cut off the end of the piping to leave a large hole. Pipe a circle of the filling around the cake layer. Fill in the centre of the circle and smooth using a palette knife. I used a small angled palette knife for more control.
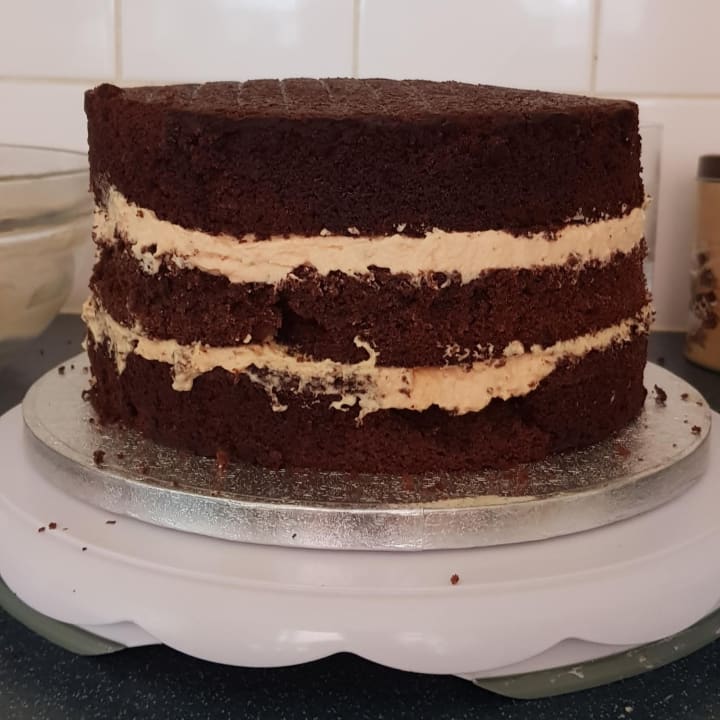
- Place the second cake layer on top and push down gently.
- Repeat the same steps of the filling.
- Turn the final cake layer upside down and place on top. Turning this layer upside down helps to create a sharper edge to your cake. Push down gently on this layer too.
To Decorate
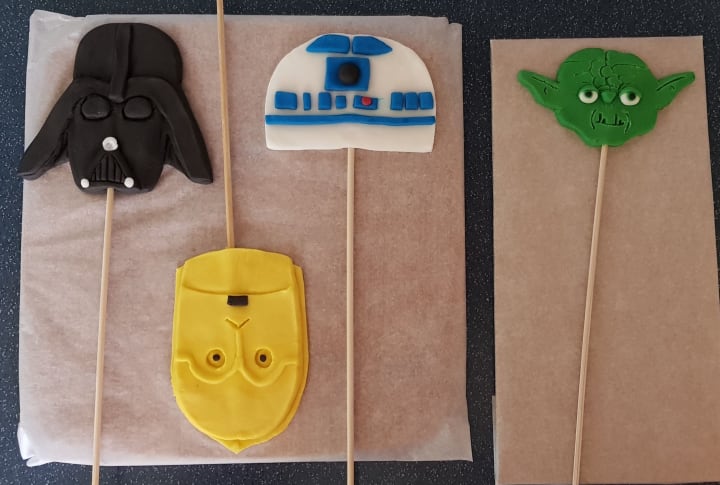
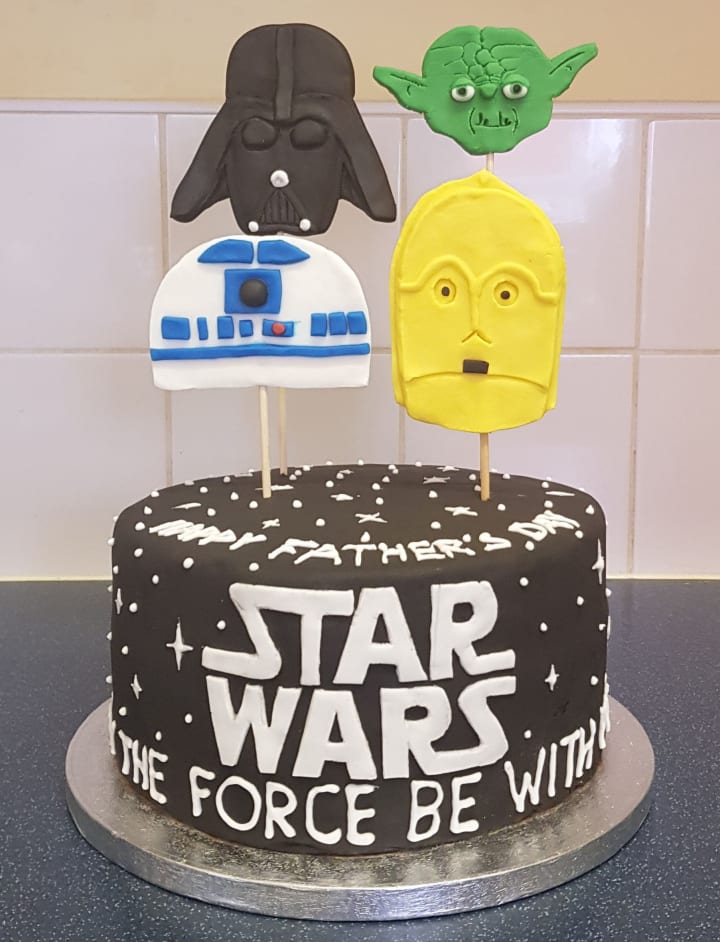
Since I made this cake for Father's Day, I used a Star Wars theme to design the cake because my dad loves Star Wars and bought him a Star Wars card. Of course, you don't have to decorate it like that; you can choose to decorate it in a different way.
A few days before, I created these fondant cake toppers to be stuck into the cake once I had finished decorating it. I created these using different coloured fondants and water. To make them hard enough to stand on their own, I turned on the oven light and left them in there for a few hours because the heat from the light was enough to make the fondant harden.
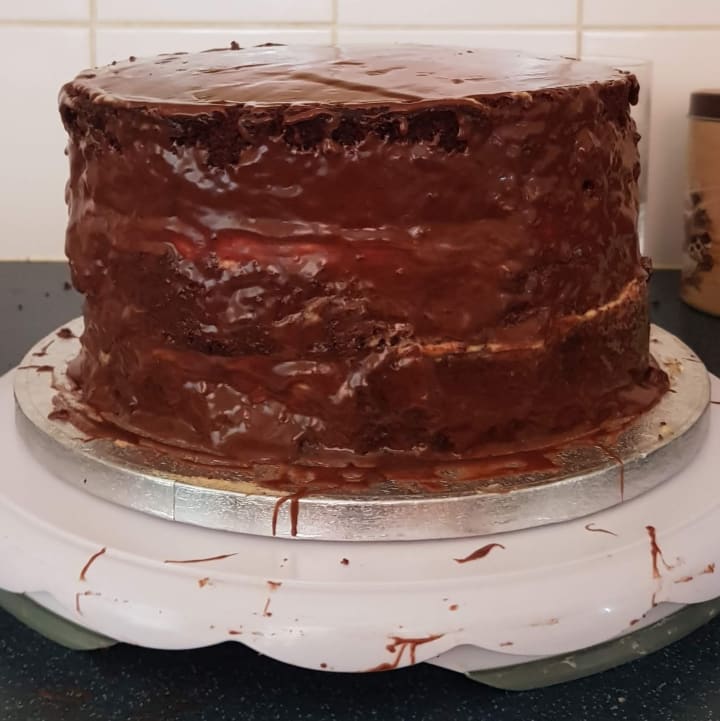
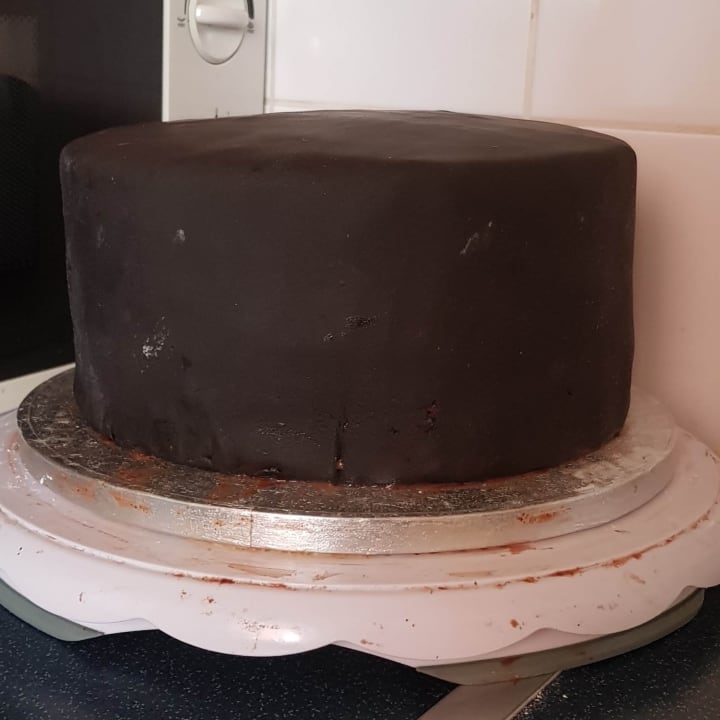
Using the chocolate ganache and a palette knife (I used the same small angled palette knife as before), create a thin crumb coat over your entire cake. Then use a cake scraper to remove any excess. Since I don't have one, I used a clean 30cm ruler to do this. Don't worry if it is not neat because another layer will be added onto it later. Place your cake in the fridge to allow the ganache to set.
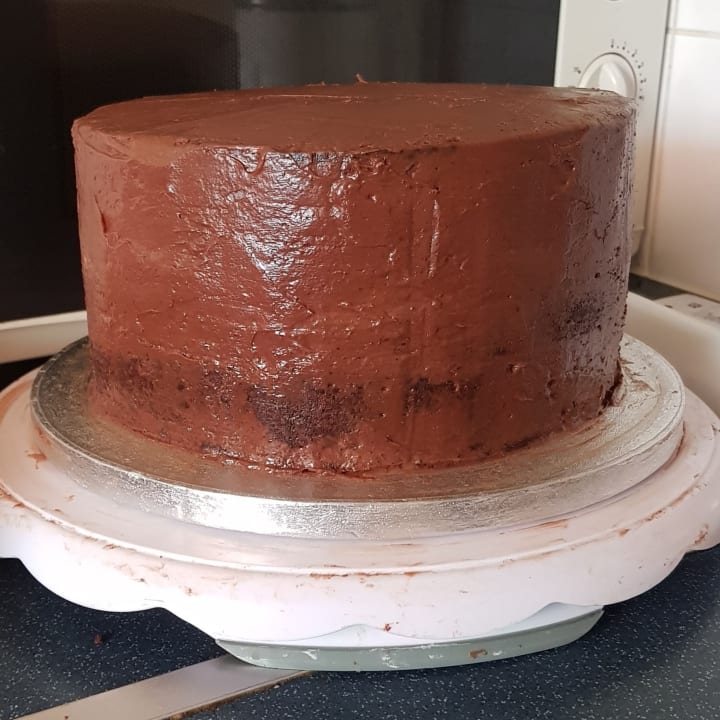
Remove the cake from the fridge and apply the final coat of the chocolate ganache in the same way that you applied the first. Ensure to be a bit neater this time since the fondant will emphasise any bumps.
Roll out the black fondant larger than your cake. Try and keep it thin because the filling and ganache are already quite sweet. But don't make it too thin otherwise you will risk tearing your fondant.
Drape half of the fondant over the rolling pin and lift it up. Place it over the cake. Using a cake smoother (I don't have one so I just used the side and palm of my hand) to smooth the top of the fondant and work your way down the sides of the cake. Gently lift the skirt of the fondant to remove any creases as you smooth the sides of the cake. Using a sharp knife, cut away the excess fondant close to the cake. Be careful not to get too close and risk cutting the cake itself. Using the back of a knife, tuck the fondant under the cake to create a smoother edge.
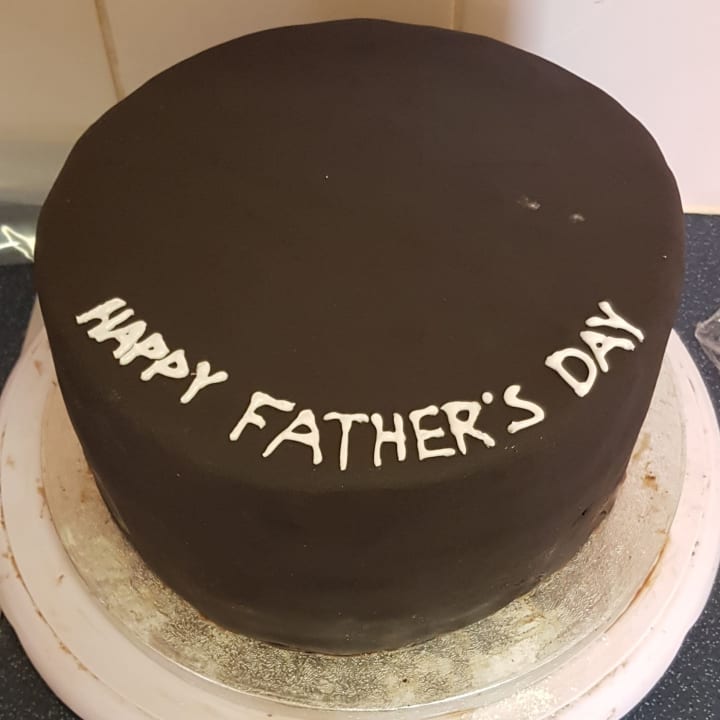
Place the royal icing in a piping bag with a piping nozzle. I used the Wilton no. 3 nozzle for more control. Along the top edge of the cake, pipe the phrase 'HAPPY FATHER'S DAY'.
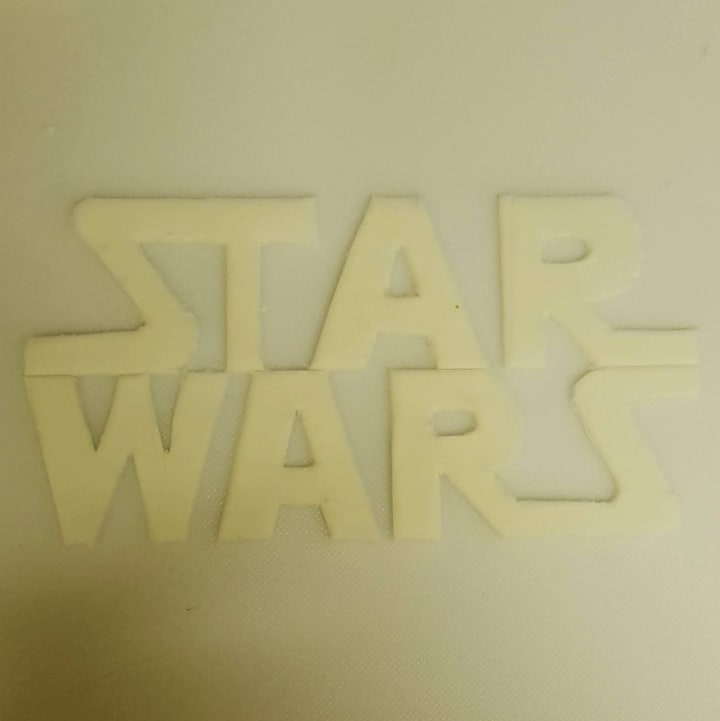
Roll out some white fondant. Carefully cut out the Star Wars logo. Ideally, you can create a stencil/template. But I used the back of a knife and a pointy end of a kebab skewer to create indents in the fondant before cutting it out.
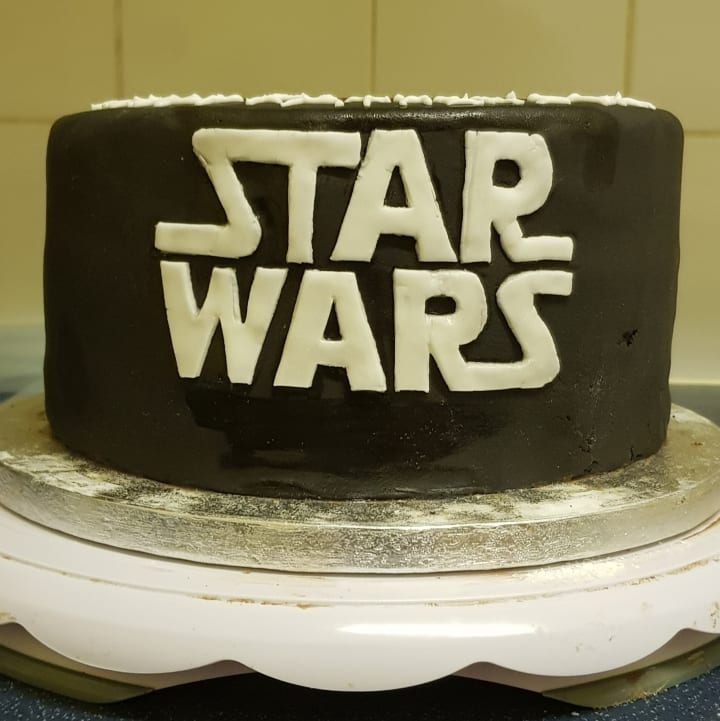
Carefully lift the letters off the surface. Pipe a small amount of royal icing on the back of each letter and place on the side of the cake. I have never tried to use royal icing to place fondant onto fondant before; usually, I use water. But I found that using royal icing was much easier and it didn't drip down the cake like water does. Also, try and keep the letters as straight as possible when placing them on the cake.
Using the same piping nozzle, pipe a small blob of the royal icing onto the cake. Quickly, before the royal icing begins to set, use a toothpick or kebab skewer to smear the royal icing to create small stars. Repeat all over the cake. Still using the Wilton no. 3, pipe small circle to fill in any gaps. I finished off by sticking two cake toppers onto the top of the cake.
Enjoy x

About the Creator
Keep reading
More stories from writers in Feast and other communities.
Easy One-Pot Meals for Busy Weeknights
Easy One-Pot Meals for Busy Weeknights: Delicious, Nutritious, and Stress-Free We've all been there—coming home after a long day, feeling tired and hungry, and the last thing we want to do is spend hours in the kitchen cooking and cleaning up. That's where one-pot meals come to the rescue! These easy, convenient dishes are perfect for busy weeknights when you want something delicious and nutritious without the hassle of multiple pots and pans. Let's explore some mouthwatering one-pot meal ideas that will simplify your evenings and satisfy your taste buds.
By Arshad Mecci2 days ago in Feast


Comments
There are no comments for this story
Be the first to respond and start the conversation.