
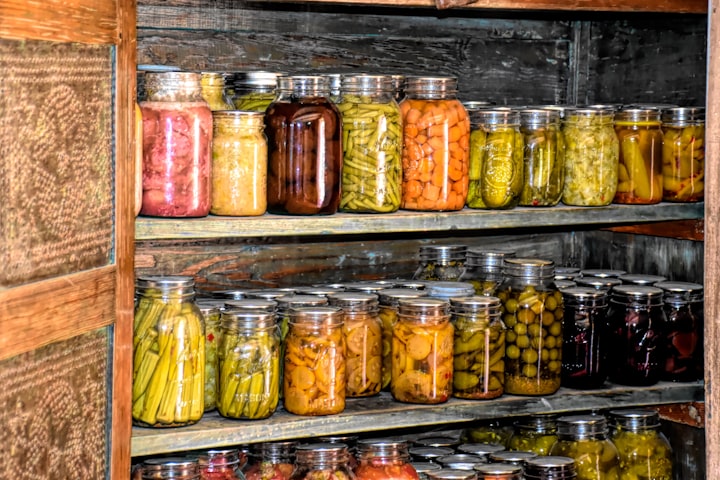
Preserving Your Harvest
Tips & Tricks for Successful Canning & Pickling


Canning is more than the act of preserving food in jars. It's a way to extend the season and keep your home stocked with delicious farm-fresh food.
Maybe you've lovingly tended your garden and have now harvested the crops. Perhaps you know you're going to miss that fresh produce in the grocery store once autumn and winter arrives. To help you enjoy the tastes throughout the winter, you've decided to try your hand at canning and pickling.
But where to start? Try these tips when canning, pickling, and preserving fruits and vegetables.
Selecting the Correct Additives
There is more to canning and pickling those fruits and veggies then just the produce themselves. It is important to have the correct additives such as pectin and pickling salt to name a few.
In pickling, the process is about adding acid (vinegar or lemon juice) to a low-acid food to lower its pH to 4.6 or lower. Acid foods include all fruits except figs, most tomatoes, fermented and pickled vegetables, relishes, and jams, jellies, and marmalade.
Here are a few common additives to consider when preserving fruits and veggies:
•Pectin - Pectin is a natural and commercially produced starch in preserves. Without pectin, jellies and jams won't gel.
•Pickling Salt - Also known as canning salt or preserving salt, pickling salt is simply pure granulated salt (sodium chloride). Pickling salt has no additives. Iodized salt makes the brine cloudy and may change the color and texture of the vegetables as well as possibly leave sediment at the bottom of the jars.
•White Vinegar - Most pickle recipes call for distilled white vinegar. This is the clear, colorless vinegar made by fermenting grains. It has a mellow aroma, tart acid flavor and does not affect the color of the light-colored vegetables or fruits. Use white vinegar when light color is desirable, as with fruits and cauliflower.
•Apple Cider Vinegar - Apple cider vinegar is milder and offers a different flavor note than white distilled vinegar. Apple cider vinegar is considered the healthier choice due to the bonus of fruit in it.
•Sugar - Sugar added to fruits when canning will help the fruit to hold its texture, shape and color. Sugar is not needed to prevent spoilage and that is why water or fruit juice can be substituted for sugarless home-canning.
•Lemon Juice - Jam needs the right balance of acid and pectin. If you're using low-acid fruits, such as rhubarb, apricots, peaches and strawberries, you need to add lemon juice. The lemon juice lowers the pH of the jam mixture, which also neutralizes those negative charges on the strands of pectin.
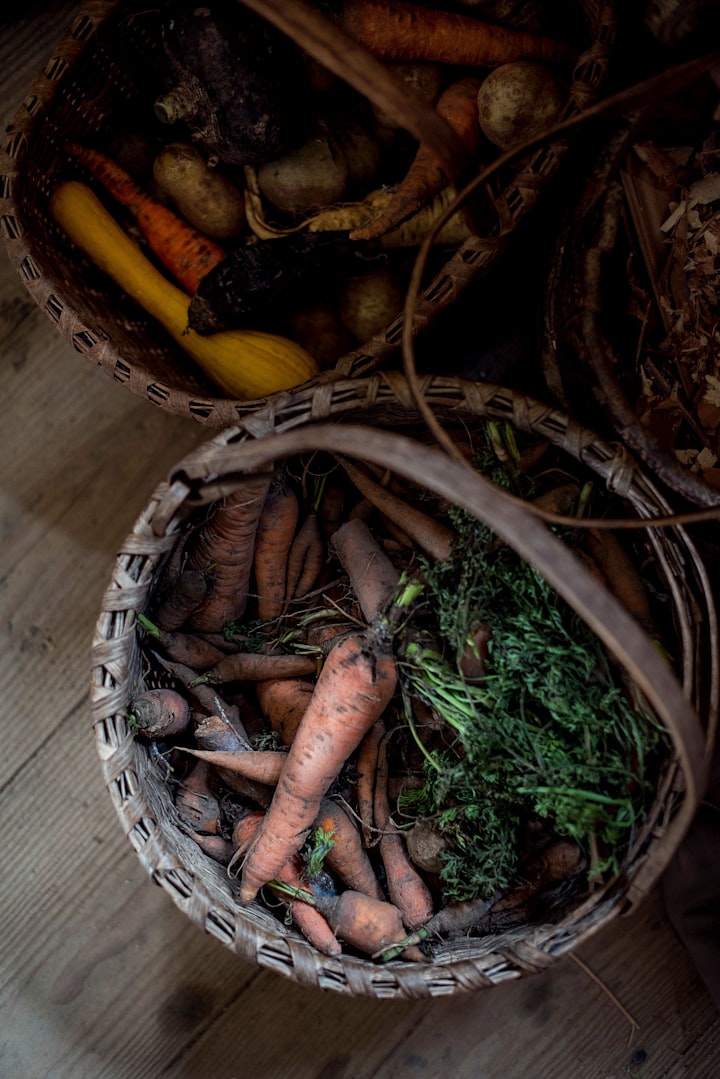
Use fresh fruits and vegetables.
Produce that sits for days on the counter or in the fridge loses some of its vitamins. It's best to can your garden fruits and veggies right after you harvest them, in order to have the highest nutritional content. It's fine to freeze produce that will be cooked before canning until you're ready to can if needed. This preserves the nutrients and taste.
•Avoid using waxed supermarket produce.
•Select the most unspoiled produce.
•Herbs and spices may intensify in flavor with long canning times. Use dried herbs sparingly.

Prepare Ingredients Ahead of Time
Getting your ingredients ready before you start the canning process is key. You want to make sure you have everything ready ahead of time. You can also prepare some ingredients the day before to make canning day less arduous. Leaving ingredients unattended for too long while you prep other ingredients can ruin all of your hard work. For example, leaving jam boiling for too long while you grate the lemon zest destroys the pectin so the jam won't set.
•Wash & Peel - Scrub food well, wash and peel the produce you plan to use. Be sure to remove and discard ¼–inch slice from the blossom end of fresh cucumbers. Blossoms may contain an enzyme that causes excessive softening of pickles.
•Soak - For crisper pickles, put the vegetables (whole or sliced) into a bowl and spread a layer of pickling salt on top. Cover and let sit overnight in a cool place. Discard the liquid, then rinse and dry the vegetables before pickling or canning as usual.
•Sterilize - In a boiling-water canner, process pints and quarts for 85 minutes. Keep reading for a more in depth look at sterilizing those jars.
Leave the Peel On or Remove It.
Canning tomatoes, pears, and plums without peeling them preserves the nutrients, prevents waste, and saves time. If you don't favor the texture of the peel, then by all means, remove it. But if you don't mind it, there's no reason not to keep it on.
Some fruits and veggies should definitely be peeled:
• Peaches – canning peaches with a fuzzy peel is not appetizing
• Citrus fruits – the peel is bitter and can ruin the flavor
• Beets – the peel is too tough
Sterilize Canning Jars
Always sterilize your empty jars before you use them. Do not use recycled commercial jars or old-style home-canning jars. They can break in the canning process.
•Sterilize and keep jars warm by:
•Placing in dishwasher on sanitize cycle
•Boiling jars for 10 minutes in a large pot
•Using a water bath canner
Follow Established & Tested Recipes
Safe canning starts with using tried and true canning recipes. Recipes that have been tested and approved for safe storage and consumption. If you don’t start off with a safe product in the jar, it doesn’t matter how you store it.
Modifying canning recipes, or creating your own from scratch can have serious consequences. If there's not enough acid in tomato recipes, it can lead to unhealthy and dangerous food. Same goes for canning corn, green beans and other vegetables.
By following tried and tested recipes, canning can be perfectly safe and fun. As well as delicious and healthy too.
Be Safe With Pressure Canning.
Canning jars should always be sterilized before pressure canning. The main goal in preserving your fresh fruits and vegetables is to prevent bacteria from growing so the preserves are free of dangerous botulism. Some foods cannot be pressure canned, such as dairy, grains, and pureed vegetables. Foods with a pH of 4.6 or above can be. Investing in a small pH tester or litmus paper is very helpful.
Head space is the space in the jar between the inside of the lid and the top of the food or its liquid. An overfilled or under filled jar may not seal properly, resulting in unsafe food. If you're losing liquid during processing or find mold during storage, you probably left too much head space.
Creating a Safe Seal
There are two ways to create a safe seal on your preserving jars: water-bath canning and pressure canning.
1.Water-Bath - Water-bath canning is when you submerge a filled canning jar in boiling water for a predetermined amount of time. Water-bath canning is recommended for high acid foods like most fruits and any food that is pickled in vinegar. Bacteria that can cause spoilage in foods is killed at 212 degrees Fahrenheit (100 degrees Celsius), the boiling point for water-bath canning. Check to make sure you process the jars in a boiling-water canner for the correct amount of time.
2.Pressure Canner - A pressure canner is a heavy-duty piece of equipment with a vent, a pressure gauge, and screw clamps. If you don't want to pickle your low-acid foods like corn, beans, and pork. Consider using a pressure canner. It's capable of heating the jars to much higher temperatures than a water-bath.
Whichever method you choose, remember to always use new jar lids for a tight seal and wipe the rim of the jar clean for a good seal after filling and just before putting the lid on. To avoid rust, screw bands should be removed from processed jars that are stored. They can be easily removed after the jars have cooled and sealed, and then reused.

Storing Your Preserved Food
Once you have your food safely in jars, the next step is storing it suitably to keep it that way. Here are some tips to best store your canned goods.
•Label and date your jars.
•Always take the rings off when storing. The rings are designed to help hold the lids in place for the first pop and seal. Leaving it in place can harm the seal more than help it.
•Store in a clean, cool, dark, dry place such as a pantry, cabinet, or basement. Never store them in a warm spot. These conditions are equally important and can affect how long your canned goods will stay viable.
•To allow pickles to mellow, wait at least 3 weeks before using.
•Always store canning jars upright, never on their side or upside down. Never stack canning jars on top of one another.
•Check your jars periodically, making sure lids are in place.
•Always check jar rims when opening for glass breaks or chips.
•Do not shake jars when storing.
Practice the common 12-month rule when it comes to how long preserved food can be stored. When properly processed and stored, canning jars will stay good for that period. Beyond that it's a good idea to err on the side of safety and stop using them.
Final Thoughts on Canning & Pickling
Now that you have a good launching pad to start your canning and pickling journey, get out there. You got this. Here's to a bountiful harvest and successful preserving.
About the Creator
Susan Grondin
Welcome.
Stay a while and enjoy a story or two.
Keep reading
More stories from Susan Grondin and writers in Feast and other communities.
Preparing Your Garden for Winter
The signs are all there. The trees are beginning to put on a brilliant show of colors. There's a chill in the air. Pumpkin spice infused food and drinks are everywhere you turn. Yup, that's right, it’s time to winterize your garden.
By Susan Grondin2 years ago in Earth
"Mastering the Art of Grilling with most affordable grill''
Grilling, the age-old culinary tradition that transcends cultures and brings people together, holds a special place in the hearts of food enthusiasts worldwide. Whether it's the sizzle of succulent steaks, the aroma of smoky ribs, or the charred perfection of vegetables, there's something undeniably magical about cooking over an open flame.
By Eimantas Stuina7 days ago in Feast
El Coto - Great Tapas In Newcastle
Introduction Someone once said that Tapas was just Spanish Leftovers. If they are just leftovers I would love to try the full meal, but that was just a joke and leftovers are usually smaller portions of what they were leftover from.
By Mike Singleton - Mikeydred5 days ago in Feast


Comments
There are no comments for this story
Be the first to respond and start the conversation.