
How To Make Traditional Sake in Your Own Home
Bring the authentic Japanese taste to your kitchen with these ten steps on how to make traditional sake in your own home.

Sake might be one of the most intimidating drinks to undertake, but it is possible to learn how to make traditional sake in the comfort of your own home. With the right tools, the best method, and a lot of patience, you will have the authentic aroma of Japanese sake filling your kitchen in no time and learn a lot of things you probably didn't know about sake along the way.
With 10 steps, try not to get scared off. Each step has an important addition to the process, and in the end, each stage will be worth the time and dedication required in the long run.
When it comes to learning how to make traditional sake, the first task to take on is to gather all of your needed equipment. This is easier said than done, as sake requires a ton of preparation. However, that's where sake making kits come in handy. This sake making kit has got you covered on all of the necessities to create your own traditional Japanese sake in the comfort of your home.
The kit includes a one-gallon jug, a two-gallon fermenting bucket, plastic tubing, a rubber stopper, a muslin bag, a cleaner, rice, yeast, and sake additives. In addition to this, you will also find a steamer and fermenter.
Washing
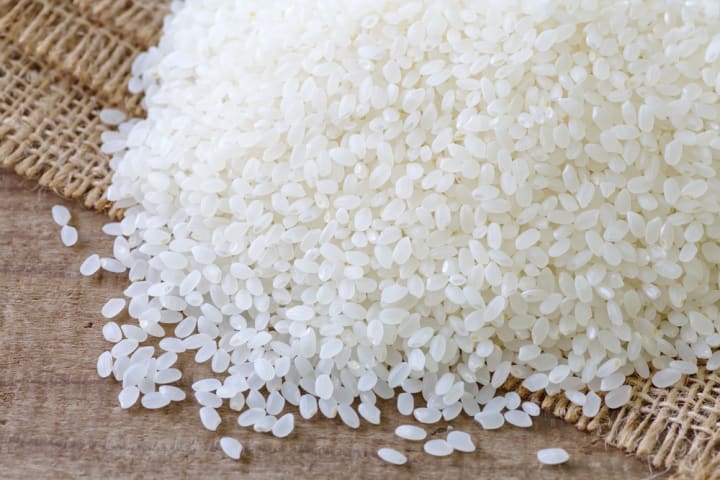
Now that you have gathered all of your needed equipment and ingredients, you will now begin the washing process. This is simple; wash the rice for the table, and do so three times in cold water.
You will also dump the turbid and rinse the rice until the water runs clear. Using a large bin, this will make for an easy process, and scrubbing the rice with your hands will allow you to get deep and quick clean, speeding up your first step. If you are making a larger portion of sake, use a large aluminum steamer tray and the sink sprayer.
Soaking
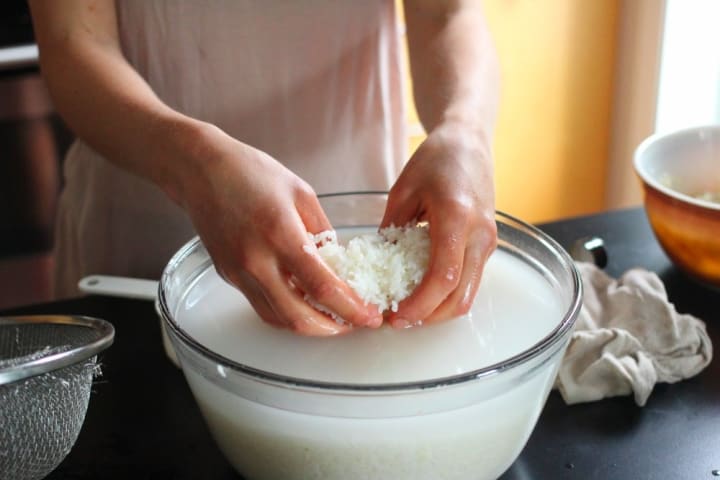
Next on our steps to learn how to make traditional sake is the soaking stage. This will be done once the rice is clean from washing. Using filtered water, you will soak the rice in a large bowl, covering the rice with a few inches of cold water.
During this step, the rice will absorb some of the water while soaking, which will gelatinize the rice starches for steaming.
Draining
Then comes draining. Draining is a simple yet crucial step for your traditional sake. Using a colander, drain the rice.
You can also use a cheesecloth-lined steamer tray to drain as well. During this step, you may also prepare your steamer. You will then bring the water to a boil.
Steaming
You guessed it, steaming is the next step. As one of the most important steps for learning how to make traditional sake, steam the rice using two trays above the boiling water. You can find a steamer for less than $20 at Home Depot.
Once you can see steam escape the lid, start your timer, and steam for approximately 30 minutes. After 30, check on your steamer, and rotate the trays from top to bottom. You should also check the water level, and refrain from allowing it to run dry.
Cooling
Move your hot rice into a mixing bin, and add ice water. This will break down the chunks of steamed rice, and power the temperature of the rice and mixture altogether.
Mixing
While you cool the sake, you will be mixing as well. As one of the most important steps to learn how to make traditional sake, the cooling and mixing process will bring the mixture down to about 70 degrees Fahrenheit. At this point, you will add the rice mixture to your fermenter, like this brew kettle set, and continue the cooling process until it reached 60 degrees or lower; the colder the better. If you have ice chunks remaining in your rice, this is fine; it will just take a little longer to melt, and will not affect the main ferment.
Just be sure to consistently stir the mixture with each addition, while still equalizing the temperature.
Temperature
Sake yeast needs low temperatures to ferment. During this process of cooling, at around 70 degrees is where the cell growth is maximized, and thus ferment the seed mash or "shubo." This process of lowering the temperature will take days, even a week, in order to lower the mixture to 55 degrees.
Once it has reached this temperature, you will continue your temperature lowering method by placing the main fermenter in a chest that is temperature controlled, and begin to add hatzucoe, nakazoe, and tomezoe, the three additions.
Stirring
Finally, one of the easier steps for how to make traditional sake is to stir! During the long fermentation process, you will have to stir your new mixture every 12 hours for the best results.
While the rice, koji, and yeast are broken down into mostly liquid, the fermentation process is necessary to be successful with regular and constant stirring, in order to rid the CO2 and break down the solids in the mixture.
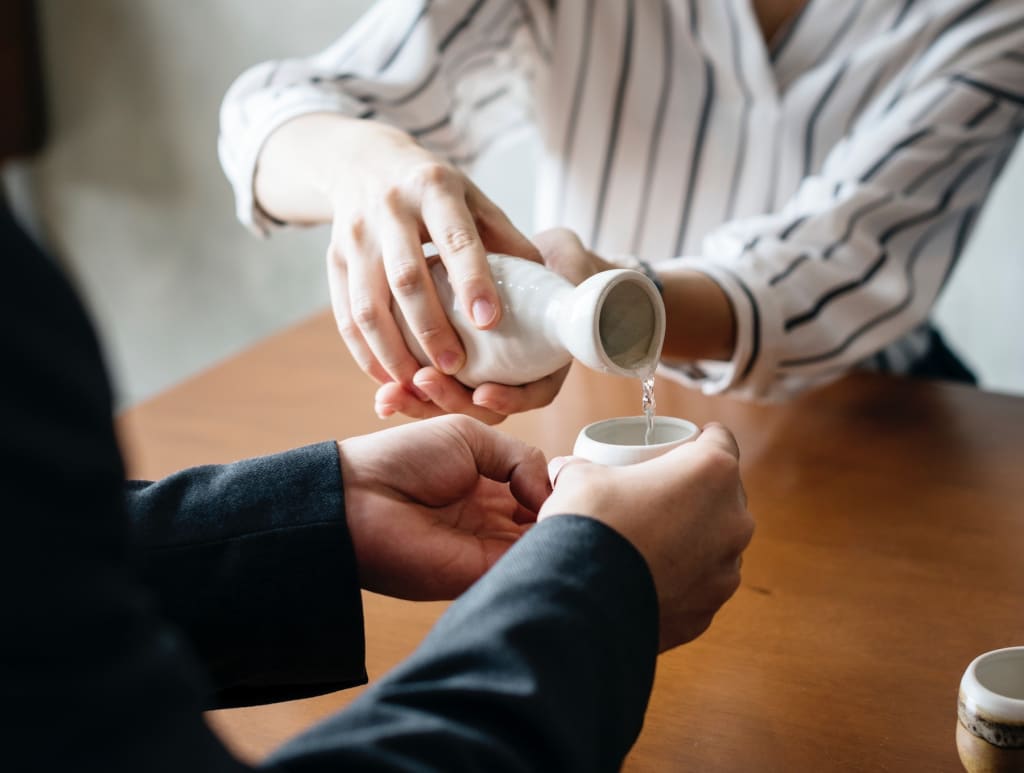
Serve!
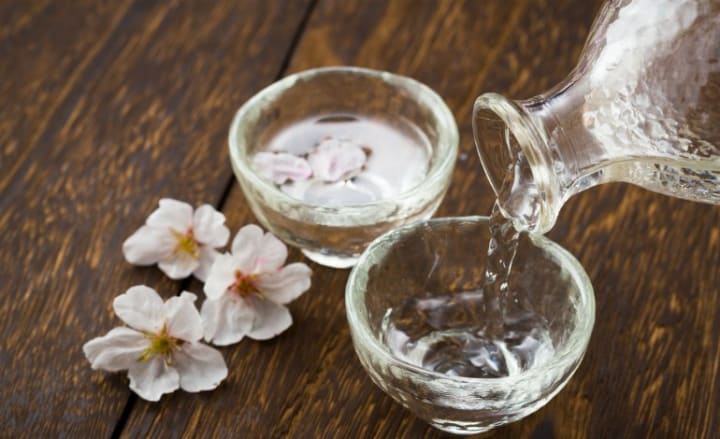
Finally, your fermentation process is complete. And the last step to learn how to make traditional sake is to serve! Your sake is finally complete, and all of your hard work is worthwhile. You will serve your sake in tokkuri. Wrap a napkin around the tokkuri to prevent burning, and hold with both hands. Fill your friend's glasses first, and as the night goes on, refill as they become empty. Allow a guest of friend to fill your own, and enjoy!
The correct way to drink your glass of sake is to hold the ochoko with two hands, say "kanpai" before drinking, and drink in small sips. And as our last tip, stop pronouncing is "sah-key" and instead the correct way: "sah-keh."
About the Creator
Kelsey Lange
Passionate about writing, animals, makeup, movies, friends, family, learning, exercising, and laughing!
Keep reading
More stories from Kelsey Lange and writers in Proof and other communities.
The Science Behind Why You Turn Red When You Drink Alcohol
Ever wonder the science behind why you turn red when you drink alcohol? It's more intricate than you think, and your body is trying to tell you something. A condition that many people suffer from, it is primarily effective in those of Asian descent.
By Kelsey Lange6 years ago in Proof
Tyler Fogarty gives Tips for Wine and Spirits Distribution: A Marketer's Guide to Reaching Every Glass
Wine and spirits distribution is a complex and multifaceted process that requires careful planning, strategic decision-making, and effective marketing tactics to reach consumers' glasses. For wine and spirits industry marketers, understanding the intricacies of distribution channels and consumer preferences is essential for success. From production facilities to retail shelves, each step of the distribution chain presents unique challenges and opportunities for reaching a diverse and discerning audience.
By Tyler Fogarty2 days ago in Proof
How to stop your thoughts from controlling your life
Have you ever stopped to ponder how many of your thoughts serve to propel you toward your life's aspirations, while others seem to act as invisible chains, hindering your progress? Do you truly wield control over the myriad streams of thought flowing through your mind? These are the profound questions that struck me during my transformative stay at a Buddhist monastery nestled in the serene forests of southern Thailand, four years ago. Life in the monastery was a stark departure from the bustling modern world – with its wooden pillows, straw mats, predawn wake-up calls, and marathon 10-hour meditation sessions each day.
By Ugochukwu victor3 days ago in Proof


Comments
There are no comments for this story
Be the first to respond and start the conversation.