
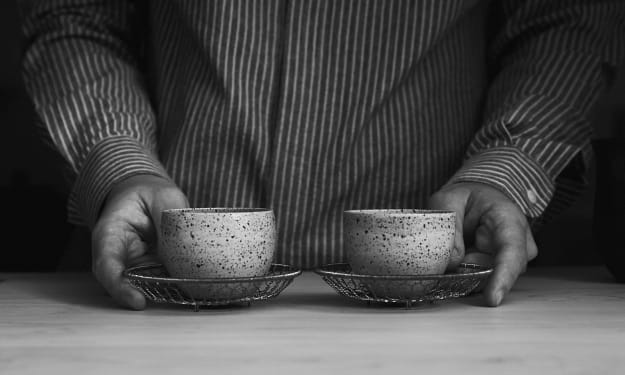
How to Make Better Coffee at Home
How to Make Better Coffee at Home


As the ongoing coronavirus pandemic means cafes and other food and beverage establishments worldwide are forced to close their doors for the time being, most of us will need to learn to fulfill our caffeine fixes at home.
Some of us might already be crafting latte art at home, while others have maybe never so much as made a cup of black coffee and are lost without a daily Starbucks. But no matter your skills, many might find they need to introduce a bit of extra effort to their home coffee set up.
To give you some tips on how to improve your at-home coffee game, I spoke to experts from some of our favorite New York City spots: Vanesa Kim, owner of White Noise Coffee Co., which has locations in Brooklyn and Queens; John Yoon, manager of White Noise’s Queens outpost; and Emily Williams, manager of Patent Coffee in Manhattan.
But whether you’re making a batch of cold brew or attempting to pull that perfect shot of espresso, keep in mind that all that matters is crafting coffee that you enjoy. “As long as it tastes good to you, you did a good job,” Yoon says.
Read on for their expert tips on how to improve your coffee skills at home, and how to support your local cafe while self-isolating.
BACK TO BASICS!
coffee cafe espresso cappuccino latte coronavirus covid 19 aeropress kalita wave foam milk french pour over white noise patent manhattan new york city brooklyn queens john yoon vanessa kim emily williams barista gofundme support instagram
Before you invest in any fancy gadgets, bear in mind that coffee is 98.75% water. As such, the quality of your water has a significant impact on your resulting coffee. “Filtered water is important to use because it reduces the amount of minerals and chlorine in the water when brewing,” Yoon explains. He does however caution not to use distilled water, which can result in over-extracted, and thus bitter, coffee.
Williams prefers Poland Springs bottled water when making coffee at home, though she advises filtered New York City tap water is also plenty good for coffee. “My rule of thumb is, if you wouldn’t drink a glass of the water alone, don’t use it to brew coffee.”
But no matter your water source, be sure to use boiling water for a proper brew. Kim recommends the electric kettle from Fellow, which is not only perhaps the most aesthetically pleasing electric kettle we’ve ever seen, but also offers temperature control and a narrow spout for precise pour over coffee.
Once your water is sorted, consider the other crucial ingredient: the beans. Fortunately, there’s no shortage of quality brands out there. “One of our favorite roasters is Counter Culture Coffee. They have a variety of single origin options, but their blends are very balanced and easy to brew,” Kim says. She and the White Noise crew also love the brand’s seasonal blends. Currently on offer through April is Counter Culture’s Sabor blend, with chocolate, fruit and crisp notes.
Whatever brand you like, Yoon and Williams emphasize the importance of an air-tight container to keep the beans fresh. As most know, freshly-ground beans are best, but ground coffee should maintain potency for about a week. After that, Yoon says you’ll need to increase the amount of grounds used per cup to maintain its flavor.
There are countless ways to brew a cup of coffee, from a low-tech french press to the stalwart Mr. Coffee or the stylish Chemex. The “best” method, according to Kim, is all a matter of personal preference. “Depending on how you’re brewing, it will give you a very tea-like texture or a very bold, heavy texture,” she says.
If your preference falls on the latter end of the spectrum, Kim recommends the classic Moka pot style, which will give you a heavy, espresso-like cup. She likes Italy’s Bialetti brand for its variety of sizes and colors, which make a charming addition to your stovetop.
“Depending on how you’re brewing, it will give you a very tea-like texture or a very bold, heavy texture.”
Williams prefers pour over at home, which gives a lighter, cleaner brew, in particular the Kalita Wave. “The flat bottom allows the water to sit a little longer with the coffee to produce a little bit of a fuller, but still super clean cup.” She recommends starting with a 1:16 ratio of coffee to water, then adjusting to your preference.
Key to making a good pour over is noting of the brewing time. “A cup of coffee on the Kalita should take about three and a half to four minutes start to finish. If it takes longer than that, consider making your grind more coarse. If it’s super quick, make your grind smaller,” Williams explains. “Think of it as water flowing through rocks versus sand. Water is going to flow quicker through rocks and is going to take longer through sand.”
Yoon is similarly a fan of Kalita for making pour over at home. But as traditional pour over coffee can require a bit of practice to perfect, he also recommends the Bonavita coffee maker, which is essentially an automated pour over machine.
No matter your preferred set-up, Yoon, Kim and Williams all agree that a quality grinder is crucial. “A basic drip machine can give you great results as long as you grind your coffee properly,” Kim explains.
Williams advises to look for a burr grinder as opposed to a blade grinder. “Burr grinders will do a better job at grinding your coffee evenly while blade grinders just chop up whatever’s in the way with no consideration of uniformity,” she says. Williams and other experts stand by the Bartaza brand, but it can be a hefty investment for some. She recommends the Hario Skerton hand-grinder for an affordable but quality option (which also doubles as an arm workout).
ESPRESSO KICK
“Espresso is a bit intimidating,” Kim says. Making espresso to your personal preference involves a bit of trial and error that baristas call “dialing in.” And as with coffee, crafting a good shot of espresso starts first and foremost with properly-ground beans. “Almost any espresso machine on the market will have the capabilities to pull you a shot you would like, as long as the coffee beans are ground correctly to a certain consistency,” Kim says.
The process is key as much as the equipment. “Dialing in is the process of adjusting the coarseness of the grinder to get your coffee tasting optimal,” Yoon explains. He recommends starting with a 1:2 ratio, meaning 19 grams of coffee will result in 38 grams of espresso. Extraction time is also an important factor, and Yoon prefers keeping in a 24 to 28 second range.
“Coffee is all about trial and error so if you brew a not-so-good tasting cup, maybe your next one will be better,” he advises. “I like to write everything down in a notebook.”
“Coffee is all about trial and error so if you brew a not-so-good tasting cup, maybe your next one will be better.”
If you don’t have the patience to develop your espresso skills, Williams recommends an AeroPress as a simple alternatrive to approximate espresso. She advises using about 17 grams of finely-ground coffee of your choice to 55 grams of water, and like with traditional espresso, making note of the extraction time is crucial.
“Pick up the AeroPress and give it a stir in a circular motion for about 15 seconds. At 25 seconds, attach the filter cap with the pre-wet filter in it to the brewer, flip it over the mug of your choice, and press all the contents out in about five seconds,” she says. “At the end of the brewing time, it should have taken about 30 to 35 seconds from the time you start pouring your water to the time you have your ‘espresso.’”
You might also want to experiment with different coffee beans if you’re making a cappuccino rather than a black cup of coffee. “I recommend any South American beans or South American forward blends. They are easier to ‘dial in’ and pair better with milk,” Yoon says.
“For the more ambitious home baristas, try dialing in some natural processed coffees and East African coffees,” he adds, with his own personal favorite hailing from the region of Yirgacheffe, Ethiopia.
MILK MATTERS!
If you want that daily cappuccino or latte (or flat white, or macchiato, or whatever your caffeine habit demands), you’ll need a milk frother. Yoon recommends the compact stovetop steamer from Bellman for a simple addition to your at-home espresso bar.
That said, you may already have everything you need to make foamed milk. “All you need is a french press,” Yoon says. He recommends starting with cold milk, which froths better than warm, and ideally milk with a higher fat content. “Milk with more fat, preferably whole milk, will create a richer and dense foam, like ice cream. Less fat will create more foam, but very airy foam.”
All you need to do is fill a french press a third of the way with cold milk, insert the plunger, and pump until you see enough foam to your liking. For hot drinks, microwave the milk foam for 35 seconds.
But if you don’t have a french press, look into your kitchen cabinet for other tools. “You could also put [milk] in a mason jar with a lid and shake it,” Williams says. “Really the possibilities are endless.”
For non-dairy alternatives, Yoon and Kim agree the oatmilk craze is warranted, as nothing can rival its creamy texture. However, macadamia nut milk is also a popular option at White Noise. It has thinner, more water-like texture compared to oatmilk, but they say many customers like its sweet and smooth flavor.
SOME LIKE IT COLD!
While some start the day with a classic cappuccino, many cannot get to work without their beloved cold brew. Fortunately cold brew is easy to make at home and requires simple equipment: a container, cheesecloth and a grinder. Kim does advise that you weigh your beans, so if you are a cold brew diehard, now may be the time to invest in a simple kitchen scale.
“We like doing one pound [of beans] to one gallon of water. You can do less or more if you’d like,” Kim says. “Grind your beans on your coarsest setting, put them in the cheesecloth and make sure it is tied up so the coffee grounds don’t get out. Add cold filtered water, and steep for 14 to 16 hours.”
From there, simply remove the used grounds and give the cold brew concentrate a good stir. To serve, cut the concentrate with equal parts water and pour over ice. Store your concentrate in the fridge and consume within two weeks (which, if you drink it daily, shouldn’t be difficult).
But that french press you used to make coffee or foamed milk can also come in handy here if you don’t have cheesecloth at the ready. “Grind about 90 grams of coffee on your course setting (think kosher salt), put it into your french press and add 3.5 cups of water,” Williams says. “Stir together, put the top on your french press with the plunger right at the water line so all the grounds are kept submerged.”
Store in your fridge and after 14 or 16 hours, push down the plunger and decant. If there is any sediment left over, simply run through a filter, and dilute with water or ice to your taste.
And of course, when it is safe to venture out to eat and drink again, do make a visit to your neighborhood coffee shop — and tip well.
About the Creator
Robert Atkinson
NYC BASED
Keep reading
More stories from Robert Atkinson and writers in Feast and other communities.
The New York Tea Shop Serving Japan’s Finest
The proliferation of tea shops, matcha bars and simply cafes in New York might lead you to believe that opening such a business is a fairly simple proposal. But there’s the kind of place that serves you an insipid teabag and a pot of lukewarm water and sends you on your way, and then there’s Kettl — which is serving something so different it’s hard to believe both resulting beverages can be categorized as “tea.”
By Robert Atkinson4 years ago in Feast
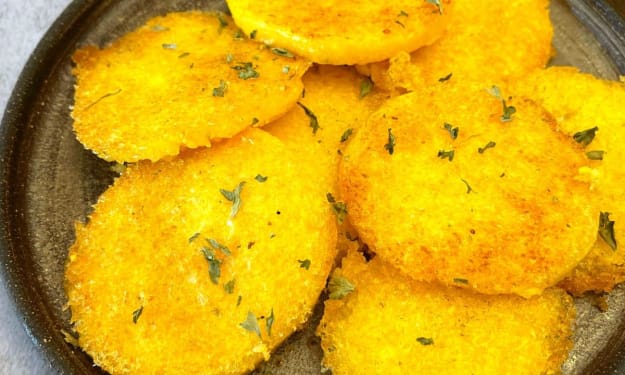
Air Fryer Polenta
Polenta is a delicious, creamy Italian dish made from cornmeal. It can be served as a main course or side dish and is perfect for air frying. If you are looking for a crunchy, flavorful polenta, then this recipe is for you. This recipe is extremely easy to prepare and doesn’t need any expert cooking skills. Even the ingredients used in this recipe are easy to find and are readily available in most kitchens.
By Kaly Johnes5 days ago in Feast


Comments
There are no comments for this story
Be the first to respond and start the conversation.