
Great Designer Ways for Decorating Dinosaur Cookies
Make your next party roarsome with these fun ideas!

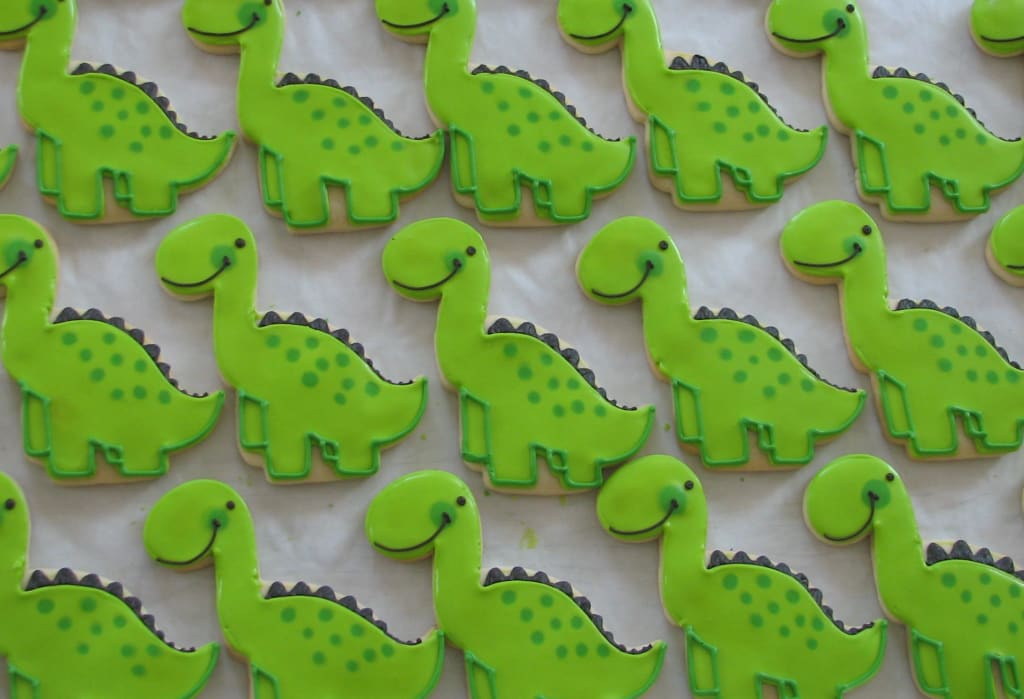
Are you ready to travel back in time to the prehistoric era and add some fun and creativity to your baking skills? Look no further than the world of dinosaur cookies! Decorating these treats with the help of some great designer tips and techniques can transform a simple cookie into a magnificent, eye-catching masterpiece.
Whether you’re throwing a dinosaur-themed party or simply want to impress your friends and family, get ready to channel your inner pastry chef and make some deliciously decorated dinosaur cookies that are sure to delight and amaze.
Learn how to make your treats roar with style
Looking for something fun and unique to bring to your next dinosaur-themed party? You can’t go wrong with decorated dinosaur cookies! But how do you take your cookie decorating to the next level and make them truly stand out? Look no further than these designer tips and tricks.
First, choosing the right cookie cutters is key. You want to find ones that are both accurate in shape and size, so that your dinosaurs look realistic. But don’t be afraid to get creative; try mixing different types of cutters (such as a T-rex head with a stegosaurus body) for a truly unique design.
And once you have your shapes picked out, it’s time to move on to the icing—where the real magic happens! With the right colors, techniques, and decorations, you’ll have everyone oohing and aahing over your delicious creations. So get ready to become a cookie artist extraordinaire!
Choosing the Right Cookie Cutters
Before you start baking your dinosaur cookies, it’s important to choose the right cookie cutters for your cookie kits.
There are many different shapes and sizes of dinosaur cookie decorating kits available, so consider what type of dinosaurs you want to create. Some popular options include T-Rexes, Triceratops, Brontosauruses, and Pterodactyls.
You can also get creative with different poses or add in some foliage for a more realistic touch.
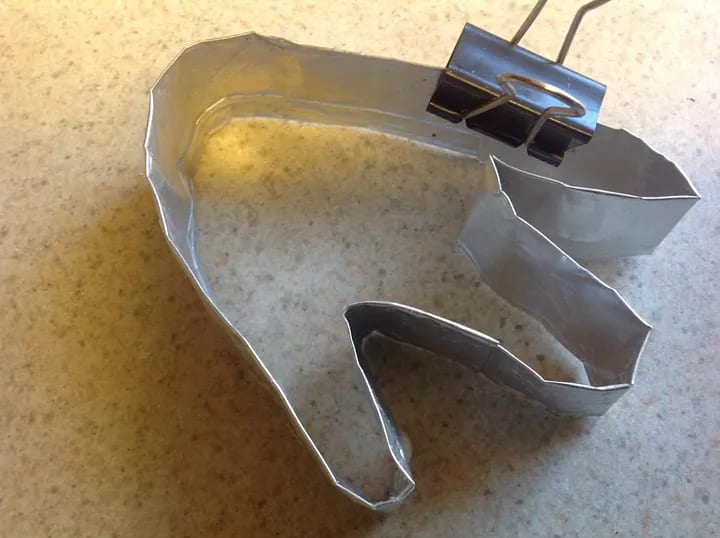
Once you’ve chosen your cookie cutters, make sure they’re sturdy enough to withstand the decorating process. Look for cutters made from metal or strong plastic that won’t bend or warp during use.
Additionally, try to find cutters that have a sharp edge for clean lines and easy release of the dough.
By selecting the right cookie cutters from the start, you’ll set yourself up for success with your dinosaur cookie decorating project!
Mixing the Perfect Icing Colors
Now it’s time to mix the perfect icing colors for your prehistoric creatures, so grab your Wilton gel food dyes and let’s create a vibrant palette that will bring these cookies to life.
When mixing colors for your dinosaur cookies, keep in mind the color palettes you want to achieve. You can go for bold and bright colors or opt for pastel hues if you’re aiming for a softer look.
Here are some tips on how to get that perfect color:
- Start with a small amount of food dye and add more as needed.
- Mix each color separately before combining them to avoid overcoloring.
- If you accidentally add too much dye, balance it out by adding more royal icing.
- Once you have mixed all the colors, fill up your icing bags with couplers attached and get ready to decorate those sugar cookies!
Remember to always test out your colors on a separate surface before applying them to the cookie. This way, you can adjust the hue accordingly until it matches what you had in mind.
With these simple tips, your dinosaur cookies will be sure to impress both kids and adults alike!
Mastering Basic Icing Techniques
Get ready to take your icing skills to the next level and bring these prehistoric creatures to life on your freshly baked sugar cookies! The key to mastering basic icing techniques is practice, patience, and a little creativity.

- Start by filling up your icing bags with the preferred colors for each dinosaur cookie. Using couplers will make changing tips easier when switching between outlining and filling in.
- To achieve smooth edges, hold the icing bag at a 45-degree angle and apply pressure evenly as you move along the outline of the cookie.
- Once you’ve outlined all your cookies, let them dry for about 5–10 minutes before flooding them with more icing.
- Use a toothpick or scribe tool to spread the icing evenly across the surface. For added texture, use cookie stencils or piping tips to create scales or other patterns on top of the base coat.
With these simple but effective techniques, you’ll get professional-looking results every time!
Adding Texture with Fondant
Adding texture to your fondant can elevate the visual appeal of your sugar cookies, giving them a unique and professional touch. Fondant is a versatile ingredient that can be used to create various designs, from scales on dinosaur cookies to intricate flower petals.
- To add texture, simply roll out the fondant and use textured mats or embossing tools to imprint designs onto the surface. Once you have prepared your fondant with texture, it’s time to apply it to your sugar cookies.
- Using icing bags filled with royal icing or buttercream frosting, outline the cookie in a contrasting color before placing a layer of rolled-out fondant on top. Smooth out any bumps or air bubbles using a fondant smoother tool, and trim off any excess around the edges of the cookie.
With these techniques, you’ll be creating beautiful dinosaur cookies with added dimension and depth in no time!
Creating Unique Dinosaur Features
Elevate your sugar cookie game by creating unique features on your dinosaur cookies that’ll make them stand out and impress your guests. While simple designs are always an option, customizing each cookie with its own personality can add a special touch to your dessert table.
One way to achieve this is by using fondant or modeling chocolate to create small details such as spikes, scales, or even tiny claws.
Another option is to use different icing techniques with the icing bags. For example, using a star tip can create textured fur, while using a round tip can mimic the look of reptilian skin. Get creative and experiment with different tips and colors to bring your dinosaur cookies to life.
With some practice and patience, you’ll be able to produce professional-looking cookies that will surely impress everyone at the party. Don’t forget to start with a great cookie recipe for the perfect base!
Using edible decorations
You can take your dinosaur cookies to the next level by using fun and colorful edible decorations like fondant or modeling chocolate for spikes and scales. You can also experiment with different icing techniques to create reptilian skin or textured fur.

- To start, roll out fondant or modeling chocolate in various colors and cut into small triangles or rectangles for spikes.
- Gently press them onto the undecorated cookies, starting from the back of the dinosaur’s head and working your way down to its tail. You can also use a toothpick to add texture by making small indents in the fondant or modeling chocolate.
- For a more intricate design, try creating reptilian skin using a piping bag fitted with a small round tip.
- Use different shades of green icing to pipe overlapping circles onto the cookie, then drag a toothpick through each circle from top to bottom to create scale-like patterns.
- Alternatively, you can use a star tip to pipe fur-like textures onto your dinosaurs using brown or orange icing.
The possibilities are endless when it comes to decorating sugar cookies with edible decorations! Just remember to have fun and experiment with different color palettes and techniques until you find what works best for you.
Displaying and Serving Your Masterpieces
Displaying and serving your dino masterpieces is easy with a little creativity and attention to detail. Once your cookies are fully decorated, allow them to dry at room temperature for 18–24 hours before moving or packing them.
To display them, try placing them on a cake stand or tiered tray in the center of your party table. This will make them easily accessible for guests while also adding an eye-catching centerpiece to your decor.
When it comes time to serve, consider offering a selection of milk or hot cocoa as the perfect pairing for these delicious treats. Be sure to store any leftover cookies properly by placing them in an airtight container at room temperature away from direct sunlight.
Following proper storage guidelines will ensure that you get the best selection results from all of your cookie recipes while allowing you to enjoy every last bite of each beautiful dino creation!
Frequently Asked Questions
What is the shelf life of the cookies once they are decorated?
Once you’ve decorated your dinosaur cookies, it’s important to keep in mind that their shelf life can be affected by exposure to air, light, and liquid.
If you plan on storing them at home, make sure to keep them in an airtight container at room temperature for up to five days.
Avoid refrigerating the cookies, as this can cause the icing colors to run or bleed. If you need to store them for longer than five days, consider freezing them for up to three months and thawing them at room temperature before serving.
Can the cookie dough be made ahead of time and frozen for later use?
Want to prepare the cookie dough for your dinosaur cookies ahead of time? You’re in luck!
The dough can be made ahead of time and frozen for later use. Simply roll it into a ball, wrap tightly in plastic wrap, and store in an airtight container or freezer bag.
When you’re ready to bake, let it thaw in the refrigerator overnight before rolling it out and cutting it into shapes.
This trick saves time and makes it easier to plan ahead for your upcoming dinosaur baby shower or birthday party.
What is the recommended thickness for the cookies before baking?
To ensure the best yield of cookies for your dinosaur-themed party, it’s recommended to roll out the dough to a thickness of about 1/4 inch before cutting and baking. This thickness will result in cookies that hold their shape well while also being soft and chewy.
Not only will this make for a more enjoyable eating experience, but it will also provide a sturdy foundation for your decorative icing. So grab your rolling pin and get ready to make some deliciously cute dinosaur cookies!
Are there any recommended storage methods for the decorated cookies?
To keep your beautifully decorated dinosaur cookies looking their best, it’s important to store them properly.
Allow the icing to fully dry for 18–24 hours before packing, and then seal the cookies in an airtight container or bag.
Be sure to keep the cookies away from air, light, and liquid, as exposure can affect their color and consistency.
Can this decorating technique be used on other cookie shapes besides dinosaurs?
Looking to decorate cookies with a fun and unique twist? This technique can be easily adapted to fit any cookie shape you desire!
Simply roll out your preferred cookie dough, cut into desired shapes, and follow the same steps for outlining and filling in with buttercream icing. Use a variety of colors to make your cookies pop, and don’t be afraid to get creative with adding details like dots or stripes.
With just a little bit of practice, you’ll be able to customize these cookies for any occasion or theme! I can’t wait to see what you come up with!
Conclusion
Congratulations! You’ve successfully created a batch of delicious and eye-catching dinosaur cookies! By following the step-by-step instructions and tips outlined in this article, you were able to choose the right cookie cutters, mix vibrant icing colors, master basic icing techniques, add texture with fondant, create unique dinosaur features, and use edible decorations to make your cookies stand out.
Whether you’re hosting a dinosaur-themed party or just looking for a fun baking project with your kids, these designer dinosaur cookies are sure to impress.
And don’t forget to show off your creations by displaying them on a decorative platter or packaging them in clear cellophane bags tied with colorful ribbon. With proper storage and handling techniques (such as keeping them in an airtight container at room temperature), your dinosaur cookies can be enjoyed for several days after baking.
So go ahead and indulge in these sweet treats that will transport you back millions of years to the time of the dinosaurs!
Thank you for reading. If you enjoyed my story, please comment and consider subscribing, and please support me by buying me a coffee:
About the Creator
Matthew Bolton
I love to provide inspirational content that lifts people's spirits, wherever that inspiration takes me!
I have a passion for cooking. I love health and fitness & like to give valuable insights on what inspires me.
Enjoyed the story? Support the Creator.
Subscribe for free to receive all their stories in your feed. You could also pledge your support or give them a one-off tip, letting them know you appreciate their work.
Keep reading
More stories from Matthew Bolton and writers in Feast and other communities.
making space
Since the only thing that might pull us back up is caring, it only makes sense that here, long after I’ve let my anger born of heartbreak and grief misplace, multiply, misdirect itself, let the enormity of my solitude turn into something I don’t know how to dispute with, something thick and heavy and suffocating, let the coldness thrash and fight under my skin, deeper still, in between the arches of my organs; here where the ground is always close and the fall is easy and I surrender to it often, lie without purpose for hours, it only makes sense that it is here, I decide to show up and surrender to the possibilities of the night. Show up to those who I deserted. Drawn to the sense of accomplishment, something I haven’t felt in a while, to memory of finished dish sending its aroma into the world and with it, wrapping the room with a strong sense of sweet nostalgia, I get up and decide to cook. I pick up my phone, type a message that reads “Dinner at mine @ 8PM, don’t bring anything” and before my courage deserts me again, drop it in our friends’ group chat, the way one would do when diffusing a bomb in the movies: one eye closed, snip at the wire, hoping for the best.
By Mesh Toraskar15 days ago in Feast
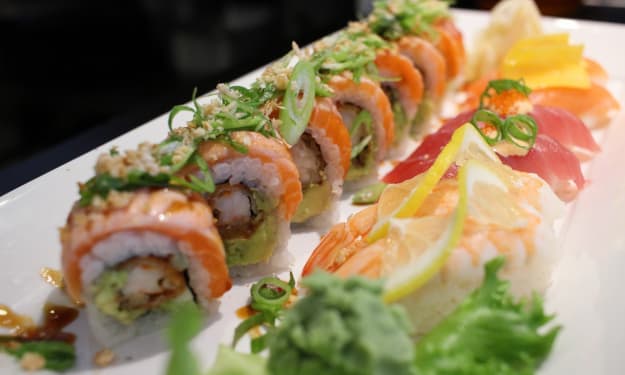
How to Enjoy Gluten-Free Dining in Tokyo
Japanese cuisine is admired around the world for its tantalizing and distinctive flavours. However, many of the ingredients in this type of cuisine contain gluten, meaning that it wouldn’t be suitable for those having gluten intolerance or celiac disease. But all is not lost! Many restaurants in Tokyo offer dishes that are free of gluten or contain minimal amounts of this substance. Some of these outstanding dining venues are described below, worth knowing before you visit.
By Roshelle Fernandoa day ago in Feast
181 Keeping Watch
Each day she watched through her window. Watched? Perhaps an exaggeration: a monochromatic nuclear aftermath remaining of the world, blurring into a blindness--loss of contrast and depth of field. Achromatic aberrations displayed a waste-scape stratified in grays.
By Gerard DiLeo3 days ago in Fiction


Comments
There are no comments for this story
Be the first to respond and start the conversation.