
Be a Beef Master!
Expert Tips for Cooking the Perfect Roast for Holidays or for Any Day

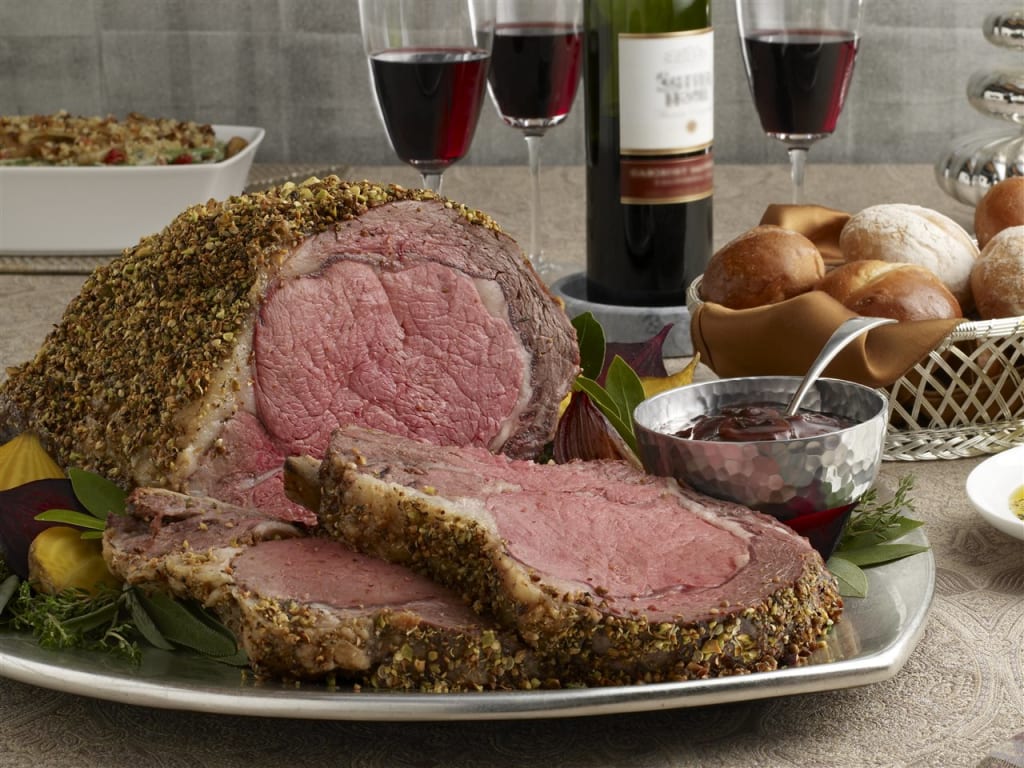
Wondering what to cook for an upcoming holiday gathering - or just a family meal? A beautiful beef roast is a feast for the eyes and the stomach, sure to impress guests of all ages. With a few expert tips and tricks, you'll be sure to serve a perfectly cooked roast packed full of flavor. Here's a "how to" guide to make you a roast expert!
_______________________________________
Wondering what to cook for an upcoming holiday gathering? A beautiful beef roast is a feast for the eyes and the stomach, sure to impress guests of all ages. With a few expert tips and tricks, you'll be sure to serve a perfectly cooked roast packed full of flavor.
Roasting tips from the pros
No matter which cut of beef you select to serve, there are some tried-and-true tricks chefs use to get the juiciest, most delicious results. The pros from Beef. It’s What’s For Dinner. and the Beef Checkoff are the experts on all things beef and offer these tips for the perfect holiday roast.
Step 1: Use tools of the trade
Before you start, consider investing in an ovenproof meat thermometer. This is particularly important when roasting larger cuts. Unlike an instant-read thermometer, an ovenproof meat thermometer stays in the roast while cooking. This helps you avoid opening the oven unnecessarily and poking multiple holes in the roast, causing you to lose some of the juices.
Step 2: Select your cut
When cooking for four people or fewer, it is best to purchase a steak. For larger parties, a traditional bone-in roast is a popular option. A good rule of thumb is to purchase a roast that has one rib for every two people. To save time in the store, you can even call your meat counter in advance to order the exact size roast you need.
Step 3: Preheat and prep
It’s important to set your oven to the appropriate temperature for your roast. For a bone-in Ribeye roast, 350 F is generally recommended, but make sure to check your recipe for specifics. While your oven preheats, season the roast according to your recipe, then sear. While it's possible to develop a crust on your roast through slow roasting, you may get tastier results by searing it over high heat at either the beginning or the end of the roasting time. Most recipes will specify whether and when to brown the meat, but when in doubt, a quick sear before popping the roast into the oven won't hurt.
Step 4: Go low and slow
When placing the roast in your roasting pan, preferably on a roasting rack, you want to place the beef on the rack fat-side-up and bone side down (if your cut has bones). Using a rack improves air circulation and promotes even cooking. Once your roast is in the pan, you’ll want to insert your ovenproof meat thermometer with the tip centered in the thickest part of the roast, avoiding the bone, if the cut you select has one. Cook as recommended, being sure not to overshoot your target temperature as it will continue to rise after pulling the roast from the oven.
Cooking times vary depending on both the cut of meat and your desired doneness. For example, if you're cooking a bone-in Ribeye Roast for four to six people at 350 F, you can plan for a cook time as short as 1 hr 45 min for medium rare, targeting an internal temperature of 135 F, or as long as 2 hr 45 min for medium, with an internal temperature of 145 F. For specific roasting time guidelines for a bone-in Ribeye Roast, as well as other cuts, you can visit www.beefitswhatsfordinner.com for a handy guide for whatever beef might be on your menu!
Step 5: Let it rest
Once you pull the roast from the oven, transfer it to a carving board and cover it loosely with aluminum foil (this is called tenting) and let it rest. It is important to let your roast rest so the juices have time to re-absorb into the meat ensuring a tender, juicy roast. Larger roasts need more time to rest, often as long as 15–20 minutes. Those few extra minutes provide a great opportunity to make an au jus from the reserved beef drippings and plate side dishes.
Step 6: Carve and serve
The most important tool for properly carving your roast is a sharp knife. And, if you're using a meat fork to help carve, try not to pierce the roast to hold it in place. If you want to avoid this risk altogether, you can use the back of the fork instead or simply opt for tongs. If you have a rib roast, cut each slice along the rib bone. And remember to always cut across the grain for maximum tenderness. (BPT)

A Simple Way to Show Your Support
Like what you just read? Did it make a difference to you? If so, please see and share this article through social media, email, and even the old-fashioned way of printing it off for a colleague or friend! And while you’re at it, ask yourself a simple question: Was the info worth a buck or two—or maybe more—to you, your family, your career, your company, etc.? If so, please consider “tipping” (after all, it is the polite thing to do!) using the easy link below.
About the Creator
David Wyld
Professor, Consultant, Doer. Founder/Publisher of The IDEA Publishing (http://www.theideapublishing.com/) & Modern Business Press (http://www.modernbusinesspress.com)
Keep reading
More stories from David Wyld and writers in Feast and other communities.
10 Healthy Breakfast Recipes to Kickstart Your Day
We've all heard it before: breakfast is the most important meal of the day. Yet, in our fast-paced lives, it's all too easy to skip breakfast or grab something less-than-healthy on the go. But what if I told you that starting your day with a nutritious breakfast doesn't have to be complicated or time-consuming? In fact, with the right recipes, you can whip up a delicious and healthy breakfast in no time!
By Arshad Mecci3 days ago in Feast
Best Air Fryers To Buy Right Now
Nowadays, kitchen appliances tend to evolve quickly. Presently, air fryers have become a game-changer. They offer healthier options compared to other frying methods, without having an effect on taste or texture. Among the many options in the market, there are certain ones that standout, like the Ninja Foodi 6-in-1 8-qt. (7.6L) 2-Basket Air Fryer DualZone Technology, the Cosori Proii Air Fryer Oven Combo, and the Chefman TurboFry Touch Air Fryer. These specific air fryers have drawn attention for their amazing features.
By Michael Tomas3 days ago in Feast


Comments
There are no comments for this story
Be the first to respond and start the conversation.