
The Best Pizza I’ve Ever Made
Cooking high-quality pizza at home

Who doesn’t like pizza? Soft, chewy crust supporting layers of succulent sauce, melted cheese, and anything else you could conceive of eating on top of a bit of bread. Pizza is also one of those foods that’s hard to recreate at home. You can whip up a pizza crust with next to no effort, and it’s not like tomato sauce, cheese, pepperoni, and so on are hard to obtain.
No, the issue with homemade pizza lies within our cooking methods. A home oven just doesn’t cut it. To get that beautiful balance of charred crust, melty cheese, and crisp toppings, you need heat. Lots and lots of heat. Slapping a pizza on a baking sheet and sticking it into a 400-degree oven, 450-degree oven…even 500-degrees doesn’t do the job. For context, a brick oven like you might find in your favorite pizzeria tends to run at about 800 degrees.
To be frank, the method I’ll be talking about today doesn’t magically make your oven into an 800-degree haven for the perfect pizza. It is, however, the best method I’ve found. We’re talking a mottled crust, crisp toppings, the whole deal. I love making pizza at home like this, and I’m sharing the secret here. But first, let’s talk about ingredients.
Toppings and Crusts
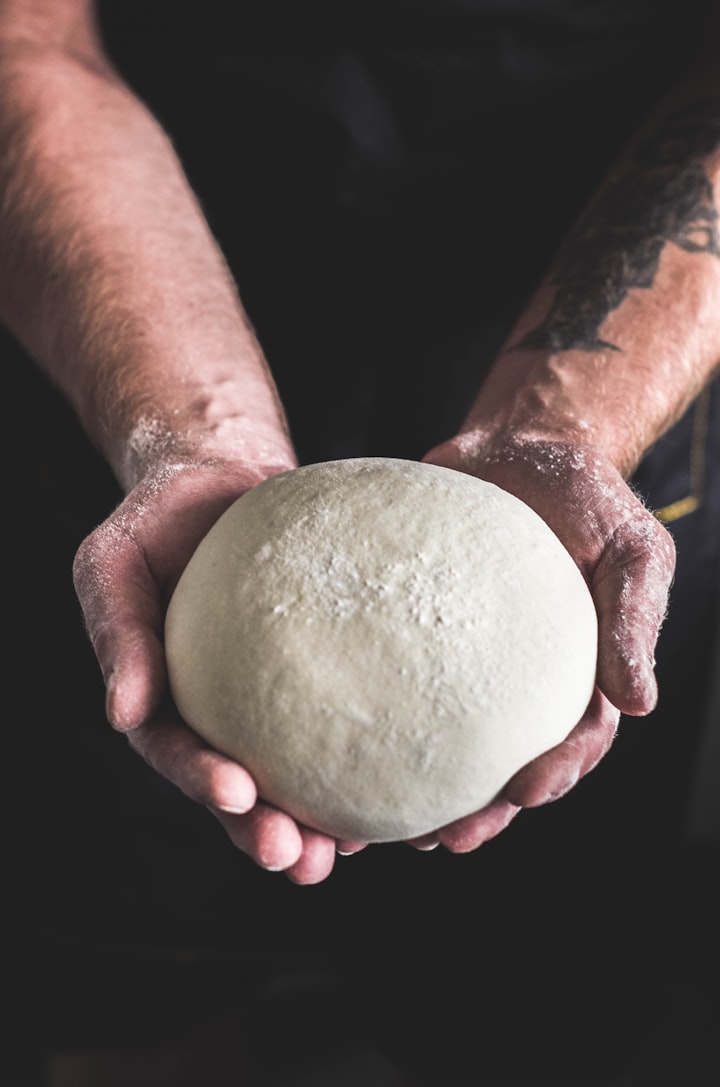
Your crust comes before everything else. In my opinion, it’s the most important part of pizza. The crust is the foundation. Additionally, it tends to be the only part of the pie you enjoy solo. Cheese, toppings, sauce, and crust are all melded together in the pizza’s center. But once you reach the end of that slice, it’s just you and the thick ridge of dough.
My personal preference is this recipe from feelingfoodish.com. A pizza crust is a blank canvas, however. A quick peruse of the web will let you uncover a plethora of recipes. Some use higher amounts of olive oil; others add ingredients like cornmeal to give the dough a little extra texture. Others use different flours like whole wheat or bread flour or a blend of flours.
My biggest recommendation when making your dough is to give it time. When preparing a yeast-leavened dough, time is your friend. I like preparing mine a day ahead and allowing it twenty-four hours in the fridge to rise and let the yeast work its magic. This isn’t to say a dough that’s thrown together an hour or two before dinnertime is terrible, but the longer the yeast goes to work, the more flavor they produce as they break starch down into complex sugars and alcohols.
Now let’s think sauces. Tomato is the classic, but you can use anything. Olive oil, pesto, alfredo, a thin layer of ricotta cheese, buffalo sauce, barbecue sauce. If you can spread it, you can use it as a pizza sauce. The most important things to consider when you pick your sauce are toppings. Barbecue sauce is well suited to a pie with grilled chicken and jalapenos across the top for a sweet-smoky kick but wouldn’t fit as well with prosciutto and olives. Whatever you pick, make sure it’s applied in a thin layer. Too much sauce results in a limp crust and toppings that slide off the slice.
Now that you’ve sauced it, what cheese comes on top? The classic is a nicely shredded mozzarella, which I almost always use. You can add cheeses other than mozzarella – cheddar or Colby jack are ones my family enjoys using. The mozzarella base can be accented with other cheeses; a touch of goat cheese gives a nice tang while a bit of shredded Parmesan gives a salty bite. Make sure whatever cheese you have is a melter; Parmesan, for example, tends to hold its shape pretty well and won’t coat the pie in a cheesy layer if that’s the only cheese you use.
What kind of toppings should you put on the pie? If I tried to list out the possibilities, this article would be longer than I am taller. The crust is your blank page to create whatever you’d like. If I have any tips, it would be to keep simple. You don’t need to put everything but the kitchen sink on top of your pizza. A few carefully chosen, quality ingredients will go a long way. If you want to pile the contents of your fridge on the pie, consider how thick you make your crust. The more toppings you pile on, the thicker the crust has to be to avoid the dreaded pizza droop that sends the toppings across your lap rather than past your lips.
All right. You’ve selected a handful of good toppings, a quality cheese, and a sauce that complements the above. The dough has had plenty of time to rise under the yeast’s power. If you don’t know how to stretch your dough, the video below taught me the method I use; I tend to avoid the rolling pin but can’t fault you if that’s your preferred method. It’s time to start cooking.
Cooking the Pizza
This method is going to produce high-quality pizza right in your home oven. The best part is that it doesn’t require purchasing an expensive, fragile stone that you have to heat for an hour and delicately extract the finished product from. All you need is a skillet and a broiler. Avoid using a non-stick pan for this. The high heat it gets exposed to could damage the coating, so stick with steel or cast iron. Please note that this method involves some hot equipment, so you may want to help the kids out with this.
Start by preheating your broiler on high and moving your oven rack as close as you can. Once that’s heated up, heat a skillet on the stove. The size of your skillet will determine how large you make your crust; I used a ten-inch skillet which creates a single-serving pie for an adult. Once the skillet is nice and hot, a minute or two on high, add a drizzle of olive oil and wipe it across the skillet with a paper towel. This ensures an even coat of oil across the pan and prevents it from pooling up beneath the crust.
Toss your stretched dough into the pan and build the pizza in the pan. Your sauce might start to bubble while you’re building it, which is fine. Try to avoid getting any cheese across the sides of the pan, as this can make extraction a little trickier. Once the pizza is topped to your liking, stick it in the oven, right beneath the broiler.
After this, it shouldn’t take more than two or three minutes. Keep a careful eye on the pie; beneath a hot broiler, cheese can go from beautifully browned to a blackened mess in the blink of an eye. You want to pull the skillet out (with a hot pad holder!!) when the cheese is bubbling, the crust is golden, and the edges of the toppings crispy.
As long as the pan is properly lubricated and the crust cooked, the pizza should easily slide out of the pan and onto the cutting board with a nudge from a spatula. I recommend cleaning a steel skillet between each pie. This prevents future pizzas from sticking and cool the skillet down that you don’t accidentally grab a hot handle. Just make sure to dry it thoroughly.
One of this method’s flaws is that making pizzas for the family is rather slow. Unless you’re using multiple skillets, they need to cook one at a time. However, this method is well worth a little extra time in the kitchen. It’s the closest I’ve ever come to making a genuine pizza in my home with the soft crust and crisp toppings. Just remember: Make a good dough with plenty of time to rise, keep your toppings simple, and you really can’t go wrong with making pizza at home.
About the Creator
Keep reading
More stories from Andy Walser and writers in Feast and other communities.
What Does It Mean To Be A Hero?
What does it mean to be a hero? This question is often asked in My Hero Academia. With the fifth season just around the corner, it seems like a perfect time to reflect on one of the show’s core thematic questions and how the most recent season addressed it. Season 4 of My Hero gave us two story arcs: the Shie Hassaikai arc that brought our heroes into conflict with a large criminal organization, and the School Festival Arc that took a much lighter tone than the rest of the show. We’ll look at both of these to see how they addressed heroics.
By Andy Walser3 years ago in Geeks
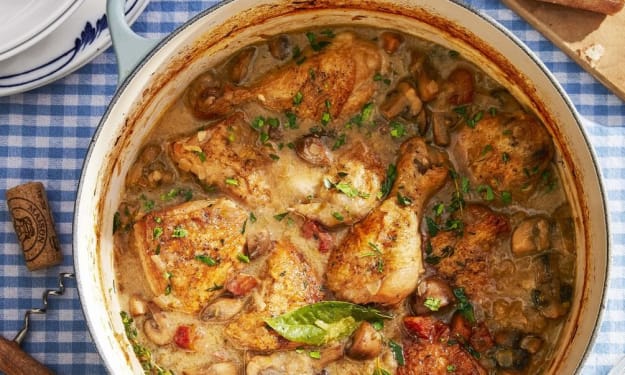
Easy One-Pot Meals for Busy Weeknights
Easy One-Pot Meals for Busy Weeknights: Delicious, Nutritious, and Stress-Free We've all been there—coming home after a long day, feeling tired and hungry, and the last thing we want to do is spend hours in the kitchen cooking and cleaning up. That's where one-pot meals come to the rescue! These easy, convenient dishes are perfect for busy weeknights when you want something delicious and nutritious without the hassle of multiple pots and pans. Let's explore some mouthwatering one-pot meal ideas that will simplify your evenings and satisfy your taste buds.
By Arshad Mecci3 days ago in Feast


Comments
There are no comments for this story
Be the first to respond and start the conversation.