
How to Create Magical Lensball Images
In this article I will show you how to create magical lensball images using the Polish Pro app.


If you would like to learn how to create magical lensball photos like the one above and the examples below, read on and I will explain how I created these images using simple editing techniques at a very low cost.

Equipment Needed
Before we get started, let’s talk about what you will need to make these magical photos possible. I do the whole process, from taking photos to editing them, on my five-year-old Samsung Galaxy S7 Active Smartphone. No fancy equipment needed. To make the edits, you will need an editing app or program that will allow you to cut out a circular shape and create an overlay. I use the Polish Pro app available in the Google Play store. You can do everything you need to create these photos with the free version of the app. Or, for a one time fee of around $15, you can purchase the app. I purchased it just to get rid of the ads. Of course, the final thing you will need is a lensball. Original Lensballs and crystal balls for photography can be purchased on Amazon for around $30. In these images, I am using an 80mm Original Lensball that cost me around $40 on Amazon.
The Lensball Overlay
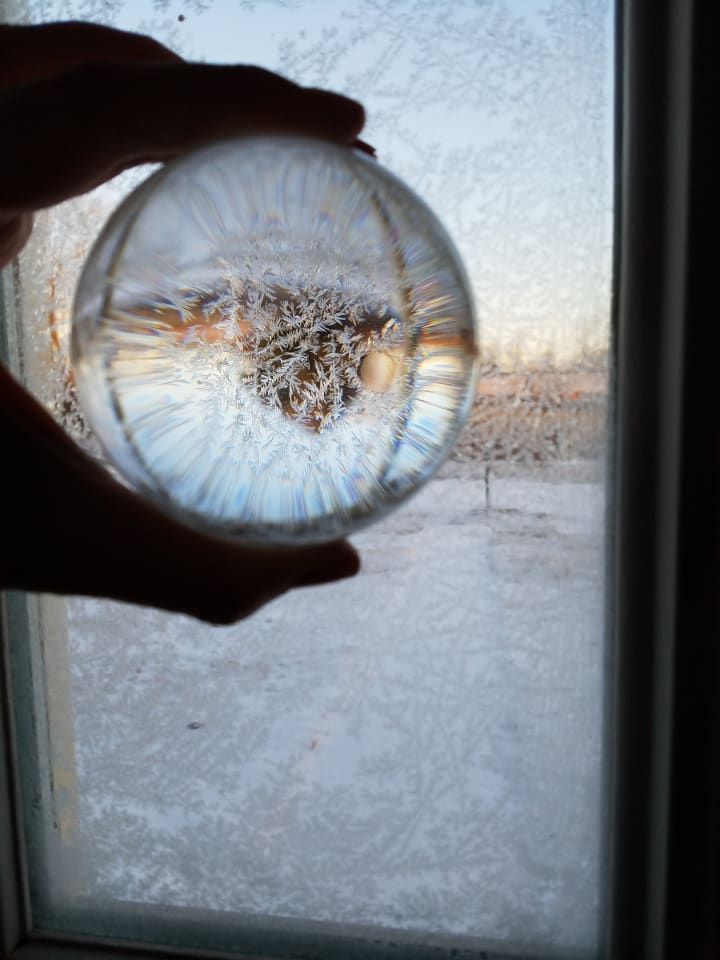
My magical lensball photos are created from two separate images, the background image and the lensball overlay, that are blended together. To create a lensball overlay, look for something that will produce an interesting translucent image in the lensball. Ice, water, snow, frost, steam, mist, and wavy glass all make for interesting lensball overlays. In this case, the background doesn’t matter because you are going to cut the lensball out of the image anyway. Over time, you can build an entire album of overlays to use. In the photo below, I used a frosty window to create a lensball overlay.
Editing The Overlay
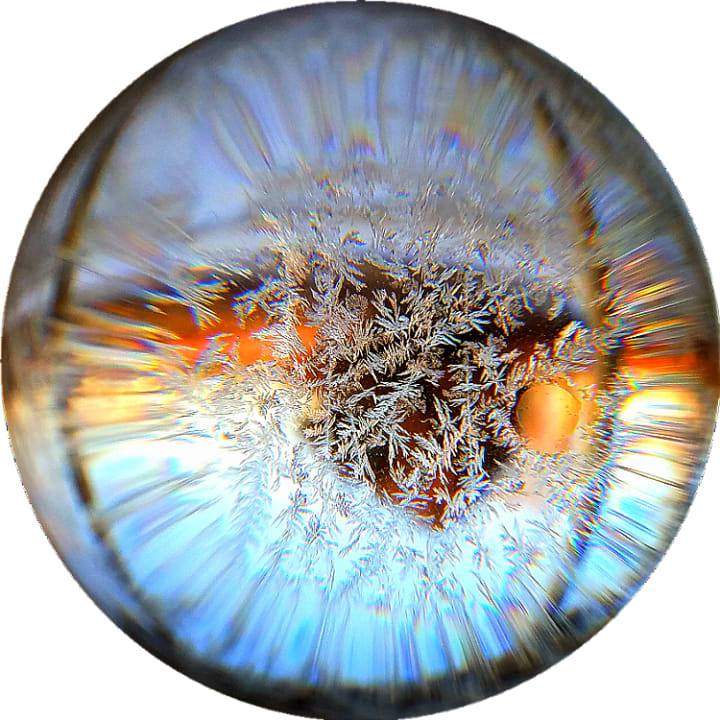
Once you have the image, use your editing software to cut out the lensball. You will want your cut out to be slightly smaller than the lensball to avoid getting any of the background around the edges. This will help it blend in better later on. Once you are happy with your cut out, adjust the saturation, contrast, warmth, sharpness, and brightness to your liking. It is amazing how much color can be found in translucent images! I was very surprised to see the color appear in my frosty window overlay. When you are satisfied with how it looks, save your image in an overlay album.
The Background Image
Now it is time to bring in the background image. You can adjust the saturation, contrast, warmth, sharpness, and brightness of your background image now. Try not to go overboard with the adjustments because you will probably want to adjust them again later to help your overlay blend into the background. You can do some fun things here, like have your background in black and white and your lensball image in color. Play around with it and be creative! Below is my raw background image. I chose this image because I liked the way the sun was shining through the lensball onto the snow. Also, the snow matches the frost in the lensball overlay.

Putting It All Together
Now is the fun part. Use the overlay feature in your editing software to place your lensball overlay on the lensball in the background image. You should have several options for how to make it blend into the background. Play with these adjustments until it looks right. When sizing your overlay to the background lensball, make sure your edges look good. If anything, you want your overlay to be a bit smaller than the background lensball. This will aid in blending. Now is also the time to rotate your lensball if you so desire. Once you are happy with the position of the overlay, it is time to adjust the saturation, contrast, warmth, sharpness, and brightness once more.
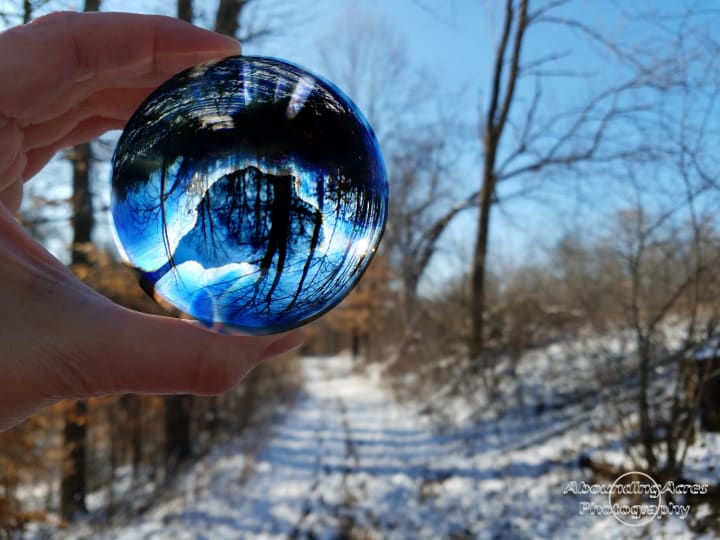
Again, don’t over-do it, the goal is to blend the two images so that the final photo looks natural. This final image was one of my first attempts. You can see where I over-did some of the adjustments and my overlay was a bit too small. With practice, I got much better at blending the images. Keep in mind that not every combination will work. It takes trial and error to find backgrounds and overlays that fit together well. Play around with it until you get something you like.

Here is a closer look at the example photos from the beginning of the article. They are early attempts that I think turned out pretty good, but some were a bit over-processed and did not blend as well as I’d like. To see more images, check out my lensball album on Picfair.


Tips and Tricks for Working With a Lensball
Lensballs can be a bit challenging to work with for several reasons:
- The bright light has to be behind the lensball or you will keep seeing your reflection. It can be very difficult to get yourself out of the lensball image, especially on cloudy days or indoors.
-They scratch easily. Scratches and dust will be very visible in your image. Keeping your lensball in a microfiber lens cloth or bag (my lensball came with one) will help protect it between shots and will also help prevent fires. Yes, fires! Which brings us to the next challenge…
-Beware! Lensballs can start fires very quickly. Have you ever tried starting a fire with a magnifying glass? Lensballs are like magnifying glass supreme. They concentrate the sun and direct it to a single spot. Be very careful working with your lensball outside and don’t leave it in one place for very long. In sunny climates, as little as 10 seconds can be too long, truly. The lensball heats up very quickly in the sun and can burn you. Keeping it in an opaque bag or covering it when you are not actively taking a photo is a good idea. This is one reason I enjoy working with my lensball in snow, ice, and water… little chance of it starting a fire or burning me.
-It can be difficult to juggle the lensball and work the camera, especially if you are holding the lensball. My phone camera can be voice activated and I found this to be very helpful when my hands were not free. All I had to do once in position was say the word “shoot” and my camera would take the photo.
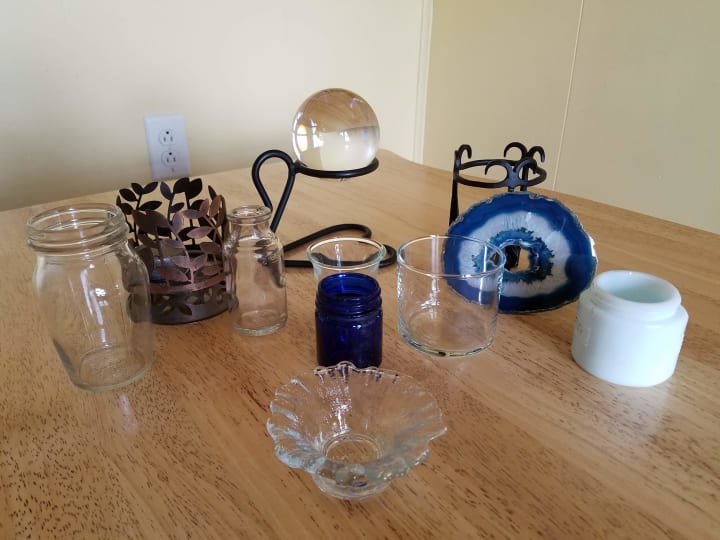
-Getting your hand out of the photo can be a challenge. I looked around my house and rounded up a collection of candle holders and old jars. They make for interesting, decorative lensball stands. I like the clear glass jars because they can be filled with something, such as flowers or stones, to match the photo.
I hope this article has been helpful in providing you with some tools and inspiration to create magical images of your own!
About the Creator
Amanda Buck
Amanda is a creative writer and photographer.
Keep reading
More stories from Amanda Buck and writers in Photography and other communities.
Patterns of Nature
When I started applying a mirror effect to my nature photos, I quickly became enamored with the results. Beautiful intricate patterns emerged. Many different patterns could be made from the same photo. I totally fell in love and wanted to apply this technique to all my nature photos to see what the resulting pattern would be. Over the course of a couple of weeks, I had created more than 500 unique images.
By Amanda Buck3 years ago in Photography
Capturing Magic
In the world of photography, timing is the key to everything. While skilled compositions and technical proficiency are undoubtedly crucial, the perfect lighting can create the perfect photo. Nowadays, we can determine any light ourselves and are no longer dependent on any natural light source, thanks to the developed technology. We can turn every day into a night by using the right filters. And we can illuminate every night to be seen as a day. A typical process, especially in the film industry.
By Krishan Mubashar8 days ago in Photography
Photo Tool: AI Photo Editor
The AI photo editor streamlines complex image editing tasks, empowering users to achieve professional-looking results effortlessly. With a wide range of AI editing tools, including automatic enhancement, object detection and removal, background manipulation, portrait retouching, and stylization. This editor simplifies the editing process while delivering captivating outcomes.
By xia sophiaa day ago in Photography


Comments
There are no comments for this story
Be the first to respond and start the conversation.