
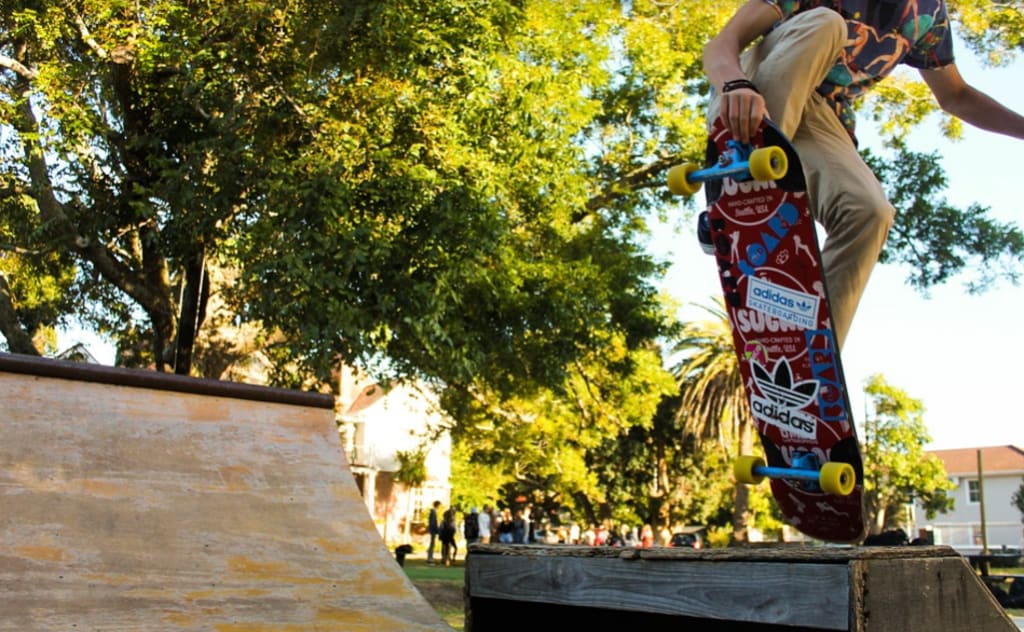
Skateboarding has certainly become a trending sport. It has been proven to be highly beneficial for both physical and mental health, thanks to it burning calories, reducing stress, increasing flexibility, enhancing physical endurance and much more.
The global skateboarding community is helping and encouraging each other to spend more time doing what they love, while benefitting a balanced and healthy lifestyle from this sport.
There are two different types of skateboarding: indoor skateboarding and outdoor skateboarding.
Indoor skateboarding is usually held at indoor skate parks, which are often built and managed by private companies. Outdoor skateboarding, on the other hand, usually takes place at open air skate parks, which are usually built by the city council.
As indoor skateparks are privately managed, they require skateboarders to pay an access fee, while outdoor skate parks are free.
Skateboarders often find themselves divided between the two different options. Many prefer the comfort of being in an indoor structure, secured, and where the weather isn’t an issue. Then, some people, especially concerned parents, are worried about the safety of outdoor skateboarding parks. The neighbourhood in which a specific park is located is the main factor when it comes to safety.
Due to this, more and more skateboarders are choosing the ‘do it yourself’ trend building DIY ramps, kickers, grind ledges and much more.
Having your own skate ramp means you can get easy access to it whenever you like. Although skateparks are good for socialising while learning new skills from fellow skateboarders, parks can get overcrowded, increasing the chances of collision and incidents on the ramps. A DIY skate ramp also means that you can get immediate access to it whenever you fancy making some moves on the ramp, without having to commute to a public one.
The concerns over the environment and how our everyday activities can affect the planet means that building a DIY skate ramp at home also needs to be eco-friendly. This can be easily achieved thanks to recycled boxes, wood, and construction leftovers.
We look at a step by step guide on how to build a DIY skate ramp that will come in handy when public skateparks are just too busy. Specifically, we’ll look at how to build a skateboard kicker ramp, which is the best DIY option easy for both beginners and advanced level skateboarders.
1. Gather Your Tools and Materials
The first step towards building a recycled DIY skateboard kicker ramp is to gather all the tools and materials that you’re going to need. You’ll need:
- A tape measure
- A pencil
- A drill
- A 9.5mm drill bit
- A 4.8mm drill bit
- Two 120x250cm, plywood sheets – must be 20cm thick
- One 120x250cm Masonite sheet – must be 10cm thick
- Five 500x100cm boards, 21cm long
- One 500gram box of 16mm screws
- One 500gram box of 2 13mm screws
- One 25.5cm 122cm piece of steel, 5mm thick.
2. Cut the sides
As soon as you have gathered all your materials and tools, you’re ready to start. Cut each one of the five 500x100cm boards into two, then cut one of the pieces of plywood to be 120cm by 180cm by 5cm. Then, cut the second piece of plywood into the shape of a triangle.
3. Frame the bottom
To frame the bottom of your kicker ramp, all you’ll have to do is screw two 500x100cm cross beams from the 10 500x100cm boards you cut in the previous step.
4. Frame the top
Now, time to focus on how to frame the top of your kicker ramp. To do this, simply attach the remaining eight 500x100cm to the top of your structure, making sure that all are perfectly flat on the top edge of each side.
5. Attach the Plywood
Next, the thick plywood. Attach the piece of plywood onto the structure that you’ve built so far. Pay extra attention to the bottom edge of the plywood, which needs to be as close as possibly to the ground but without touching it completely.
6. Attach the Masonite
Then, move unto the next step which is attaching the Masonite. Here, you have to cover the plywood with the sheet of Masonite, which as we said earlier, should be 6mm thick, 120cm wide and 150 long. Make sure the Masonite is covering the entire surface, up to the very edge of the ramp but not all the way to the bottom.
The important step: make sure that you have screwed the Masonite into the studs beneath the plywood. This will secure the ramp, helping avoid the screws to come off.
7. Attach the steel
The final step of the DIY skate ramp is to attach the metallic steel at the bottom of your ramp. This is why we allowed extra space when applying the Masonite on top of the plywood. To do this just drill a 9.5mmhole about two inches on each side and use the 4.8mm drill to secure it down.
Finally, double check that everything is secured, especially the screws that keep the structure together. The measurements above are just suggestions, but you can adjust the size of your ramp according to your needs, keeping in mind where exactly you are going to be keeping the ramp. So now, all that’s left to do is enjoy your DIY ramp whenever you fancy it.
*All measurements were converted from US inches.
Sources
https://www.realbuzz.com/articles-interests/sports-activities/article/the-top-10-best-skateparks-in-the-uk/
http://www.diyskate.com/kicker_ramp.html
About the Creator
Keep reading
More stories from Fay McFarlane and writers in Longevity and other communities.
The #1 Fruit for Diabetes, Recommended by Dietitians
While all foods affect your blood sugar, those that contain carbohydrates are the ones that will impact it the most. The bloodstream carries usable energy (blood sugar) to all your body cells to be fueled. When you have diabetes, being strategic about what you eat, how much you eat and how often you eat can help your body to regulate blood sugar efficiently. And when choosing fruit with the least impact on your blood sugar levels, here’s what registered dietitians who are also certified diabetes educators recommend.
By Kaly Johnesabout 4 hours ago in Longevity


Comments
There are no comments for this story
Be the first to respond and start the conversation.