


If you're thinking about selling your home or getting it staged for buyers to get excited about, then put your efforts around the kitchen because it's the room that sells the home. Believe it or not, it's not the master bedroom or the ensuite and it's definitely not the garage or the theater room either. It's where the meals are prepared and the place for family to meet before the day begins.
Before I handed the house keys to my realtor, I wanted to make the house look better. I started in the kitchen and worked my way through the house, taking care of small DIY repairs that I could handle. My handyman skills are a mere five out of 10 according to my spouse but I'm getting better.
When freshening up your kitchen, look closely at your kitchen cabinet doors. Are there any imperfections? Are the edges still defined? Are there any water damage?
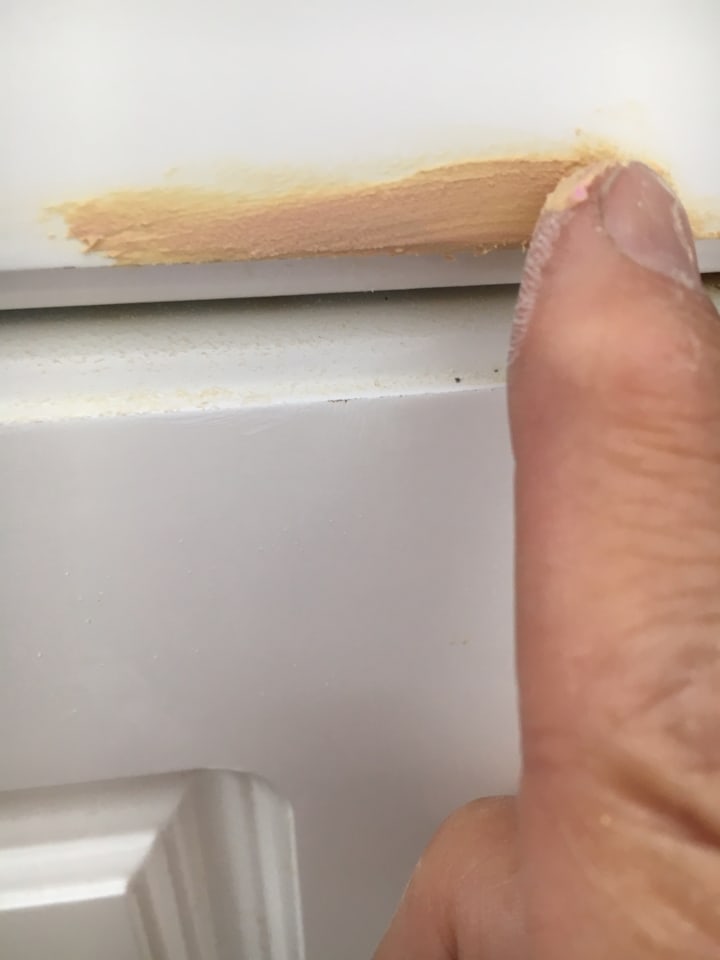
I got down on my knees and ran my fingers along the edges of my cabinet doors. The edges were still defined but in some areas, there were visible bumps in the wood like mini-cinder cones.
Let's look at water-damaged cabinet doors more closely. Most kitchen cabinet manufacturers use a specially engineered product known as 'MDF' or medium-density fibreboard, which is basically a glorified 'particle board' to make cabinet doors with. It is a popular product, inexpensive to manufacture, easy to work with and strong, but it has a tendency to absorb water and bloat.
Cabinet makers would warn you that when water splashes on it, quickly wipe it up with a good absorbent cloth. Otherwise it will be water-damaged.
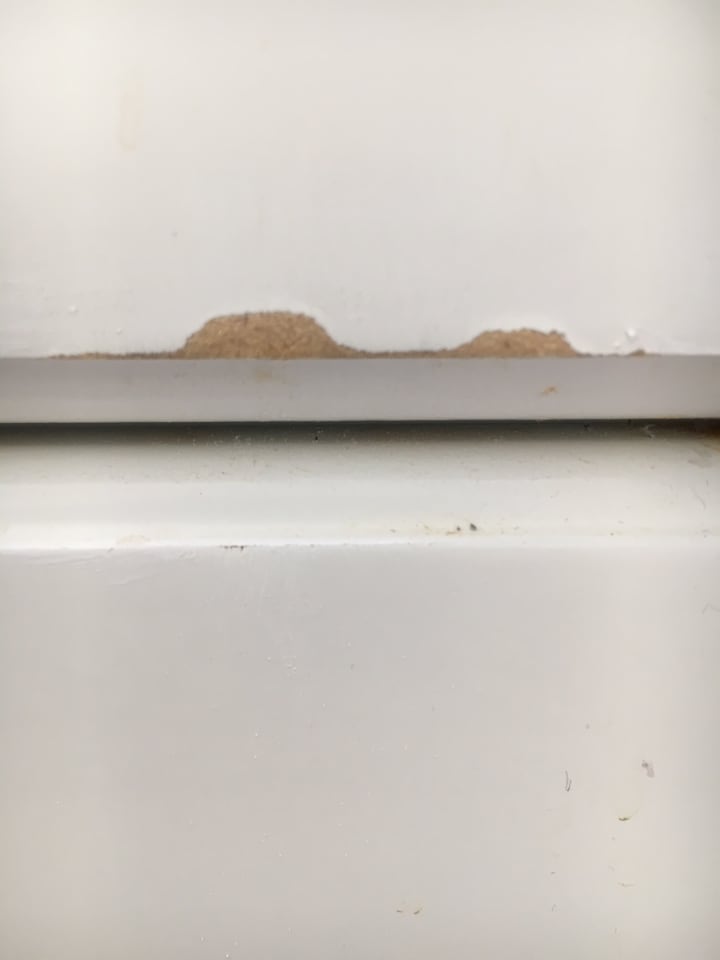
Having water-damaged cabinet doors is common in most kitchens. Take a look at the photo below and compare it with your kitchen cabinets. You may have the same problem as I had. The good news is that I have a tip for you and it is easy to fix with a handful of items.
Water-damaged cabinet door

The first thing you will need is a scrap piece of sandpaper with some teeth. I would recommend a piece with medium grits either #120 or #150. You don't need a large piece to work with, just cut or rip a piece off a larger sheet. As you can see from the image below, I have a relatively small piece of medium grit sandpaper.
Medium Grit Sandpaper (#120 or #150)

With the piece of sandpaper between your thumb and index finger, use your thumb to apply pressure over the bump as you run the sandpaper over the bump. Start on the opposite side of the edge and make a firm stroke towards the edge. Lift and repeat so that you are making a stroke in one direction. (ie. with the edge on the right, stroke from left to right).
With enough pressure applied to the bump, you should start seeing the bump go down in height. I managed to flatten the bump after making three strokes.
Water-damaged bump disappears
As the photo above shows, the water-damaged bump is completely gone. It may be uneven or depressed slightly but don't worry, we will fix it soon enough.
Grab a tub of Elmer's Wood Filler and smear some filler over the exposed wood. You don't need a lot, just enough to fill the dent and a little more.
Let the filler dry completely. It will harden and get chalky. After 24 hours of drying, the area can be sanded. Use a fine grit sandpaper #220 to sand the cabinet door. It's okay to sand the entire area, both the exposed wood and the painted area. Once you've sanded the area, you are ready to paint it.
Elmer's Wood Filler
The paint I used is for baseboards and trims and the color I chose was a 'pure satin white'. This was the closest to the white cabinet as I could find. You might want to unscrew the hinges on your cabinet doors to remove it and bring it in to your local paint store to get a color match. You would be surprised to hear how many variations of white there is.
I also found using a small paint roller produced better results than using a brush. The finish was smoother and it didn't show brush marks.
With two pieces of sandpaper, a tub of Elmer's Wood Filler, a small roller and a quart of baseboard and trim paint, I had repaired water-damaged cabinet doors in the kitchen. It was easy and fast. Just take your time and be confident.
If you don't have the supplies around your house to tackle this job, I've added affiliate links here to help you buy the right supplies from Amazon.
Elmer's Wood Filler, Medium Grit Sandpaper, Fine Grit Sandpaper,Paint Roller
If you like my tips, please tip me and share my post with your friends.
About the Creator
Tony Li
Tony Li is a fan of anything and everything. He loves playing golf, traveling to distant lands, cruising, building smart homes, learning new things and programming. He hopes to win a lottery one day and change the world.
My philosophy for a happy life
Hello everyone, I'm Victor, and as of today, I've officially entered my twenties. A few years back, before my freshman year in high school, I harbored a dream – to play the snare drum in the Foxboro High School Marching Band. However, there was a significant obstacle in my path: my condition, Progeria, limited my physical abilities. With each snare drum and harness weighing around 40 pounds, and my own weight barely tipping 50 pounds, carrying a standard-sized snare drum was simply out of the question. But I was determined to make my dream a reality.
By Ugochukwu victor2 days ago in Lifehack
HOW TO CHANGE YOUR LIFE WITHOUT WILL POWER
In the world of self-improvement, hypnosis is like a hidden gem, often misunderstood but incredibly powerful. It's been captivating minds for centuries, promising to unlock the secrets of our subconscious and bring about real change. Whether it's conquering fears, boosting confidence, or rewiring ingrained habits, hypnosis has proven its worth in various arenas of personal development. In this expansive exploration, we'll embark on a journey into the depths of hypnosis, uncovering its inner workings, delving into its manifold benefits, and unveiling the transformative potential of self-hypnosis MP3 audio tracks.
By David Snama day ago in Lifehack


Comments
There are no comments for this story
Be the first to respond and start the conversation.