

**North Pole Holiday Cheer Task Force Training Video Series, episode 3 of 12**
Welcome everyone to our second virtual holiday baking prep session! I’m so happy to be back with all of you again, virtually. I hear this is being sent out asynchronously…which means you’re not watching right now? Oh, goodness gracious, we have learned a lot about technology haven’t we? Who knew when we set this all up last Christmas that we’d be doing it all again this year?
Certainly not me! Anyway…
Today’s lesson is quick review of your, mine, everyone’s favorite—gingerbread cookies.
Whether you’re new to the Holiday Cheer Task Force, or a seasoned seasonal veteran, this beloved classic is a Christmas must have! Our time-tested, Santa-approved recipe is sure to spice up your holiday baking!
Now, we got a lot of requests from our regional offices for gluten and dairy free options last year, so I’m going to say, before we get started, that you can substitute vegan butter, and gluten free flour for this recipe and it will still taste delicious!
Um…let's see, I have a note here to make sure your gluten free flour includes xanthan gum…apparently it helps the dough stick together better.
Let’s get started!
**If you need a refresher on basic masking and sanitation guidelines for holiday baking for others, please refer to episode 12 of the North Pole Holiday Cheer Task Force Video Series: Health and Safety**
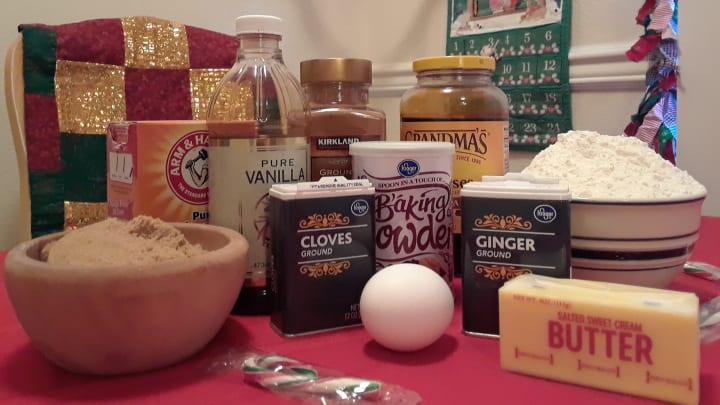
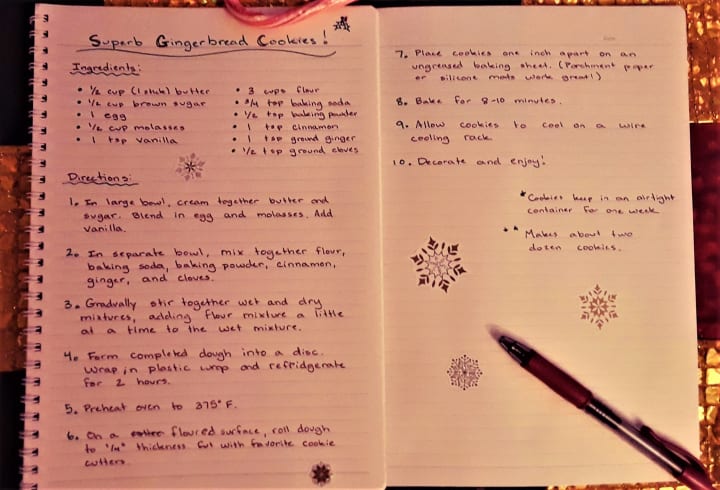
So, first things first—we’re going to cream together our butter and brown sugar. Now I hear in the regional offices, they are using electric mixers now. If that’s the case for you, you’ll want to run your mixer on a medium speed until your butter and sugar are all creamed together, or you could just use a wooden spoon like we’ve been doing for hundreds of years. It works great!
Once the butter and sugar are creamed, we’re going to blend in the egg, and add the molasses and vanilla.
You’ll all recall from your basic training that the amount of vanilla listed on any cookie recipe is only a suggestion, so even though the recipe says one teaspoon, you measure with your heart.

Give all your wet ingredients a good stir until everything is incorporated, then set that aside.
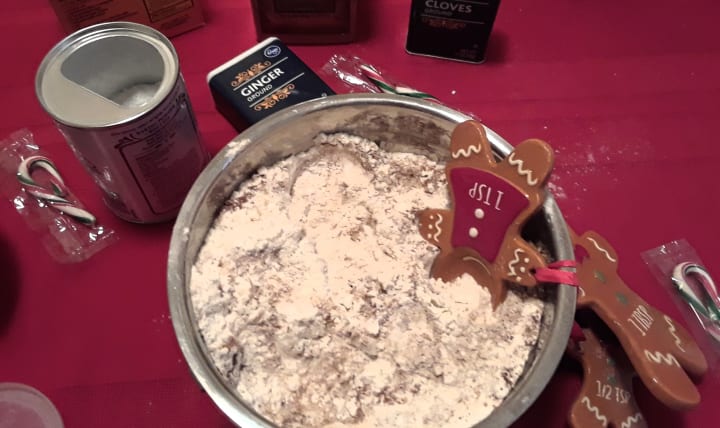
In a separate bowl, stir together your flour, baking soda, baking powder, cinnamon, ginger, and cloves. Doesn’t it just smell wonderful?
Now, I have received a few questions regarding our time-tested and Santa-approved spice mixture, so I just wanted to take a moment to address one in particular.
We don’t put nutmeg in our gingerbread cookies, because nutmeg doesn’t belong in gingerbread cookies. I love the creative drive I have seen in our Task Force bakers, but nutmeg is a powerful flavor, and these aren’t ‘nutmegbread cookies’ are they? No, they’re gingerbread cookies. We don’t put nutmeg in them.
Moving on!
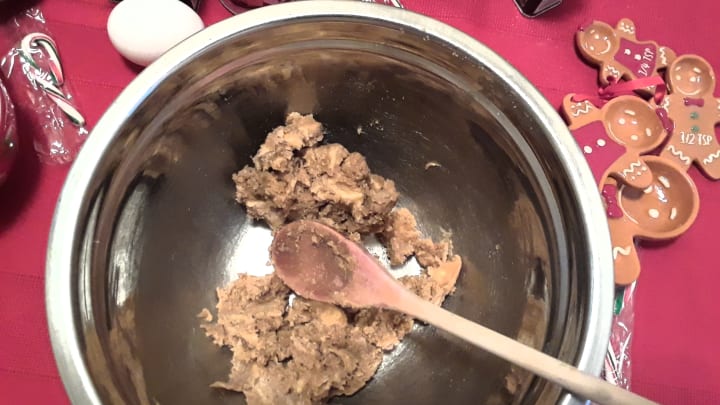
Once the dry ingredients are prepared, we’re going to add them into the wet ingredients a little bit at a time, mixing as we go to make sure everything is blended. When it’s ready, there should be no visible flour and your dough should stick together when pressed into a ball.
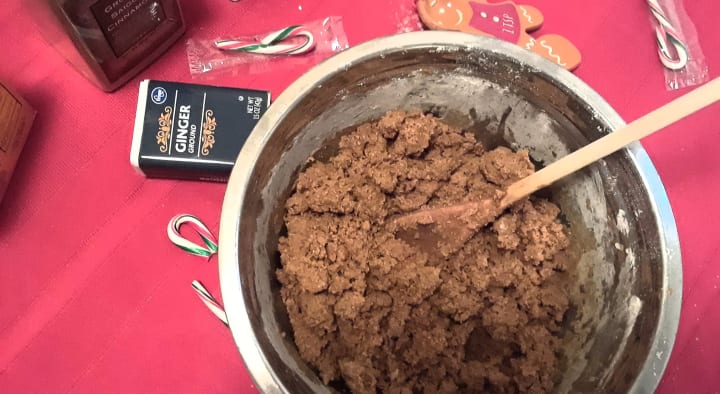
Special note: If your dough is too dry and crumbly, not to worry!
This happens with certain brands of flour used in the regional offices. We don’t have this problem here in the North Pole, where our flour is made with magic and Christmas spirit, but if you picked up your flour at the local grocery store, you might end up with dry, crumbly dough.
If this happens, simply add a tablespoon of milk, or if you’re making a dairy-free option, a tablespoon of water, and keep mixing until the dough sticks together.
Form the dough into a ball and press it into a thick disk. We’re going to wrap this up and put it in the cold cellar, or as I’m told you all in the regional offices use, a refri—reridg—refrigerator. Did I get that right? Okie-dokie.
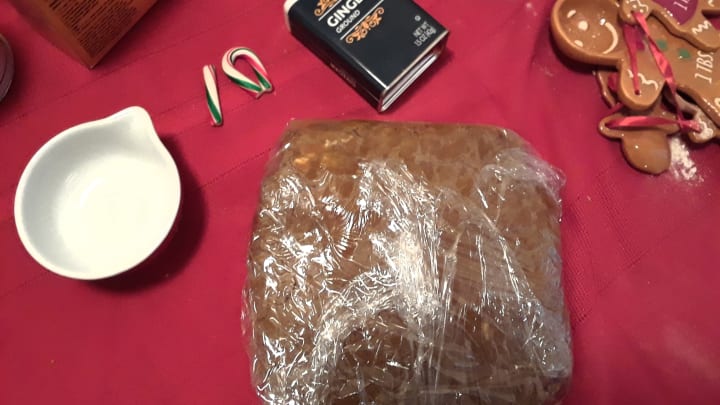
You’re going to put in in the cold cellar or refrigerator for at least two hours. If you’re in a cookie making frenzy, you can leave it in there for a few days, or even keep it in the ice box, or…freezer, while you work on your other baking.
After the dough has chilled, you’ll want to flour your rolling surface and roll the dough out to about one quarter inch thickness. You can go thinner, but the cookies will be crispy!
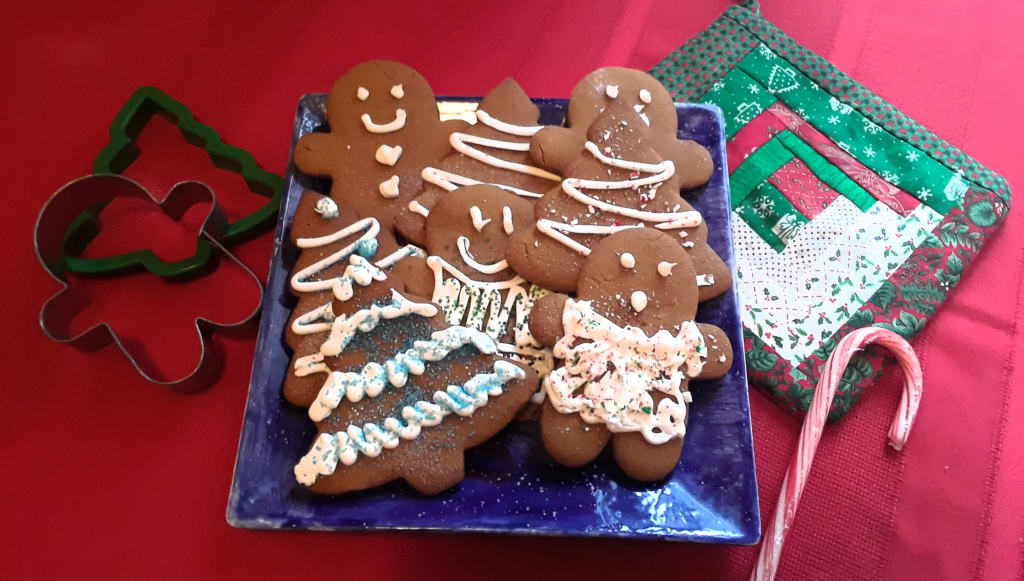
Next we’re going to cut out our cookies using your favorite Holiday Cheer Task Force approved cookie cutters, mine are the Christmas tree and classic gingerbread kid. Remember to cut your cookies as close together as possible. You can always ball up scraps and roll the out again, but too many re-rolls might result in a tough cookie.
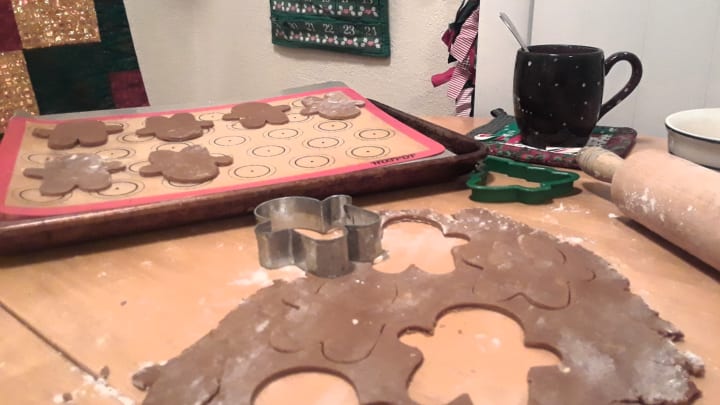
Place the cookies at least one inch apart on your cookie sheet. Using parchment paper works wonders to keep the cookies from sticking.
Last year, I got a message about using silicone mats, and I have to say, they work very well.
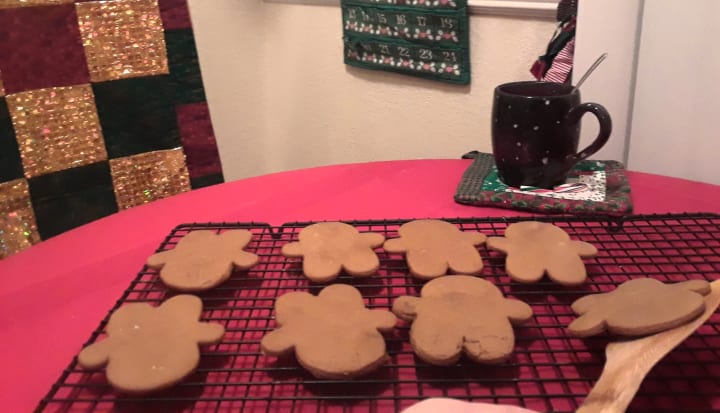
Bake the cookies for eight to ten minutes at 375 degrees Fahrenheit or until they feel soft but not squishy when you press on them with your fingers. This part is a lot harder to teach virtually, let me tell you, but I have faith in all of your baking abilities!
When the cookies are baked, remove them to a wire cooling rack and let them cool completely before you start decorating.
Usually, the preferred method of decoration for cookies in the Holiday Cheer Task Force is royal icing, and gumdrops, but I hear there are supply chain issues for you folks who don’t have everything delivered by magic reindeer, so this is where you can let your creativity shine!
Try new decorations—marshmallows, sprinkles, licorice sticks! I tried using pulverized candy cane on mine this year and I must say, it’s lovely.

Once your cookies are decorated, it’s time to share and enjoy!
Thank you for joining me in our second virtual holiday baking prep session for the North Pole Holiday Cheer Task Force! Stay tuned for episode 4: Sugar Cookies!
And one final note:
Wherever you are, however you’re doing, and whatever you have to work with, I know you are all doing your best to keep the magic of the season alive for the people around you, and that is what the Holiday Cheer Task Force is all about. None of us expected things to be this difficult, but you are all making it work, and still moving forward. I’m so proud of you.
Merry Christmas!
About the Creator
Rena
Find me on Instagram @gingerbreadbookie
Find me on Twitter @namaenani86
Check my profile for short stories, fictional cooking blogs, and a fantasy/adventure serial!
4 Signs You're Drinking Too Much Water
We're constantly reminded of the benefits of staying hydrated, but drinking enough water can be tricky, even if you've found a water bottle you love. But can drinking too much water be bad for you? And if so, how do you know you've had too much?
By Kaly Johnes4 days ago in Feast
Final Call
She flings her arms around my neck and squeezes me like she’s never going to let me go. My head spins as her lips brush against my cheek. She must be able to feel my heart thumping in my chest. I shuffle backwards and ram my hands into my coat pockets, watching her reach down and heave the rucksack across her shoulders.
By Caroline Craven4 days ago in Fiction


Comments
There are no comments for this story
Be the first to respond and start the conversation.