

Did I ever tell you about the time I stole a fudge recipe from that fancy fudge place in Oregon?
We picked up a little bit, just to say we had. It cost nearly twenty dollars! For this little baggie of fudge!
I thought, I could definitely make that for less than twenty dollars. I could make a whole batch of that for less than twenty dollars.
So, when we got home from the trip, I started a detailed analysis of all the flavors in the fudge. I made a list, and started experimenting.
This was before the internet, mind you. I couldn’t just look it up. I’m sure there are a whole bunch of other people out there who’ve figured this out, but I did it pre-internet!
There was obviously chocolate, and the peanut butter flavor was distinct. After several test batches, and some trial and error with vanilla candy coating, and proportions, I finally managed it. I stole their recipe!
What? That doesn’t count as stealing the recipe?
Well, saying I stole it makes a much better story.
So.
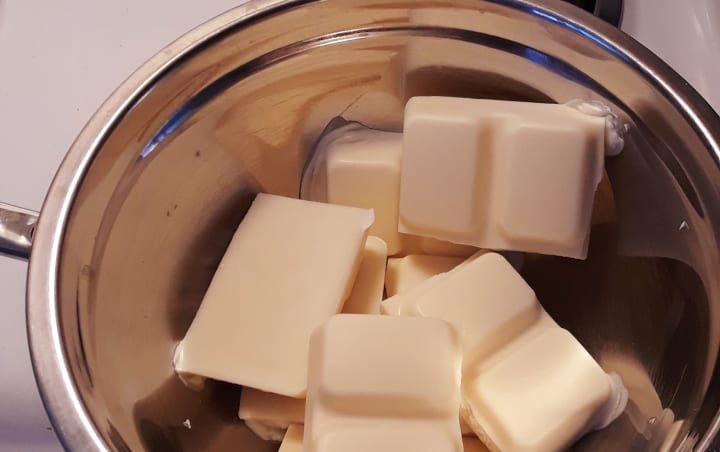
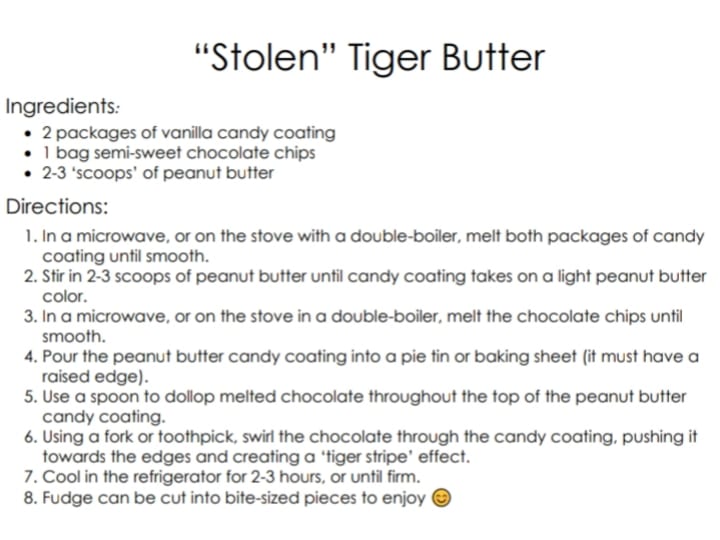
To make this delicious peanut butter chocolate fudge, you only need vanilla candy coating, semi-sweet chocolate chips, and peanut butter.
It was the short ingredient list that made this recipe so easy to crack!
The first thing you want to do is melt your vanilla candy coating. You can do this on the stove with a double-boiler, or in the microwave. Either way, it helps to break up the candy coating into smaller pieces first.
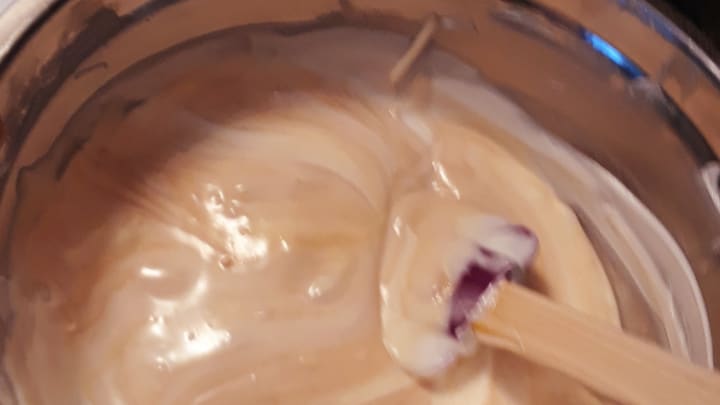
Once the candy coating is melted, stir in two or three good-sized scoops of peanut butter. No I did not measure anything when I was experimenting with this recipe. I got it right, and this is how I remembered it. It’s two or three scoops of peanut butter, with a regular spoon. The candy coating will turn the color of light peanut butter.
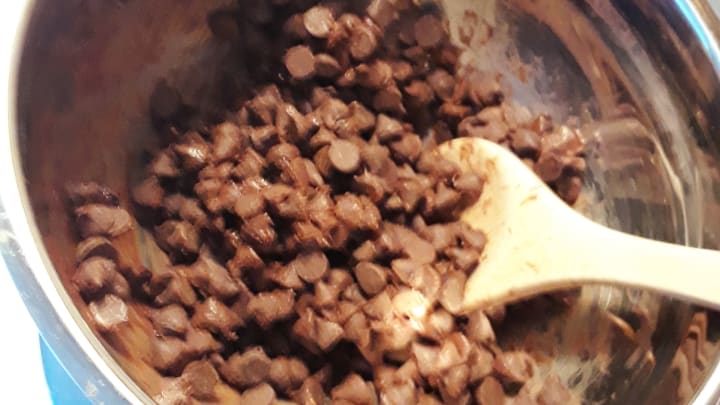
Now you want to start melting your chocolate. The peanut butter candy coating will stay warm and pourable for a while, but the quicker the better, so whether you’re using the microwave or the stove, get your chocolate melting!
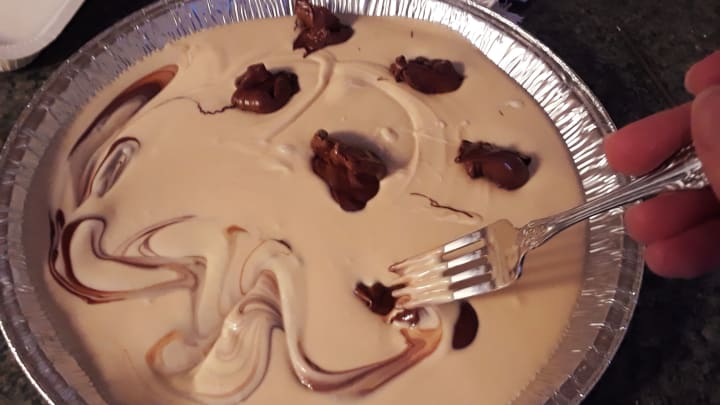
Once the chocolate is melted, pour the peanut butter candy coating into whatever dish you’re using to hold your fudge. This can be a spare pie tin, like I’m using, a baking dish, or even the little cardboard trays that the candy coating comes in.
The most important thing to remember is that it has to have a raised edge. This is not a thick pouring fudge and it will run all over everything.
I speak from experience.
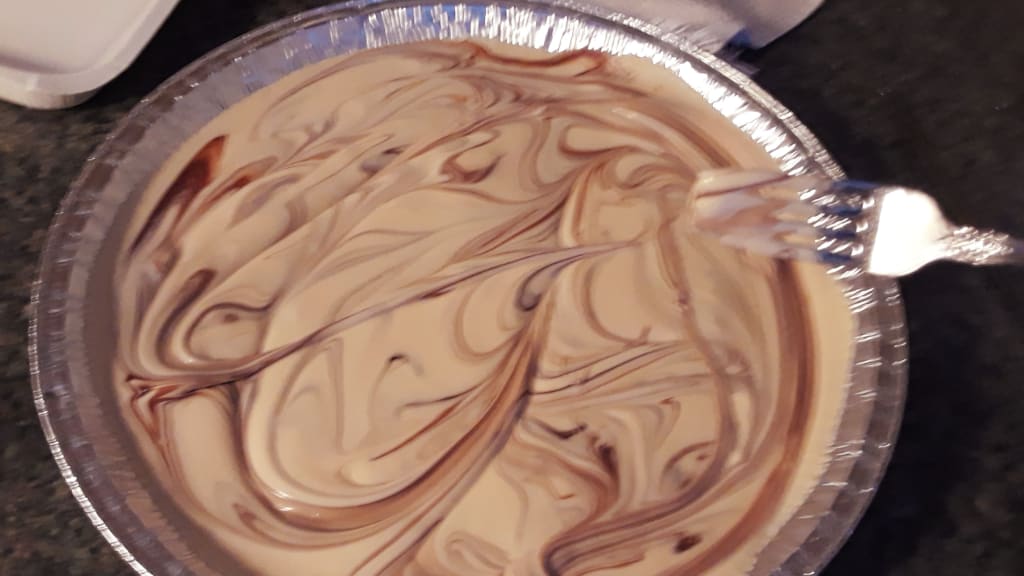
After you pour your candy coating, use a spoon to drop dollops of melted chocolate throughout the fudge.

This is the part that gives the fudge its characteristic ‘tiger stripe’.
Using a fork, swirl the chocolate through the fudge. You want to push the chocolate through to the bottom and out to the edges, but be careful! It’s easy to mix too much and end up loosing those beautiful tiger butter swirls!
The way I do it, is to mix first, then draw the fork back and forth across the top of the fudge to make sure there are distinctive tiger stripes.
Since this is a very liquid fudge when it’s warm, it needs a little more time to set. I usually give it 3-4 hours in the fridge to make sure it’s firmly set up before I turn it out of its container to cut it into delectable bite-sized pieces.
Leaving it in the fridge overnight might be even better. I don’t know your fridge, and turning it out too early can be bad.

Stealing this fudge recipe was one of the best decisions I’ve ever made! It’s a favorite in my holiday goodie bags.
No, I don’t care if figuring out the recipe isn’t the same as stealing the recipe. Stealing it makes a better story.
Happy holiday treat making, everyone.
I totally stole this recipe.
About the Creator
Rena
Find me on Instagram @gingerbreadbookie
Find me on Twitter @namaenani86
Check my profile for short stories, fictional cooking blogs, and a fantasy/adventure serial!
Make Your Own Pasta
I recently bought a pasta attachment for my Kitchen Aid mixer and I have never enjoyed cooking so much. It might seem simple and silly--dried pasta in the store is fairly inexpensive and its a labor of love to mix up the dough and cut it into whatever type of pasta you're craving, but it truly has been so much fun. When I first began making my own pasta I mixed the dough by hand as most of the websites recommend (and rather, insist upon) but I've recently turned toward mixing the dough in my mixer and man-oh-man is that a time saver (and a muscle saver too). I just put the mixer on the first setting and let it slowly combine all the ingredients. I usually mix for ten minutes total or so, adding a little bit of water here and there if I think the ingredients aren't combining after a reasonable amount of time. It's super slick! I figure I'm using my mixer anyway with the pasta attachment, so there really isn't much of a reason not to use it for the dough creation process as well. Call me a cheater, whatever. I can handle it.
By Lizzy Gabrick6 days ago in Feast
The Best No-Sugar-Added Apple Pie
This no-sugar-added apple pie gets its natural sweetness from antioxidant- and fiber-rich dates. Cider vinegar helps to enhance the flavor. We like Gala apples for their sweetness and crisp texture, but any sweet, firm apple will work well. If you like your apple pie on the tart side, add a Granny Smith to the mix. We use frozen pie crusts for the bottom and top of the pie. The dough should release easily from the tin for the top crust within about 10 minutes out of the freezer. If not, let it sit out a bit longer until it releases easily.
By Kaly Johnes3 days ago in Feast


Comments
There are no comments for this story
Be the first to respond and start the conversation.