
Kitchenin Metal Stand Mixer with Attachments: Product Review
Testing Out a New Appliance

Baking With a New Mixer
I recently purchased a stand mixer from Kitchenin: a new company that sells kitchen appliances. The stand mixer came with three attachments: the dough hook, paddle, and whisk. These are generally considered the standard attachments that come with a mixer for baking.
On This Page
- How well the mixer and attachments work
- Pictures of the metal stand mixer and attachments
- Measurements of the items
- Pictures of baking goods that were created with the mixer
Recommended Users
Before getting too deep into the review, I want to share my opinion on who I think is best suited for this mixer. I recommend it for someone who wants to optimize space in their kitchen. If you live in an apartment or have a small cooking area, this mixer is a convenient option. In my opinion, it is best for new bakers and amateurs. From what I can tell, the product is more appropriate for home baking than for a bakery or restaurant.
It’s a great starter mixer, and it’s more affordable than other appliances that do the same work. If you’re not really sure if you like baking and want to try it out as a hobby, then I would recommend buying products that are in a comfortable price range for you.
Kitchen appliances can get really expensive, just like in other hobbies such as photography, with different cameras and lenses; or music, with different instruments and pedals.
Testing the Mixer
To test out the product, I prepared three recipes:
- Bread for the dough hook
- Cookies for the paddle attachment
- Cake for the whisk
Pictures of the Stand Mixer
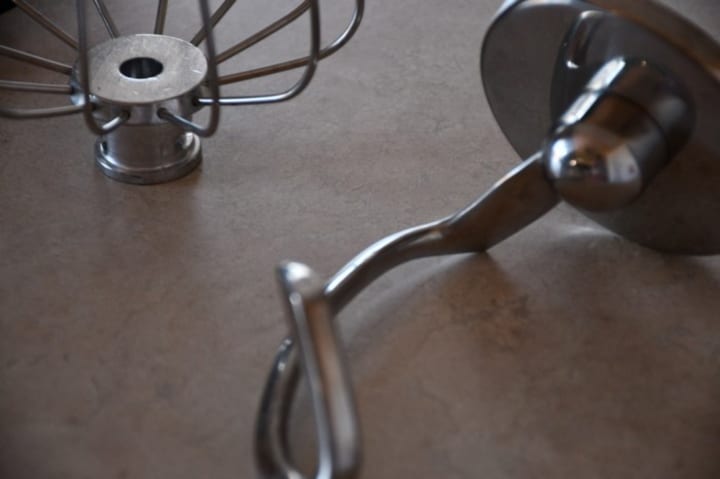
The dough hook, paddle, and whisk attachments will move in a circular motion. The mixer has eight speed settings.
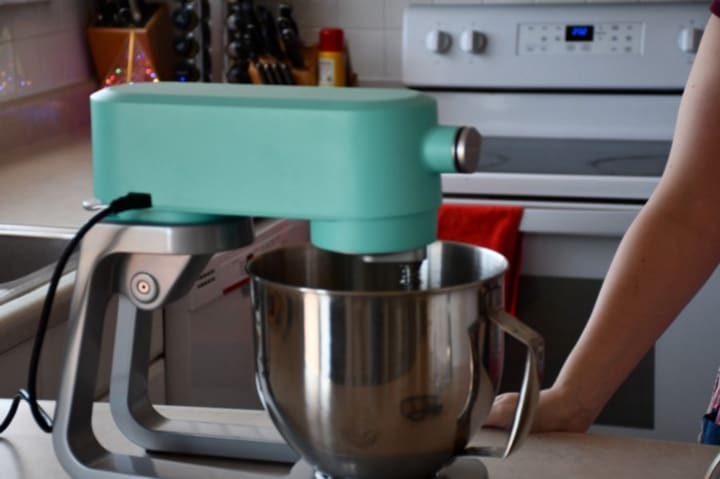
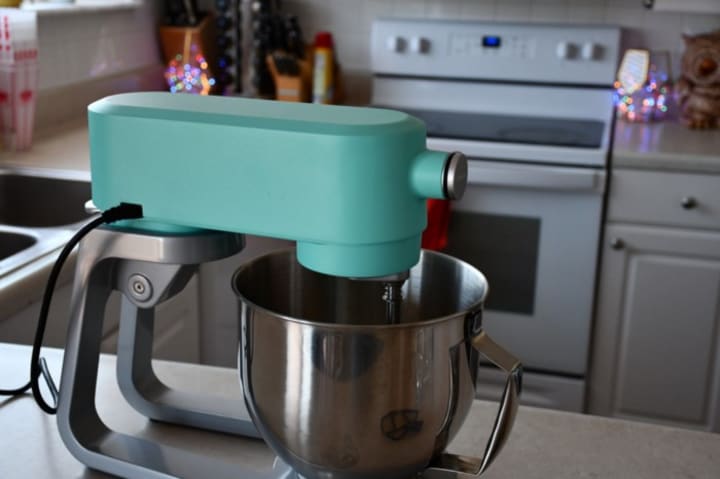
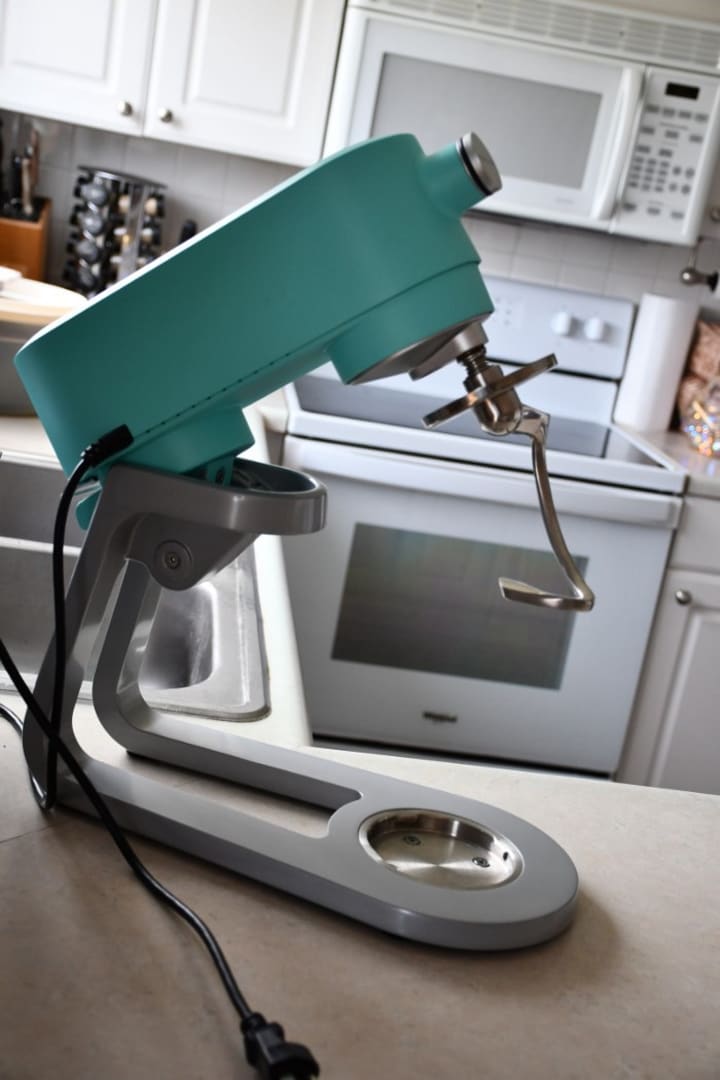
The Kitchenin stand mixer has a unique design, the stand itself looks like an opened paperclip. It doesn’t take up a lot of counter space.

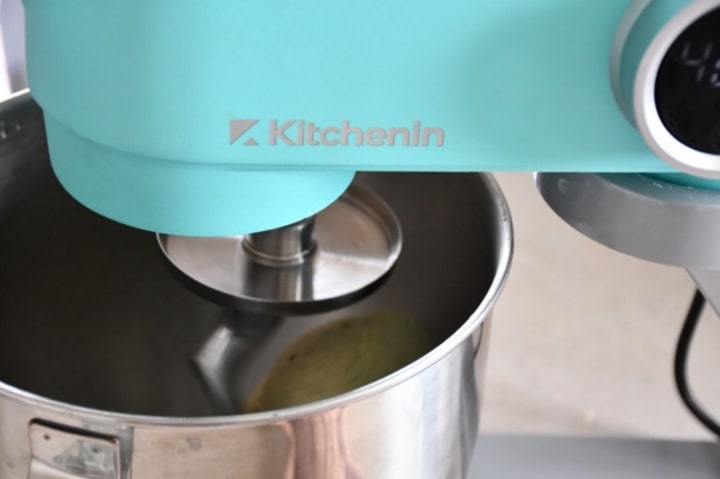
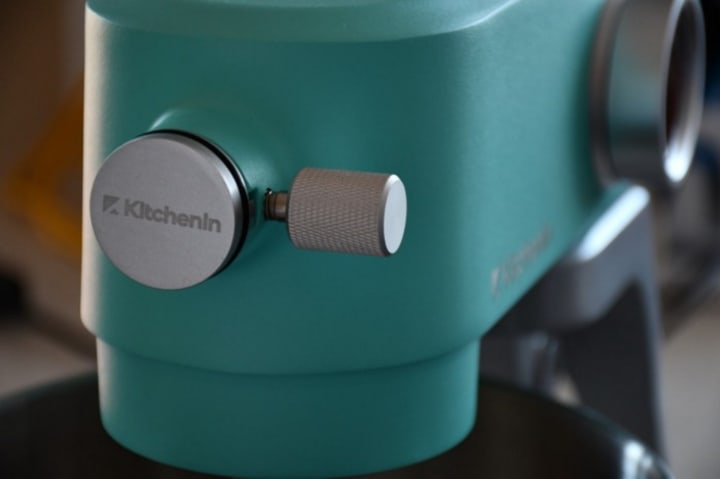
The mixer comes in several different colors. I own the teal one. There are also versions in red, green, orange, and black.
The metal bowl has a handle. It fits comfortably in the stand. The metal bowl is very reflective.
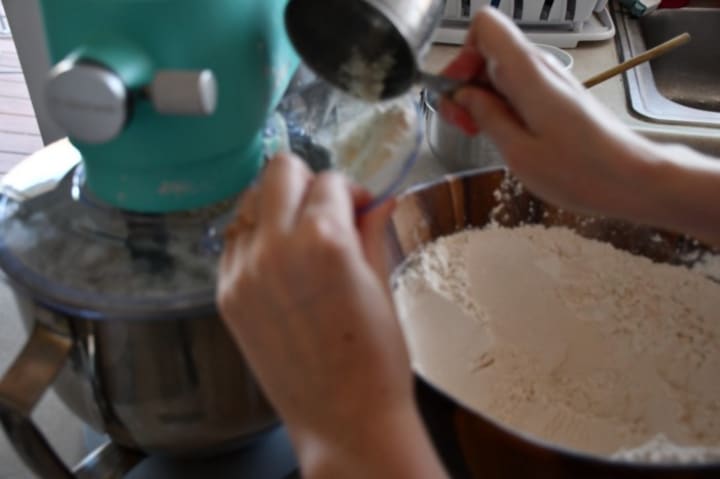
The splash guard is easy to assemble. It has a spout, so you can pour in new ingredients while mixing.
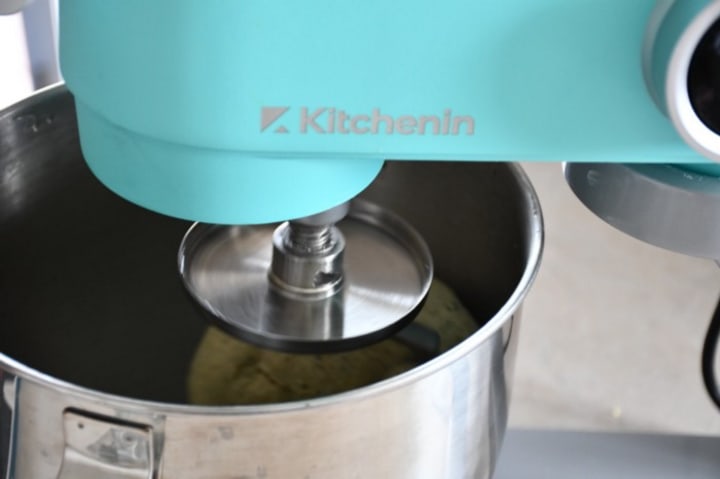
It’s easy to connect different attachments to the mixer. The attachments are secure while mixing. I never had one pop off.

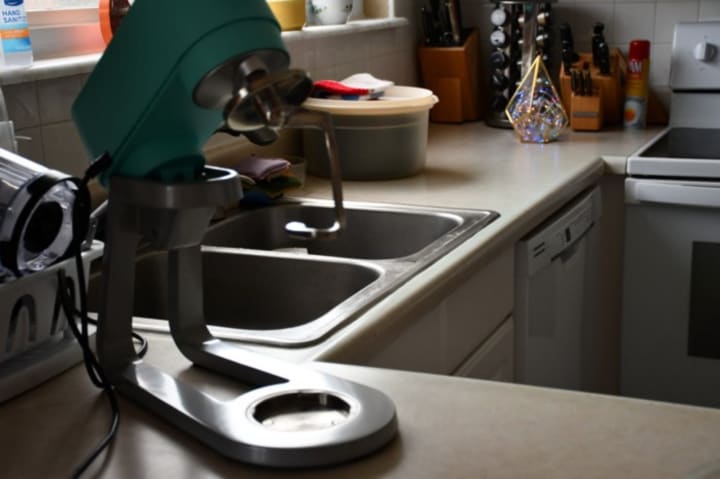
Here you can see the stand mixer without the bowl. The bowl fits perfectly in the stand. It doesn’t wobble.
The timer on the side of the stand is easy to use. Once you begin mixing, the timer will start. It acts like a stopwatch.
The universal mounting hub is one of the best features. You can attach accessories of any kind and from different manufacturers.
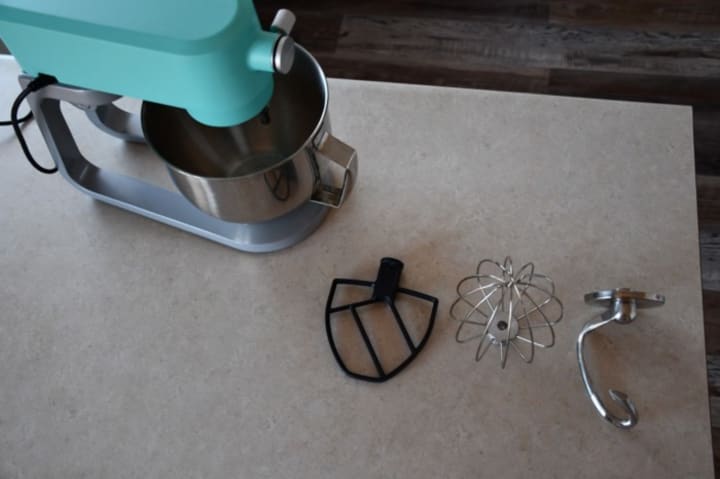
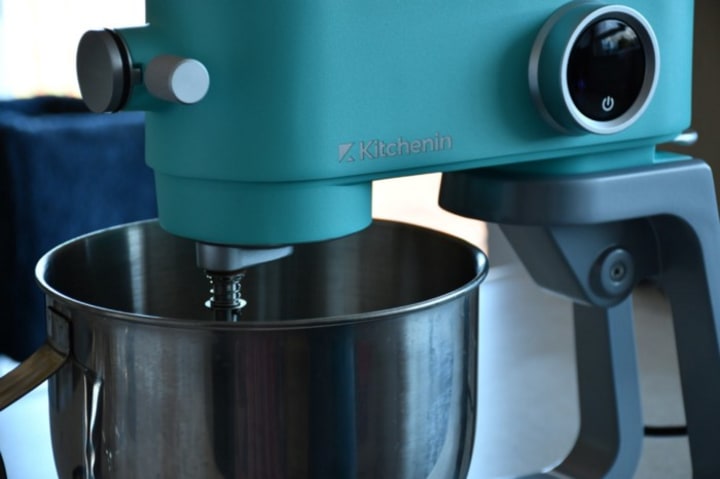
Here is the metal stand mixer with the three attachments: the paddle, whisk, and dough hook.
The Stand Mixer
Before we get into the various attachments, let’s discuss the stand mixer itself.
Design and Washability
The stand mixer has an interesting and compelling design; the base looks like an opened-up paperclip. It comes in charming colors, and more importantly, it’s easy to clean. The tilt-head is flat, making it easy to scrub. Make sure to read the instructions for the attachments before washing.
Speed Settings and Timer
One feature I really like is the speed knob, which doubles as a timer. The speed knob has eight different settings. For most of the recipes, I kept it at about 3–4 where it has a nice medium pace. The lowest setting is excellent if you’re just needing to quickly stir something and don’t want to overmix it.
Do not put the unit on the edge of a counter; that’s bad practice for any device. As a side note: I once had a bread machine fly off a counter and break. My husband and I, fortunately, kept our warranty and got a new bread machine for free and the incident was labeled off as a freak accident.
As for the timer, it does make life easier. In baking, you often need several timers because you have to multitask. The timer starts when you start mixing; it is helpful if you have trouble remembering to set one. The timer acts as a stopwatch, letting you know how long you’ve been mixing.
You do need to be attentive to the device. Don’t leave the kitchen for 30 minutes and leave any sort of mixer by itself. You could have ingredients that get stuck, or the unit could overwork itself or do something undesirable, like fall off the counter or overheat.
Working With the Product
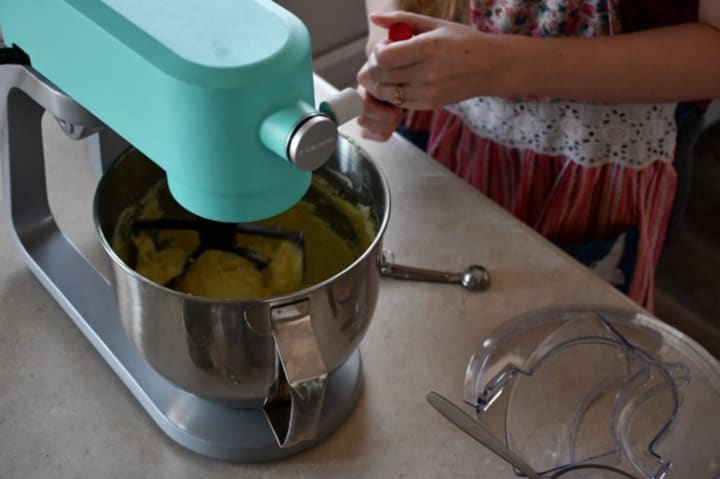
I do like that the mixer is easy to use. You can flip the top with the push of a button, which gives you plenty of room to fasten the attachments. I can connect the dough hook, paddle, or whisk to the head quickly and hassle-free.
The metal stand mixer has a tilt-head design with planetary motion, which means the arm and attachments move in a circular motion. The design guarantees that the ingredients are well mixed and not left stranded within the bowl.
Design Features
The unit has several notable design features. I have mentioned a couple of them above, but here are some other aspects to note:
- The mixer is made entirely of metal; there is no plastic like you would expect at a cheaper price point.
- The mixer has a natural dip for the bowl, so there is no struggle to get the bowl in and out of the stand.
- The design is lightweight, so you won’t break your back when you pull it off a shelf or out of a cabinet. (I do think the unit could be a little heavier to stabilize it, particularly at the base.)
- The splash guard is easy to assemble and comes in two pieces. It will protect you from ingredients that may fly out while mixing. You could also turn off the unit and pour in new ingredients directly.
- The mixer has a universal mounting hub, allowing you to turn the stand into other kitchen appliances like a pasta maker, veggie slicer, or meat grinder.
- The mixer’s unique design gives it a contemporary/chic look; I was happy to find a version with a colorful teal shade… I’m a sucker for bold colors.
Pictures of the Dough Hook
The dough hook is easy to attach to the stand mixer. I find it easiest to tilt the head back and then attach the hook.
The dough hook works to knead dough and shape it into a ball. You can tell in the picture that the dough is forming into a ball.
The dough hook stands a little over 6 inches tall. Its diameter is about 3.5 inches long.
Dough Hook
When I made bread with this mixer, the dough didn’t stick to the sides of the bowl. The attachment properly kneaded the ingredients into a whole, so I didn’t have to scrape down the sides. I see this as a positive.
Occasionally, the hook would cause the dough to form into a funky shape, like a baguette. I would turn off the unit, adjust the dough, and it would start to form into a ball.
The mixer did most of the kneading for me, so I didn’t have to work too hard after the fact to reshape and rework the loaf.
Stiff Doughs
If you’re working with a really stiff dough, I recommend listening to the mixer and looking for signs that you might be overworking it. (Personally, I think there is something wrong if you have a brick-like concoction.)
With a super thick dough, I recommend temporarily working with it out of the mixer. Knead it with your hands to soften it or add some water; this will give it a better chance to knead correctly in the unit.
Picture: Bread Made from the Dough Hook

The bread in the corner was my end result from using the dough hook. I worked with a dough that wasn’t too thick or too thin.
Pictures of the Paddle Attachment
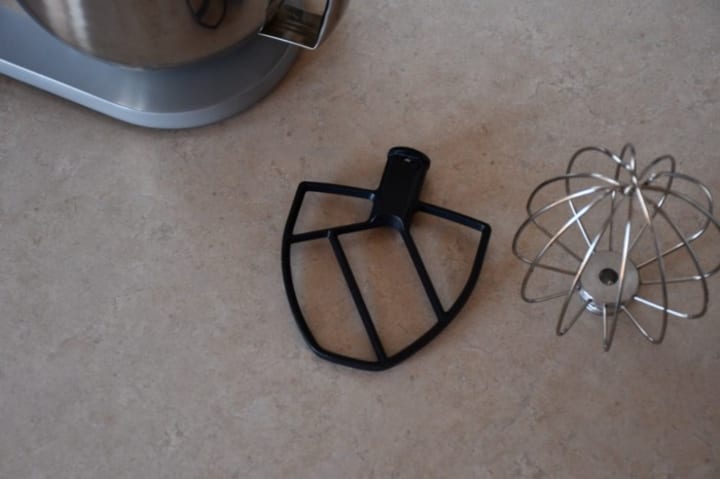
The paddle is about 6 inches tall and 5.25 inches wide.
The paddle did make an even batter. I didn’t have problems with residue sticking to the bottom.
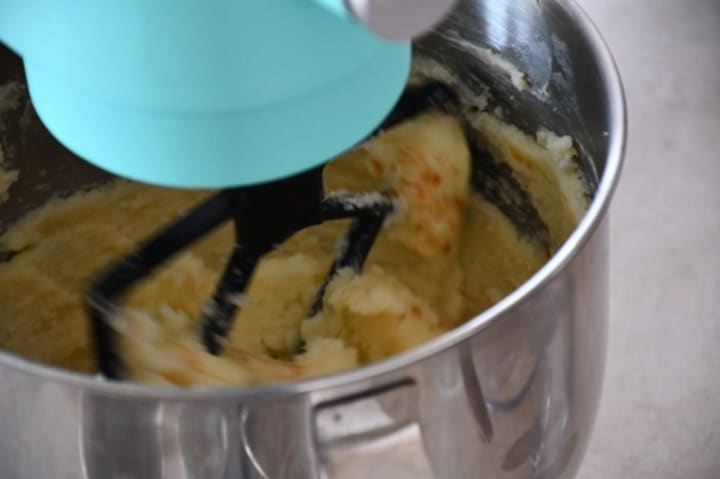
I do recommend softening butter if you make a cookie batter. Too thick of ingredients or too many ingredients can stress the attachment and mixer.

I do recommend using the splash guard when you have a lot of ingredients or if you’re using flour.
Paddle
I pushed the paddle somewhat hard for my cookie recipe. I essentially put in enough sugar and butter for two batches. The butter was also unsoftened.
So here’s my advice: be reasonable with how much you put into the mixer bowl. If it’s too much, the mixer won’t respond as well. Add ingredients slowly rather than all at once as this may overwhelm the appliance and/or attachment. Also, instead of throwing in eight sticks of cold butter, soften them by either leaving them out for a while or zapping them in the microwave.
If you put too many ingredients in the bowl and then try to bring the tilt head down… it might not fit/lock. If your mixture is too thick and you push the tilt head back, the attachment might have a hard time coming back into the mixture, so you won’t get the mixer back into the correct position. If the tilt head isn’t in the right spot, the machine won’t start.
Also, if you have too many ingredients, or the mixer starts working too hard, you may receive an “H” error message… the unit has overheated, so you have to stop and wait for it to cool down.
The paddle attachment fits well in the mixer bowl. You may need to occasionally turn off the unit and scrape down the sides, but this is typical of most mixers when working with cookie dough. Make sure that there are enough ingredients to reach the paddle and you don’t have a small amount of stuff that’s resting below the attachment.
Key takeaway: Cookies can be hard on a mixer. Stiffer doughs require more power and torque. I don’t recommend doing double batches in the Kitchenin mixer.
If you’re adding flour to a mixture, I recommend using the shield to prevent ingredients from flying out and getting all over you and your kitchen. The shield is simple to use, but don’t try to shove too much into the spout all at once.
Picture: Cookies Made from the Paddle
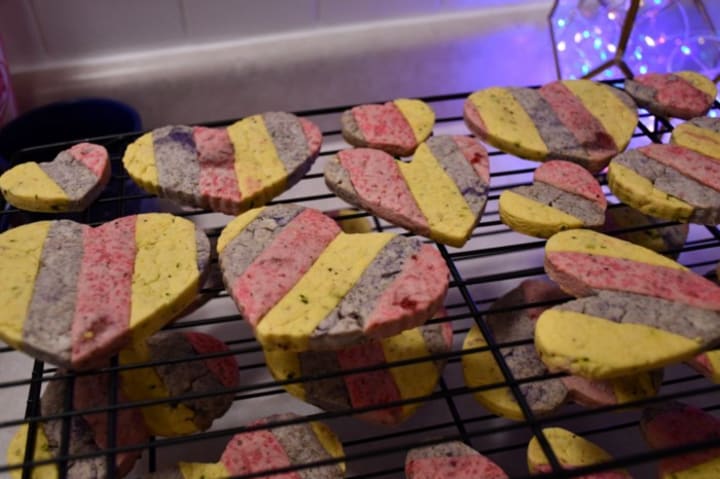
My heart-shaped cookies were the end result of the dough that was formed using the Kitchenin paddle attachment.
Pictures of the Whisk Attachment
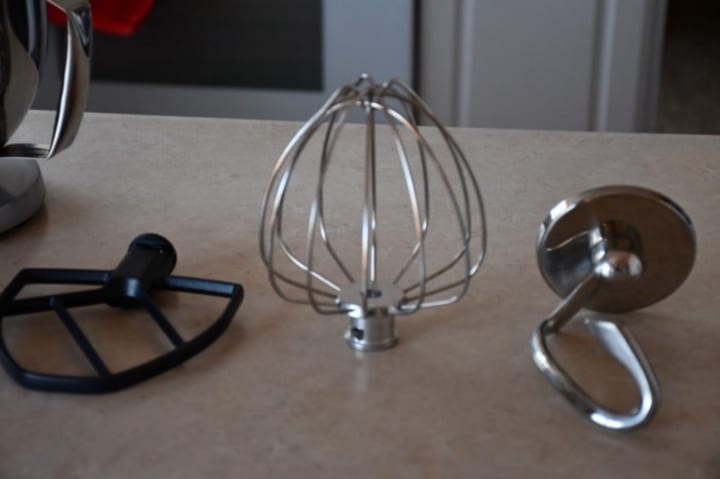
The whisk is about six inches tall and five inches wide.
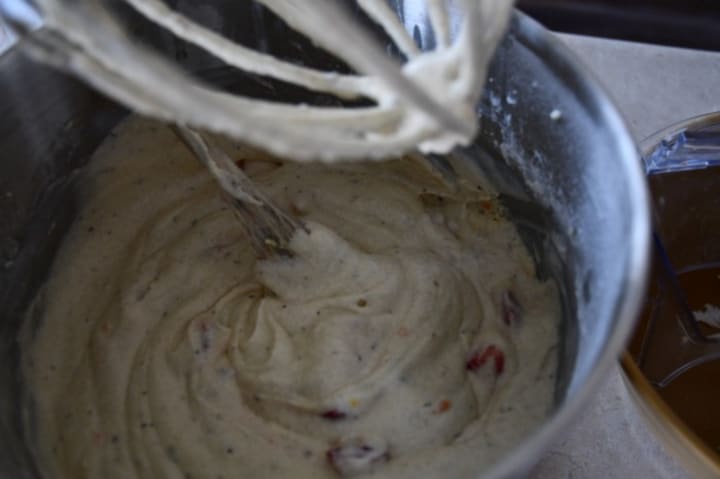
The whisk made for consistent batters and creams.
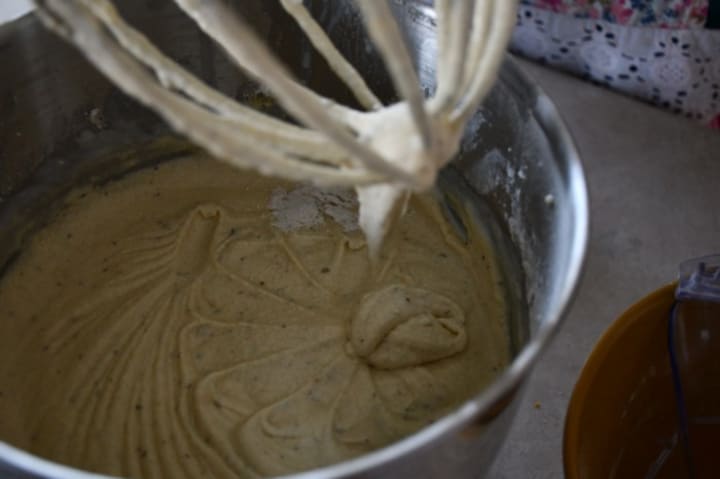
Here you can tell the whisk did a good job evenly folding in the ingredients.
Whisk
Of the three attachments, I think the whisk performed the best. I was very pleased with how my cake batter turned out and also the buttercream for the cake. Again, I do recommend using softened butter, which is generally recommended for recipes anyway.
The buttercream turned out nice and foamy. It turned white and creamy at the exact time that was recommended for the recipe. I found the whisk was the right height for the bowl; it spread things out evenly and there wasn’t a shallow pool underneath the attachment.
The ingredients were evenly folded into the cake batter. The cake didn’t have different flavors in every bite, so the consistency was correct. The buttercream was also delectable and could have been a dessert on its own.
Picture: Cake Made from the Whisk

My cake was the end result of the batter and buttercream that were formed with the Kitchenin whisk. I had no complaints with this cake! It came out perfectly.
Last Thoughts
Overall, the baked goods I sought to make did come out as intended using the Kitchenin metal stand mixer. I was happiest with the results I had from the whisk. The dough hook would be my second favorite attachment followed by the paddle.
I found the appliance was easy to assemble, use, and clean. I had the best results when I stuck to single batches rather than doubling recipes. The timer is a convenient perk.
The mixer overall is decently foolproofed. The machine won’t let you do something stupid like tilt the head back while it’s mixing. It also won’t work if the tilt head isn’t pushed all the way down. The mixer will indicate an error message if you try to push it beyond its job, like if you were trying to mix items not meant for cooking or baking.
I like its size, and I found it’s more lightweight than similar products. I think it’s convenient for people with smaller kitchens. The sleek design also makes it easy to store.
If you would like to take a look at this product, I’ve attached a link to the mixer’s listing on Amazon.
*** *** ***
Originally published: https://delishably.com/cooking-equipment/Kitchenin-Metal-Stand-Mixer-Product-Review
About the Creator
Andrea Lawrence
Freelance writer. Undergrad in Digital Film and Mass Media. Master's in English Creative Writing. Spent six years working as a journalist. Owns one dog and two cats.
Keep reading
More stories from Andrea Lawrence and writers in Feast and other communities.
Basil, Garlic, and Mozzarella Sourdough Bread
Basil, Garlic, and Mozzarella Sourdough Bread My recipe has an attractive appearance because it includes a deep score of the loaf, separating it into eight slices. The rustic bread is tearable and great for dipping into soup. It’s packed with flavor: there is enough basil and garlic that the dough turns greenish before it’s baked. The tangy notes from sourdough beautifully complement the herbs.
By Andrea Lawrence2 years ago in Feast
An Ode to the Flavours of Rhodes
I write this as the sun shines. The blades of grass that are ankle-high on my lawn shimmer as the wind ruffles through them in swirls. They look like they are watching an erratic tennis match. From here, in my kitchen, it is tempting to imagine sitting amongst them, perhaps with a bowl of strawberries and cream on my lap. But then, a big, dark, blooming cloud sashays across and blocks out the sun, stealing the shimmer of the grass and the golden light from my patio window. Cold drops down like the blade of a sword, and I remember that I can't sit on the grass because the earth beneath it is soaked with months of rain and that if I wanted to enjoy the warmth of the outside, I would need thermals to see the distance. The swing in temperatures going on today is verging on violence
By Caroline Jane4 days ago in Feast


Comments
There are no comments for this story
Be the first to respond and start the conversation.