
How to Make Espresso Without an Espresso Machine
3 easy methods for making the perfect cup of espresso at home


The little cup of espresso and the drinks that rely on it, such as the cappuccio and lattes, are ever popular in coffee shops around the world. However, the powerful, dark shot of espresso coffee has remained less popular among home and office brews, as traditional espresso machines are less convenient. They are simply to large, expensive and loud for the average home or workplace.
For coffee lovers however, the good news is that there are multiple ways to make a very good approximation of an Espresso at home.
What is Espresso?
The characteristics of Espresso coffee are a thicker body, with a higher concentration of dissolved and also suspended coffee solids than regular coffee. These include oil droplets which not only provide the creamy taste but also aromas that can be lost in filter coffee. Together with increased suspended solids, this means a smooth, intense flavour with a higher caffeine content per volume than most other coffee beverages.
What beans do you need to make an Espresso and how do you grind them for the perfect brew?

Espresso coffee is most typically made from Espresso roast where beans are roasted to a much darker finish. Longer roasting times make these beans more porous than other coffee beans which increases the available surface and ability to release flavour and aroma once ground. You can experiment with different roasts, including other strong roasts to get the flavour you prefer at home.
Once you have selected your beans, it is important to achieve the correct grind for Espresso coffee. This grind has to be very fine (although not fine enough to block your filter!). The fine coffee grind slows the water as it penetrates throught the coffee, as well as providing more opportunity for flavours, aromas and oils to be released into your coffee.
You can easily grind your beans at home. While this is possible in a hand grinder, the perfect fine grind is hard to achieve unless you have arms like the Norse god Thor! Instead, use an automatic coffee grinder which allows you to achieve a regular, predictable grind. You will be able to select your preferred level of consistency which should look like very fine caster sugar.
While most coffee lovers prefer to grind their beans as they need them, you can also store them in an airtight container away from light, moisture and heat.
How do you make an Espresso in an AeroPress?

What is an AeroPress?
An AeroPress is the perfect way to make coffee or espresso relatively quickly, especially because the process leaves the equipment relatively easy to clean. The AeroPress is small and compact, perfect for making just the amount of coffee you need if you are on your own.
The AeroPress is a relatively new addition to the range of devices used in coffee making, but it has quickly gained popularity. With a short brewing time, it can achieve the same concentration as an espresso and lower acidity than drip coffee. This can make for a smoother flavour and a brew more suited for drinking black, rather than with creamer or milk.
As the AeroPress presses the water through a layer of coffee grinds, it is similar to traditional ways of making espresso where hot water is forced at high pressure through finely-ground coffee beans, although an AeroPress does not reach the pressure used by espresso machines.
Lastly, as the AeroPress is made from lightweight plastic and is relatively small and compact, they have become popular for travelling as well. While currently, AeroPress uses a BPA free plastic, older models do contain BPA. They have been tested to show that no BPA leeches into the brewed coffee, however.
What else do you need?
Aside from your AeroPress, you will also need the correct paper filters for it. Some of those will be included with the AeroPress when you first buy it, but they are easy and cheap to replace.
You will also need the espresso coffee beans of your preferred roast and a grinder. Remember to use a grinder that will allow you to achieve the correct and fine grind needed for espresso! As the AeroPress easily makes a small amount of coffee and cleans quickly, this is the perfect opportunity to experiment with different roasts to compare them and find your favourite. A different flavour each time will make your coffee experience more fulfilling, even on a regular Monday morning!
You will need an electric or stovetop kettle as well as a water thermometer . While you may just pour the water straight from the kettle into your mug for all your other hot drinks, for the perfect coffee it is important that you can measure the temperature. While most coffees are brewed at 205F (96C), for an AeroPress you can experiment with temperatures between 185-205 F (85-96C).
Lastly, you will need a sturdy mug. An AeroPress will dispense your coffee or espresso directly into your mug, so make sure your mug is stable and will hold up to some pressure.
How to make an espresso with an AeroPress?
There are two ways of making coffee with an AeroPress. The regular way is the most common and most straight forward. However, some baristas and coffee drinkers prefer the inverted method, although this is more tricky to execute safely and without a mess.
The inverted method is less suitable for espresso coffee, as it traditionally has a longer steep time. However, it is a popular way of brewing a good cup of coffee and worth a try! The brewing process is more similar to that of using a French Press, although the water is still pressed down through the coffee and a filter at the end of the process.
Traditional method:
- Heat up your water and grind your beans to a fine consistency. The exact amount you need depends on the strength and amount of coffee you want. To start with, you can use about 2 tablespoons (1oz) of coffee for a double shot of espresso.
- Place a filter in your AeroPress drain cap and put the cap back on the AeroPress. Then place the chamber with the attached filter cap onto your mug. The filter side points downwards towards the mug. Remember that you will be applying pressure through the filter onto the mug so make sure your mug is on a flat, stable surface and will hold up to some pressure!
- Add your coffee grounds to the chamber and press them down into a smooth “puck” of coffee.
- Add ½ cup (4 fl oz or 120ml) of hot water (for a double shot of espresso). Make sure it is at an optimal temperature. For an AeroPress, that can be between 185-205 F (85-96C). Quickly stir the mixture in the chamber, as some of the grounds and CO2 bubbles will rise to the surface.
- Leave the mixture to brew for around 30s. An espresso is a quick brew, compared to a cup of black coffee which you might leave to brew for up to 60s. This is the time where the flavours are extracted. As this time is pretty short, a fine grind is needed for an espresso to make sure you get the optimal smooth coffee flavour. Depending on your preference, you can also experiment with the amount of time you leave your coffee to steep to achieve your optimal flavour.
- After this time, take the plunger and gently insert it into the AeroPress. Press it down with the palm of your hand. You will feel resistance, but keep pressing down gently and consistently until you have forced all the water through the filter and into your mug.
- Carefully lift the AeroPress from your mug, taking care to let any last drips fall into the mug to avoid any mess! Simply clean by removing the filter and coffee grounds and washing the AeroPress.
Inverted method:
- Combine the plunger and chamber, without pressing the plunger down. Once the plunger is securely in place, turn the AeroPress so that it rests on the plunger and the open filter-side is facing you.
- Add the grounds and heated water. You can use the same amount of water and coffee grounds as for the traditional method, however, for this method it is best to keep the water temperature at the ideal 205F (96C). For the best flavour, some baristas recommend initially submerging the coffee grounds in a small amount of water for 30s before adding the rest. This might not be ideal for espresso due to the short steeping time, however, you can experiment with timings to find your ideal coffee flavour. Aim for 60s-2min for espresso.
- Quickly prep the filter and cap by placing the filter into the cap and carefully wetting it so that it sticks to the cap. This is not normally necessary for the traditional method, however, for the inverted method, it is important that the filter sticks to the cap. Place the cap with the filter on the top of the AeroPress.
- Place the mug on top of the AeroPress and turn both over so that they are again in the “correct” position. Make sure you keep a tight grip on both to avoid any spillage, especially as hot water can lead to dangerous burns. It might be best to practice this before actually brewing your first coffee this way.
- Press the plunger down to press the water through the coffee and the filter. Clean up the same way as for the traditional method.
How do you make an Espresso in a Moka Pot?
What is a Moka pot?
A Moka pot is a more traditional way of making an espresso-like coffee. They are able to create an espresso-like coffee that is less strong than traditional espresso but still 2-3 times stronger than drip coffee.
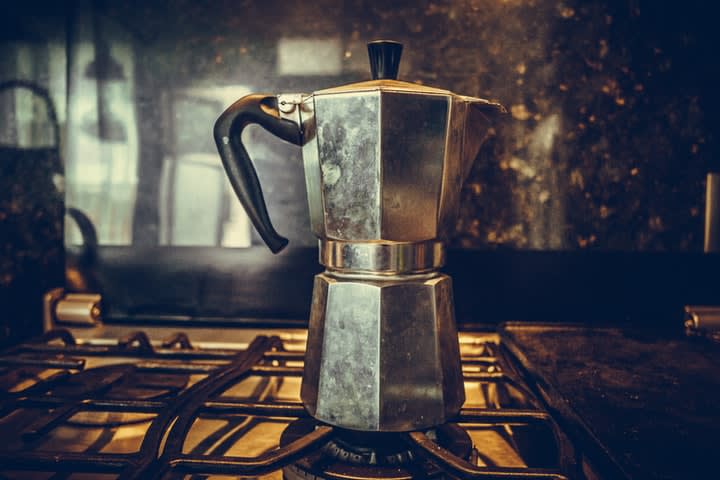
Part of the appeal of a Moka pot lies in the elegant simplicity and old-world charm this method extrudes. It is a method traditionally used in Italy and the typically eight-sided silver pots are visually iconic. They are made from metal, which is safe to heat directly on the stove and conducts the heat well. However, their enduring appeal is also bolstered by their ability to make a more viscous, dense espresso without electricity or more fancy equipment.
A Moka pot consists of a bottom container in which water boils and the steam rises through a layer of finely ground coffee. This method too, therefore, has some direct similarities with a traditional espresso machine, where steam is pressed at pressure through coffee grounds. While a Moka pot lacks the pressure from a traditional espresso machine, you can get a wonderful cup of espresso using one.
What else do you need?
To make espresso in your Moka Pot, you will also need the espresso coffee beans of your preferred roast and a grinder. Remember to use a grinder that will allow you to achieve the correct and fine grind needed for espresso! The exact amount of coffee depends on the size of your Moka pot, so check any instructions you may have received with it. If you don’t have any, start with around 20-22g of finely ground coffee which is an amount suitable for most standard sized Moka pots.
You will also need some water, but for this brewing process, the temperature is unimportant. Using already hot water will make the process quicker and easier. However, as the process involves heating the water, the exact temperature does not matter. Instead, you will need a stovetop on which you can place your Moka pot to boil the water. Ideally, you will be able to easily and quickly control the temperature of this, so gas hobs are perfect.
You can serve your espresso in your favourite mug or an espresso mug, as well as storing it in a carafe to serve separately.
How to make espresso with a Moka Pot?
- Fill your Moka Pot with water. The lower chamber should be filled to just below the valve. Overfilling will affect the quality and taste, so don’t get too excited. If you need more coffee, the solution is to use a bigger Moka pot or several pots instead.
- Insert the funnel onto the lower chamber and fill it with coffee grounds. Remember to use finely ground coffee. While it can be tempting to push the coffee down and tamp it, you should avoid that with a Moka Pot as it is likely to cause too much pressure.
- Screw the upper part of the Moka pot to the base. If you filled the lower chamber with hot water, you need to be careful, as this will have made the lower chamber hot to the touch. Use an oven glove or tea towel to be safe.
- Place the assembled Moka pot on the stovetop. Start with medium heat. The water in the lower chamber will start to boil. Once that happens, the pressure will push the steam through the funnel and into the upper chamber. The water (now coffee) will turn into coffee in the upper chamber. Make sure the handle of your Moka pot faces away from the stove to avoid it becoming too hot to touch. The flames from your gas stove should not hug the base, but be just smaller than the base.
- Carefully watch your Moka pot and adjust the temperature as needed. To find the ideal temperature, you should aim for a gentle hissing and bubbling sound. If the water does not boil, you need to increase the stove temperature, while if the water explodes upwards, you need to turn it down.
- Once foam starts appearing out of the spout, check the top chamber. By now it should be full of coffee and you can remove the Moka pot from the stovetop. Remember that the metal parts of the Moka pot will be very hot so use oven gloves if needed, and place on a heat-safe surface.
- Your coffee will now be a robust, heavy-bodied, slightly viscous espresso. Give it a stir in the Moka pot and serve in an Espresso mug.
- When cleaning your Moka pot, it is important to make sure all parts have been cleaned thoroughly with warm or hot water and have dried completely before putting it back together. As Moka pots are made from metal and you risk the parts rusting or otherwise becoming discoloured if trap moisture in the seams. Remember to also clean inside the inner funnel. A properly cleaned Moka pot can last you decades.
How do you make an Espresso in a French Press?
What is a French Press?
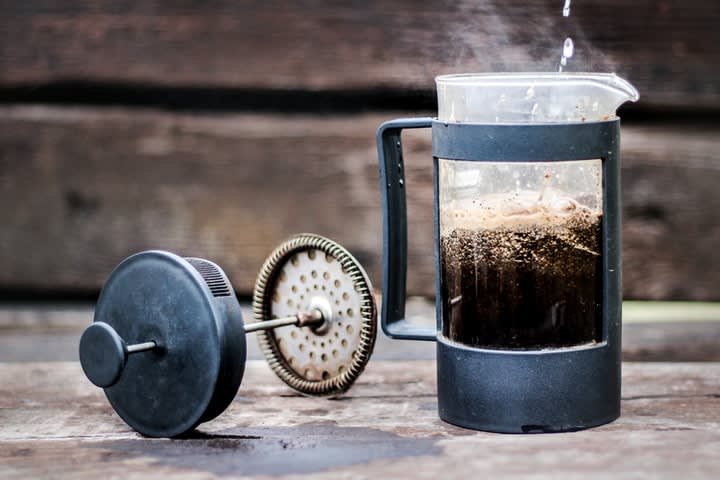
Most coffee drinkers will already have a French Press. It is one of the most common ways to make coffee from grounds, especially for those with little space and without drip coffee makers. French Press coffee is smooth and indulgent and rich.
Using a French Press is easy and requires little oversight, although the brewing process can take a while. The process works by simply brewing the coffee by combining water and grounds, before pressing the grounds towards the bottom, leaving the coffee to be poured.
This makes the process of making espresso using a French Press more different to that using a traditional espresso machine. However, a French Press is one of the most common coffee makers, as well as being one of the easiest. Therefore, for many coffee drinkers, this is the method requiring the least new equipment and no new skills.
Most French Presses are made from borosilicate glass, which means that they are more resistant to thermal shock than regular glass. This makes it safe to pour hot water directly into it. However, stainless steel and stoneware or ceramic French Press carafes are also popular for a more elegant look. Even plastic can be used to make them, as long as it is BPA free. This range of options means that for this means of making espresso, you can also take into consideration your style and find one to suit your kitchen, as well as finding one to match your needs and budget.
What else do you need to make espresso in your French Press?
These instructions are based around an 8-cup French Press, one of the most common sizes available.
To make espresso in your French Press, you will also need the espresso coffee beans of your preferred roast and a grinder. Remember to use a grinder that will allow you to achieve the correct and fine grind needed for espresso! You will need about 28g (1oz) of coffee grounds for every 1 cup of water.
You will also need an electric or stovetop kettle for heating the water. Using a French Press, you can use water just after boiling. For most methods of brewing coffee or espresso, around 205 F (96 C) is the ideal temperature and the same holds true for the French Press. Therefore you do not need a kitchen thermometer.
How to make espresso in your French Press?
- Grind your coffee beans very fine. You will need about 2 tablespoons (28g or 1oz) of coffee grounds for every 1 cup of water. This will ensure the strength of your coffee. Add to the required amount of coffee grounds to your French Press after removing the lid and plunger.
- Heat your water in your electric or stovetop kettle. Once it has boiled, leave to stand for 15-30s. This will allow the water to cool to just below boiling. There is no need for a thermometer but if you do have one, the ideal temperature is 205 F (96 C).
- Add a few splashes to the French press. This process allows the grounds to bloom, which releases oils and aromatics. You need to wait only a few seconds for this.
- Add the remaining water to your French Press. This will cause the grounds to rise and suspend in the liquid. Don’t stir it as that can cause the grounds to fall out of suspension. The grounds will naturally rise and spread out in the best way for the extraction of the flavour.
- Close the lid but keep the plunger up. Then, let your coffee steep. You can experiment with the time to get your ideal flavour and strength. A good starting point is 4 minutes of steeping time. If you shorten this time too much, you will risk a weak, watery coffee while brewing it for too long can risk a bitter taste.
- Press the plunger of your French Press down halfway. You should press slowly and steadily and you will encounter some pressure. Once you have plunged to the halfway point, raise the plunger again fully before pressing it down again fully.
- You can now pour your coffee into your mug. If you wish to keep it for longer, you can also pour it into a serving pot to halt the extraction. While the coffee grounds are separated from the coffee by the plunger, they do still release further taste and you can risk the coffee becoming increasingly bitter by storing it in the French Press itself.
- To clean your French Press, first rinse out any coffee grounds stuck to the bottom. You can then add some hot water and use the plunger to agitate it. This will remove most oils and coffee stains. You should still make sure to use a brush and some baking soda or other cleaning material regularly to avoid residues building up and occasionally you should disassemble the plunger and filter to avoid any grounds getting stuck in the fastenings.
Espresso at home? Do it!
None of these ways exactly emulate the traditional way of making espresso by pressing steam at high pressure through a layer of finely ground coffee. However, some of the mechanisms can be emulated at home.
For example, the AeroPress allows you to press hot water through a layer of ground coffee, which helps avoid bitter notes from long brewing times and creates a smooth, flavourful cup. The MokaPot also emulates espresso brewing mechanisms by letting the steam rise through a layer of fine coffee grounds, which creates a thick, creamy brew. Even with the popular French Press, you can create a flavourful, rich espresso by using the right beans and brew times without having to buy extra equipment.
Experimenting with different brew times and different coffee beans using just these three simple methods will help you achieve YOUR perfect cup of espresso at home. Give it a go now!
About the Creator
Keep reading
More stories from Sam Winkler and writers in Feast and other communities.
10 Things to Pack in Your Hospital Bag for Expecting Moms
The birth of your baby is one of the most important days of your life and you will likely be both excited and anxious about giving birth. For many new moms, giving birth will be their first extended hospital stay. Even for those who have given birth or otherwise had to stay in hospital before, it can be difficult to anticipate what you will need while there.
By Sam Winkler4 years ago in Families
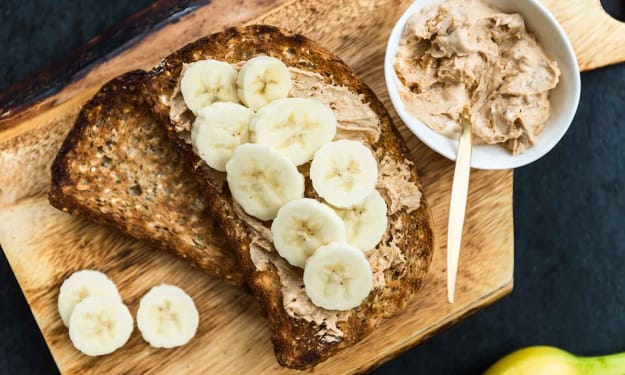
10 Healthy Breakfast Recipes to Kickstart Your Day
We've all heard it before: breakfast is the most important meal of the day. Yet, in our fast-paced lives, it's all too easy to skip breakfast or grab something less-than-healthy on the go. But what if I told you that starting your day with a nutritious breakfast doesn't have to be complicated or time-consuming? In fact, with the right recipes, you can whip up a delicious and healthy breakfast in no time!
By Arshad Meccia day ago in Feast
Best Air Fryers To Buy Right Now
Nowadays, kitchen appliances tend to evolve quickly. Presently, air fryers have become a game-changer. They offer healthier options compared to other frying methods, without having an effect on taste or texture. Among the many options in the market, there are certain ones that standout, like the Ninja Foodi 6-in-1 8-qt. (7.6L) 2-Basket Air Fryer DualZone Technology, the Cosori Proii Air Fryer Oven Combo, and the Chefman TurboFry Touch Air Fryer. These specific air fryers have drawn attention for their amazing features.
By Michael Tomasabout 22 hours ago in Feast
In The Blink of Her Eye
Time itself bent and morphed, allowing Shannon the precious seconds needed to see and adjust to the disaster unfolding in front of her. Each frame showed minute details she would have missed had the clock not slowed down until she heard every click of the hands as they swept toward the end of everything. If only she was being melodramatic...
By Lisa VanGalen2 days ago in Fiction


Comments
There are no comments for this story
Be the first to respond and start the conversation.