
Grill Master Hacks: How To Make Charcoal Grilling Way More Fun
Here’s some quick steps to show you how easy it is to use the Kick Ash Basket


I have been using the Kick Ash Basket™ products since 2015 when I first met its creator, Chad Romzek, at Eggtoberfest. During this event held in Stone Mountain, GA, I was first introduced to the product and its benefits. This was the first generation basket and we were all blown away by the added airflow that it provided in our ceramic grills! Chad had provided a few so we immediately added the baskets to every Big Green Egg grill we could.
One of our dishes involved frying, so you can imagine how much this helped. As the spectators came by our tents they would notice the Kick Ash Basket™ and wonder what it was for and how it worked. Most kamado owners only knew one thing; You have a cast iron grate full of holes in the bottom and you stir your ash and charcoal with a metal rod until hopefully most of the ash makes it through the tiny holes. Minds were stretched that day for sure. Chad sold out of every Kick Ash Basket™ that day and we all made sure we had ours on the way! The Kick Ash Basket™ was the first of its kind to market and has been copied by other companies. However, it still remains to be the best and most efficient basket out there.
Once receiving my new Kick Ash Basket™ at home I tossed the cast iron grate below and got to work promoting it on Instagram. We all did. The brand exploded and it was everywhere! We made sure to tell all of our friends as well. I also visited a few local retailers to see if they were carrying it yet. Still to this day when I see people ask about the one thing you should get for a new grill, I tell them about this product.
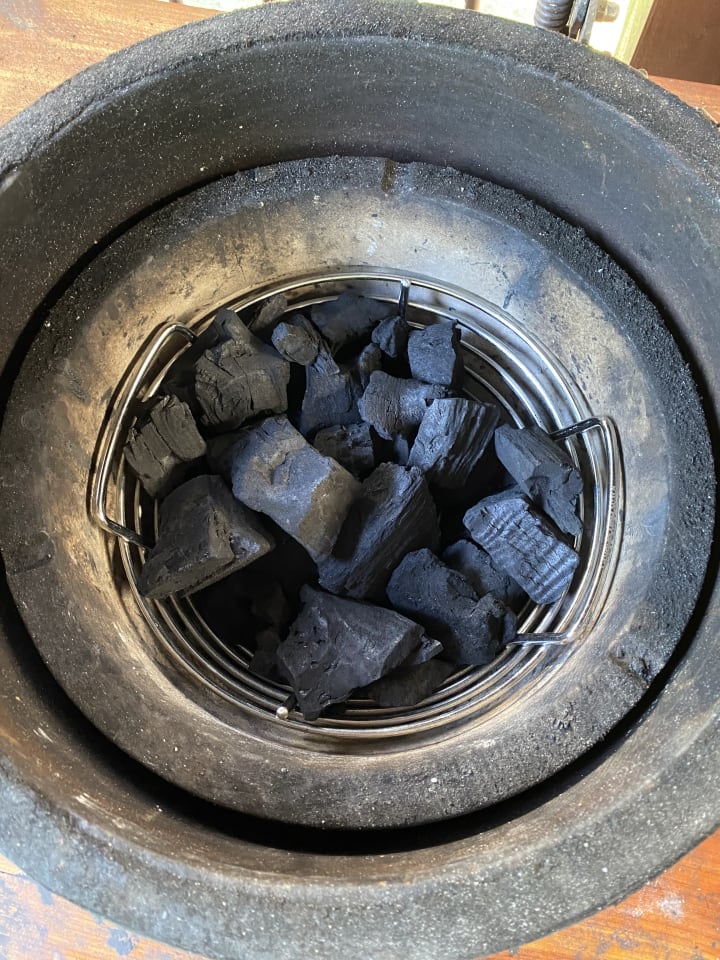
The idea of the basket is super simple. The day after you grill something and the coals have cooled, all you have to do is pick up the basket and give it three or four good shakes to remove the excess ash. You can also dump the hot coals into a metal container or something that can handle the heat if you’re tailgating, allowing for a quick way to cool down your grill before the game.
After a few years, Kick Ash Basket™ came out with a new, stronger version of the basket with heavier gauge wire. This new version held up much better under the high heat you can obtain in a kamado grill. They also introduced the baskets for different grills. Around this same time, the Kick Ash Basket™ Grate Hook and Super Lifter came out. These were yet again another game changer. The Grate Hook was for lifting and then hanging a hot grate for the grill and the Super Lifter was great for heavier components like a Big Green Egg Plate Setter or ceramic half moon pieces used for heat deflection. I use my Grate Hook nearly every day. Shortly after the hooks came the Adjustable Dividers. These allowed you to separate the charcoal and allow two different zones. Having more than one zone allows you to cook something without a direct flame below it like a brisket or short ribs that require longer cooking times to become more tender.
One of the newer inventions from Chad and crew is the Kick Ash Can™. This allows you to easily remove the ash below the basket and dump it in the trash without having to scrape the bottom vent with the metal ash rod or fire up the shop vac. They come in handy and they have one for nearly every kamado. I am always impressed by how they come up with these products we didn’t know we needed until we saw them and got our hands on them.
As I accumulated more and more grills, I had to make sure I picked up a basket for each as well because personally I think it’s a required accessory for every grill. Over the years, Kick Ash Basket™ has created a basket for nearly every type of grill out there!
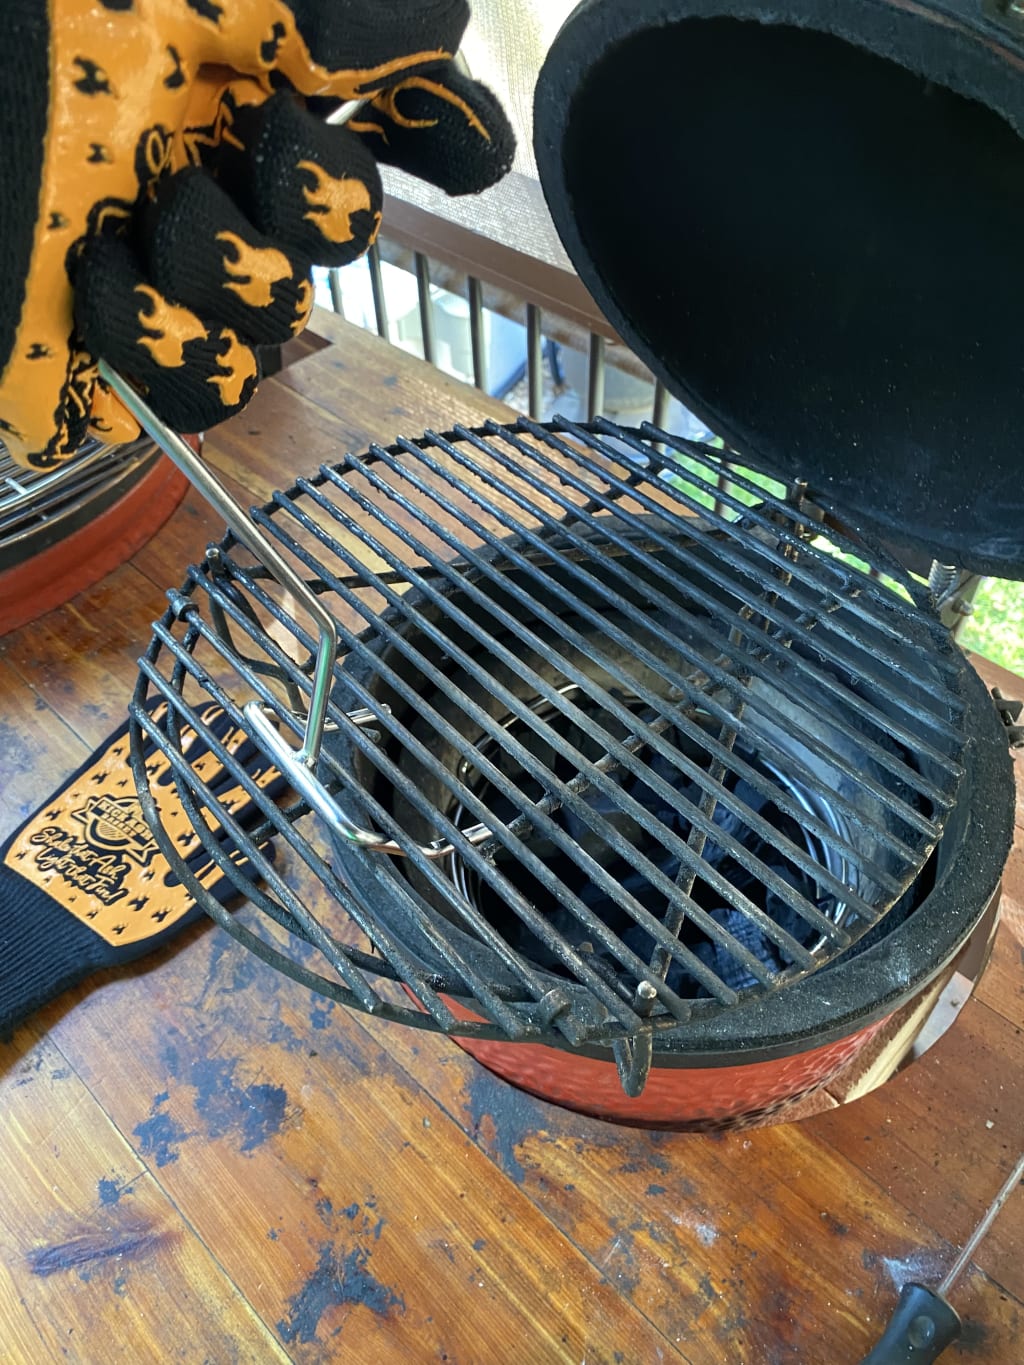
Here’s some quick steps to show you how easy it is to use the Kick Ash Basket™!
1. Once you are ready for maximum air flow and convenience, remove the charcoal from your grill and vacuum out your grill. If you have a cast iron grate in the bottom, it can be removed.

2. Add your shiny new Kick Ash Basket™ to the fire bowl or bottom of the grill and fill with charcoal. I typically try to keep the level below or right at the top of the basket. For longer cooks, like a low & slow brisket or BBQ, more charcoal is needed.

3. When your cook is complete and the coals have cooled, it’s time to SHAKE THAT ASH!

The Kick Ash Can™, Grate Tool, and Charcoal Gloves
The Kick Ash Can™ is another super easy product to use. Repeat the same steps as before and remove the charcoal and vacuum out of the kamado. Place the can in the bottom and start collecting some ash! When it begins to get full and has cooled you can dispose of the ashes.
HAPPY GRILLING!
About the Creator
Tim Shelburn
Father, Kamado Joe, recteq, Meat Church, Team FOGO, Alfa Ovens, Beefer, Cambro, backyard grill master & influencer.
Keep reading
More stories from writers in Feast and other communities.
Discovering Cafe In Mukteshwar: A Cozy Retreat Amidst the Himalayas
Nestled amidst the serene beauty of the Himalayas lies the charming town of Mukteshwar, a haven for nature enthusiasts and seekers of tranquility. Amidst this picturesque landscape, one gem stands out - Cafe de Mukteshwar. This quaint cafe not only offers a delightful culinary experience but also serves as a cozy retreat for travelers seeking solace in the lap of nature.
By Rudrapratap Thapar4 days ago in Feast
A New Beginning
Tony couldn’t sit still, crossing and uncrossing his legs, trying to calm his trembling hands as Clara stood at the office window deep in thought. The airline ticket in his shirt pocket moved to the beat of his heart¬– each beat bringing back the nightmare causing memories of the words he’d spoken over ten years ago. Thanks to Clara he’d finally gained the courage to buy that ticket.
By Gerald Holmes5 days ago in Fiction


Comments
There are no comments for this story
Be the first to respond and start the conversation.