
Early Summer
Canning Garden Strawberry Jam
After the rhubarb, asparagus, and salad greens of late spring, summer begins in earnest in the garden. Next in line after that trio, there are the strawberries of early summer.
Strawberries remind me of my maternal grandmother who had a 40-foot row of them at the edge of her expansive vegetable garden. After school let out for the year, we would help pick them alternate mornings during our summer visit.
Eaten fresh for breakfast, with homemade shortcake and whipped cream, and savored in fall and winter as jam on toast, strawberries are one of the quintessential members of the summer fruit garden. The plants are easy to grow, produce in a relatively short time frame, and require just a little care once established.
Grandma made jam, and most people in the UP, the Upper Peninsula of Michigan, knew who she was. She sold it by the side of the road later in life and made most of her income from it. People would drive for hours to buy it.
She saved glass jars from grocery store items and sealed her jam with a layer of paraffin wax. This practice is somewhat frowned on by the USDA today. She also canned jam using the current accepted water bath canning method.
The year I had completed 9th grade, my sisters and I stayed with her the entire summer while my parents looked for a new house in a new state. Trying to find an occupation to keep three teenagers busy in rural Michigan, she used that summer to teach us how to make pies and jam, starting with strawberry jam. From then on, my sisters and I made jam using any available fruit every year.
My row of strawberries is considerably smaller than hers, but it still produces enough to make several jars of jam each year. Unlike my grandmother's postwar generation, I have the luxury of making it for fun.

Jam is easy to make, flexible as to recipe, and requires just a few ingredients and little specialized equipment if the result is to be canned rather than refrigerated or frozen. The three main ingredients are fruit, a source of pectin (a thickening agent derived from apples or citrus fruit rinds), and a sweetener such as sugar, honey, or fruit juice.
I prefer to grow my fruit for the thrill of economy and control over how it is grown. I started with about a dozen plants. These plants send out runners forming new plants each year that increase the size of my plot. I don't use herbicides or pesticides in my garden.
If using purchased fruit to make your jam, I recommend using organically grown fruit or fruit purchased from a trusted source. The commercial strawberry crop is one of the most heavily treated with herbicides. If a plant or insect won't live through an application, to my mind, it follows that my health will most likely be affected in some way as well.
I recently began to use pectin which requires little to no sugar and have made small experiments substituting various types of juice. I have settled on using the low-sugar version. It calls for 1 1/2 cups of sugar or less to 4 cups of prepared fruit rather than the 7 cups of sugar in some traditional pectin recipes.
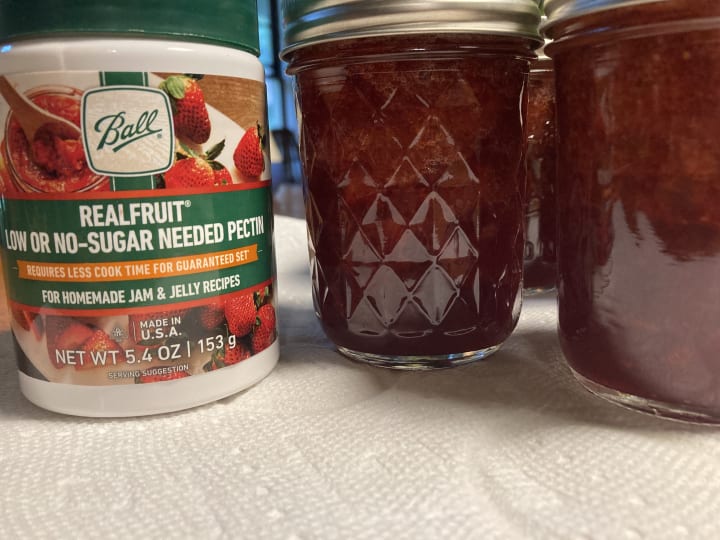
The amounts in the recipe outlined below represent 3 times the amounts given on the label of the Ball RealFruit Pectin product I used.
The yield is 5-6 half-pint jars. The pectin is available on line and at many grocery retailers. I prefer the jar of pectin to the pre-measured packets because I can easily match the amount of pectin to the amount of fruit I have available.
Ingredients and Instructions

The entire process of jam production takes me about two hours.
Start by preparing half-pint (1 cup) jars, lids, and rings.
Inspect each jar for chips on the rim or cracks in the glass and discard damaged ones. The jars can be run through the dishwasher or submerged in a pan of water and boiled. Canning jars are reusable. I try to encourage people to return the empty jars to me if they are the recipient of a gift, since the cost of buying new jars each year adds a considerable amount to the cost of production. I am thrifty.
The lids should be new. They are single-use only. The rings can be reused over and over until they become rusty or damaged in some way.
The jars should be clean and hot when the finished jam is ladled or poured into them. I try to prepare one extra jar and lid assembly than required. Often in a recipe, you will end up with one more jar of jam than allowed for. Alternatively, there will be some extra jam that you will refrigerate and eat in the next few weeks.
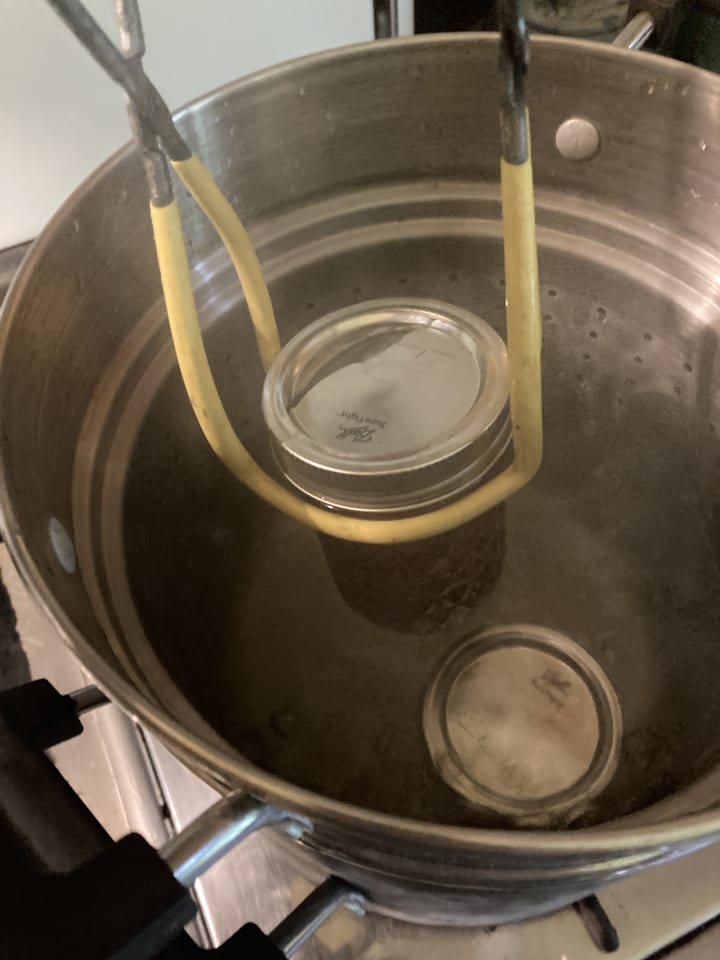
Since I make small amounts, I use a pasta pot with a removable liner as a substitute for a canner. Keeping your jars off the immediate bottom surface of the pan is important to prevent the jars from breaking during the canning process. If you don't have a pot that matches this description, canning racks are available separately for a relatively inexpensive investment.
Ingredients and assembly:
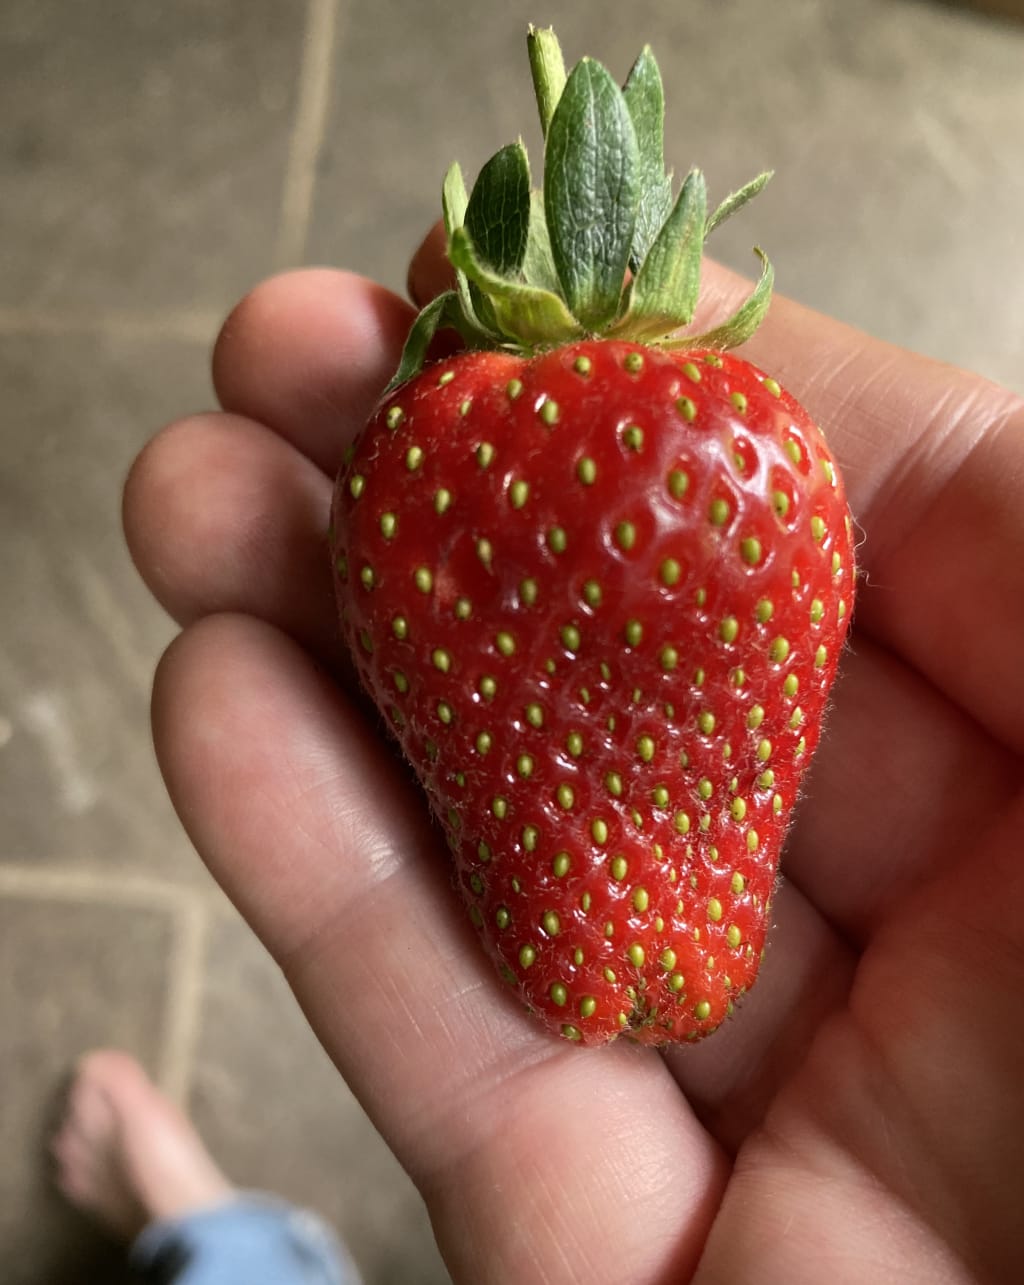
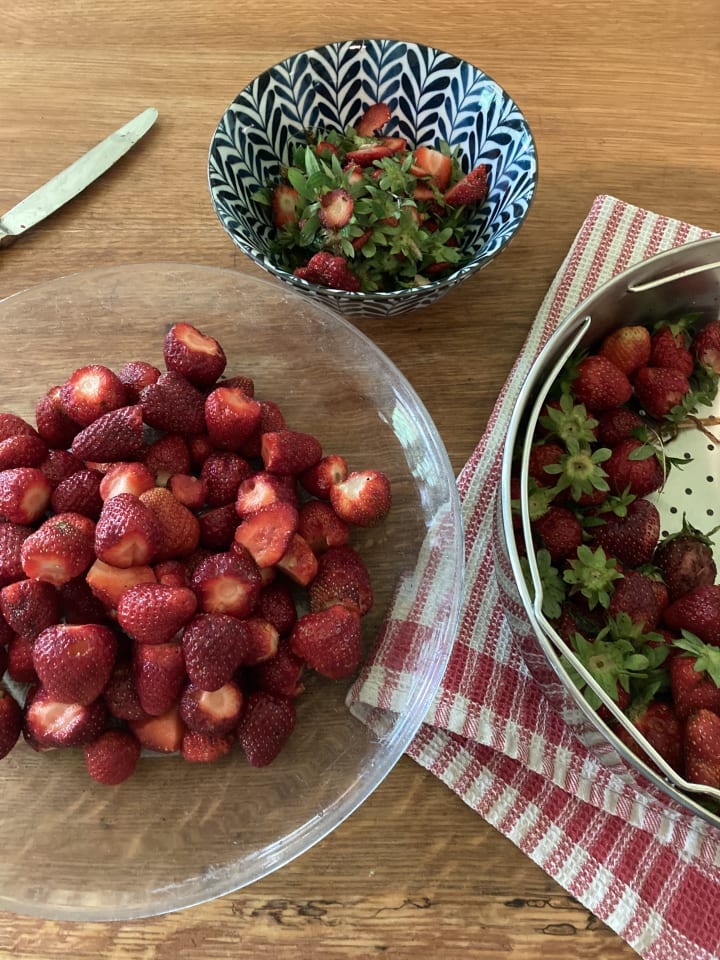
4 cups prepared strawberries- The strawberries should be ripe, fragrant, and still shiny and firm. Dull and dark fruit may still be edible but is too mature for jam. Prepare the fruit by hulling and mashing it with a potato masher. The goal is large irregular chunks of fruit.
Pour the fruit into a stainless steel saucepan large enough to prevent the fruit from boiling over the edge. For this size recipe I use a pan that can accommodate one gallon.

1 cup of water or fruit juice- I use water, but I can imagine strawberry juice or a clear juice such as apple or white grape juice. Add the liquid to the prepared fruit and stir it in.
4 1/2 Tablespoons of Ball Real Fruit Low/No Sugar Needed Pectin (4 Tablespoons and 1 1/2 teaspoons). If using a different brand or type of pectin, follow the instructions and quantities indicated in the packet.
Sprinkle the pectin over the prepared fruit and liquid and heat to a rolling boil while stirring. Gentle but continuous stirring is essential to keep the jam from sticking to the bottom of the pan. A rolling boil means the mixture is visibly boiling even though you are stirring diligently.

1 1/2 cups of sugar. The amount of sweetener is negotiable when using low/no sugar pectin. I use the entire amount indicated on the package, but other substitutions are possible. These include honey or fruit juice. Use the instructions on the label if substituting ingredients.
Stir in the sugar and bring the jam back to a full rolling boil while stirring gently but continuously. When the jam reaches this point, you will see some foam. Again, you won't be able to stop it from boiling by stirring it. Count to 60 seconds while stirring, then turn off the heat.
Your jam is nearly ready to add to the jars.
Let it sit for a minute while you complete your jar preparation. Then gently skim any foam off the top with a spoon and save it for sampling on toast or a cracker. I promise it will be delicious.

Filling the Jars:
Ladle or spoon the finished jam into the jars. Leave space at the top of the jars for the vacuum seal. The rule for all canning is to only fill the jar to the large glass rim at the bottom of the cap. This point is about 1/2" below the top of the jar.
If the jar is too full, it will be in danger of breaking during the canning process; if too empty, there will be too much air stored with the finished product. If the last jar is half full, store it in the refrigerator when cool and enjoy the fruits of your labor over the next few weeks.

Wipe the rim of each jar with a clean, damp paper towel or cloth to remove food that would prevent a clean seal from forming. With tongs, retrieve the lids from the pan they have been sterilized in and place them on the jars, label facing up. Screw on the rings until they stop turning. The rings should be screwed firmly onto the jars, but not over-tightened.

Canning the Jam
After closing the jars with the lids and screwing the rings in place, lower the hot, filled jars into a pot of boiling water. Avoid crowding the jars together to avoid breakage. If they won't all fit in the pan, make separate batches.
If you don't own a good, solid-walled canner, a tall pot with a liner such as a pasta pot or a pan with a rack that allows the jars to remain off of the bottom surface works best. The pot must be tall enough to allow 1-2" of water to cover the top of the jars.
When jars are settled directly on the pot's bottom surface, you risk breakages in the water bath. If you don't have a rack that will pair with a pot, canning racks are sold inexpensively and separately from a canner.
The one tool I recommend purchasing is a set of canning tongs. These have rubberized or silicone grips designed to grip and lift the jars in and out of hot water. You will probably only need one set of these in your lifetime. My tongs are over 30 years old.

Bring the water back to a boil. Keep the water boiling for 10 minutes for 1/2 pint jars. The current recipe I use calls for the jars to sit in the water for another 5 minutes before removing them to a cloth or paper towel for cooling.
As they cool, you will hear the popping sound of jars sealing. This sound is music to every home canner's heart and brings a smile at each "pop" for the 1-minute up to 1-hour time frame as the jars cool.

Allow the jars to stand 24 hours after canning, then write the month, year and contents on the lid using a Sharpie or other indelible pen. Over time you will forget what is in the jars and when you made it.
The screw-on rings of the lid assembly can be removed for reuse at this point, or left on the jars. Do not give in to the temptation to screw them on tightly, most likely the jar will break when you attempt to open it later.
Store your jars in a cool, dark place. Refrigerate the jam after opening.
As you take the jars out in the fall and winter, you will remember your garden, a time spent cooking with family or friends, or the sounds and scents of summer.
I remember my grandmother, my sisters and the time we spent picking strawberries and cooking together.

**************
Thanks for reading my words. I hope you have an opportunity to try this recipe.
I write for personal enjoyment, but I hope you will consider leaving a "heart", constructive comment, or tip. All feedback is appreciated to aid my quest to become a better writer.
I can also be found on Instagram @maisonette_textiles where I hold forth on various topics and showcase photos of my garden.
About the Creator
Natalie Wilkinson
Writing. Woven and Printed Textile Design. Architectural Drafting. Learning Japanese. Gardening. Not necessarily in that order.
IG: @maisonette _textiles
Reader insights
Outstanding
Excellent work. Looking forward to reading more!
Top insights
Compelling and original writing
Creative use of language & vocab
Easy to read and follow
Well-structured & engaging content
Excellent storytelling
Original narrative & well developed characters
Expert insights and opinions
Arguments were carefully researched and presented
Eye opening
Niche topic & fresh perspectives
Heartfelt and relatable
The story invoked strong personal emotions
On-point and relevant
Writing reflected the title & theme
Keep reading
More stories from Natalie Wilkinson and writers in Feast and other communities.
Japanese breakfast tradition
The rising sun paints the Japanese sky as a symphony of flavor awakens the senses. This is the magic of the Japanese breakfast, a meticulous dance of ingredients and textures that nourishes the body and soul. More than just a meal, it's a cultural touchstone, steeped in tradition and reflecting a deep respect for nature and seasonality. Let's embark on a journey to explore the essence of the Japanese breakfast.
By Moharif Yulianto5 days ago in Feast
Victors of the Whispering Woods Challenge
Unearthing the Whispering Woods In the heart of the mystical Whispering Woods lies a challenge that has mystified adventurers and seekers for generations. The Whispering Woods Challenge is not just a test of physical prowess but a journey of the mind and spirit. Amidst the rustling leaves and the haunting whispers of the ancient trees, champions are forged.
By Paramjeet kaura day ago in Feast
My To Be Read List
I have been taking some time away from writing. I haven't forgotten about Vocal, the truth is I just have been too busy pursuing other things to write online and honestly, my little family and I just had a really hard month between the flu and a weird eye infection/cold circulating our house. I'm currently sipping some warm peppermint tea because my throat is sore.
By Chloe Rose Violet 🌹3 days ago in BookClub


Comments (2)
Good step by step guide to canning strawberries. Preserving food is a lost art, isn't it? Your jam froth made my mouth water. :)
Thank you for sharing this. I'll really need that no sugar pectin