
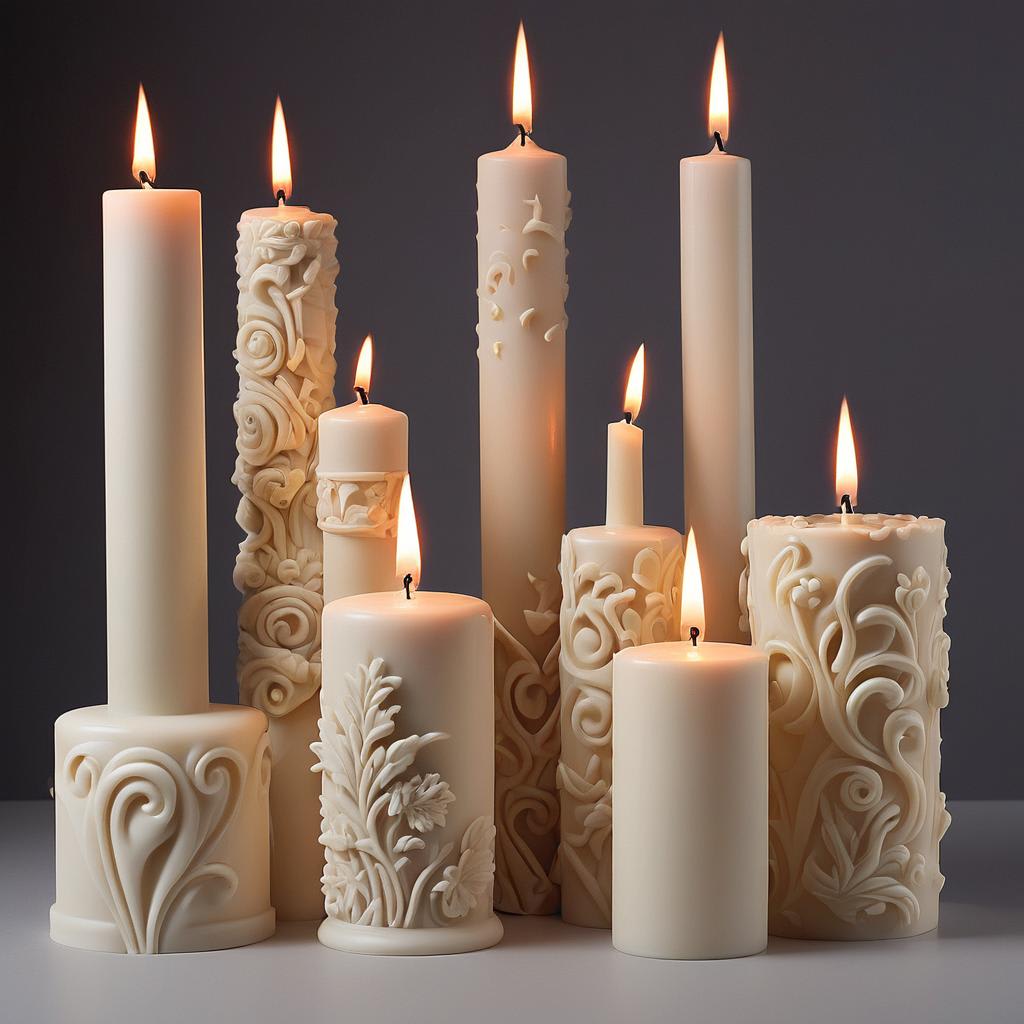
Crafting Beautiful Candles with Latex Molds
Learn how to create stunning candles using latex molds for a unique touch to your home decor or gifts.

Learn how to create stunning candles using latex molds for a unique touch to your home decor or gifts.
Choosing the Right Latex Mold
When it comes to crafting beautiful candles with latex molds, choosing the right mold is crucial. Latex molds come in various shapes and sizes, allowing you to create candles in different designs and styles. Consider the theme or purpose of your candle and select a mold that complements it. Whether you want a simple pillar candle or an intricate shaped candle, there is a latex mold available for every preference.
Additionally, ensure that the latex mold is of high quality. Look for molds that are durable and flexible, as they will make the demolding process much easier. It's also important to choose a mold that is suitable for candle making and can withstand the heat of the melted wax.
Take your time to browse through different options and choose a latex mold that inspires your creativity and enhances the beauty of your candles.
Selecting High-Quality Candle Wax
To create beautiful candles, it's essential to select high-quality candle wax. The type of wax you choose will greatly affect the appearance and performance of your candles.
One popular choice for candle making is soy wax. Soy wax is natural, renewable, and environmentally friendly. It has a smooth and creamy texture that allows for easy pouring and excellent scent throw.
Another option is beeswax, which is known for its natural golden color and sweet honey scent. Beeswax candles have a lovely warm glow and can add a touch of elegance to any space.
Paraffin wax is a commonly used wax that is readily available and affordable. It is known for its excellent scent throw and ability to hold vibrant colors.
No matter which wax you choose, make sure it is specifically formulated for candle making. This will ensure optimal burn time, scent throw, and overall quality of your candles.
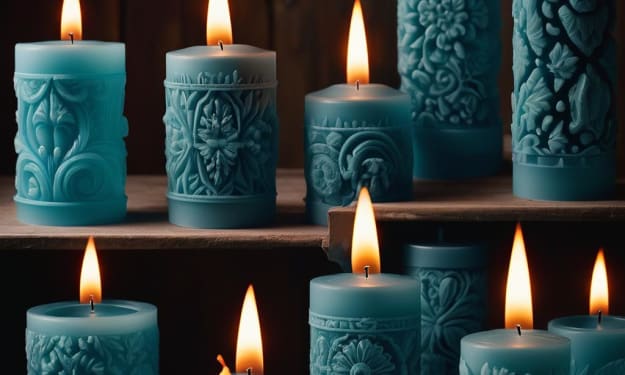
Adding Fragrance and Color
Adding fragrance and color to your candles is a great way to enhance their beauty and create a unique sensory experience.
When selecting a fragrance, consider the theme or mood you want to evoke with your candle. Choose scents that complement the purpose of the candle, whether it's a relaxing lavender scent for a calming atmosphere or a vibrant citrus scent for an energizing ambiance.
There are various ways to add fragrance to your candles. You can use fragrance oils or essential oils specifically designed for candle making. Start by adding a small amount of fragrance and gradually increase until you achieve your desired scent strength.
In terms of color, you can use liquid dyes or color blocks made specifically for candle making. Experiment with different color combinations to create unique and visually appealing candles.
Remember to follow safety guidelines when handling fragrance oils and dyes, and always test a small batch before making a large quantity of scented and colored candles.
Pouring and Setting the Candle
Once you have prepared your mold, wax, fragrance, and color, it's time to pour and set the candle.
Start by melting the candle wax according to the manufacturer's instructions. Use a double boiler or a dedicated candle melting pot to ensure safe and even heating.
When the wax has reached the desired temperature, carefully pour it into the latex mold. Be sure to leave a small space at the top to allow for any potential shrinkage during cooling.
To prevent air bubbles from forming, gently tap the mold on a flat surface to release any trapped air. You can also use a heat gun or a hairdryer on a low setting to eliminate any bubbles on the surface of the wax.
Allow the candle to cool and set completely before attempting to remove it from the mold. This process may take several hours or overnight, depending on the size and thickness of the candle.
Once the candle is fully set, gently remove it from the mold by carefully peeling back the latex. Take your time and be patient to avoid damaging the candle.
Congratulations! You have successfully poured and set a beautiful candle using a latex mold.
Decorating and Personalizing Your Candle
Now that you have a stunning candle, it's time to add some personal touches and make it truly unique.
You can decorate your candle by adding embellishments such as ribbons, charms, or dried flowers. Secure them to the candle using a hot glue gun or a small amount of melted wax.
If you prefer a more subtle decoration, consider using a decorative label or a custom-designed sticker to add a personalized touch.
For a more artistic approach, you can try painting or carving designs directly onto the candle. Use acrylic paints or specialized candle carving tools to create intricate patterns and designs.
Remember to consider the safety of your candle when decorating. Avoid adding decorations near the wick or any areas that may come in contact with the flame.
With your creativity and imagination, you can turn a simple candle into a work of art that reflects your personal style and taste.
About the Creator
Enjoyed the story? Support the Creator.
Subscribe for free to receive all their stories in your feed. You could also pledge your support or give them a one-off tip, letting them know you appreciate their work.
Keep reading
More stories from Digital Barkha and writers in Art and other communities.
Expert Tips for DIY Candle Mold Selection
Understanding Different Types of Candle Molds When it comes to DIY candle making, it's important to understand the different types of candle molds available. There are various shapes and sizes to choose from, including pillar molds, container molds, and novelty molds. Each type of mold has its own unique characteristics and advantages. Pillar molds are perfect for creating standalone candles, while container molds are great for making candles in jars or containers. Novelty molds allow you to create fun and unique shapes, such as animals or flowers. By understanding the different types of candle molds, you can choose the one that best suits your project.
By Digital Barkhaabout a month ago in Art
Tea set by a suffragette
Pankhurst is a name well known to the history of women’s suffrage. Who hasn't heard the name Emmaline Pankhurst, founder of the Women's Social and Political Union (WSPU), an all-women organisation campaigning for the right to vote? The group that helped to achieve the right to vote for women in Great Britain and Ireland in 1918. Some know of her daughter Christabel, both being honoured by the Pankhurst memorial in Victoria Palace Gardens, London, right next to the UK Parliament buildings. Sylvia Pankhurst is notably not included in the monument. Why? Because she split with the WSPU to campaign against Britain's entry into First World War.
By Raymond G. Taylor13 days ago in Art
How to Watch the Kung Fu Panda Movies & Shows in Order
Kung Fu Panda Franchise Overview The Kung Fu Panda series, which began in 2008, has grown into a beloved franchise, grossing over $1.8 billion worldwide. It includes several spinoffs, television specials, and four main films, the latest being Kung Fu Panda 4, released in 2024.
By Olawale Abaire5 days ago in Art


Comments
There are no comments for this story
Be the first to respond and start the conversation.