
How to Register with a Dutch Municipality
Details about this required step for immigration to The Netherlands, plus how to install the important DigiD app!


When you immigrate to The Netherlands, there's a term you'll hear often during your visa process: the Municipality (Gemeente).
The Municipality is like the city you’re going to live in once you move to The Netherlands. Regardless of which visa you're applying for, you'll need to register with the Municipality of the location you're moving to. Since I have experience with the Dutch American Friendship Treaty visa, it's the example I'll be using in this article.
After you’ve submitted your DAFT visa application to the IND, in order to continue further, you need a BSN (a Dutch equivalent to an American SSN). Registering with a Municipality will provide you with a BSN and is necessary to unlock future requirements for your immigration. You have four months from the time you arrived to register with your chosen Municipality.
Aside from your BSN functioning the same as an American SSN, it's important for another reason. You need your BSN to activate what's called a DigiD to be able to make an appointment with the KVK (the third DAFT step). We'll get into the what, how, and why of the DigiD app further down this article after we dive into the details of scheduling your Municipality appointment!
---------
For your Municipality appointment, you will need:
- Your valid proof of identity, such as a passport or identity card
- The stamp of residence endorsement in your passport that you need from the IND.
- Your apostilled birth certificate — my post How to Apostille Your Birth Certificate explains how to do this.
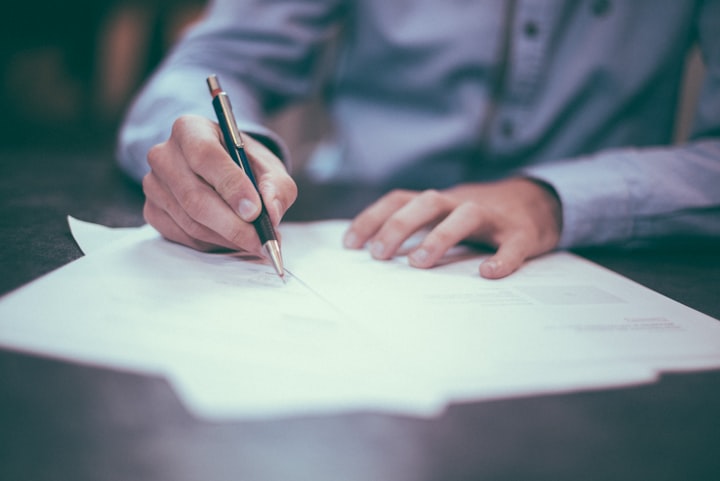
- Every Municipality likely has a different application form they will provide that you must fill out completely before your appointment. It should be given to you in a link through your confirmation appointment email or on their website. You can contact them to inquire about this if you don’t see it in either of those places.
- A written Permission of Residence form filled out and signed by the owner of the household you’re going to register with. You’ll need to attach copies of their passport identification pages as well. I’m confident every Municipality has a different one you can find online! Consent for Lodging Agreement is an example of the one I used.
Scheduling Your Municipality Appointment:
By now you've probably found the website of your city/Municipality through a quick Google search. Good. Every city/Municipality's website is different, so you'll just need to find their instructions for scheduling an appointment. It’s probably a good idea to schedule the appointment with your Municipality after you scheduled your IND appointment. Depending upon the city, it might take a while to get an appointment.
Note: Ideally, you’ll want to meet with the IND first before you meet with the Municipality because you need the stamp in your passport from the IND to show to the Municipality, otherwise they'll need to share information back and forth.
I was able to make an appointment with the Municipality I was moving to online, but you can call them as well. In my situation, online was easier because it was difficult to reach them via phone due to low staff during the covid-19 pandemic.
What to expect at your Municipality appointment:
This is a fairly easy going appointment since your preparation with filling everything out is already most of the work. The Municipality employee just has to make copies of your documents and enter all of your application into their computer. There is no fee you need to pay for this registration.
You can either expect to receive your BSN in the mail the following days after your appointment, or you may get it instantly on the day of your appointment like I did. Although, my Municipality appointment was abnormal, and it wasn’t just because of covid-19 pandemic circumstances...
If you’re curious about my own experience with meeting with the Municipality, you can find it down below, or scroll past it to read about the DigiD app used for accessing Dutch government websites.
------------------------------------------
My personal experience with registering with a Municipality:
Right after I got home from the IND, I was on a motivational high and quickly scheduled my Municipality appointment. Unfortunately, the earliest date for an appointment was September 29th. That was a whole month away from the day I signed up for it! Even with checking daily, it wasn’t like with the IND where there were constant cancellations. I was stuck with waiting and the regret of not scheduling sooner.
September 29th arrived and I was my usual anxious self. When I met with one of the Municipality’s employees, we’ll call them Kind Employee, I was expecting the half hour meeting stated in the confirmation email. Alas, Kind Employee’s computer decided to not cooperate that day and was unable to submit my information during the appointment. They gathered all the documentation required from me and sent me on my way after fifteen minutes.
Kind Employee assured me they’d email me personally when they tried again later that day to enter my application. It was great that Kind Employee automatically reassured me, and a couple of hours later they eased my worries when they emailed me my BSN document.
- The Deadline Clock -
This is a big part of my experience I need to address: do you recall when I mentioned in my IND appointment post how the IND prefers the document collecting to be done within one month under normal circumstances? Well, I received an automatic letter stating they needed everything within 2 weeks.
That was impossible to accomplish with how slow each step was progressing because of the covid-19 pandemic. My partner kept me calm when I tried to reach the IND by phone again, waiting the entire on-hold period each time I called. I’d get automatically disconnected because of waiting too long. You can imagine my panic was overwhelming at this point.
Eventually I was able to talk with an IND representative, and after explaining my situation, I was told I had to call the caseworker assigned to me for assistance. Sigh, fair enough.
Note: If you ever need to know how to reach the caseworker assigned to you, their contact information is on the right side of the 2nd IND letter you’ll receive.
The next day I was able to get in touch with My Caseworker and they kindly gave me an extension for the document collection until October 22nd. I was grateful and ecstatic! I was convinced that it would surely be enough time.
The Deadline Clock had begun to tick.
------------------------------------------
How to get a DigiD
What the DigiD app is, how you install it, and why you need it
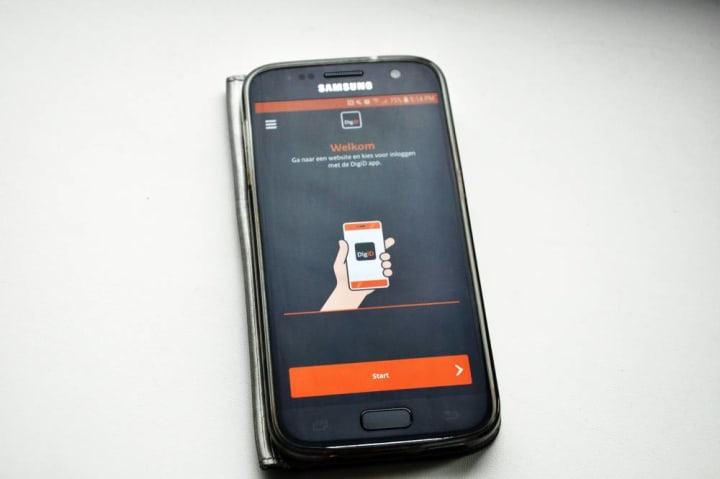
Your DigiD is going to be a necessary app you'll use often during your time living in The Netherlands regardless of the visa you used to move to Holland. It's how you securely access vital Dutch government and healthcare websites, such as:
- Your specific health insurance website
- Mijn IND (My IND - where you can submit documents to the IND digitally)
- KVK Registration
- Mijn Belastingdienst (My Tax Authorities)
- MijnOverheid.Berichtenbox (My Government Message Box - where you can receive your letters from the Dutch government digitally)
- Mijn.toeslagen (My allowances portal)
and more!
Using a phone number:
In order to use the DigiD app the easy way, you'll need a Dutch phone number, whether it's using your own that you obtain or from someone you know. My partner activated one of their old phones for me to use until I could get a new phone with a Dutch number. You might get lucky with not having to buy a new phone if your phone has a SIM card you can just replace, but alas, mine did not.
It's possible to use and activate your DigiD without using a mobile number, but using the app through your phone or even a tablet makes it incredibly easy and faster to use.
Note: I recently learned through my partner's experience with switching from his old phone to a new phone that you need to have your DigiD info transferred to your new device via the DigiD app. Within the app there is an option to make this transfer and then you follow instructions that say something like scanning a QR code with your new phone. This is by far the easiest way to transfer your DigiD info. If you do not or cannot do this task, you'll have to request a new DigiD all over again or contact the DigiD help lines for another solution.
Requesting a DigiD:
First you need to go to digid.nl so you can make a DigiD account and find the application to fill out under their "How do I apply for DigiD?" tab. You'll need your general contact information and your BSN for this.
The next step is waiting! It takes several days to activate your DigiD because valuable pieces of information will be mailed to you, all separately, for security protection.
Once you have everything for activating your DigiD, you can install the DigiD app on your phone and use your activation code through the DigiD app to activate both the app and your DigiD. If this doesn't work or if you're experiencing issues, you can return to the DigiD website to troubleshoot the problem or follow their directions on their activeren page. There's a time limit of 20 days to activate your DigiD before it expires and you have to submit another request.
How it works:
- After you've followed the instructions and established your DigiD, you just open the app and click "start".
- On the website you're trying to access it'll ask for the 4 letter code. Once you enter the code, you click "volgende" (next) on the app and website.
- Next, a QR code will pop up on the website for you to scan with your phone.
- On your DigiD app it'll say "inloggen" (log in) and then ask for the PIN code you chose when you set up the app. You'll have to use this PIN code every time you use the app to access a site.
And there you go, you're in! You've successfully used one of your first Dutch apps. Hang on to these instructions for my next article that you'll be able to find on my Vocal page: registering your business with the KVK.
--------
Hey there! I appreciate you taking the time to read my article. If you found any of this information/my experience interesting or helpful, please give it a like and share!
Check out my other DAFT How-to's linked in this article and on my Vocal page for more information about immigrating from the US to The Netherlands via the DAFT visa!
About the Creator
Nicole Kunefke
Aspiring Fantasy & Horror Writer. Chaotic Night Owl. Freelancer.
The genres I write in are Poetry, Mental Health, and Immigration via my experience immigrating from the US to The Netherlands.
Find me on FB & Twitter: nkunefkewrites
Keep reading
More stories from Nicole Kunefke and writers in Wander and other communities.
Exploring Porto's Uniqueness: A Tapestry of History, Architecture, and Passion
Nestled along the banks of the Douro River, Porto, Portugal, is a city that captivates the soul with its rich tapestry of tradition, history, and passion. From the timeless beauty of its historic landmarks to the modern elegance of its sports stadiums, Porto exudes a unique charm that beckons visitors from around the world. Join us on a journey through the essence of Porto as we explore its iconic landmarks: Porto Cathedral, Dom Luís I Bridge, Chapel of Souls, and Estádio do Dragão.
By Gabriel Gima4 days ago in Wander

Comments
There are no comments for this story
Be the first to respond and start the conversation.