

Using Adobe Lightroom Classic for Wildlife Photography
I’ve been a wildlife photographer for over 30 years, and I’ve seen many photographers struggle with getting their photos just right. It takes time to learn how to use your editing software properly, but you can save so much time if you use Adobe Lightroom!
Lightroom is a photo editing software that lets you edit all of your pictures from one place instead of having to open them up individually on your computer.
This is especially helpful if you’re a wildlife photographer because you can quickly make changes to all of your photos at once. One of the best things about Lightroom is that it’s customizable to fit your own needs.
10 Common Mistakes When Using Adobe Lightroom Classic in Wildlife Photography
- Forgetting to crop your image before making adjustments
- Not using presets
- Failure to use the histogram
- Not using a mask to edit specific parts of the picture
- Making too many adjustments and ending up with an over-processed, artificial-looking photos
- Focusing on sharpness at the expense of other aspects of the picture
- Ignoring lens correction settings
- Deleting your original RAW file before editing in Lightroom
- Ignoring metadata and copyright information
- Assuming Lightroom is just for editing, can also organize and store photos as well
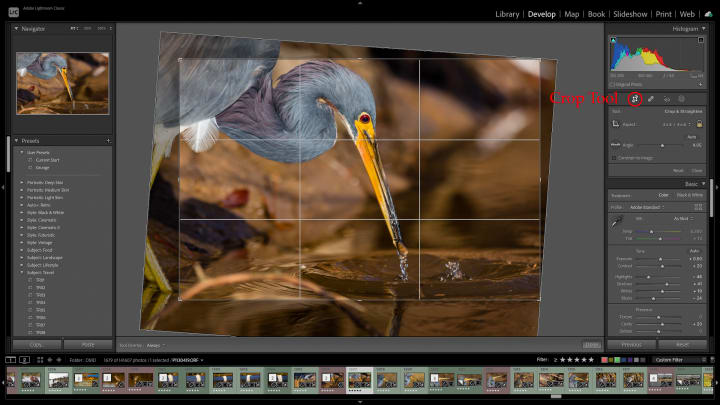
Forgetting to crop your image before making adjustments
One of the most common mistakes people make when editing their photographs in Lightroom Classic is forgetting to crop their images before making any adjustments.
There are a few different ways to crop an image in Lightroom. The simplest way is to select the "crop" tool in the Develop Module, and then drag the corners of the crop box until the image is cropped the way you want it. You can also use the "aspect ratio" slider to change the aspect ratio of the image while cropping.
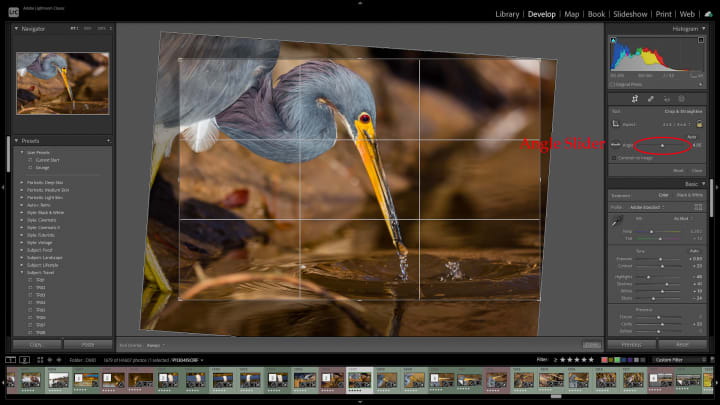
If the scene in your photograph isn't level you can straiten it using the angle slider in the crop tool.
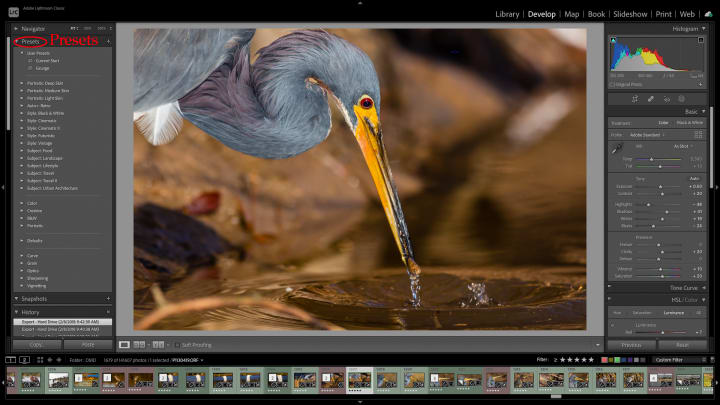
Not using the presets
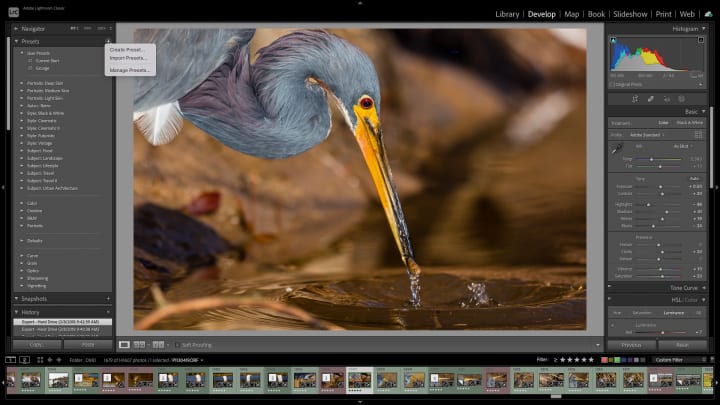
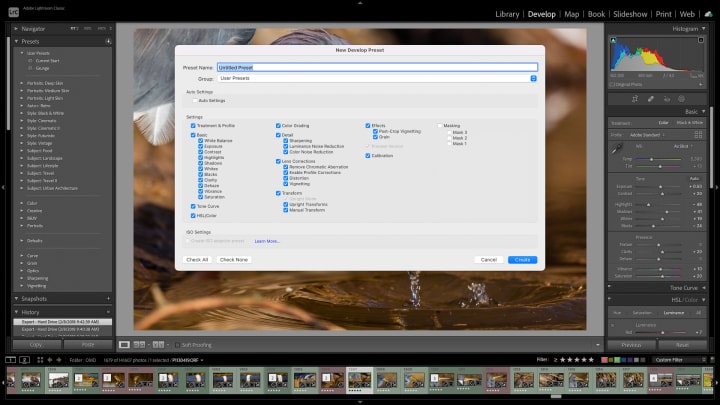
Another mistake that people often make when editing their photos in Lightroom is not using the presets. Presets are a great way to quickly and easily apply changes to your photos. There are a lot of different presets available, and you can even create your own presets based on the adjustments you use most often.
To use a preset, select the "preset" tab in the Develop module, and then click on the preset you want to use. The preset will be applied to your image, and you can then make any additional changes you want.
You can also save your own presets by selecting the "save" button in the preset panel.
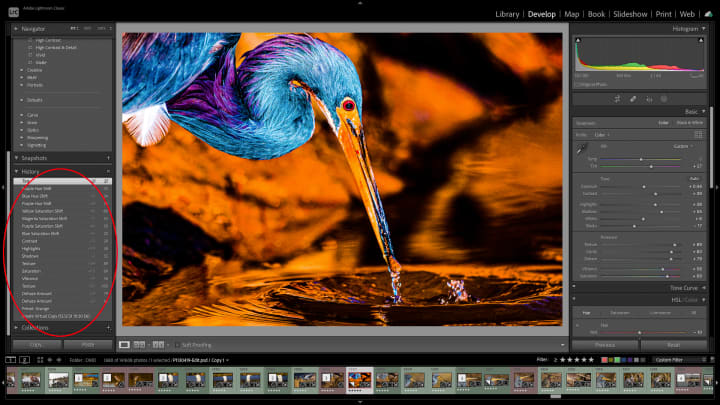
Not using the histogram
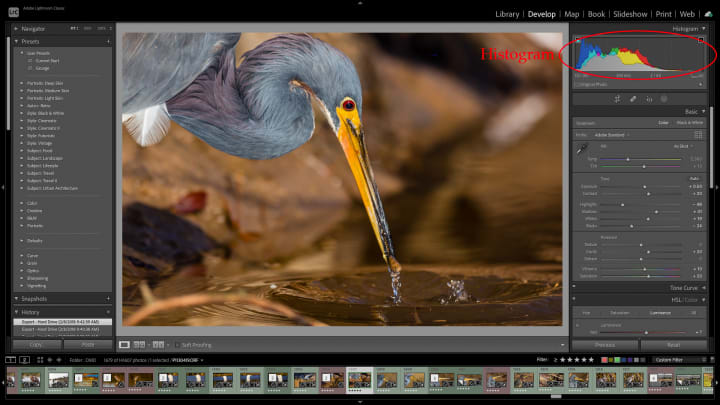
Another common mistakes people make when editing their photographs in Lightroom Classic is not using the histogram. The Histogram is a tool that lets you see the tonal distribution of your photo. This can be helpful when making changes to the brightness, contrast, and saturation of your photos.
The histogram is located in the Develop module, and it's usually displayed as a graph with three channels: red, green, and blue. The horizontal axis of the graph represents the tonal values of the image, and the vertical axis represents the number of pixels at each tonal value.
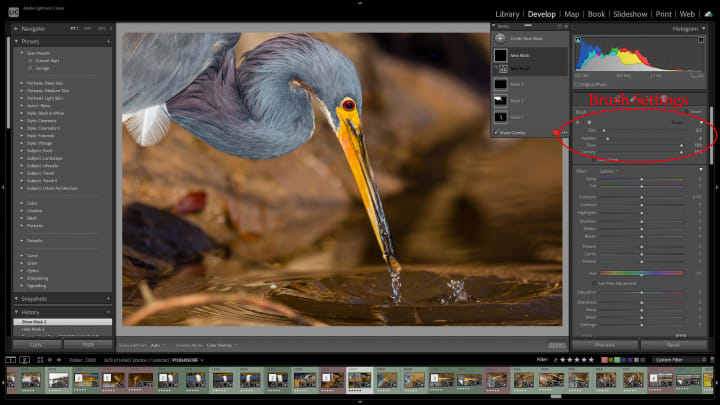
Not using a mask to edit specific parts of the picture
One of the most powerful tools in Adobe Lightroom is the masking tool. The masking tool lets you selectively edit certain parts of the photograph without affecting the rest of the image. This can be helpful if you want to brighten up the sky in an image but don't want to change the color saturation or contrast of the other elements in the photo.
To use the masking tool (located in the develop module), select "mask" in the toolbar, and then paint over the part of the image that you want to edit. The part of the image that you paint over will be affected by the changes.
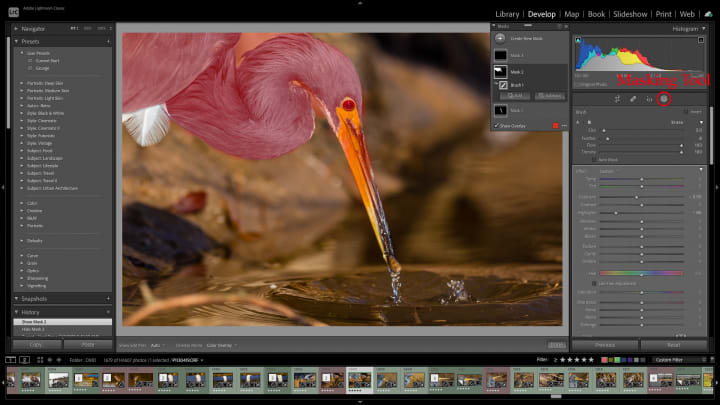
You can also adjust the "feather" of the brush to add a soft edge to the edits if needed.
Making too many adjustments and ending up with an over-processed, artificial looking photo
Another mistake people make when editing their photos in Lightroom is making too many changes. It's easy to get lost in all of the different options available in Adobe Lightroom, but try to stick to a small number of adjustments for each picture. Over-processing your photos reduces their quality and makes them look artificial or fake.
One way to prevent this from happening is by using presets regularly throughout your editing process instead of saving all of your individual adjustment steps as presets. This will keep your edits consistent between photos.
Focusing on sharpness at the expense of other aspects of the picture
When editing your photos in Adobe Lightroom, it's important to focus on the overall sharpness of the image. However, you don't want to sacrifice other aspects of the photo in order to achieve a sharp photograph.
A good way to avoid this is to use the "clarity" slider to add some sharpness to your photo without making any other changes. This will help to keep your photos looking natural and well-balanced. Make sure that you only make small changes to the clarity and sharpness of your image, or you risk over-processing them and making them look artificial.

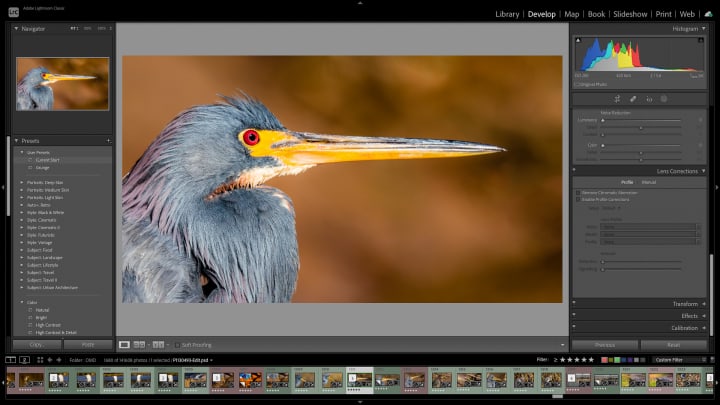
Ignoring lens correction settings
When you're editing your photos in Adobe Lightroom, it's important to pay attention to the lens correction settings. This will help to improve the quality of your photos and keep them looking natural.

It's always better to correct the lens distortion before you start editing your photos. This will help to keep your photos looking natural and well-balanced.
Deleting your original RAW file before editing in Lightroom
The number one mistake people make when using Adobe Lightroom Classic is deleting their original RAW files after they edit them. It's important to always save the original RAW file before you make any adjustments because this will allow you to go back and re-edit it if something doesn't look right later on. Saving your individual changes as presets can also help you quickly reapply specific edits if needed instead of having to change every adjustment manually again.
Ignoring metadata and copyright information
What is metadata and copyright information
Metadata is data that is embedded in a digital photo file. This data can include things like the camera make and model, the lens used, the aperture and shutter speed, as well as the date and time the photo was taken.
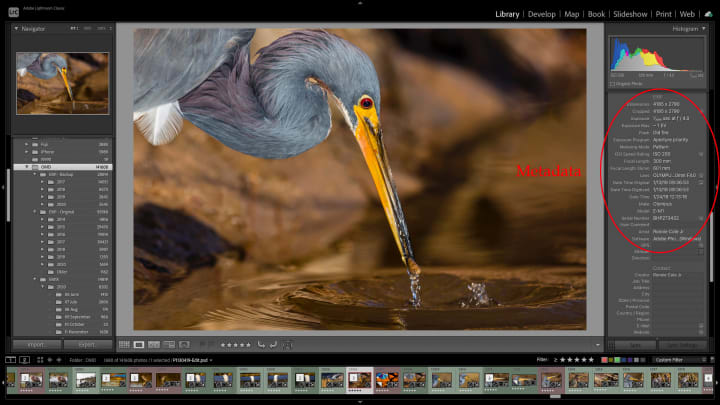
Copyright information is also embedded in digital photo files and includes things like the name of the photographer, the copyright holder, and the date the photo was taken.
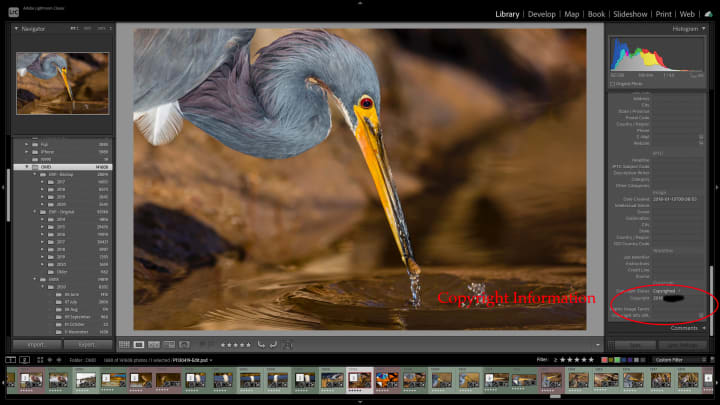
Why should you care about it
Both metadata and copyright information are important to keep track of when editing your photos. Metadata can help you to identify where a photo was taken and which camera and lens were used. Copyright information can help you to protect your work from being copied or used without your permission.
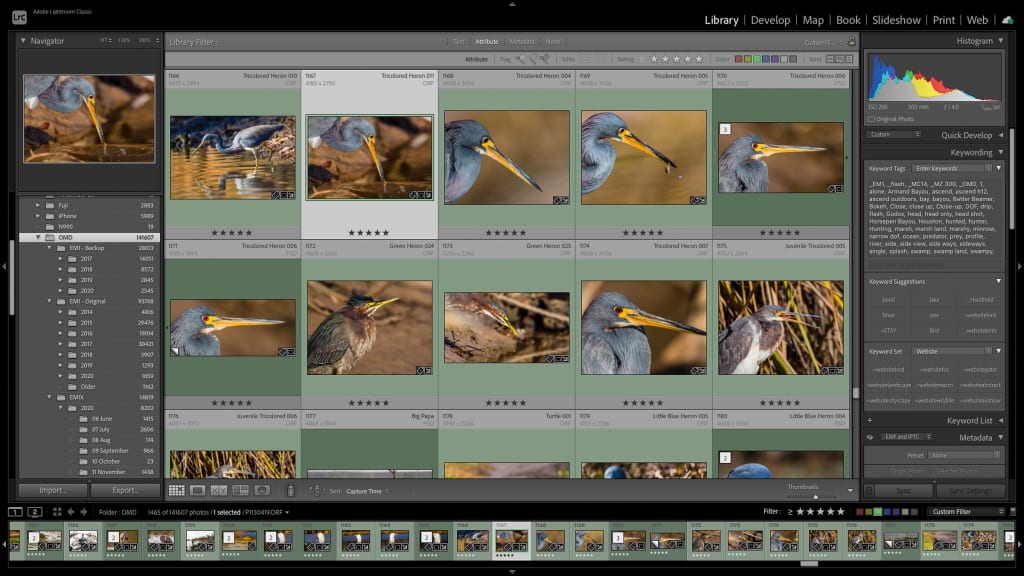
Assuming Lightroom is just for editing, not organizing or storing photos as well!
Many people use Adobe Lightroom for editing photos, but that's not the whole story. Lightroom is also great at organizing and storing your photos.
Adobe Lightroom gives you a library where you can find all of your pictures in one easy-to-access location.
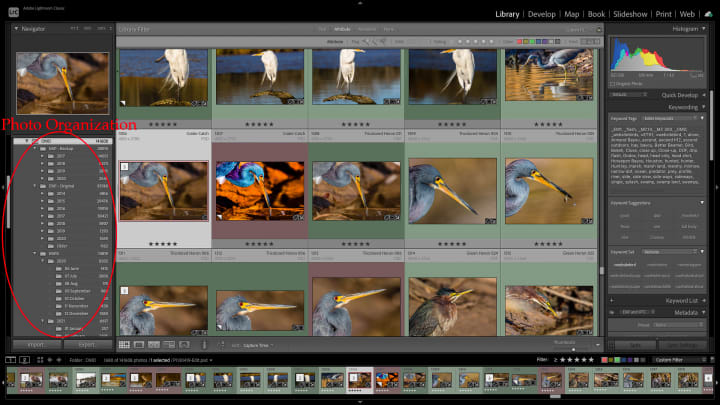
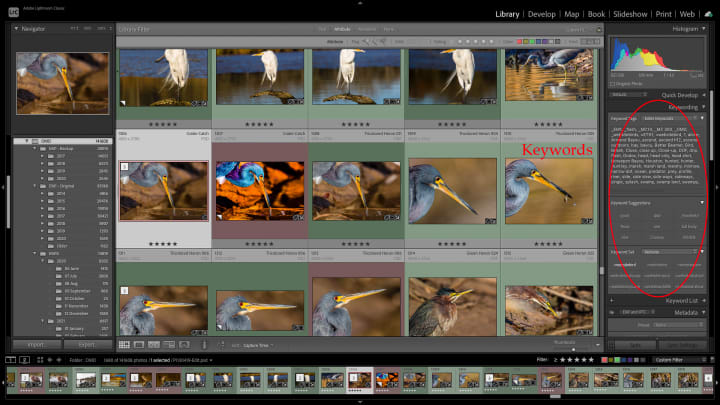
You can even tag your pictures with keywords like "animal" or "Scotland" so that they're grouped together automatically.
If you don't want to make any adjustments to your photos, you can upload them directly to an album and they will stay organized and named correctly.
Don't worry! There are still lots of things that you can do with Lightroom besides editing your images
In Conclusion
These are 10 mistakes can be easily avoided when using Adobe Lightroom Classic in Wildlife Photography. If you’ve come to this article looking for tips on how not to make these common mistakes, then congratulations! You found them.
The most important thing is to take the time to edit your photos in Lightroom before sharing them with others. Otherwise, they could end up ruining your reputation and credibility as a photographer because of poor quality images or bad editing practices like over processing an image or choosing an inappropriate preset (which could lead people to think you don't know what you're doing).
Take the time to learn how to use Lightroom Classic like a pro. It will save you time and headaches in the long run.
So do yourself a favor and avoid the above mentioned pitfalls by following our simple guidelines - after all, it's better than getting frustrated at trying to figure out why. Don't forget to use Adobe products like Photoshop in conjunction with Lightroom to bring your wildlife photography to that next level.
I have uploaded full resolution images from the article to this Flickr album so you can view them in greater detail.
If you would like to view more my photographic work or purchase some of my images visit my website https://phocalart.com
Phocal
About the Creator
Phocal
I am outdoor adventurer and wildlife photographer who also enjoys story telling.
See as well as purchase my photographic work here: https://phocalart.com
Keep reading
More stories from Phocal and writers in Photography and other communities.
The Baby Gator Project: Part 1
After a year of photographing baby American Alligators (Alligator Mississippiensis) I became completely obsessed with them and started The Baby Gator Project. The projects mission was to seek out and explore ways to photograph these amazing animals to show off their beauty and grace. You have to admit, baby gators are just so cute you want to pick em up and pet em.
By Phocal3 years ago in Photography
Capturing Magic
In the world of photography, timing is the key to everything. While skilled compositions and technical proficiency are undoubtedly crucial, the perfect lighting can create the perfect photo. Nowadays, we can determine any light ourselves and are no longer dependent on any natural light source, thanks to the developed technology. We can turn every day into a night by using the right filters. And we can illuminate every night to be seen as a day. A typical process, especially in the film industry.
By Krishan Mubashar9 days ago in Photography
The Secret of Lighting
“Light is not just an element, but the essence that breathes life into images.” Whether it is capturing the delicate contours of a portrait, the vibrant hues of a landscape or the intricate details of still life, lighting plays a tremendous role in shaping the mood and visual impact of a photo. Understanding the nuances of lighting is crucial for us to elevate our craft from snapshots to interesting works of art. It is not just about having the right equipment, it is about harnessing the light creatively to transport emotions, tell stories and evoke reactions from our viewers.
By Krishan Mubashar5 days ago in Photography


Comments (1)
I don't normally read a lot of tutorial-style articles on Vocal, but I'm glad this one caught my eye. As a past lead writer and editor for Photography Talk and Irix USA, I want to congratulate you on a well thought-out, clear and informative article that any new Lightroom Classic user (and any serious photographer should be using it, imho) should read. I've subscribed and will be looking into more of your work here as well as checking out your website & Flickr account.