
How to Take Your Phone Photography to The Next Level
Phones are getting powerful, and so are their photos.

I've been messing around with Android smartphones since I was 15. People that follow me on my Instagram mentioned how great my photos are.
Thankfully for me, Instagram reduces the details of a photo. It's a place where phone photography, or phoneography, flourishes.
But it takes more than a good click to make a great photo. It takes some editing too. Everyone can create a great picture like the one in this article. I'm here to show you how.
After all, you'll gonna need it in my many future challenges.
While we are at it, I wanna begin with presenting to you our first challenge for my newest Instagram account @phoneography.world. Make sure to follow it and get notified for every future challenge as well as getting featured too.
Let's begin by mentioning the most important part of phone photography.
Hardware and Software
I use a less than 200$ smartphone to capture my vision so it's safe to say that you don't need a high budget for high-quality smartphone pictures. My android smartphone is a Xiaomi Redmi Note 9s.
Featuring the main lens of 48 MP, f/1.8, 26mm (wide), 1/2.0", it's a decent budget camera for phone photography.
What makes the difference is the software.
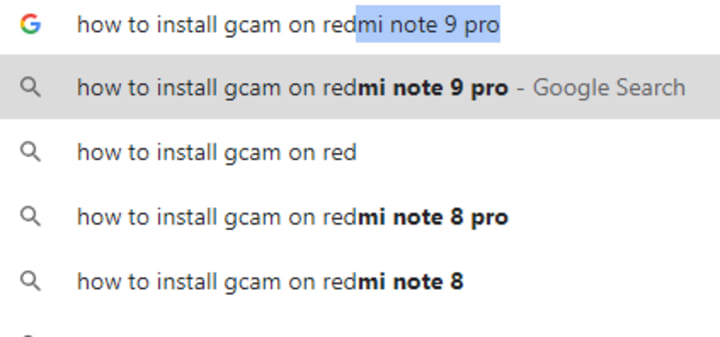
I don't take pictures with the base phone app. Instead, I'm using Gcam. It's the app that Pixel phones are using. To install it do this, with your phone name instead.
Once you get it ready, you will notice that every picture you take has better quality than before.
Why?
The algorithm that Google uses to capture images is the best in the market. It's a native app that works wonders with any android.
While you use Gcam or any photo app for that matter, you need to have the RAW option on as well.
What is the RAW format?
In few words, it's the image before any processing. You need to edit it with another app.
The app I use? Snapseed. It's close to Lightroom in power, but it's the most user-friendly app for android at this point.
The Editing
You just captured your first RAW format picture. It's looking neat. But it can get a whole lot better.
I'm here to show you how.
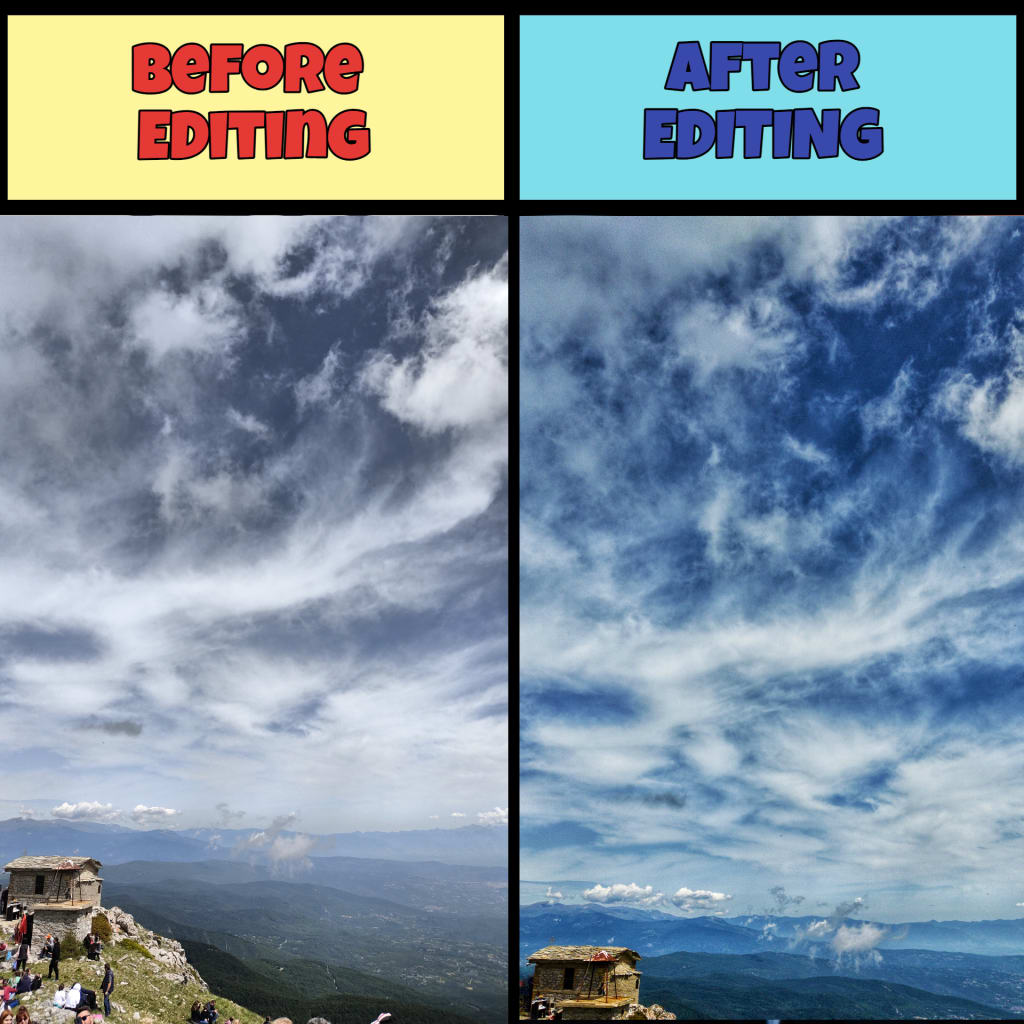
I chose a mountain picture. It has elements of clouds, sky, and finally a cute little building in it. In the next part of my article, we will see how to treat these kinds of pictures.
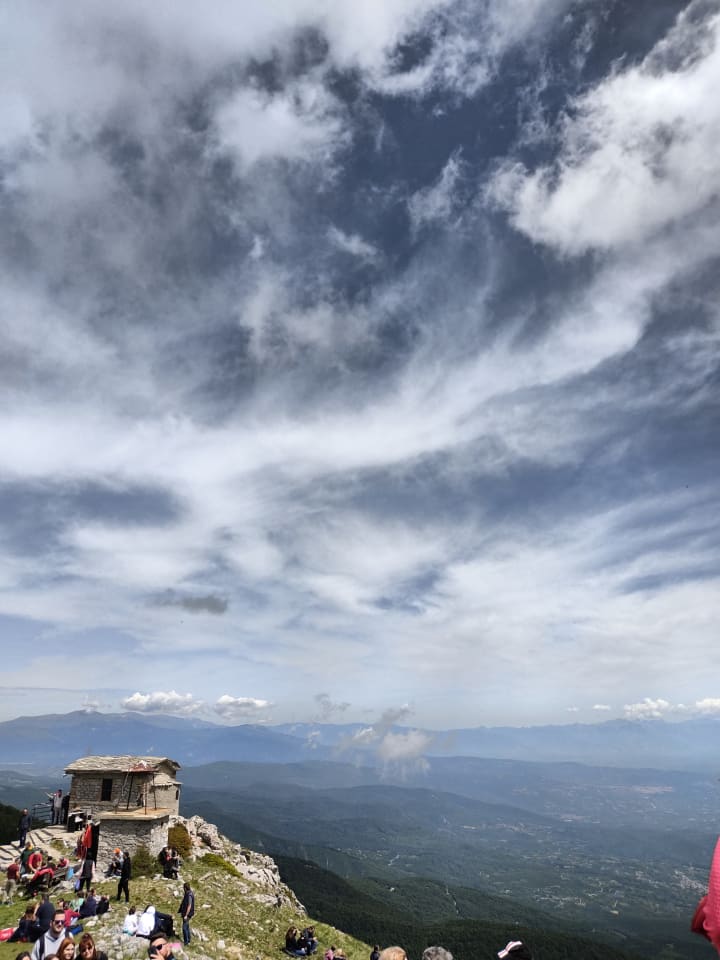
This picture is not bad. But it needs a lot of fixing.
- People need to be cropped from the photo.
- Some colors need tweaking to get balanced.
This is where Snapseed comes in.
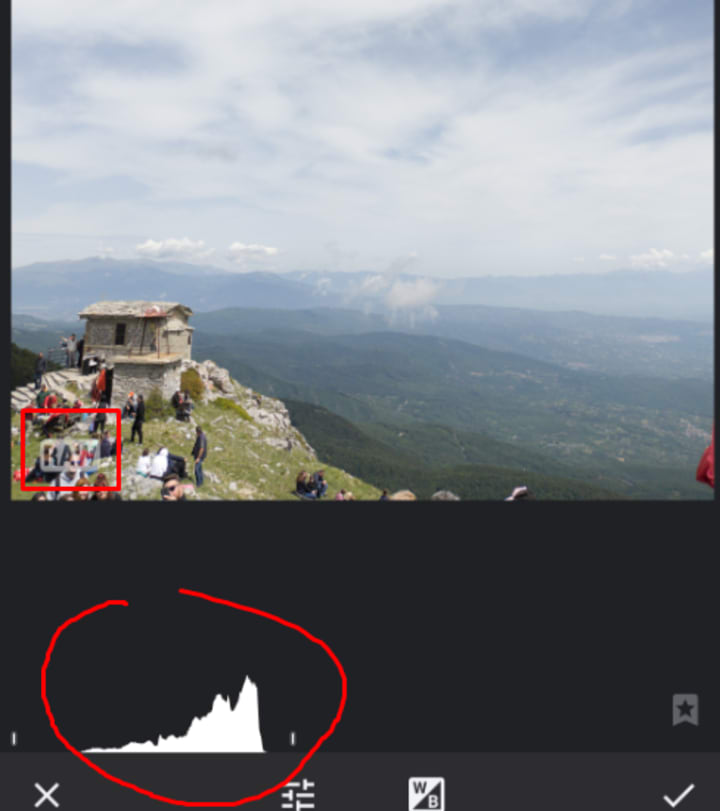
When you open Snapseed, you get the RAW logo on the left, which gives you the ability to edit some values before you go further down the editing train.
Notice this graph above? It needs some fixing. It needs to look more like a valley with a hill than like a mountain. Try to tweak the numbers to get desirable results. Here's my result after the first editing.
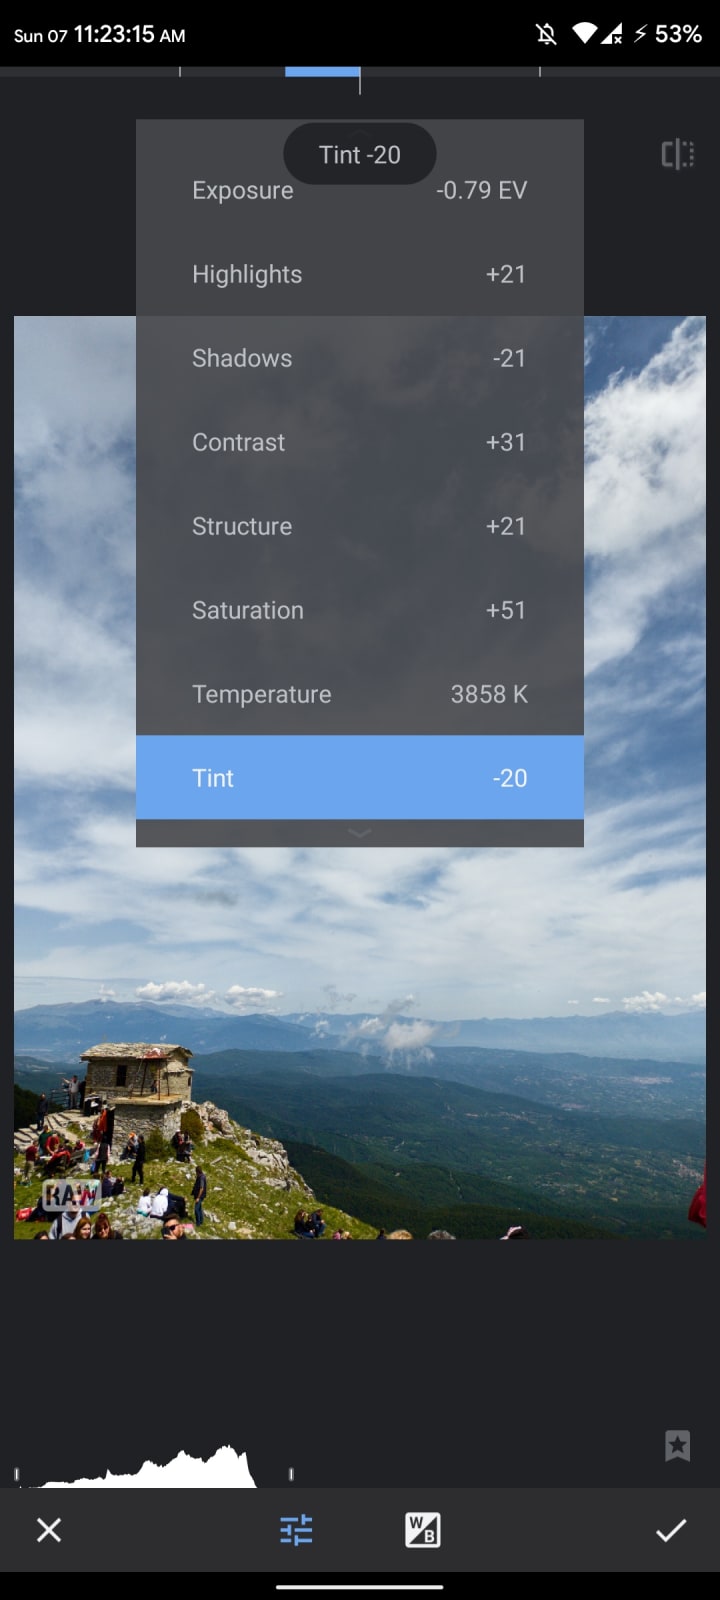
(Don't be distracted by the fact every number I have ended in 1. It's me and my OCD...)
Okay, the first edit is over, colors got fixed.
When you finish with the primary edit and the most important one, you will gain the ability to chose between some presets.
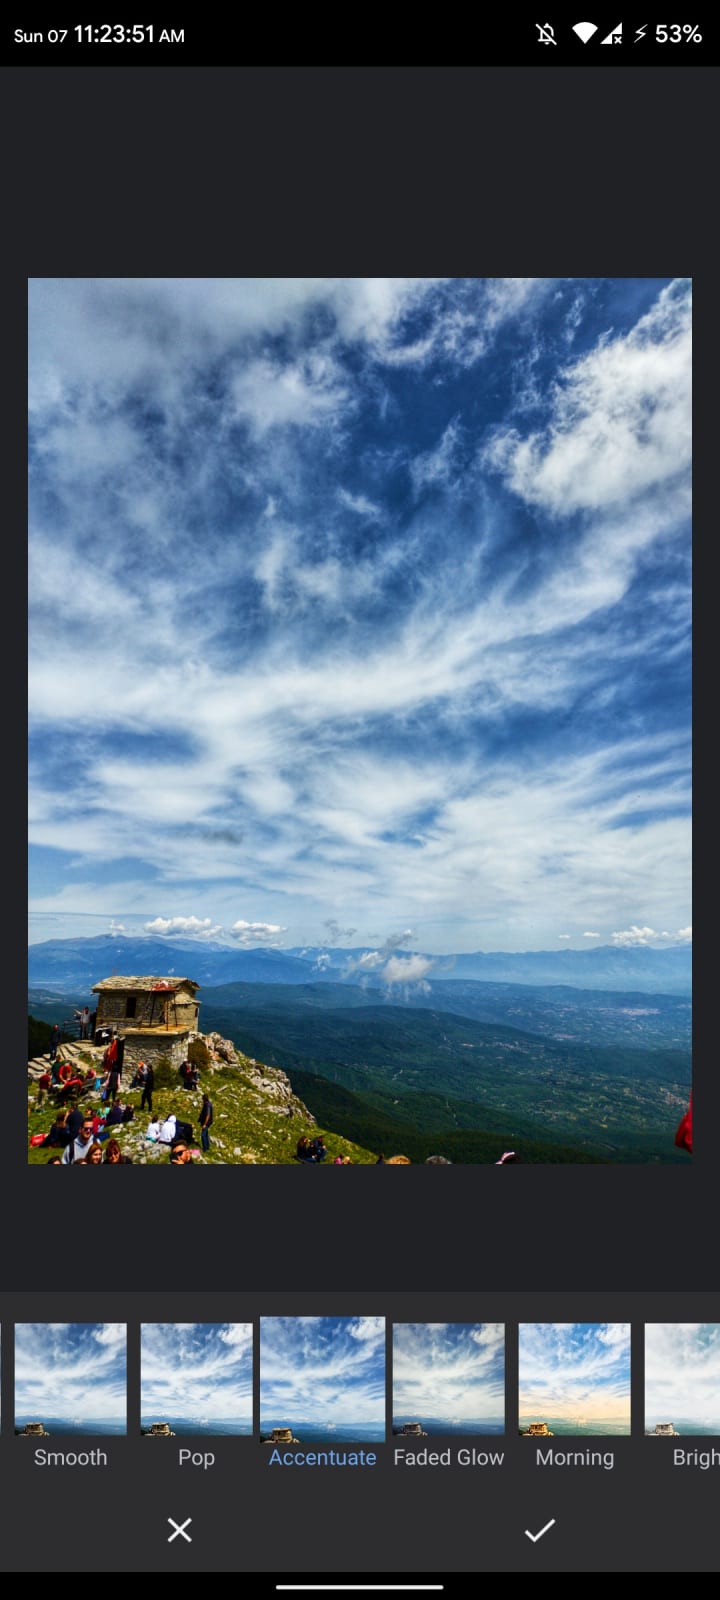
When it comes to mountain shots that have a lot of blue in them, I like to go for more vivid options. Pop and Accentuate are the best for that. I chose the second one here as you can see.
This part is also over and you are left with the final edit process.
Now, we'll see a bigger menu. More tools to mess around with. Because our picture is scenery with mountains and sky, there's not so much we need to do outside of three options.
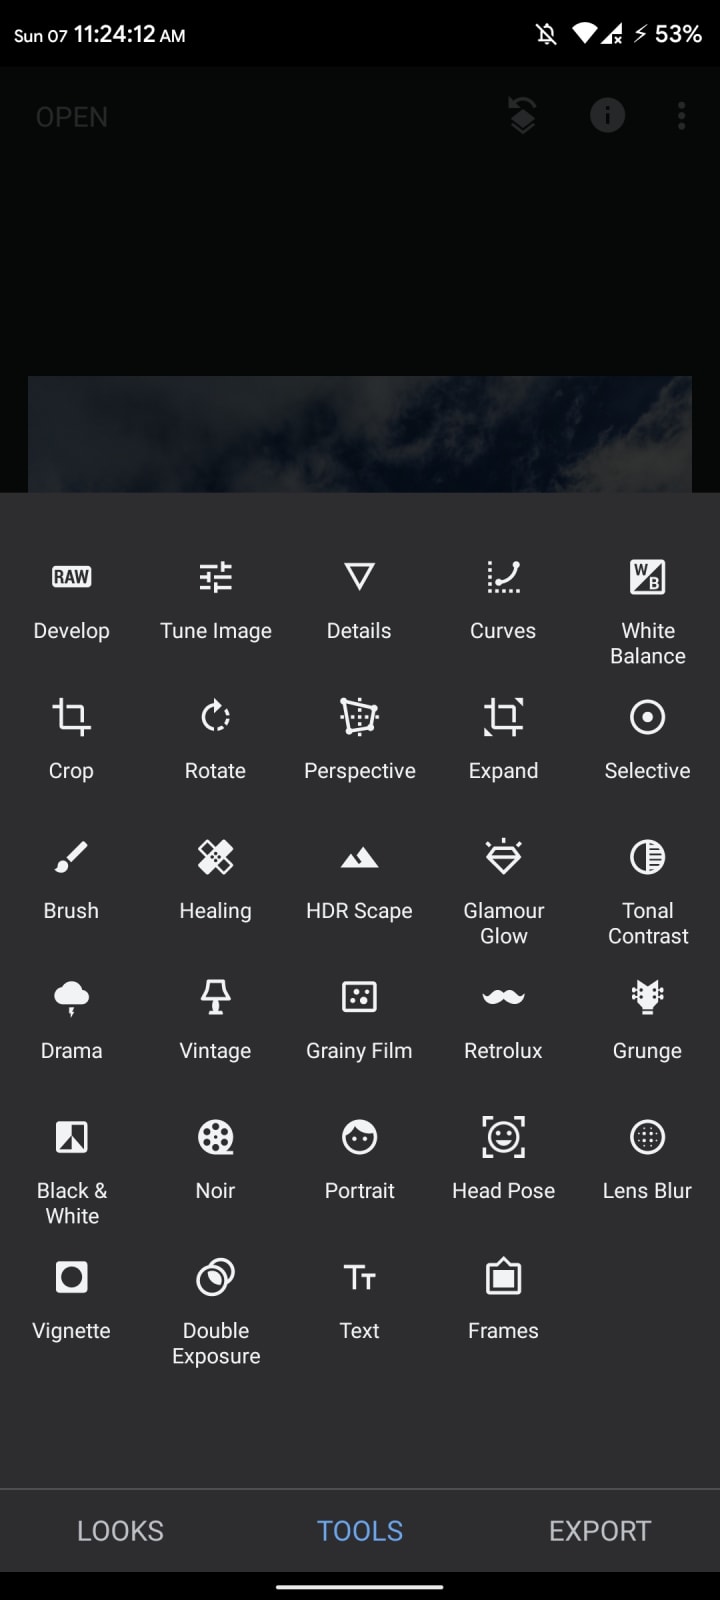
Depends on what you want to do, the four best options to mess around with are: Tune Image, Details, Healing, and Crop.
The Crop option is useful if you want to make your photo 1:1, which is perfect for Instagram shots. I chose to remove the people on the bottom.
I use Healing to remove people on the left side of the building.
Details are perfect to make your picture more crispy.
Do you think you are done with your edit?
There's one thing left to do. Ensuring that you get the best quality out of your edit.
If you click on the three dots on the top right of your screen, you get an option for JPG quality. Change it to 100%.
Finito.
Your great photo is ready and looks better than ever.
Become a Part of Our Community
Your great phone photos have a home now. And they can grant you great rewards also.
In @phoneography.world, I will upload tips, tricks, and ideas. But it won't end there. I will feature your pictures also. As we grow, there will be many challenges for you to be a part of, with great rewards.
Upload your next phone photo and add the tag #phoneographyworld to be featured in PGW.
See you there!
About the Creator
Giorgos Pantsios
Fulltime Writer | Fulltime learner | Polymath from Greece | Exploring life | Modern Philosopher | Phone Photographer https://linktr.ee/giorgospantsios
Keep reading
More stories from Giorgos Pantsios and writers in Photography and other communities.
Capturing Magic
In the world of photography, timing is the key to everything. While skilled compositions and technical proficiency are undoubtedly crucial, the perfect lighting can create the perfect photo. Nowadays, we can determine any light ourselves and are no longer dependent on any natural light source, thanks to the developed technology. We can turn every day into a night by using the right filters. And we can illuminate every night to be seen as a day. A typical process, especially in the film industry.
By Krishan Mubashar14 days ago in Photography
How to Make a Photo Book
All those photos you have gathered from numerous life events, like family trips, reunions, birthday parties, weddings, or graduations, can be effectively safeguarded and shared by turning them into personalized photo books that adequately reproduce your digital photos and make great gifts for any occasion while preserving the memories that you can cherish for a lifetime.
By Rachel Arbuckleabout 17 hours ago in Photography


Comments
There are no comments for this story
Be the first to respond and start the conversation.