
How to Edit your Pictures with Airbrush
By Kate Callaghan

Don’t own a professional camera? Don’t have any clue what you’re doing when it comes to photography? No problem. I don’t own a professional camera either and less than a year ago, I had no idea what I was doing when it came to photography. I am by no means a professional now either, but I do like how my pictures turn out after editing them. I am someone who loves to travel and I take as many pictures as possible so that I have lasting memories of my trips. About two months into the pandemic, I was really bored during lockdown, so I decided to create a travel account on Instagram to share my pictures. All my pictures are taken with my iPhone and I honestly don’t feel the need to spend hundreds, if not thousands of dollars on a professional camera.
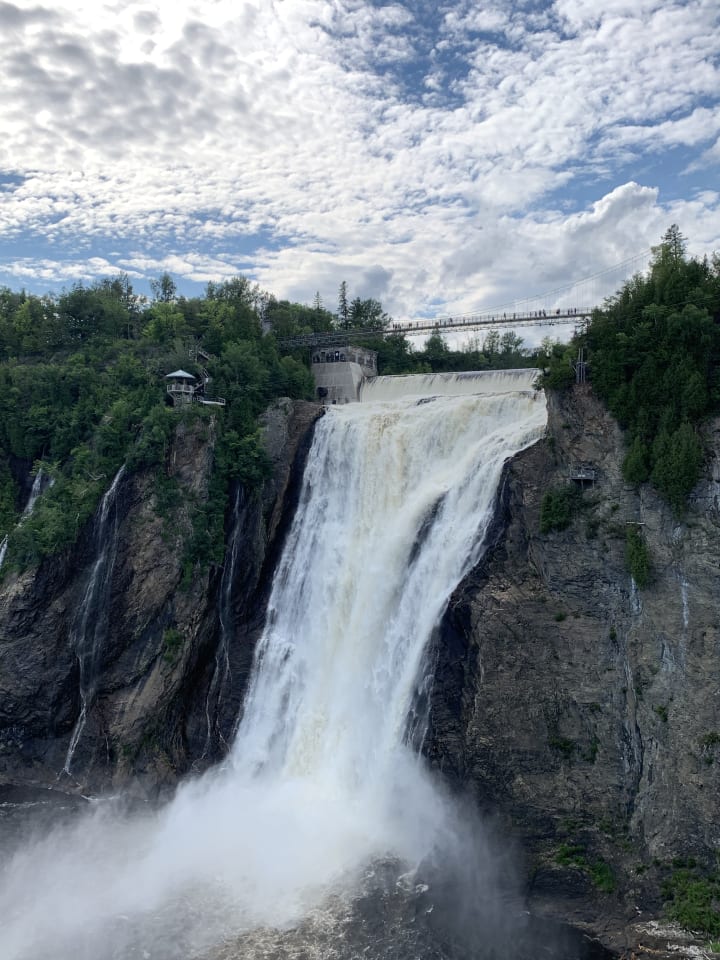
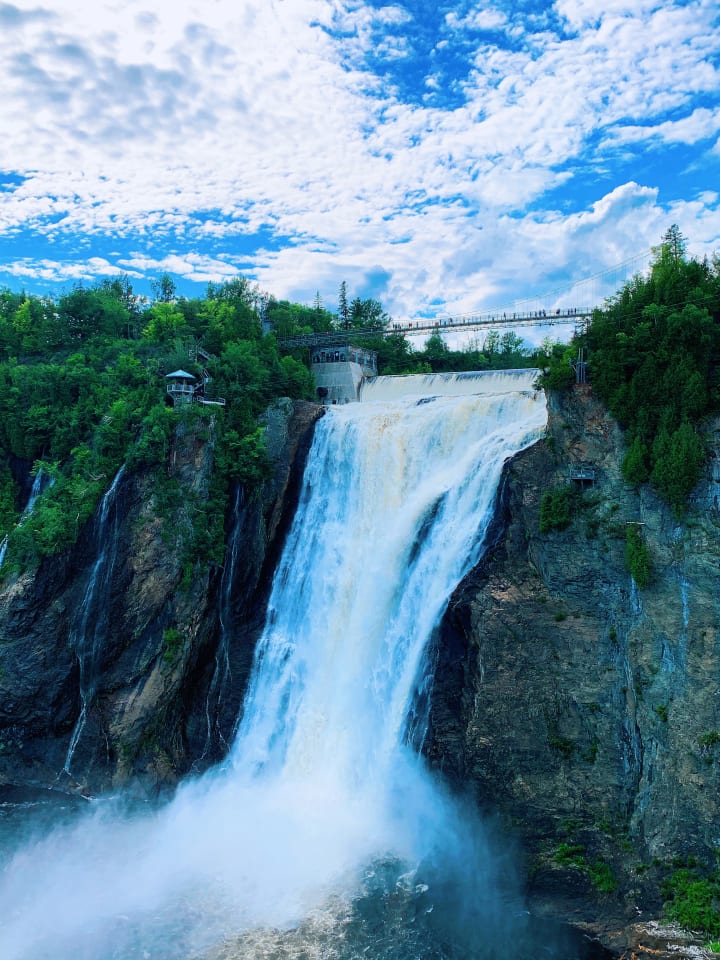
The first step to editing your pictures is to invest in a good app. Most people will choose Lightroom, but I prefer Airbrush. If you’ve never heard of Airbrush before, I highly recommend downloading the app so that you can try it out. I have the pro version, but there is a free version available as well. Here are the steps I take to edit all of my pictures. Start by opening the Airbrush app on your phone and selecting the picture that you want to edit. For a regular landscape picture, click on “Tools”, then “Enhance”. I love vivid colours, so I usually always increase the saturation of my pictures. I will also play around with both the contrast and temperature, until I’m satisfied with how my picture looks. If the original picture is dark, then I will also play around with the shadows and brightness. What is so great about this app is the eraser feature. So if I want to brighten some parts of the picture, but not all, I will use the eraser to remove the brightness from the unwanted areas. The eraser is especially important when it comes to editing a picture with a person in it. When increasing the saturation of an image with a person in it, their skin will turn orange, which does not look very natural at all. So you would then use the eraser to remove the saturation from the skin. Once I’m satisfied with my enhancements, I click on “Filter” and then choose the filter that looks best. Because I want my Instagram feed to look aesthetically pleasing, I often use the same filter. I click on the “Modern” filter set and then on the “Iceland” filter. I love the “Iceland” filter because it makes the blues in my pictures really pop. Here is a before and after picture, edited with Airbrush and using the “Iceland” filter:
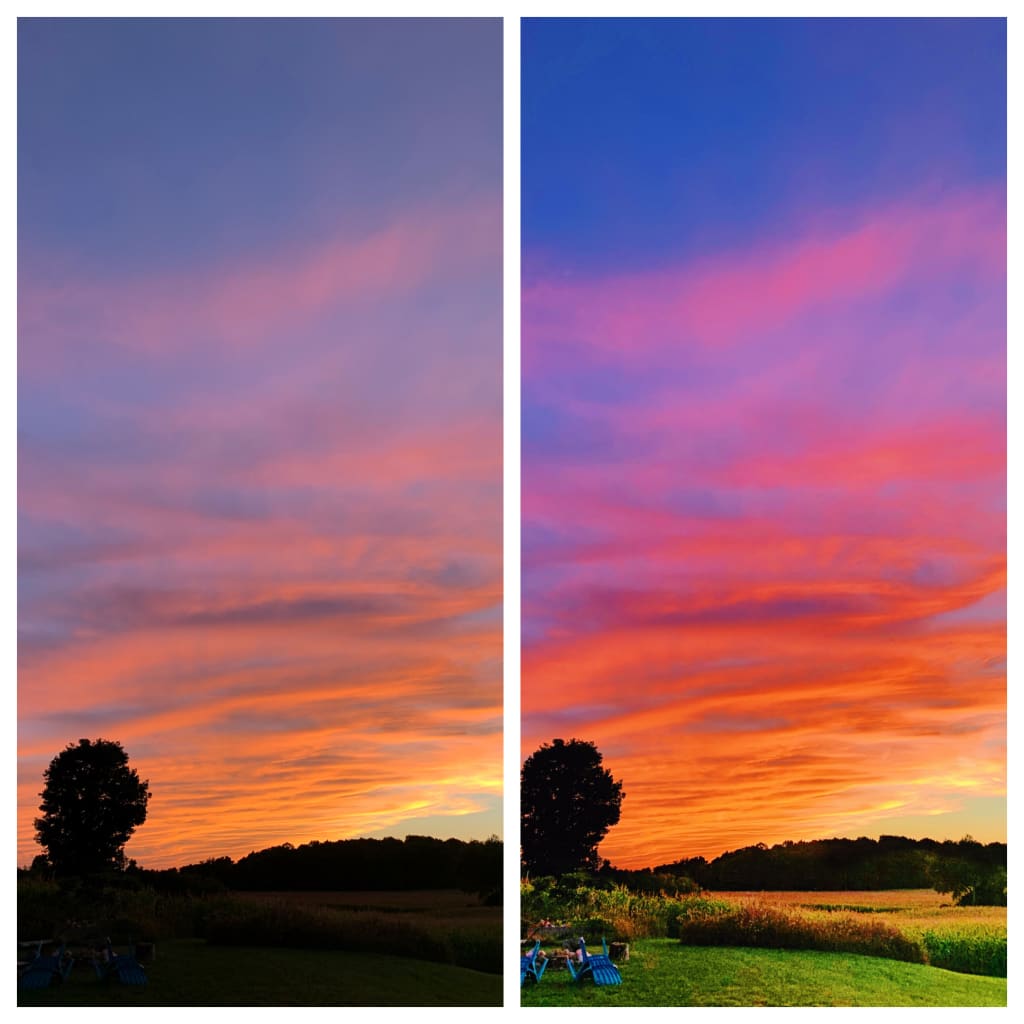
This past fall, I did a series of posts on my Instagram where I used a different filter. Airbrush came out with a new filter pack, called “Fall”. Here are the steps I used to edit one of my favourite sunset pictures. First, I increased the saturation and because the original photo was so dark, I increased the brightness, then used the eraser tool to remove the added brightness to the entire sky area. From there, I clicked on “Filter”, went into the new “Fall” filter set and selected the “Autumn” filter. Here are the results of that simple edit:
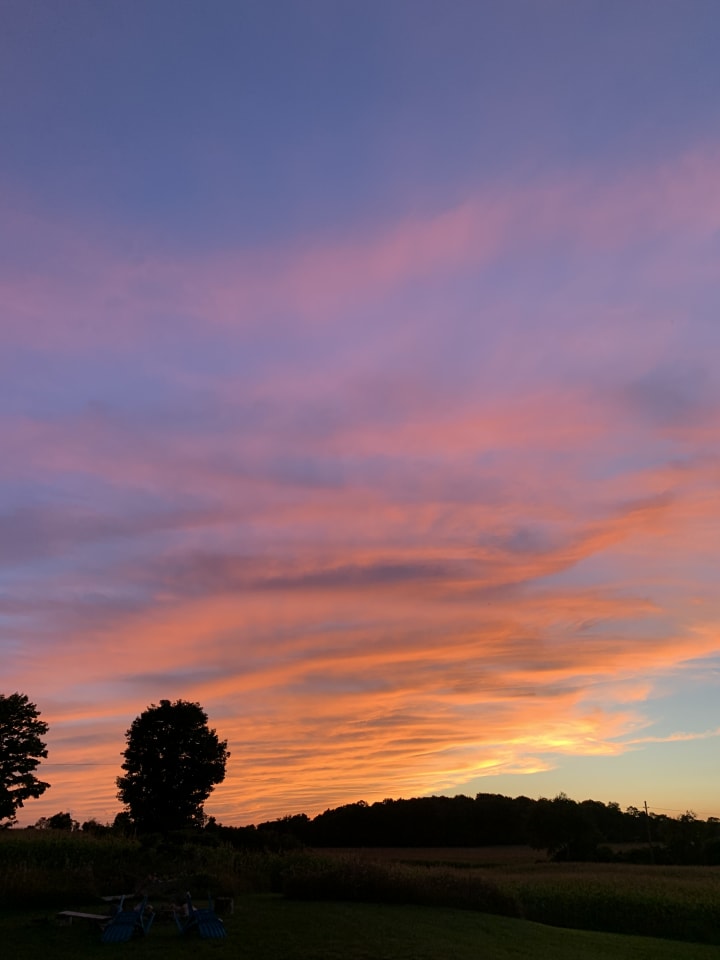
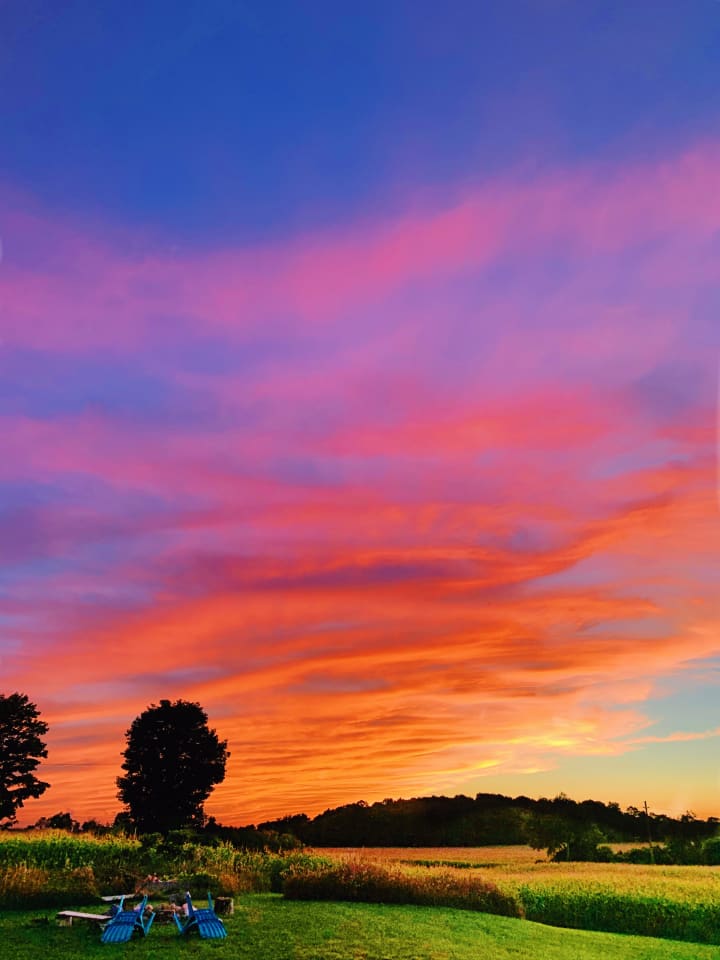
As you can see, turning any picture that you take, even with just an iPhone, can yield amazing results with a few simple edits. It is all about having the right tools and learning how to use them. If you’re interested in seeing more of my travel pictures, you can find me on Instagram at @katietravelfit.
About the Creator
Enjoyed the story? Support the Creator.
Subscribe for free to receive all their stories in your feed. You could also pledge your support or give them a one-off tip, letting them know you appreciate their work.
Keep reading
More stories from Kate Callaghan and writers in Photography and other communities.
The Bonaventure Metro Station
It was a cold Tuesday morning, when I stepped into the Bonaventure metro station. It was just after 5am, the earliest they would allow us in, when I took my seat on the corner ledge. I internally beamed with joy for being the first one to arrive. I set up my blanket, placed a medium sized Tim Hortons cup to my right side, a short distance away and dropped a quarter in it; every one of us knew the importance of keeping at least one coin to start the day with. I always found it odd, but for some reason, people were more generous when they knew that other people were as well. Finally, I pulled out my black notebook and pen that a kind young woman had given me a few weeks back.
By Kate Callaghan 3 years ago in Humans
Capturing Haridwar: Photography Hotspots for 2024
12 Priority Spots in Haridwar The hallowed city of Haridwar offers a beautiful and interesting mix of culture. Being one of the seven holiest urban areas in India, Haridwar frequently clamors with fans. It favorable area close to the heavenly Stream Ganga has made itgain greater notoriety. With the progression of time, it has become something beyond a strict city, where individuals swarmed to perform submersion of the remains or took a dunk in the water to wash away their wrongdoings. It has as a matter of fact developed into Yoga, social and otherworldly focus and has likewise turned into an excellent center point for learning Sanskrit language The present day, Haridwar is the impression of the way of life of India and in this manner offer proposition a lot to its guests. Here is the rundown of best 12 places that one high priority in this sacred city:
By prashant soni4 days ago in Photography


Comments
There are no comments for this story
Be the first to respond and start the conversation.