
How I Took This Photo
Photo Editing Tips From Someone Who Watched Too Many YouTube Videos


Whelp! Look at where I have ended up. One day I fancy myself a book reader, the next a writer, and today? Today, apparently, I’m a 'professional' photographer. What a time to be alive! Thanks to a Vocal challenge, a lazy Sunday afternoon, and a spark on inspiration, I have found myself just slightly outside my comfort zone.
How splendid!
Picture this, (Get it? ‘Picture’? Just a nice little pun for ya.) I’m sitting on my couch, scrolling on Instagram, liking countless photos of books and libraries. 'Bookstagrammers' have really gotten creative lately and it is quite inspirational. That's when an idea sparks in my head.
I say to myself, ”Self, I bet you could do that too. I bet I could take a unique photo of me holding a few books. Why not?”
I’m creative, have a day to kill, and have a photo editing app on my phone, I can pull this off. Hey, maybe if it comes out good enough I could write about it for a Vocal challenge. Well, here I am!
Let's start off with the original photo, shall we?
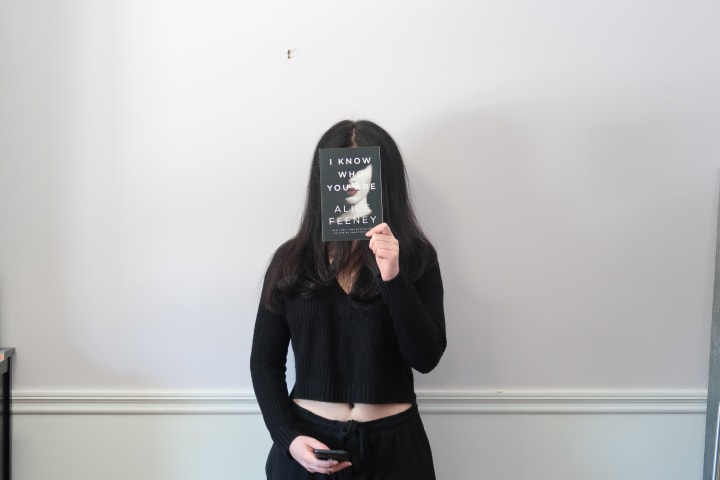
I chose a wall in my house that was blank and had a lot of light facing it. Standing in the middle I took a simple photo of myself, hiding my face because I didn’t feel like putting on makeup.
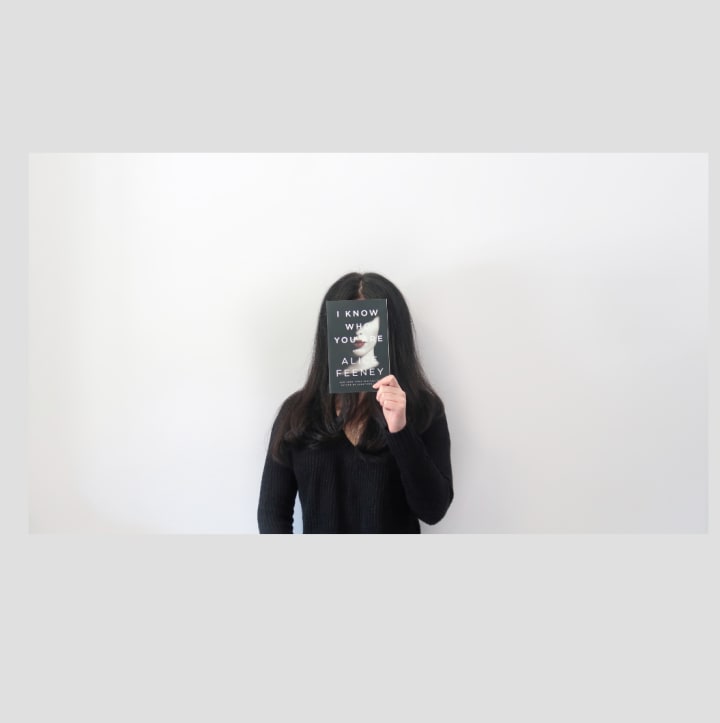
From there, I took random photos of my arms holding books near the middle of the shoot. After testing it from all angles and perspectives, I decided upon six of the shoots that I found acceptable and moved on to editing.

'Snapseed' is the only editing app I used to get my final shot, and in less than an hour in total, I had my final product. I start with the original, edit out the imperfections using the healing tool, then crop it to the size I liked.
From there, I used the double exposure tool to overlap the original photo with one of me holding a book. After playing around with the angle, I started to draw over the part that I wanted shown in the photo.
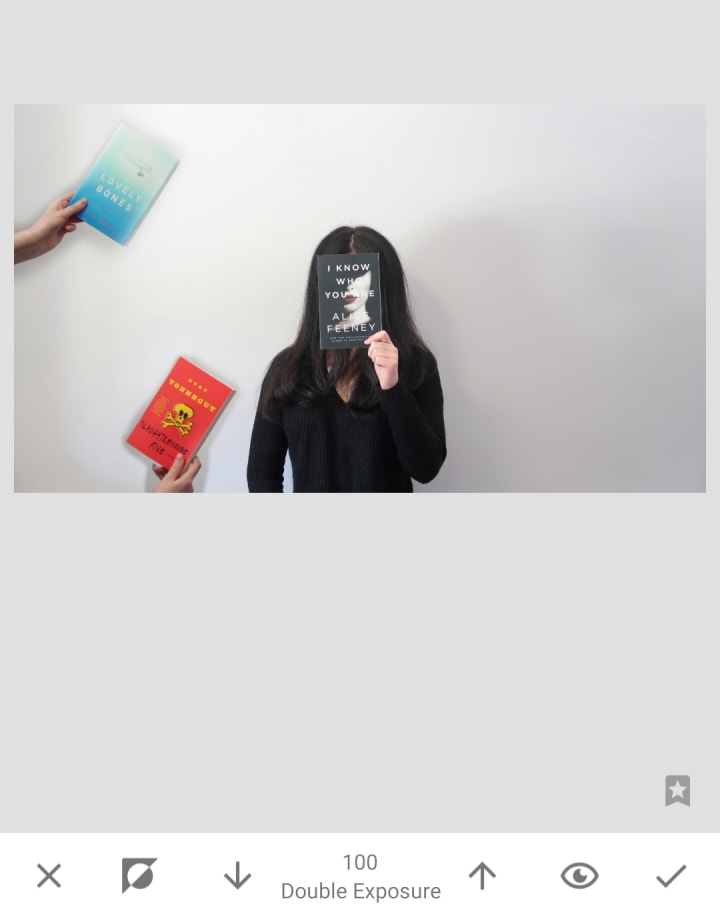
When doing this, it is very important to get as close to the outline of the item in question as possible.

I then repeated that step 5 more times, until all six books became visible in the original shot.
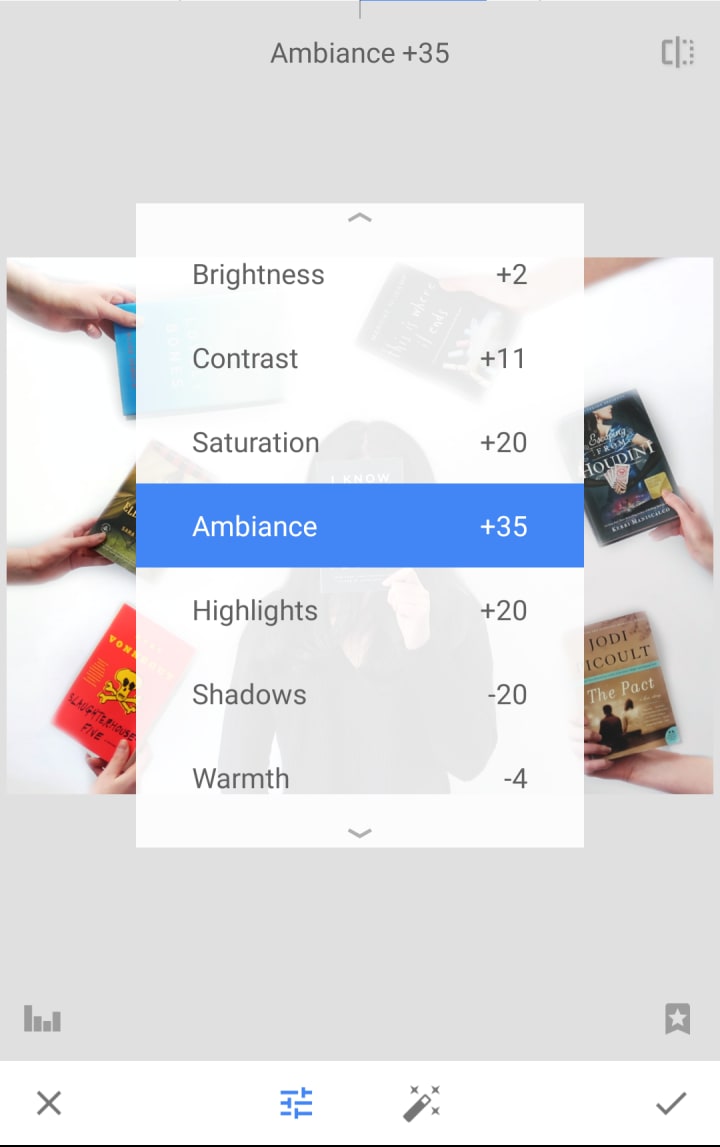
Once I had them all in the shoot arranged to my likings, I started playing around with the other aspects of the photo. I turned up the exposure, sharpened the details and added some saturation to the books themselves. I also fiddled around with the basic details of the photo aimlessly, until I was satisfied.
Cropped it once more and just like that I had my masterpiece.
The whole process was actually pretty quick and easy. I amazed myself with my newfound mastery of the photo editing craft. Honestly, I’m starting to think I should start teaching classes and selling tickets at a few hundred a piece. I’m pretty sure people would pay more, but I don’t want to be greedy.

In this day and age of social media and 'facetune', it is hard to stay confident in your photography abilities. It seems that no matter what photo you take, someone else had already taken the same photo, and somehow did it 10x better. Don’t get discouraged by this, if it is something that you enjoy doing, don’t let yourself compare your craft to someone else's. On the bright side, for every amazing photo you see online, there is also a video available teaching you how to achieve that same photo.
Learn, practice, and grow until you are satisfied with your own abilities.
About the Creator
Keep reading
More stories from Amanda Mitchell and writers in Photography and other communities.
Photo Editing Tips for Beginners
I have no aspirations to be a photographer, a social media icon, nor a marketing guru. I simply like photography. I grew up in the world of social media, and it has become as much a part of my everyday life as scrapbooking must have been thirty something years ago. I’ve been walking around with a camera phone in my back pocket since I was thirteen years old and, to this day, I won't leave my house without it.
By Amanda Mitchell3 years ago in Photography
Capturing Magic
In the world of photography, timing is the key to everything. While skilled compositions and technical proficiency are undoubtedly crucial, the perfect lighting can create the perfect photo. Nowadays, we can determine any light ourselves and are no longer dependent on any natural light source, thanks to the developed technology. We can turn every day into a night by using the right filters. And we can illuminate every night to be seen as a day. A typical process, especially in the film industry.
By Krishan Mubashar13 days ago in Photography
Exploring the Best AI-Based Video Creation Tools
Artificial Intelligence (AI) has revolutionized many industries, and video creation is no exception. With the advancements in AI technology, creating high-quality videos has become more accessible and efficient. In this blog post, we will explore the best AI-based video creation tools available in the market today and how they can benefit content creators.
By Arnar Dadia day ago in Photography


Comments
There are no comments for this story
Be the first to respond and start the conversation.