
Effective Real Estate Photography
The key is to make the house look good... but not too good.

The art of photographing properties for real estate listings is a delicate balance between truth and appeal. The images should be captivating enough to lure potential buyers into scheduling a viewing, yet accurate enough to prevent the disappointment that comes from overly enhanced photos. This guide serves as a tutorial to ace real estate photography while maintaining this vital balance. My background is that I'm not just a real estate agent for the past 8 years, but before that, I was a professional photographer for 10 years, mainly shooting weddings. I've shot my own listings and eventually hired other photographers to shoot when I became too busy with the real estate side to do the editing.
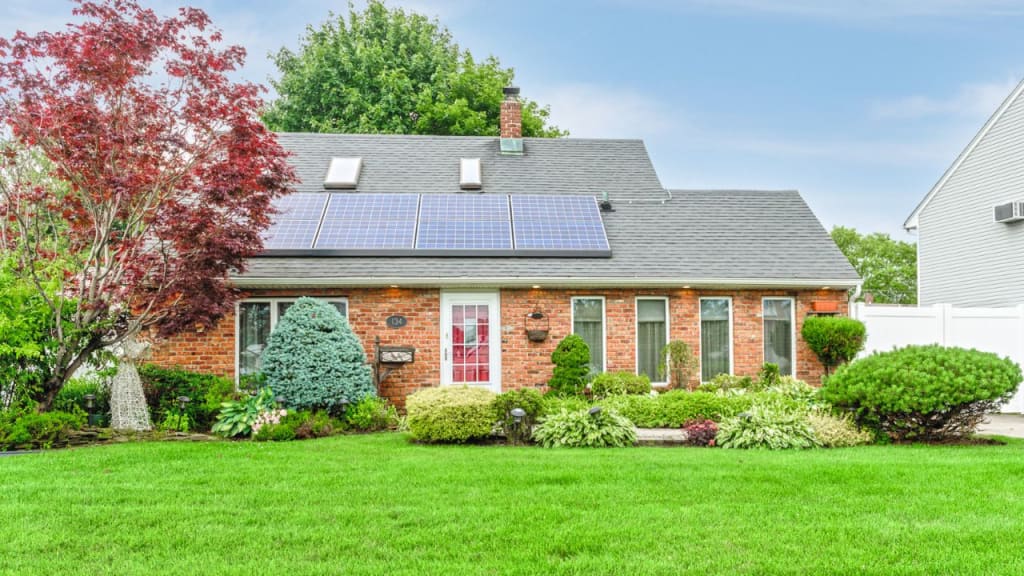
The primary goal of real estate photography is not to depict an idealized version of the property, but to convince the viewer that they want to see the home in person. The first step in achieving this is to understand the space you are working with and plan your shots accordingly. Take a tour of the property, noting its standout features, quirks, and potential challenges. Always bear in mind that each photo should showcase the room's functionality, space, and unique attributes. The layout, finishes, and fixtures all tell a story of the house's potential to become a cherished home.
The effective use of equipment is a key skill in real estate photography. A tripod is a crucial tool for stable and sharp images, while timers can help prevent camera shake from manual shutter releases. An indirect flash unit can illuminate darker rooms without producing harsh shadows or over-exposing the image, especially when it comes to balancing light in windows with interior light to avoid blown out highlights. Experiment with different combinations of these tools to learn how they can best serve your style and the property you're shooting.
Camera placement is another significant consideration. A common mistake is placing the camera too high, resulting in skewed perspectives and a distorted sense of space. Generally, the ideal camera placement is about four feet off the ground. This position maintains the correct perspective and provides a realistic representation of the room's size. However, this is not a hard-and-fast rule; be ready to adjust based on the room's unique layout and the effect you're trying to achieve.
The choice of lens also plays a pivotal role. Wide-angle lenses are popular in real estate photography because they can capture more of the room in a single frame. However, this can be a double-edged sword. While it's important to show as much of the space as possible, overuse of wide-angle lenses can make the room seem larger than it is, leading to disappointment when potential buyers visit the property. It's a balancing act – aim to show the room in its entirety without misrepresenting its size. This is one of the biggest areas where new photographers get in trouble.
Editing is another area where balance is key. While post-production can help enhance the final image by adjusting exposure, correcting colors, and sharpening details, there's a fine line between enhancement and deception. Over-editing can make the photos look too perfect, which can lead to a letdown when potential buyers see the actual property. Be mindful to retain the essence of the property while making the necessary enhancements.
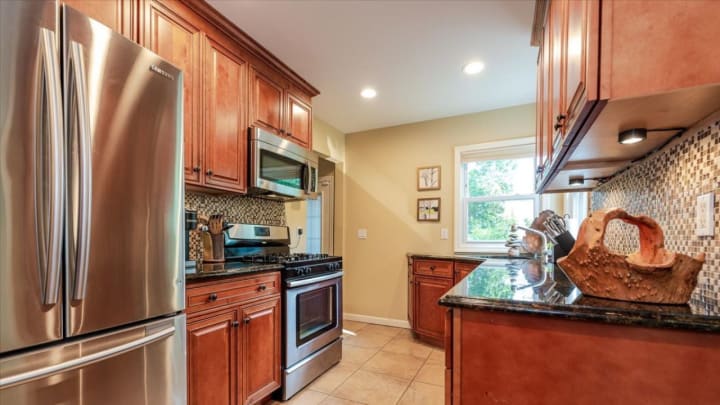
Reflective surfaces are a common challenge in real estate photography. Mirrors, windows, unpowered televisions, and glossy furniture can reflect unwanted objects, including the photographer and their equipment. This not only distracts potential buyers but can also detract from the room's appeal. When photographing rooms with reflective surfaces, consider the angles and lighting to minimize reflections. You might need to reposition yourself or adjust the room's layout to capture the best shot.
You will probably find yourself decluttering for most of the shoot. People live in their homes, especially the kitchen, and even when asked to declutter before the shoot, they will generally leave out the things they use daily. Your choices are to move them out of the line of sight (sinks, dishwashers, or a table in the other room are my usual go-to places to hide sink clutter), or use camera angles to minimize the size of large items like coffee makers and air fryers when they can't be moved.
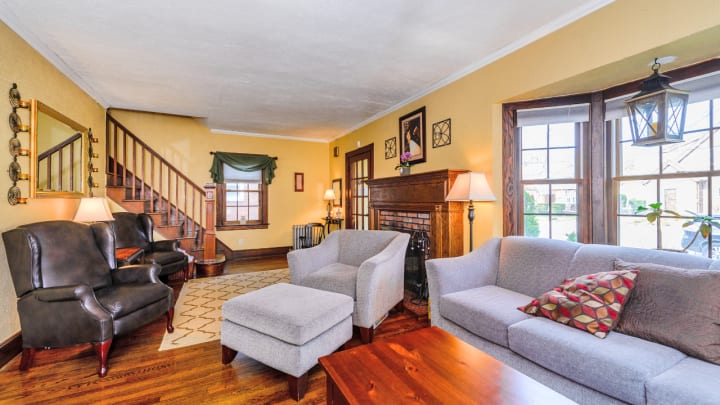
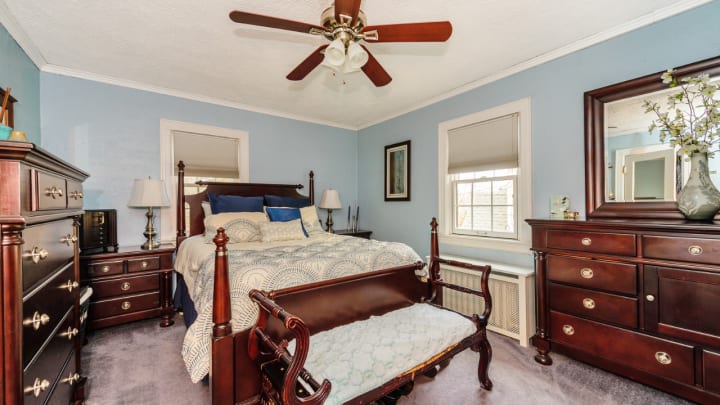
Finally, remember that you're not just photographing a property, you're telling a story. Each image should invite potential buyers to envision themselves living in the space. Show the flow of the house, the way the rooms connect, and how the space could be used. Keep the décor neutral and minimal to avoid personal taste clashes and help buyers imagine their own belongings in the space.
In conclusion, successful real estate photography is about balance. It requires the careful use of equipment, the mindful choice of angles, and a light touch in editing. But above all, it requires a clear understanding of the goal: to create appealing, honest images that encourage potential buyers to schedule a viewing. The ultimate goal is not just to attract potential buyers, but to give them a realistic impression of the property that aligns with their in-person experience. Remember, the biggest negative in real estate photography isn't failing to entice viewers to schedule a visit, but causing disappointment when they walk in the door.
Your photographs should sell not just a house, but a potential home. They should be aspirational, allowing viewers to see themselves within the spaces. That's why it's vital to ensure every detail, from the positioning of the furniture to the cleanliness of the space, is meticulously managed.
Photographing for real estate listings is not a simple task. It takes skill, patience, and a keen eye for detail. But with the right approach, you can portray properties in their best light, creating captivating images that give viewers a real sense of the home they could have. It's not just about getting people in the door - it's about helping them visualize their potential life within these walls.
The technical aspects – like using tripods, timers, and indirect flash units, or maintaining a correct perspective with a 4-foot high camera placement – all work in unison to create an accurate and attractive representation of the property. Each tool, angle, or technique you use should serve this overarching purpose.
If you're looking to upsell your clients, the best places to do so are with 3D camera tours and by measuring rooms and generating floor plans in your post production. These have been in high demand since the pandemic. The 3D camera, especially the Matterport camera, does a great job of helping you stitch together a coherent virtual walk through the house to help buyers understand how the rooms work together. Floor plans make for great handouts at open houses and are often uploaded into the listing with the pictures.
As a real estate photographer, your role extends beyond mere documentation. You are a visual storyteller, translating the essence of a home into images that resonate with viewers and inspire them to take the next step. Always remember this as you navigate through the challenges and opportunities of each unique property. To summarize, your job as a real estate photographer is to create a delicate balance of appeal and honesty. Your images need to be inviting and convincing enough to inspire potential buyers to visit, yet they also need to offer a realistic depiction of the property to avoid any disillusionment. By paying attention to the details, utilizing your equipment effectively, and considering the unique characteristics of each property, you can master the art of real estate photography and play a critical role in the home-selling process.
About the Creator
Ian Lozada
Ian Lozada, a dedicated realtor with Keller Williams Elite on Long Island, brings a creative eye to property, cultivated through a decade of wedding and event photography. Passionate about shaping homes and stories. Serial entrepreneur.
Keep reading
More stories from Ian Lozada and writers in Photography and other communities.
Will Mortgage Rates Begin to Slow Their Rocket Ride?
In recent weeks, the U.S. economic landscape has been a hotbed of significant developments that have and will continue to impact the real estate market and mortgage rates. Amidst this dynamic landscape, a complex paradox has emerged – a thriving real estate market with rising prices against a backdrop of banking sector turbulence and evolving Federal Reserve policies.
By Ian Lozada11 months ago in Trader
Capturing Magic
In the world of photography, timing is the key to everything. While skilled compositions and technical proficiency are undoubtedly crucial, the perfect lighting can create the perfect photo. Nowadays, we can determine any light ourselves and are no longer dependent on any natural light source, thanks to the developed technology. We can turn every day into a night by using the right filters. And we can illuminate every night to be seen as a day. A typical process, especially in the film industry.
By Krishan Mubashar23 days ago in Photography
Sleep music soothing relaxation
Healing Piano Music for Stress Relief, Calm Music for Meditation, Sleep, Relax, Healing Therapy, Nat ► Relaxing music encompasses a wide range of genres and styles, all aimed at promoting calmness, reducing stress, and inducing a sense of relaxation.
By PeacefulMusic4 days ago in Photography


Comments
There are no comments for this story
Be the first to respond and start the conversation.