

Building a basic pc setup from scratch is more than just slotting in pieces. It delves deeper into the intricacies of understanding the symphony of hardware components working in unison, striving for that peak performance every tech enthusiast craves. But what do you need to build a pc? Beyond the technicalities, crafting your PC is about personalizing a machine that resonates with your unique needs and aspirations. Let this guide be your compass, illuminating the path and imbuing you with the knowledge and assurance to craft your ideal basic pc setup with aplomb.
Understanding the Core Components
Diving into the world of PC building starts with a deep understanding of its essential components.
The Central Processing Unit (CPU)
Often dubbed the 'brain' of the computer, the CPU manages all tasks and processes. While many brands produce CPUs, the choice generally boils down to Intel or AMD. Each has its pros and cons, so researching based on your specific needs is crucial.
Motherboard: The Heart of a PC
The motherboard connects all the components. It's vital to ensure the motherboard is compatible with the CPU, RAM, and GPU you select.
Random Access Memory (RAM)
RAM is your system's short-term memory. It temporarily holds data that the CPU might need fast access to. For most users, 16GB of RAM suffices, but heavy gamers or professionals may opt for 32GB or more.
Storage Solutions: SSDs and HDDs
When it comes to storage, two primary options exist: Hard Disk Drives (HDDs) and Solid State Drives (SSDs). SSDs offer faster data access times than HDDs, but they also generally come with a higher price tag. Combining both can offer a balance of speed and storage capacity.
Visual Components: GPU and Monitor
The Graphics Processing Unit (GPU) dictates your PC's visual output. Nvidia and AMD are dominant players in this field. Depending on your needs - gaming, graphic design, or general use - you'll need to choose a GPU that suits your requirements.
Your monitor also plays a crucial role. Ensure it aligns with your GPU's capabilities for the best visual experience.
Ensuring a Steady Power Supply: The PSU
The Power Supply Unit (PSU) is often overlooked but is vital. It supplies power to every component. A modular PSU is recommended for better cable management.
Cooling Your Machine: Heatsinks and Fans
A well-cooled PC lasts longer and performs better. Depending on your build and usage, investing in quality heatsinks and fans is essential. For overclockers, considering liquid cooling might be beneficial.
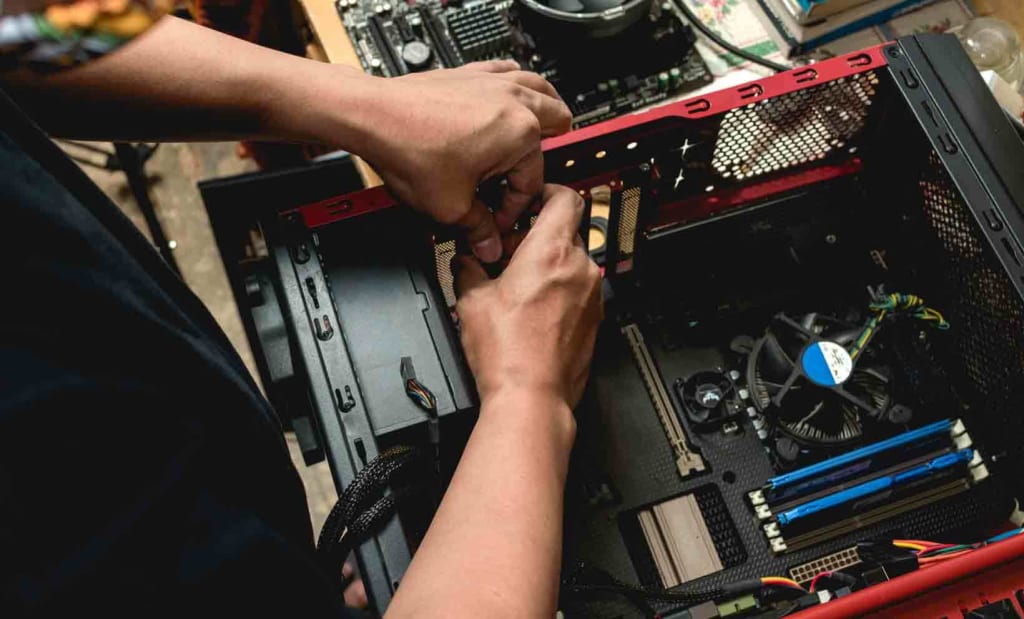
Assembling the Machine: A Detailed Step-by-Step Guide
Prepare Your Workstation
Before you even touch a component, it's paramount to prepare your working area.
- Choose a spacious, well-lit, and clutter-free area to work.
- Lay down an anti-static mat. This ensures that no static electricity damages the components.
- Keep your tools (screwdrivers, cable ties, etc.) handy.
Install the CPU
The CPU is the brain of your system and requires careful handling.
- Open the CPU socket on the motherboard by lifting the lever.
- Look for the corner with a tiny golden triangle on your CPU; this is your orientation point.
- Align the CPU with the socket, ensuring the golden triangle aligns with the corresponding corner of the socket.
- Gently place the CPU down without applying pressure.
- Lock the CPU in place by lowering the lever.
Attach the RAM
RAM provides quick access storage for your CPU.
- Identify the RAM slots on the motherboard.
- Open the clips on either side of the slots.
- Align the notch on the RAM stick with the notch in the slot.
- Firmly push the RAM stick down until the clips snap into place.
Fix the Motherboard
Your motherboard is the main hub connecting all components.
- Place your motherboard inside the PC case.
- Align the screw holes of the motherboard with the standoffs in the case.
- Secure the motherboard using screws but don't overtighten.
Connect the PSU (Power Supply Unit)
Your PSU provides power to every component.
- Position the PSU in its designated area in the case.
- Secure it with the provided screws.
- Plug the necessary power cables into the motherboard, GPU, and other components.
Install the GPU (Graphics Processing Unit)
The GPU is crucial for gaming and graphic tasks.
- Identify the PCI Express slot on your motherboard.
- Unlock the clip at the end of the slot.
- Align your GPU's connectors with the slot and push until the GPU is seated, and the clip locks.
- Secure the GPU to the case with screws.
Connect Storage Devices
This step is where you'll install your SSDs and HDDs.
- Identify the drive bays in your PC case.
- Slide your SSD or HDD into a bay and secure it with screws.
- Connect the data cables from the motherboard to the drives.
Set Up Cooling
Keeping your components cool ensures longevity and performance.
- Position fans in areas of the case that allow for optimal airflow (typically front-to-back and bottom-to-top).
- If using liquid cooling, mount the radiator and ensure tubes don't obstruct other components.
- Connect all fan cables to the appropriate headers on the motherboard.
Final Check
Before powering on, a thorough check is essential.
- Double-check all connections to ensure they're secure.
- Organize cables for better airflow using cable ties.
- Ensure no tools or spare screws are left inside the case.
Boot Up
It's the moment of truth!
- Connect your monitor, keyboard, and mouse.
- Turn on the power supply switch at the back of the PSU.
- Press the power button on the case.
- If all goes well, you should see the system's BIOS or a prompt on the monitor, indicating your PC is alive and well!
Conclusion
Constructing a PC is a rewarding endeavor, equipping you with not only a machine tailored to your needs but also invaluable knowledge about computer hardware. As the tech landscape evolves, so will the components and choices. However, the foundational understanding you gain from building a PC remains an enduring asset. Dive in, stay informed, and embrace the journey of being a PC builder.
About the Creator
David Wix
📚 I'm a seasoned technical content writer with over 5 years of experience, specializing in computer hardware.
🔗 Connect
Twitter:@davidwix18
Email: [email protected]
How an Eye Doctor Made $5 Billion Dollars
Walking down the colorful streets at Miami Beach, Florida, and coming across a man in his sixties, with red fedora hat and wire rimmed glasses, his presence might not even make you look twice as he goes out of your sight. This scrawny guy, who appears to be a total nobody, is, in fact, a very rich man, with a one-of-a-kind tale of rags-to-riches that begins with just his optometry training. Despite this, I remain very curious to know how a third eye doctor who had no funds became a billionaire. Then, there is Herbert Wertheim, the exceptional investor whose name has since turned completely desiccated even in the minds of the numberless multitude.
By Amine Oubih7 days ago in Lifehack
A Front Door: Your Home’s First Impression
A front door is what visitors see first when they come to your home, and therefore, it plays a crucial role in creating a first impression of your home. It sends a welcome message. The key difference between exterior and interior doors lies in their functionality and construction. Apart from being robust for security and energy efficiency, these doors are built to prevent penetration of sound into your home.
By Sanjay Kumar2 days ago in Lifehack


Comments
There are no comments for this story
Be the first to respond and start the conversation.