
How to Fix Saggy Couch Cushions
You don't want to have to replace your couch every time it gets a little worn, so here's how to fix saggy couch cushions, and stay comfortable for longer.


If you don't know how to fix saggy couch cushions, they can be a major curse. They're unsightly, uncomfortable, and kind of sad, sometimes being the catalyst to dissatisfied sex on the couch. If you're anything like me, the sight of your new, beautiful couch in the living room brings a feeling of satisfaction, and even excitement. When couch cushions start sinking and sagging, looking ever more sad and sat-upon, it takes a toll on your aesthetic sensibilities. Plus, as the cushions get flatter and flatter, and the filling gets lumpier and lumpier, they can start to get much less comfortable. In order to avoid this, here are some tips for fixing those sagging couch cushions so your couch doesn't have to be a sore spot in your life anymore.
Just fluff it up.
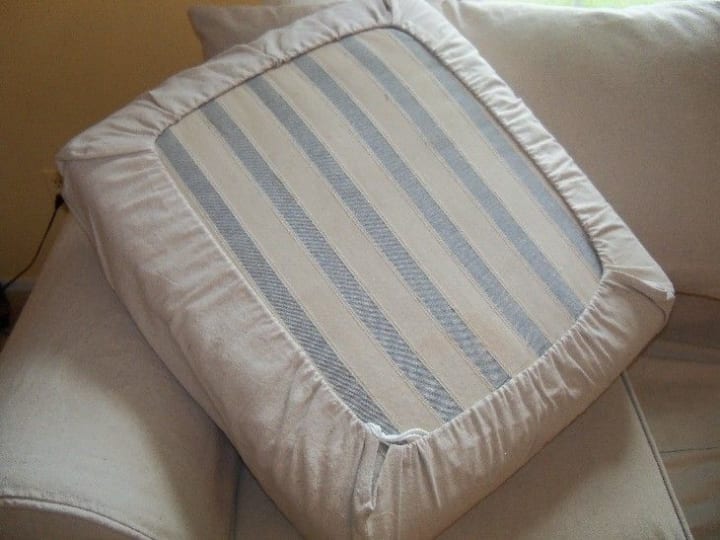
Photo via Pixabay
It may surprise you to learn that most saggy couch cushion issues can be fixed with no tools, no payments, and no sweat or frustration. On most sofa cushions, there are hidden zippers in the upholstery. All you have to do is remove the cushions, unzip the upholstery, and manually fluff the stuffing.
People sit and lean on couch cushions. That's what they're for. There are even couch exercises for stoners that could, ultimately, cause a shift in fabric beneath the cover of your couch cushion. In reality, they're really just sturdy fabric wrapped tightly around loose, movable filling. When you put weight on a section of it, that filling moves and condenses. Some of it is pushed out to the sides, and wherever you sit directly becomes compressed. In order to fix the sagging, you need to uncompress it.
Knowing how to fix saggy couch cushions is usually simple:
Step 1: Remove the couch cushions you want to fix.
Step 2: Find the hidden zippers and unzip them.
Step 3: Check for secondary zippers. Usually, there's a zipper for the upholstery, and a second zipper for the casing around the inner material. If this is the case, unzip that zipper as well.
Step 4: Reach your arm in to where the sagging is an issue—for seat cushions, it's usually right around the center, where people generally sit.
Step 5: Use your hands to fluff up the inner material. You want to basically push it back into shape, and make sure to keep the corners and edges are filled in. Any flat, condensed material should be separated and fluffed.
Step 6: Put everything back and take a look! Oftentimes, that's all it takes to make your couch look just about as good as new.
Even knowing all this though, the longer you have and use your couch, the more your cushions will sag. At some point, you may have to put in just a little extra work.
Add more filling.
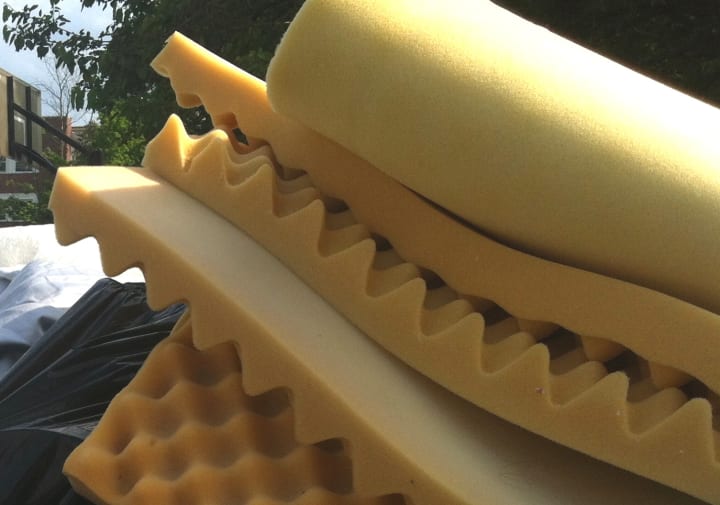
Photo by Windell Oskay on Flickr
Especially for older, well-loved couches, the sofa cushions might need a little extra help to regain their former shape, so don't be afraid to re-fill them. This isn't an exact science, which means there are a number of easy, cheap ways you can achieve this.
Firstly, you can usually just buy more of the same kind of stuffing. If you have poly fil cushions, buy extra poly fil, if you have down cushions, buy extra down, etc. Generally, you don't need to go that far or be that exact. You can use any kind of stuffing, really, for the extra volume; since it's just adding a bit of extra fluff, it doesn't need to be the most high-quality stuffing.
Another very easy option for adding volume and fluff to your saggy couch cushions is using foam egg cartons. You know, those big foam egg-carton-shaped mattress things? Just cut one up and slide the pieces into your couch. They provide both structure and volume, and that foam material stays comfortable and good looking for a lot longer than other kinds of stuffing—especially down.
Slip some plywood underneath.

Photo by Stylin Art Collections on Flickr
You can go out and buy specially-marketed "furniture fixers" or "couch supports," but it's going to be a lot more expensive, and probably no easier, than making one yourself. Those manufacturers are right about how to fix a saggy couch, but it doesn't have to be with their $30 piece of wood. Instead, you can use a cheap piece of plywood.
To fix your sagging couch cushions using plywood, you need to first remove the cushions. Measure the area of the couch over which those cushions go, and cut a piece of plywood to that size. Slide it in, replace the cushions, and sit down. It might seem odd to put hard wood in your comfortable furniture, but it's important for your cushions to have support underneath all that comfy fluff. A simple piece of plywood can provide that support with ease, and keep your cushions from sagging.
If you don't have zippers, don't fret.
Photo by Woodbine9 from Wikimedia Commons
Some couches don't have the hidden zippers I was talking about earlier. Any old IKEA couch will, since you usually have to at least put the upholstery on by yourself, but many higher-end manufacturers will sew the upholstery and/or casing around the stuffing. If you find that you're trying to solve your saggy-cushion issues but are discouraged by your inability to get in there without a zipper, don't worry. You don't have to suffer the curse of sagging cushions just because you bought a fancy couch with no zippers.
Your first option, as I mentioned above, is to cut a piece of plywood to fit into your couch and slip it underneath the cushions. It's a simple, cheap fix that doesn't require you to open up your sofa at all, besides removing the cushions altogether.
If you don't want to do that, or it doesn't solve the issue, all is not lost. Non-zippered couch cushions will have seams. Look underneath the cushion, and find a sewn channel. If you're not much for sewing, find one that's out of the way and won't be seen after you're done. Then, just rip it open. I recommend using an actual seam ripper, not scissors or X-acto knives and your hands, just to make sure you get a clean severance. Open up the seam just enough to get your hands in there, and fluff up the stuffing, or add more, just as with the zippered cushions above.
Once your cushion is nice and fluffy and re-shaped, it's time to put it back together again. Obviously, the ideal way to do this is by sewing it back up. Just make sure to use sturdy thread and make your stitches close-together—a properly stuffed piece like that will likely put pressure on the seams.
If you're not a sewing type though, that's okay too. You're welcome to get creative with your re-upholstering. You can use those heavy-duty staples to keep it together, or a sturdy glue applied with a glue gun, which will give you a slightly neater seam. Even reading up on how to replace the upholstery in your car might provide you with some creative ideas to getting your furniture back in top form. It won't look as great at the seam itself, of course, but these options will hold your cushion together, and let it look good where it's visible; which is, after all, the only place it really needs to.
About the Creator
Nicola P. Young
Lover of Books, Saxophone, Blogs, and Dogs. Not necessarily in that order. Book blogger at heartofinkandpaper.com.
Keep reading
More stories from Nicola P. Young and writers in Lifehack and other communities.
Amazon Lifehacks You Should Know
Amazon is quickly becoming a one-stop (or one-click) shop for all of your needs and wants. I mean hey, you can even get groceries from Amazon. And most of the time, it's way cheaper than buying in-store or ordering through another online retailer. But what you might not know is that Amazon also offers a wide range of extra deals and ways to save money. So don't settle for saving a few bucks of a product here and there, and make use of these Amazon lifehacks to save in every area of your life.
By Nicola P. Young6 years ago in Lifehack
From Darkness to Light
Depression is like a big, heavy cloud that hangs over everything. It makes you feel sad and tired all the time, and it's hard to see any light at the end of the tunnel. I know because I've been there. But I also know that it's possible to beat depression and find happiness again. Let me tell you about my journey.
By Rafayet Rabbi 2 days ago in Lifehack
American Boxwood(Buxus sempervirens): A Classic Evergreen Shrub for UK Gardens
Title: Preserving Tradition: American Boxwood (Buxus sempervirens) - A Timeless Evergreen for UK Gardens In the tapestry of British gardens, few plants hold the esteemed status of the American Boxwood (Buxus sempervirens). Its timeless elegance, versatility, and adaptability have made it a staple in landscapes across the United Kingdom for centuries. This classic evergreen shrub, with its dense foliage and graceful form, continues to enchant gardeners and landscape designers alike, embodying the essence of traditional garden design while seamlessly integrating into contemporary landscapes.
By Kavya Organic Garden5 days ago in Lifehack
When the Robots Took My Job
This is for RM Stockton's Write Club prompt for the month of April: AI Please allow me to vent. For "college," I went to a scam school that is now closed. We were promised internships that were never spoken of again after admissions, and we were promised help finding jobs. The first time I went to the career counselor's office, she was completely frazzled. She had no idea what to do with us, the film majors. The second time I visited her office, I let her know that I'd found myself a job, and she was visibly relieved.
By Rebekah Conard4 days ago in Journal


Comments
There are no comments for this story
Be the first to respond and start the conversation.