
Bullet Journaling Basics
A Simple Guide for Bullet Journal Beginners
When it comes to getting our lives together, many of us reach for agendas and pre-made planners that we can buy at the store in order to keep track of appointments and events happening in our lives. This method can be effective if you just need to keep note of a date and time of an event, but what if you want something more personalized and more unique? What if you want your agenda to keep track of more than just appointments and events? What if you wanted to keep track of your habits, your mood, and even your sleep?
That's where the "Bullet Journal" comes in. In the last few years, the bullet journal has become a popular way of keeping track of events, moods, habits, sleep and so much more. From trackers to wish-lists, the bullet journal has it all, and the best part? It's personalized to the individual using it. Each month can be different, it all depends on you and your unique style. You can experiment with different layouts each month until you settle on a layout that works for you, and each month can have different elements depending on if certain special events (such as Christmas or Halloween) are happening that month.
In this article, I'm going to break down the basics of what you need in a bullet journal, and some extras to add to each month to help you get started on your bullet journal journey.
The Supplies
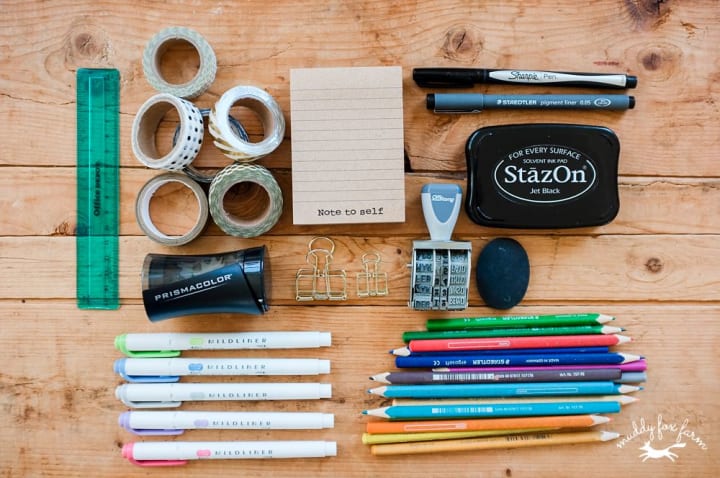
First, let's talk about some basic supplies.
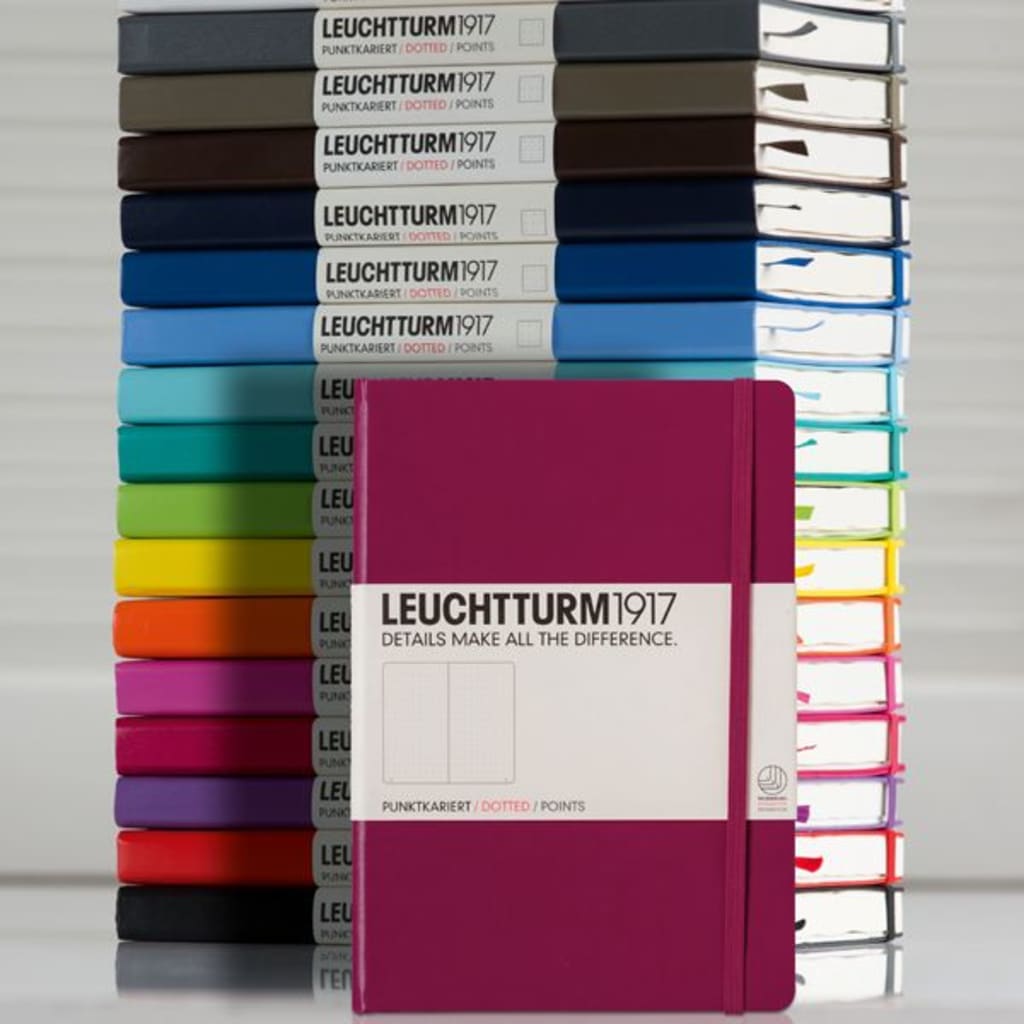
While any notebook will suffice, the best type of notebook to use is a dotted notebook, as they allow for easy grid planning and don't have prominent lines that'll interfere with the overall look of the bullet journal. It's also a good idea to go with a flat-laying notebook, such as a Leuchttrum 1917 as they offer a wide variety of colors, have pages that don't bleed, and lay flat when open, which is easier for writing in. I also recommend a hardcover notebook, as they are easier to write on if you are on the go.
As for writing equipment, pencils and erasers are a must for rough drafts of trackers and any doodles you may want to incorporate into your bullet journal, but investing in a good set of pens that have varying thicknesses, with at least one of which being a 0.1 thickness pen for writing will prove to valuable when bullet journaling. Having pens with different thickness can nice if you want the outlines of your trackers and calendars to be thicker than any lettering you do.
Colored pens, pencils, and markers are optional if you're going for a more creative bullet journal. The type of pens, pencils, and markers you invest in is entirely up to you and your budget, but you can get away with using Crayola pencil crayons and markers for any drawings you do.
Your best friend is going to be white-out. We all make mistakes, and instead of scribbling over the mistake and making our journals look messy, we can use white-out to cover up the mistake and simply write over the white-out.
Your other best friend is going to be a ruler. If you're somewhat of a perfectionist and want straight lines in your bullet journal, you'll want a ruler to make those perfectly straight lines.
Some fun other things to get for bullet journaling are post-its and washi tape. This is for the more artistically-inclined who wish to add color to their journals, or who wish to add in notes to their journals when they aren't able to write in their bullet journal directly.
To summarize:
Necessary:
- Notebook
- Pencil
- Eraser
- Black Pens of varying thicknesses
- White-out
- Ruler
Desired:
- Dotted, Flat-laying, Hardcover Notebook
Optional:
- Colored Pens
- Colored Pencils
- Colored Markers
- Washi Tape
- Post-Its
The Key
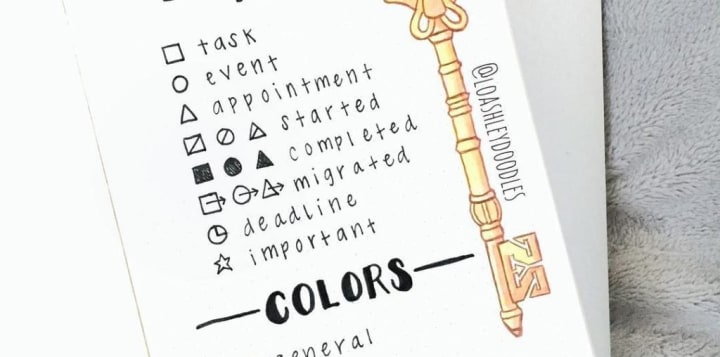
In any bullet journal, it's important to have an index. This index will help you differentiate between tasks and events at a glance when looking at your calendars (which we will discuss in a little bit).
Your index should contain these elements:
- Task: A task is something that needs to get done
- Completed Task: This signifies that the task is completed. You can simply cross out the task symbol.
- Task Migrated: This signifies that the task needs to be moved from this month or week to the future. You can simply put an arrow on the task symbol
- Task Canceled: This signifies that the task does not need to be done. You can simply bar the task.
- Event: An event is something that usually requires going out or planning for.
- Event Migrated: This signifies that the event was moved to a future date. You can simply put an arrow on the event symbol,
- Event Canceled: This signifies that the event will not be happening. You can simply bar the event.
- Appointment: An appointment is normally a scheduled meeting
- Appointment Migrated: This signifies that the appointment has been moved. You can simply put an arrow on the appointment symbol.
- Appointment Canceled: This signified that the appointment does not need to be attended. You can simply bar the appointment.
- Note: A note is something you wish to remember
- Idea: An idea is something that you thought of
- Due Date: A due date is for when assignments or tasks are due
- Reminder: A reminder is placed before a due date to make sure you remember to complete the assignment or task
- Important/Urgent: This is a signifier placed next to one of the other symbols, to indicate that that particular item is important and needs to be done first.
While it may feel like an exhaustive list, each point plays a key role, and some things, like Task Migrated, Event Migrated and Appointment migrated can just be an arrow added to the Task, Event and Appointment symbol.
This key can go anywhere in your journal, as long as you are able to find it, in case you are unsure of which symbol to use or which symbol means what.
The Index
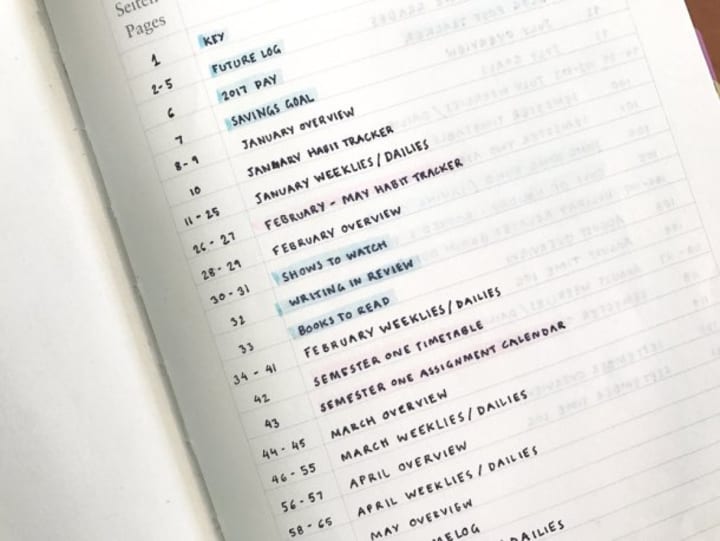
In a bullet journal, the first few pages are always dedicated to being the index. This index can be helpful if you are looking for specific pages within your bullet journal later and can't remember which page you put them on.
For each entry you make, make sure to include what is on the page and the page range. For each new page you make, make sure to include it in your index. It can be easy to forget to indicate on your index what pages you've added to your bullet journal, but if you keep in the habit of writing in the index each time you make a new page, you won't forget.
The Future Log
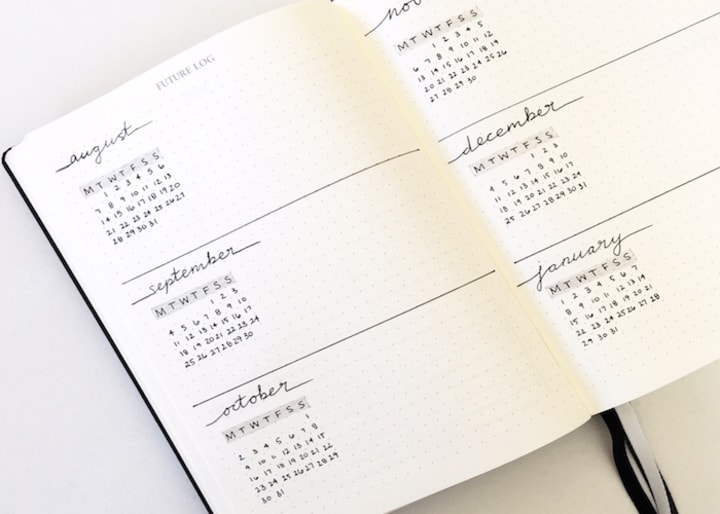
While some people include a future log, others don't, and whether you do is entirely up to you. The future log is meant to depict the events and tasks for the next six months so that you have a general idea of what your next half of the year is going to look like. This can be a good place to include migrated tasks and events that won't be done for the next few months and can later be incorporated into your monthly calendars once you create your monthly spreads.
The future log is a two-page spread and should be equally divided into six sections (one section per month, starting on the month after. So if you start your bullet journal in January, your future log would start in February). At the time of starting to make your future log you know of any important events or appointments that will be happening in the next six months, you can fill it out in the future log by using a symbol, or bullet, and putting a quick little bit of information like the date, time and a sentence about what that event or appointment is.
Now you're ready to start with your monthly spreads.
The Cover Page
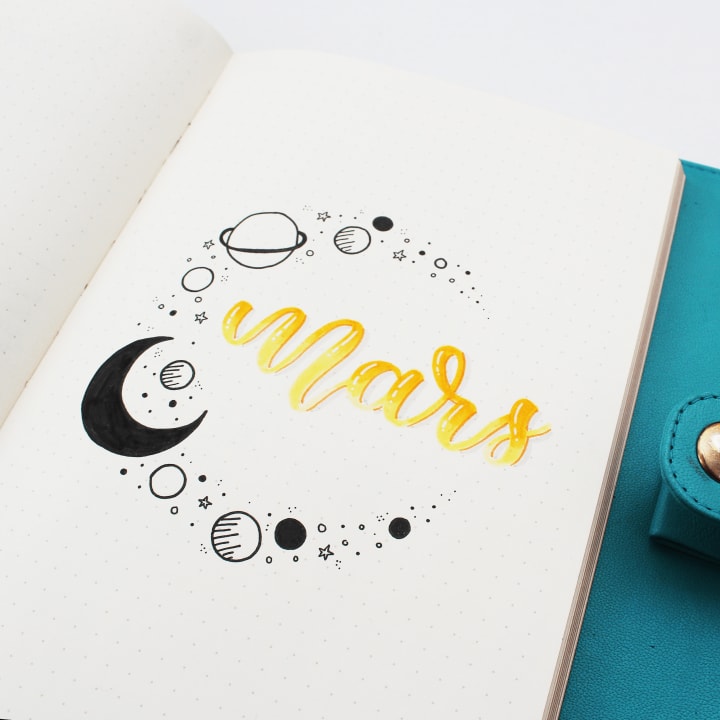
In order to differentiate which month you're in, it's best to create a cover page. If you're more artistically inclined, you can create a drawing on your cover page along with the name of the month, but if that isn't your style you can simply write the name of the month on the cover page so that you know which month you're in.
The Monthly Overview Calendar

On the next page after your cover page should be your monthly calendar. You can set it up on either a single page or do a two-page spread (whichever suits your fancy), as long as you're able to put your bullets on the calendar to signify important events and appointments. Tasks shouldn't be put on the calendar unless they are monthly tasks, since putting weekly tasks would clog up the calendar. Weekly tasks are reserved for the weekly spreads, where you'll be able to go more in depth about what the task is, as you'll have more space to write out all the tasks you need to do in the week.
If you do a single page spread, on the opposite page, create a box and label it Events. This is where you'll write out what each bullet is on your calendar so that, at a won't, you are able to tell if you have any tasks, events or appointments coming up, and what they are.
If you did a two-page spread, and you have enough space, simply write in the boxes on the calendar, a quick sentence on what the event or appointment is. If you don't have enough room, you can make an Events box on the next page and write out what each bullet signifies in a quick sentence or two.
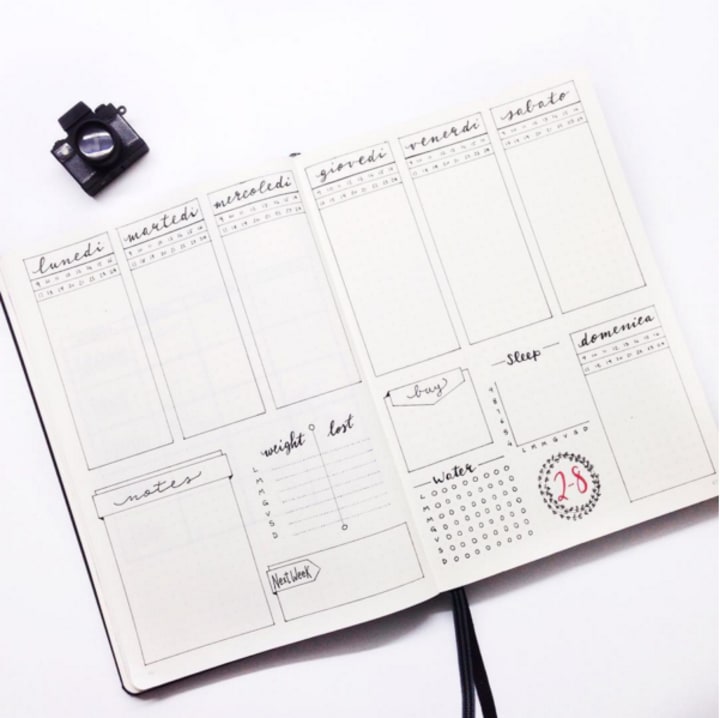
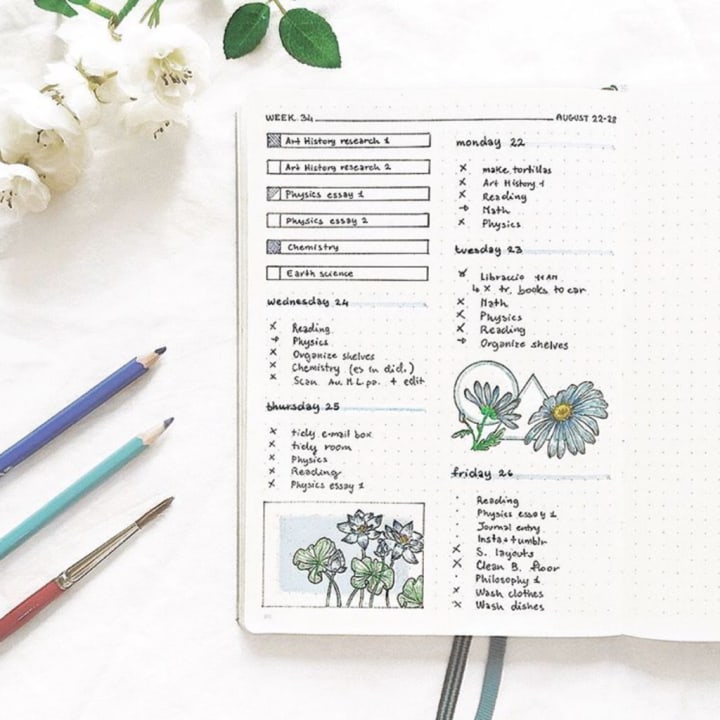
Weekly spreads are the break down of the month in (typically) seven-day chunks so that you can better plan your week. This is where the typical "planner/agenda" style comes into play.
A typical weekly spread is a two-page spread and can be set up however you see fit. it can be as elaborate or as minimalistic as you wish. The Spread should include each day of the week in its own separate box so that you can write out tasks that need to be completed that day. This is the bare minimum that you need for a weekly spread page.
You can also include a Notes section, in order to jot down any notes or ideas that come to mind during that particular week.
Tip: Create a mini monthly calendar in the corner of your monthly spread and highlight which week you are in so that you can keep track of what week you are working on.
Now we can talk about some optional trackers and ideas to add to your bullet journal.
The Mood Tracker
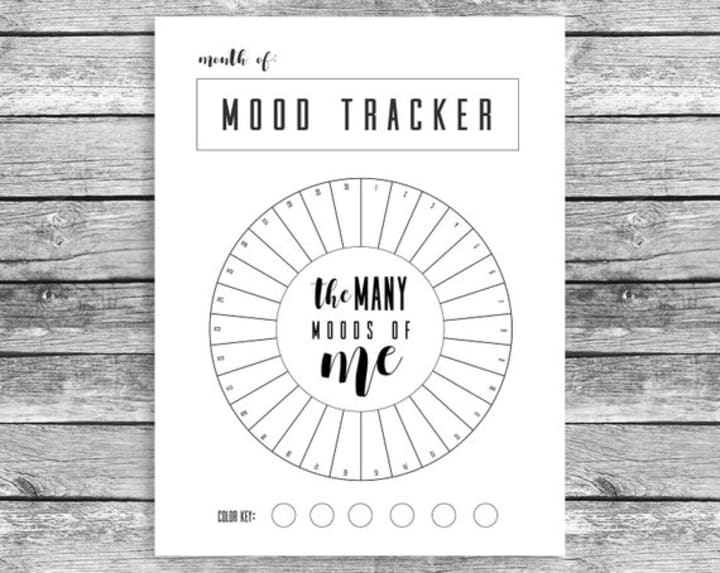
Mood trackers are great for keeping track of your mood throughout the month, especially if you're someone with a mood disorder who wants to keep track of how their symptoms are evolving over time (especially if you've started a new medication or if you suffer from Bipolar disorder). The mood tracker can be a general mood tracker or it can be more elaborate. I'll give you two layouts, one simplistic and elaborate one, so that you have two templates to go off.
Here is an explanation of the simplistic style:
- Happy: In a very good mood. Delighted, Joyful, Cheerful, Elated.
- Content: In a good mood. Comfortable, Fulfilled.
- Neutral: Neither in a good mood nor a bad mood. Normal, Indifferent.
- Down: In a low mood. Blue, Low.
- Sad: In a bad mood. Depressed, Crestfallen, Miserable.
Here is an explanation of the elaborate style:
- Angry: having a strong feeling of or showing annoyance, displeasure, or hostility.
- Anxious: experiencing worry, unease, or nervousness.
- Bored: feeling weary because one is unoccupied or lacks interest in one's current activity.
- Creative: relating to or involving the imagination or original ideas, especially in the production of an artistic work.
- Depressed: in a state of general unhappiness or despondency.
- Energetic: showing or involving great activity or vitality.
- Excited: very enthusiastic and eager.
- Exhausted: drained of one's physical or mental resources; very tired.
- Frustrated: the feeling of being upset or annoyed, especially because of inability to change or achieve something.
- Hypomanic: mood state characterized by persistent disinhibition and elevation
- Indifferent: having no particular interest or sympathy; unconcerned.
- Irritable: having or showing a tendency to be easily annoyed or made angry.
- Lonely: sad because one has no friends or company.
- Manic: showing wild and apparently deranged excitement and energy.
- Motivated: stimulated interest in or enthusiasm for doing something.
- Relaxed: free from tension and anxiety; at ease.
- Stressed: subjected to pressure or tension.
When setting up your mood tracker it's best to keep it to a one-page spread. You can set it up how you like, but a popular set up is to write the days of the month down the side of the page. Then you have two options: You can either assign each mood a color and color the square next to the date to the corresponding mood you were feeling that day, or you can write the moods at the top or bottom of the page in a line and then just fill in the square that matches up to the date and mood you felt that day. There are a variety of ways that the mood tracker can be set up and it truly depends on how you want it to look and what best works for you.
The Habit Tracker
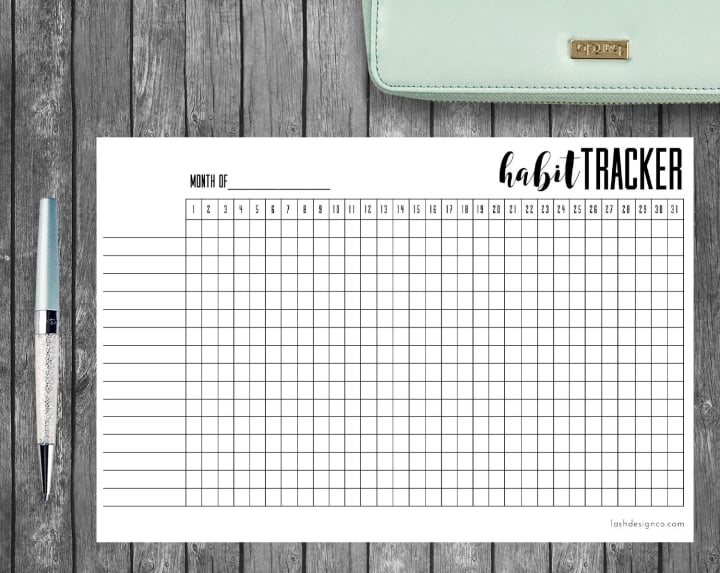
Another popular tracker that has made its way into the world of bullet journals is the habit tracker. The habit tracker is meant to keep track of habits that you want to do on a daily basis and get in the habit of doing. this can include things like taking medication, drinking enough water, going to bed on time and even meditating once a day.
Some of the habits that people like to track include:
- Hydration: Some people want to make sure they are getting at least getting two liters worth of water a day.
- Meditation: Sometimes we need just five minutes to ground ourselves and meditation can be a good way to do that.
- Eight Hours of Sleep: Ideally, everyone should be getting at least eight hours a sleep a night.
- Studying: For students, especially around midterm and finals season, studying can be a habit that's hard to get into and its best to keep track of when we studied and what we studied.
- Creative Time: Creative activities, whether it's drawing or writing, is a good use of our free time and gets blood flowing to different areas of our brains.
- Exercise: Exercise is an important part of a healthy lifestyle. WHO recommends that we get 150 minutes of exercise a week, and habit trackers can be a good way of tracking how much exercise we are getting a week.
- Morning/Night Medication: For those of us who take medication on a regular basis, it can be hard to remember to take it every day, and if we do forget, we often forget when the last time we took it was.
- Reading: Reading is a perfect way to relax and lose yourself in another world. This is a perfect habit to get into if you want to find a way to relax at the end of the night and found that meditation isn't for you.
When setting up your habit tracker, its best to keep it to a one-page spread, just like the mood tracker. One variation of the habit tracker is to build it in a similar way to the mood tracker: writing down the side of the page the days of the week and then writing the habits you want to track on either the top or the bottom of the page. Another variation you can try is to give each habit you want to track its own box, and then to divide each box into 28/29/30/31 boxes (depending on the month) so that you can circle or color in each box for each habit you complete.
The Sleep Tracker

For some of us, keeping track of how many hours of sleep we get is important, not only for our mental health but for our physical health. With a sleep tracker, we can monitor just how much sleep we have been getting throughout the month and make the necessary modifications to our sleep schedule in the following month so that we can get enough sleep.
There are a few ways you can lay out a sleep tracker, but you should keep your sleep tracker to a one-page spread.
One way of laying out your sleep tracker is writing out the days of the month along the side of the page, and then across the page writing the time, starting at midnight and ending at midnight. How this will work is that you'll start filling out the time you went to bed at up until midnight. Once you hit midnight, you switch to the next day and fill it in up until you woke up.
Another way of laying out your sleep track is doing it like a scatter plot chart. While keeping with writing the dates down the side of the page, instead, write the numbers between four and twelve across the top and bottom of your page. How this style will work, is that you'll place a dot along the line that corresponds to the number of hours you slept, then you'll connect each dot with a straight line.
The Expense and Savings Tracker
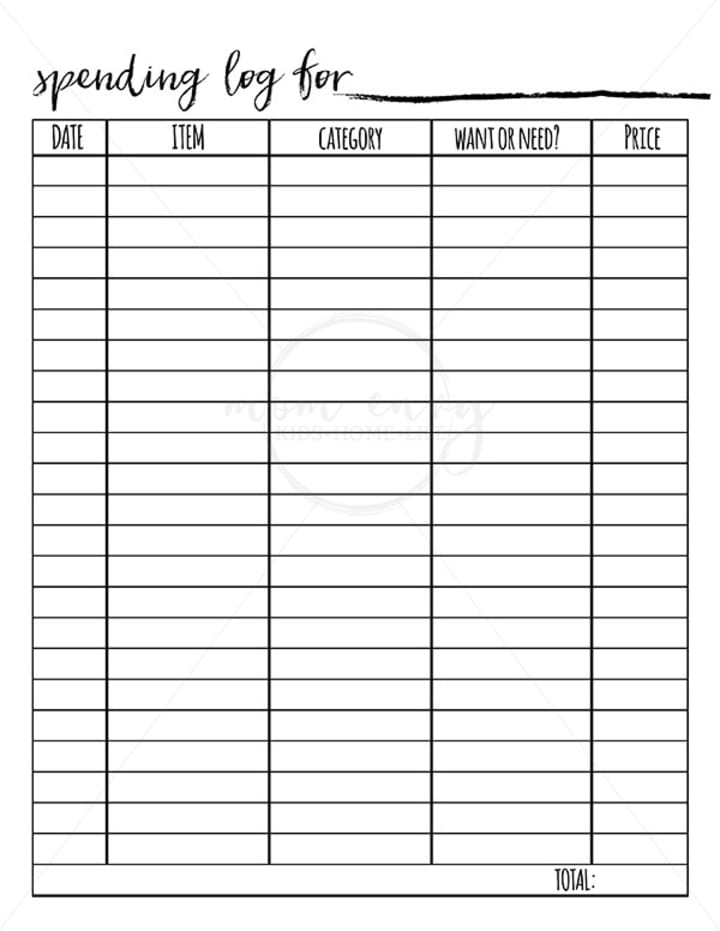
With online and mobile banking, sometimes we forget just how quickly our money can disappear. This is where an expense tracker can be helpful. It places all of your necessary expenses and your random purchases in one place so you can calculate your net spending and make adjustments to your spending habits. You can also create a savings tracker so that you can monitor how much you are adding to your savings account.
The expense and savings tracker is typically a two-page spread and can be set up however you want. There are so many variations to expense and savings trackers that you can experiment and research different styles, but they all include a general structure that is: a box to write down the amount and what you spent it on, a total section at the bottom of the box, a box to write down the amount you are saving, and a total section at the bottom of box.
The Brain Dump Page
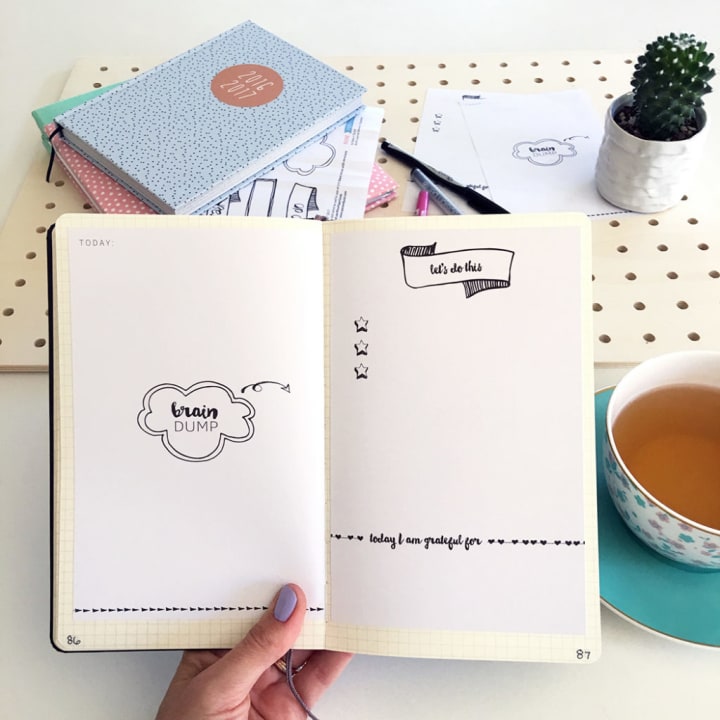
Have you ever had an idea and wanted to write it down? Have you ever written down a great idea but then lost or misplaced the paper you wrote it down on? This is where the brain dump page comes in. Brain dump pages are for writing down quick notes and ideas that you'll want to remember later but have no place to store them.
The layout is simple. It can either be a one or two-page spread with the words brain dump written across the top. Then, each time you have an idea or note that you need to write down, simply write it on your brain dump page.
You can also keep small post-it notes inside your bullet journal and put them on your brain dump page if you write a note outside your bullet journal but still want to keep the note for later on. This can come in handy if you are at work and don't necessarily have your bullet journal on you at the time.
The Daily Spread
A daily spread is a lot like a weekly spread, but it's meant to be for a specific day. The daily spread should break down all the tasks you need to include throughout the day, and, if any, events and appointments that are going on that day.
Daily spreads are one-page spreads that can be set up any way you like, as long as they include the date at the top of the page, and the day of the week. They can include a snippet from your habit tracker and a space for you to jot down any notes if you want to fill up any extra space on the page.
Tying it All Together
Now that we've discussed some of the basic components of the bullet journal and even have some optional trackers and pages you can include in the bullet journal, you are now ready to tie the bullet journal together.
There is no set way that the bullet journal has to be laid out after the cover page and monthly overview calendar. It should suit your unique style and needs. you can place your weekly and daily spreads at the end of the "month" or you can block them off in the beginning and place your trackers towards the end. The beauty of the bullet journal is that you get to decide how your bullet journal is laid out. You can include the bare necessities, or you can include trackers and other pages. You can have a minimalistic style or it can be creative and filled with drawings and doodles and even have a unique theme for each month.
No matter how you choose to lay out your bullet journal, it's important to keep in mind that this is your journal and that there is no right or wrong way of doing a bullet journal. While there may be hundreds of blog posts, Pinterest pages and YouTube videos of bullet journal set-ups, no one will have the same set up as you, because no one has the same needs as you do. Don't worry if someone else's bullet journal looks different from yours, everyone's journal is catered to them, which is what makes the bullet journal such a unique piece of planning equipment.
About the Creator
Hailey Gumbley
Just a Girl in her Early Twenties on a magical adventure
Enjoyed the story? Support the Creator.
Subscribe for free to receive all their stories in your feed. You could also pledge your support or give them a one-off tip, letting them know you appreciate their work.
Keep reading
More stories from Hailey Gumbley and writers in Lifehack and other communities.
New Year, New Bullet Journal
Every New Year's Eve, we make promises to ourselves. Promises for the new year to come that usually involve losing weight, becoming a better person, working out more, or saving up more money. The new year is all about new beginnings and a fresh start, which is why the new year is the perfect time to start a bullet journal (or to start a new one if you're an avid bullet journalist). If you aren't sure how to set up a bullet journal, you can check out thefollowing article to get a feel for how the bullet journal is normally laid out.
By Hailey Gumbley6 years ago in Lifehack


Comments
There are no comments for this story
Be the first to respond and start the conversation.