
Bottle up
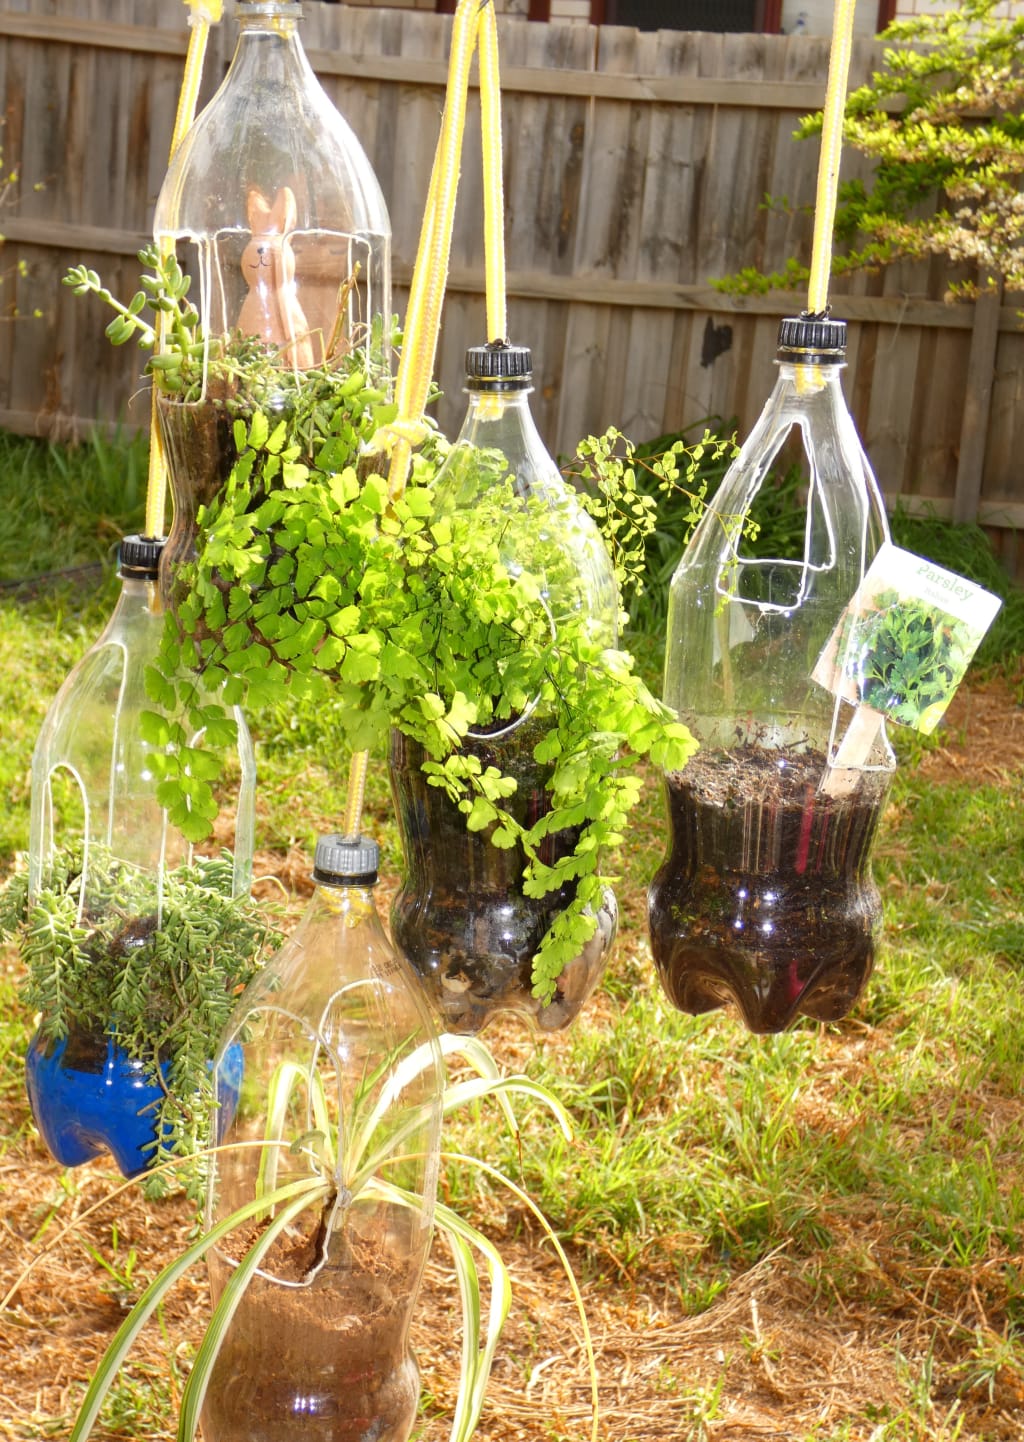
Turn used drink bottles into hanging planters


The average household generates a lot of waste through packaging, and it worries me that recycling programs are not able to keep up with it all. So, I’m always looking for ways to use packaging, tins, and bottles in craft projects. Why buy art supplies when they’re already right here in our homes?
I have put together step-by-step instructions on making some simple hanging planters. These can be used for ornamental plants to brighten things up, or for more practical kitchen herbs … or even a combination plant like calendulas.
Here’s what you will need.
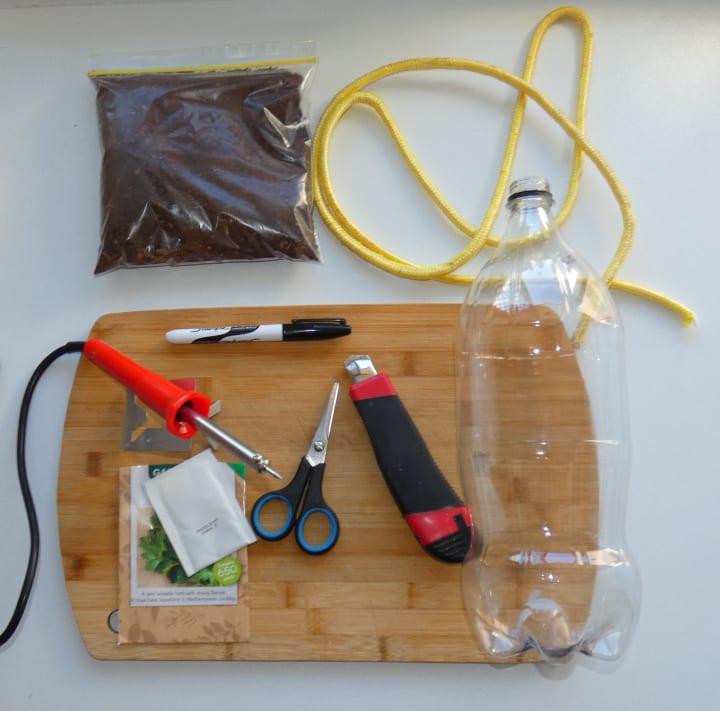
- At least one large drink bottle and its lid (2 litre bottles are great)
- A piece of small gauge rope (about 60cm long)
- Knife or scissors
- Marker
- Soldering iron
- Potting mix
- Seeds or plant.
I also use a protective surface i.e. cutting board for the soldering iron. A face mask and well-ventilated workspace are good too, as melting vinyl plastic will produce a little smoke.
STEP ONE
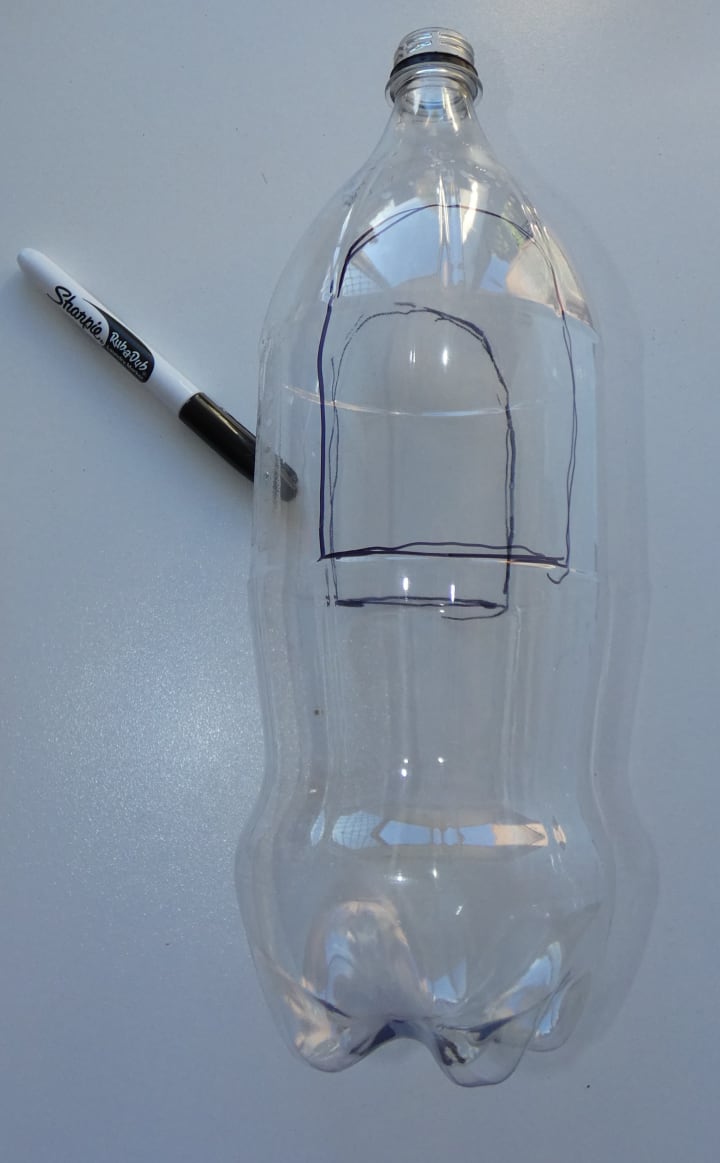
The bottle will need windows for your plant to grow. These can be any shape such as arches and circles. Mark out your shapes, but leave a 3-4cm space at type to maintain the bottle’s strength. Leave about 4-5cm at base so your soil doesn’t leak out. In the photograph, I have done two large arches facing each other.
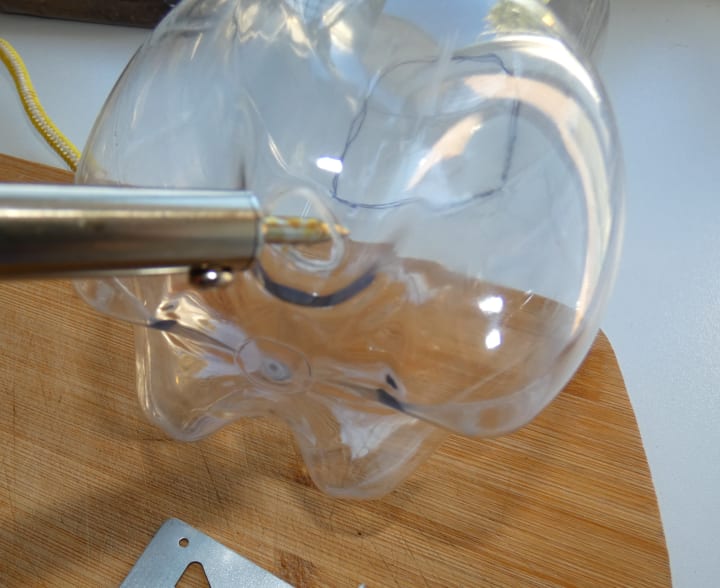
STEP TWO
Using your soldering iron, make holes in the base of the bottle. These are for drainage so don’t make them too large. I’ve done mine on each of the base points of the bottle. Don’t worry though if they get a bit bigger than intended as you can use pebbles to stop your soil leaking out.
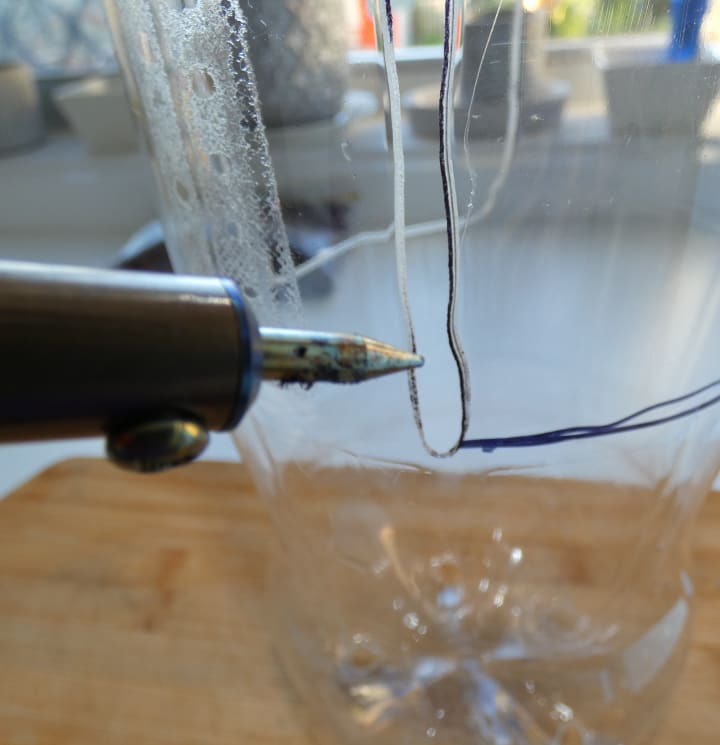
STEP THREE
Using the soldering iron, cut away the windows you’ve marked out. You may wish to keep the pieces you’ve cut out to use as plant markers if you plan to use your bottles for seeds.

STEP FOUR
Melt a hole in the bottle lid large enough to allow you to thread your rope through it. Wait a minute or two to allow the lid to cool before moving to the next step.

STEP FIVE
Tie a knot in one end of your rope, then thread it through your bottle lid. If the lid has not cooled down enough, the rope may stick and it can be a little tricky threading it through. You may also find at this point you need to make the hole a bit bigger … I always do!


STEP SIX
At the other end of the rope, tie a loop so you are able to hang up your bottle when it’s finished.

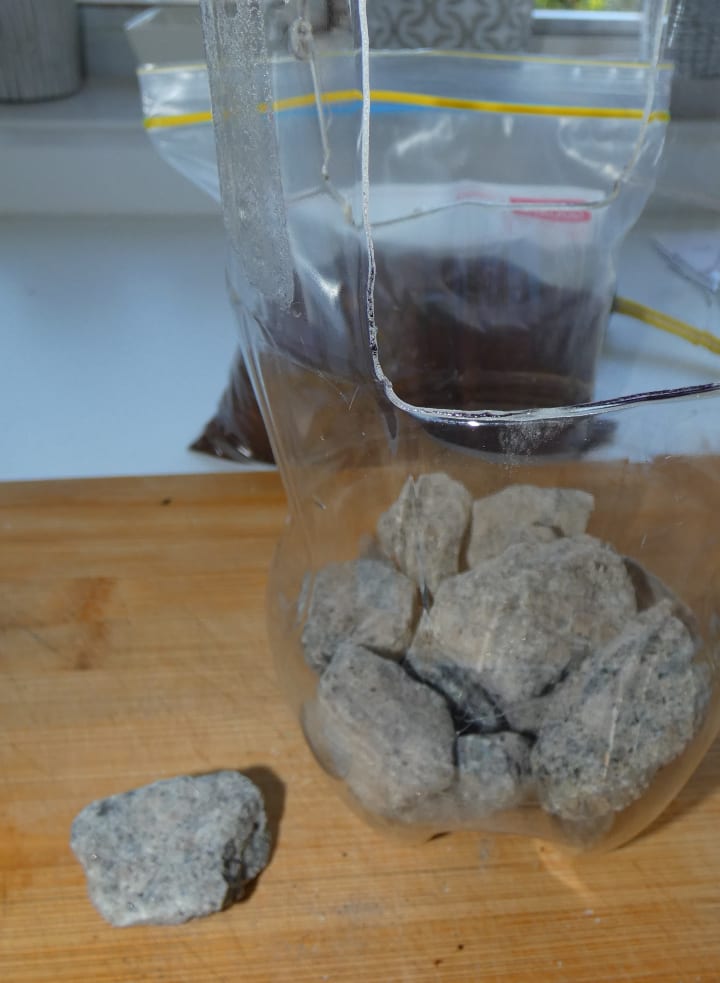
STEP SEVEN
At this point you can place stones and soil in your pot. You can use ornamental stones if you wish, although I find pebbles look a bit better once the soil or potting mix is added. Choose a plant or sow those seeds, then screw on the cap. Voila! You have a hanging pot.


About the Creator
Enjoyed the story? Support the Creator.
Subscribe for free to receive all their stories in your feed. You could also pledge your support or give them a one-off tip, letting them know you appreciate their work.
Keep reading
More stories from Anne van Alkemade and writers in Lifehack and other communities.
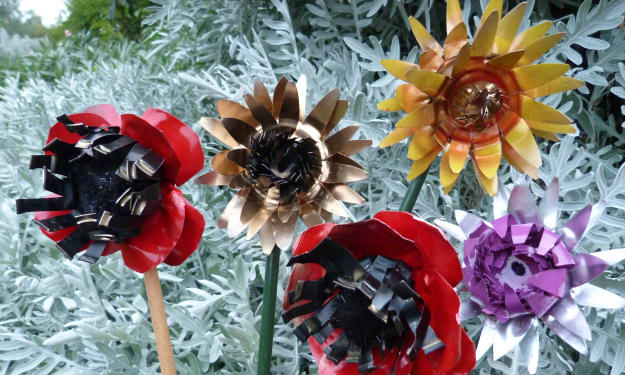
CFT Flowers
One of the things that makes me extremely uncomfortable about being a doting old cat lady is that I indulge my furry friends and feed them the stuff that comes in the tiny, aluminium ring pull tins - which means lots of packaging to throw out. Sure, they're recyclable, but what if I could MAKE something with them? Not only do I have an ongoing supply of art materials, I'm also able to create gorgeous, never-die flowers.
By Anne van Alkemade3 years ago in Lifehack
JongWha Chang On Deciphering Your Medical Bill: A Survival Guide For The Bewildered
If you’ve ever felt like you need a Ph.D. in finance to understand your medical bill, you’re not alone. Healthcare billing is notoriously complex, often leaving patients confused, frustrated, and sometimes even financially burdened. But fear not, knowledge is power. Let’s break down this medical maze with the help of health services expert, Jongwha Chang, and arm you with the tools to navigate it.
By JongWha Chang3 days ago in Lifehack
Bless Me Father for I Have Sinned
So, here’s me sitting on the 7b bus heading into town. I shouldn’t be on the bus. I don’t want to be on the bus. I should be on a bike, legs pumping like pistons. The freedom of the open road. Direction where the tyres press, as the poet said.
By Brendan Donaghy7 days ago in Humor


Comments (1)
That is an excellent idea. Lovely photos as well. We have dedicated recycling bins in my apartment block as well.