
A Complete Guide on How to Make a Tailored Lampshade
Tailored lampshades refer to lampshades that are custom-made to fit a specific lamp or lighting fixture.


(Please ignore the bad lighting/editing or white cut-offs done on the images in this article, as the images are taken either from a very old book from my library or from a CCL raw image database)
(Links to certain articles are highlighted in a different colour. Click the link and it will take you the article accordingly)
Tailored Lampshade
A tailored, fabric covered lampshade can be made to fit most frame shapes. Choose a frame, paint it, if necessary, and bind the top and base rings, and one opposite pair of uprights, with the binding tape (see article "How to Make a Lampshade Frame"). Select the outer lining fabrics. A white silk lining will reflect the light outwards from the interior of the shade.
Measure the circumference of the lampshade at its widest point, and add 15 cm (6 in). Measure the shade height, and add 7.5 cm (3 in). Cut out the outer fabric along the bias to these dimensions. You will also need the basic sewing kit and clear fabric glue.

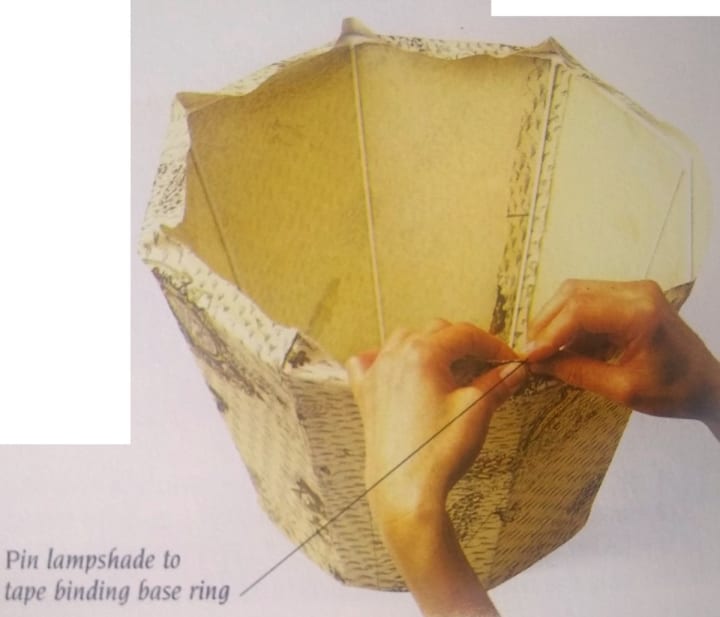
1. Pinning Fabric to Uprights: Cut the outer panel of fabric in half. Pin one piece of the fabric to the frame. Firstly, pin the fabric to the taped uprights, stretching the fullness around the frame, then pin it to the taped rings.

2. Pinning Fabric to Ring: Work around frame, pinning fabric to top and base rings between the pair of taped uprights. Pull fabric taut to remove any creases, and apply the pins inwards.

3. Marking Fabric: As long as the fabric is stretched taut, you will have a clear outline of one-half of the frame. Draw the shape of this outline on the fabric, using a vanishing ink pen or tailors chalk. Draw between the pins, following the lines of the rings and the two uprights.

Safety Notice
As there are people out there who are just beginning on their journey of complete home furnishing. I would advise taking great care when it comes to dealing with sharp knives, scissors and especially pins.
4. Cutting Out Fabric: Unpin fabric from frame. Cut out, following drawn line, adding 2 cm (3/4 in) all around. Cut out an identical panel on the bias. Cut out two panels of lining, using a panel of outer fabric as a pattern.
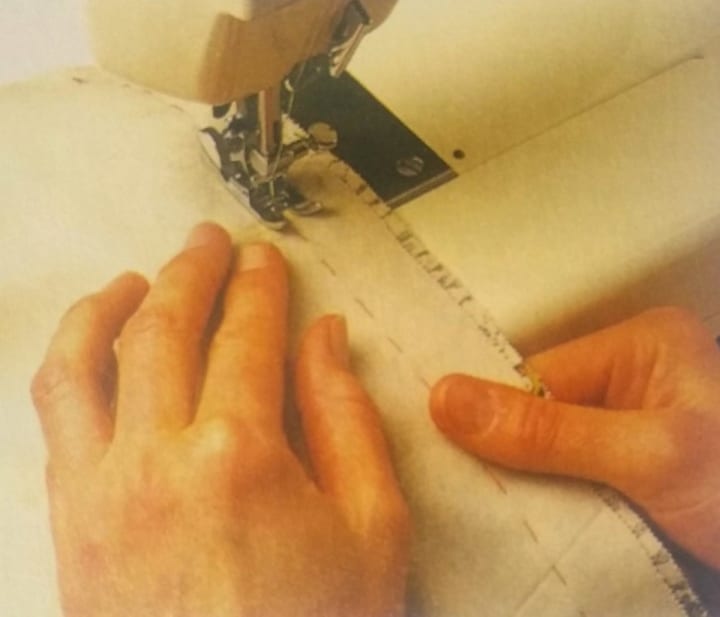
5. Sewing Outer Panels: Lay the two outer fabric panels right sides together, and pin, tack, and sew them along the two short sides, to form a tube of fabric. Do the same with the lining fabric. Press the fabrics, and turn the outer fabric to the right side.
6. Positioning Outer Fabric: Remove the tape from the two upright struts, and slide the outer tube of the fabric over the lampshade frame. As you do this, make sure that the two seams run along a pair of opposing upright struts.

7. Pinning Fabric: Pin the fabric to the top and base rings. As you pin it, pull and snip the fabric allowance, so as to avoid any creasing. Make sure that the side seams do not move out of line with the two upright struts.
Safety Notice
Where silicon padded gloves if necessary and make sure you use a pin cushion for all your collection of pins. Stay away from the fireplace in your house, as the majority of the fabrics are highly flammable.
8. Sewing Fabric: Over-sew the fabric to the binding tape on the rings, using doubled cotton thread. Work around the rings, making small stitches through the fabric to the outer edge of the binding tape.

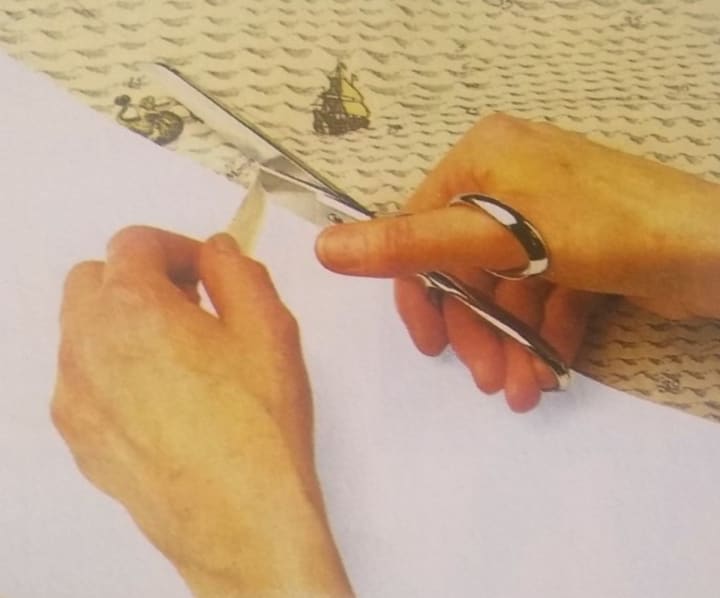
9. Trimming Fabric: Use a sharp pair of scissors to trim the excess fabric around the ring by cutting as close as possible to the stitching.

10. Pinning Lining: Place the lining fabric inside the frame, right sides to the inside of the frame. Match the seams with those of the outer fabric, before stretching and pinning the lining to the top and base rings.

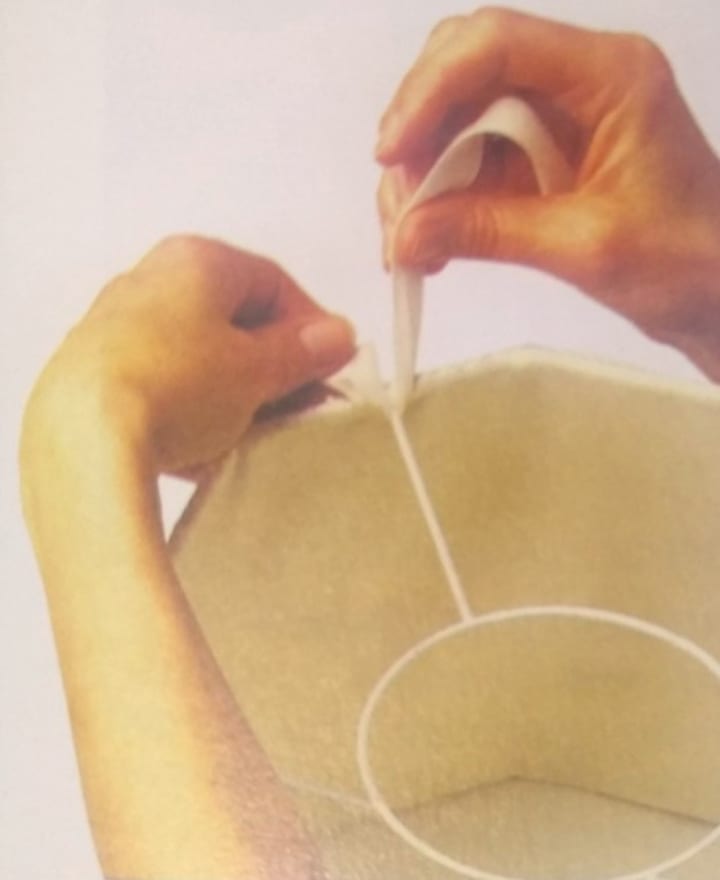
11. Cutting Incisions: Make short incisions in the lining, so that it fits neatly in place around the gimble supports. Adjust and pin the lining fabric, keeping it taut. Over-sew the lining all around, making sure that the stitches are on the outer edge of the shade, so that the edging will conceal them.

12. Trimming Fabric: Trim the excess lining fabric around the top and base rings. Neaten the points where the gimbal supports meet the top ring by covering each join with a piece of lining fabric. Cut out strips of lining on the bias. Each should measure 5 x 3 cm (2 x 1-1/4 in). Fold under the long edges of each strip by 6 mm (1/4 in) and press.

13. Attaching Strips: Wrap lining strips around and over the tops of the gimbal supports and the top ring, and glue them in place. When dry, trim them to match the outer edge of the shade. Make up the edging by cutting two bias strips of fabric to the same lengths as the circumferences of the rings, 4.5 cm (1-3/4 in) wide.
Turn the long edges under by 1 cm (3/4 in), and press. Fix edging to top and base rings, using glue. Work in 15 cm (6 in) lengths at a time. Fold the ends under by 6 mm (1/4 in), and overlap the turnings by 2 cm (3/4 in). Use clothes pegs to secure the strips while they are drying.

About the Creator
Temoor Dar
💡Topic: Entrepreneur and Writer💡
♟️Hobbies: Traveling, Poems, Playing Chess and Solving Puzzles♟️
🎂Born: July 7, 1991🎂
📍Born in Stockholm, Sweden, and now a Londoner since 1996📍
📚Lifelong Learner📚
🌟Wisdom from Mentors🌟
Keep reading
More stories from Temoor Dar and writers in Lifehack and other communities.
Reflecting Beauty: The best Vanity mirror on the market
Introduction: In the realm of beauty and self-care, the ritual of preparing oneself for the day ahead or winding down in the evening is an intimate and cherished practice. At the heart of this ritual lies the vanity mirror, a quintessential tool that not only reflects our physical appearance but also serves as a conduit for self-expression and empowerment.
By Xavier Robertsa day ago in Lifehack
Dwarf Yaupon Holly: A Petite Evergreen Treasure
Title: Dwarf Yaupon Holly: A Petite Evergreen Treasure Word Count: 802 --- Tucked away in gardens and landscapes across the southern United States, the Dwarf Yaupon Holly stands as a petite yet captivating evergreen treasure. With its compact size, glossy foliage, and versatility, this ornamental shrub has become a favorite among gardeners seeking year-round interest and low-maintenance beauty.
By Kavya Organic Garden6 days ago in Lifehack


Comments (1)
Very interesting! Well written!