
Complete Guide on How to Make Paper Lampshades
A complete step by step guide on how to make paper lampshades

(Please ignore the bad lighting/editing or white cut-offs done on the images in this article, as the images are taken either from a very old book from my library or from a CCL raw image database)
(Links to certain articles are highlighted in a different colour. Click the link and it will take you the article accordingly)
Paper Lampshades
Making your own paper or card lampshades can be one of the most satisfying and rewarding home decorating projects. You can construct a variety of lampshades for lamp bases or pendant fittings, using plain or patterned paper.
The sides, which are supported by a standard lampshade ring with a gimbal, can either be pleated or flat. Self-reinforced by its own folds. A pleated paper lampshade can be made from a variety of weights of paper, ranging from cartridge to light card.

Pleated Paper Lampshade
Choose the paper card, and decide on the height of the finished shade. Select an appropriately sized, painted wire ring to support the lampshade at the top, and a length of ribbon. You will also need a hole punch, ruler, set square, craft knife, pencil, scissors, table knife, and glue.
Calculate the circumference of the completed lower edge of the lampshade. Decide how deep you wish the pleats to be. Depending on how deep the pleats are, multiply the circumference by approximately two to give the total length of paper required.
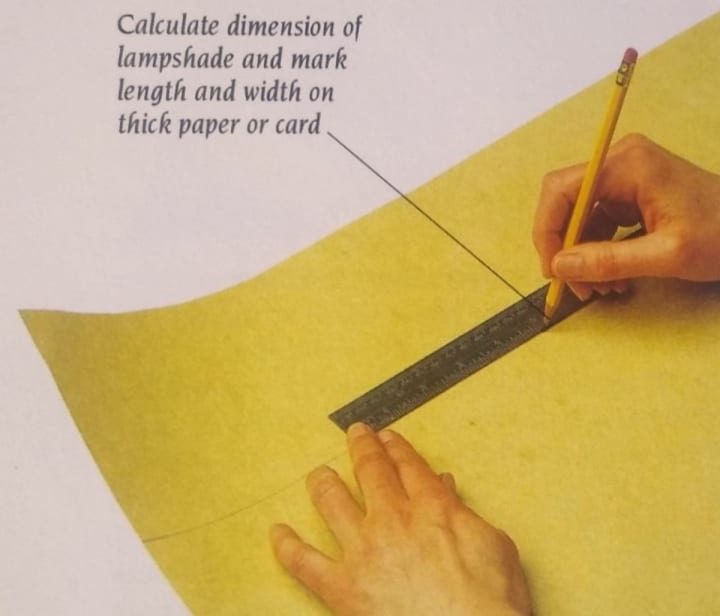
1. Measuring Up: Divide the circumference by the size of one pleat, in this case, 4 cm (1-1/2 in). Round up to an even number for the pleats needed. Using a ruler, set square, and sharp craft knife, cut the paper into one or more strips to the total length, by the height of the finished shade.
2. Marking Pleats: Mark intervals to correspond with the pleat depth along the top and bottom long edges on the wrong side of the paper. If you are using more than one length of paper, allow extra paper for the glued joins, continue the sequence of pleat marks across the joins, and keep the marks on the inside.

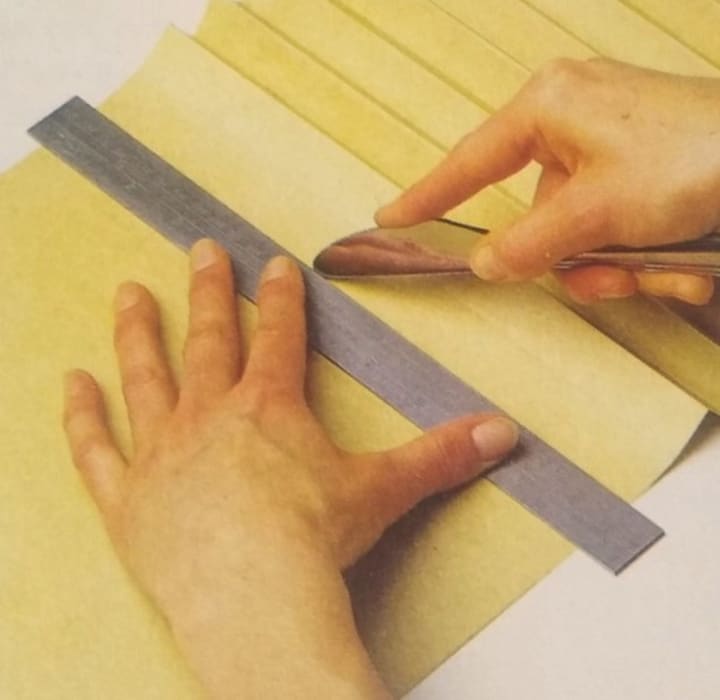
3. Folding Pleats: To make crisp pleats, press down and draw a crease line between the marks, using the blunt edge of a table knife or dressmakers scissors. Guide the blade with a metal ruler. Fold the creases into alternate pleats over the edge of a table. If joining strips to make up a complete length, glue the strips within a pleat.
4. Making Template: Cut out a piece of card measuring 5 x 2 cm (2 x 3/4 in). Draw a central line down the length of this template, and make two holes with a paper punch, one for the gathering ribbon, 2.5 cm (1 in) from the top edge, and the second a little over 2.5 cm (1 in) below this, for the supporting ring. Place the template on one side of each fold, and accurately mark the punch holes with a pencil.

5. Punching Holes: Grip each double pleat between the jaws of the punch at the marks, and punch through the paper. In this way, punch pairs of holes in the pleats. At each end of the paper, leave the final pleat unpunched ready for gluing.

Safety Notice
As there are people out there who are just beginning on their journey of complete home furnishing. I would advise taking great care when it comes to dealing with sharp knives, scissors and especially pins.
6. Cutting Across Holes: Using a sharp pair of scissors, cut across the lower row of holes to the inside, or wrong side of the fold, to allow the lampshades supporting ring to be inserted. Point the scissors down at a very slight angle when cutting.

7. Gluing Ends: Secure the ends of the paper by applying glue to the surface of each end fold. Join the two ends to make a complete pleat. Allow the glue to dry thoroughly.

8. Securing Ends: Hold the ends together until the glue has dried. Using the template, mark a pair of holes through the overlap. Punch the holes. Using the scissors, cut through the lower holes to the inside.

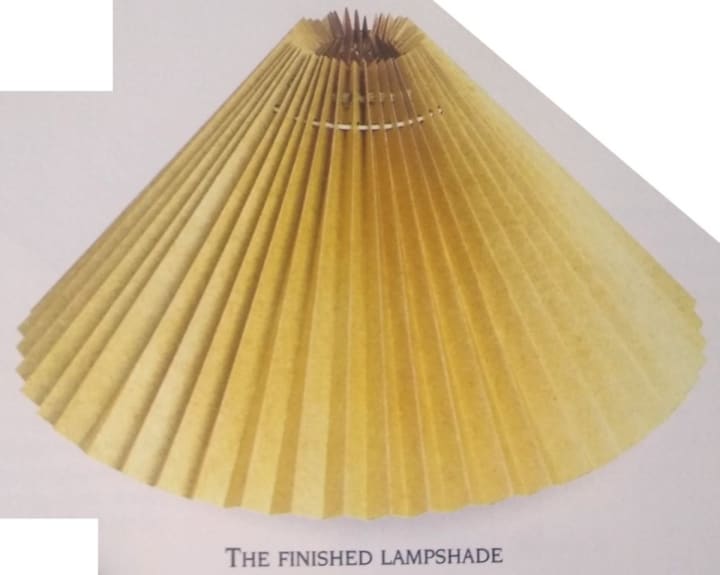
9. Threading Ribbon: Cut apiece of ribbon to fir through the top set of holes. Approximately 1 m (1 yd.) has to be cut. Wind tape around the leading end, and thread the ribbon through the holes.

About the Creator
Temoor Dar
💡Topic: Entrepreneur and Writer💡
♟️Hobbies: Traveling, Poems, Playing Chess and Solving Puzzles♟️
🎂Born: July 7, 1991🎂
📍Born in Stockholm, Sweden, and now a Londoner since 1996📍
📚Lifelong Learner📚
🌟Wisdom from Mentors🌟
Keep reading
More stories from Temoor Dar and writers in Lifehack and other communities.
How many ounces in a cup
The relationship between ounces and mugs is a abecedarian aspect of cuisine and baking. Understanding this relationship not only ensures accurate measures but also plays a pivotal part in achieving asked culinary issues. To comprehend the conversion between ounces and mugs, one must claw into the history, delineations, and practical operations of these units of dimension. originally, let's establish the delineations of both ounces and mugs. An ounce is a unit of mass in both the Homeric system and the United States customary system of dimension. In the Homeric system, one ounce is original to28.3495 grams, while in the US customary system, it's roughly28.3495 grams. This slight distinction arises from the literal development of these systems. On the other hand, a mug is a unit of volume dimension used primarily in cuisine and serving sizes. In both the Homeric and US customary systems, one mug is original to 8 fluid ounces. still, it's important to note that there are different types of mugs used for colorful purposes. The standard mug dimension used in fashions is known as the" legal mug" and is defined as 240 milliliters. This description is honored by utmost countries as the standard mug size. Now, to understand how numerous ounces are in a mug, we need to consider the conversion factor between volume and mass. Since a mug measures volume and an ounce measures mass, converting between the two requires knowledge of the viscosity of the substance being measured. Different substances have different consistence, meaning their mass- to- volume rates vary. For water, which is frequently used as a standard in cuisine measures due to its harmonious viscosity, one fluid ounce is original to roughly29.5735 milliliters. thus, one mug of water is roughly8.3454 ounces. This conversion factor is pivotal when dealing with liquid constituents in fashions, as it allows for accurate dimension by volume or mass. still, not all constituents have the same viscosity as water. For illustration, flour is important lighter than water, so one mug of flour weighs lower than one mug of water. On the other hand, constituents like sugar and honey are thick than water, so one mug of these substances weighs further than one mug of water. In practical terms, knowing the conversion between ounces and mugs is essential for following fashions precisely. Whether you are measuring flour for a cutlet, milk for a sauce, or sugar for eyefuls, understanding how numerous ounces are in a mug ensures thickness and repetition in your cuisine. also, this knowledge becomes indeed more critical when spanning fashions up or down. For case, if a form calls for 2 mugs of flour and you need to halve the form, you will know that you need 1 mug of flour, which is original to roughly4.173 ounces. also, if you are doubling the form, you will need 4 mugs of flour, or roughly16.69 ounces. In professional kitchens, precise measures are consummate to the success of a dish. Cookers and confection cookers calculate on accurate measures to insure thickness in flavor, texture, and donation. Whether they are casting delicate afters
By vinoth kumara day ago in Lifehack
A guide to maintaining your pond in spring
With spring well underway, now is the perfect time to prepare your pond for the year ahead. With many different maintenance tasks, you can ensure your pond maintains a healthy ecosystem, so plants and fish continue to live happily. Here is a guide to maintaining your pond in spring.
By Aaron Middleton4 days ago in Lifehack


Comments
There are no comments for this story
Be the first to respond and start the conversation.