
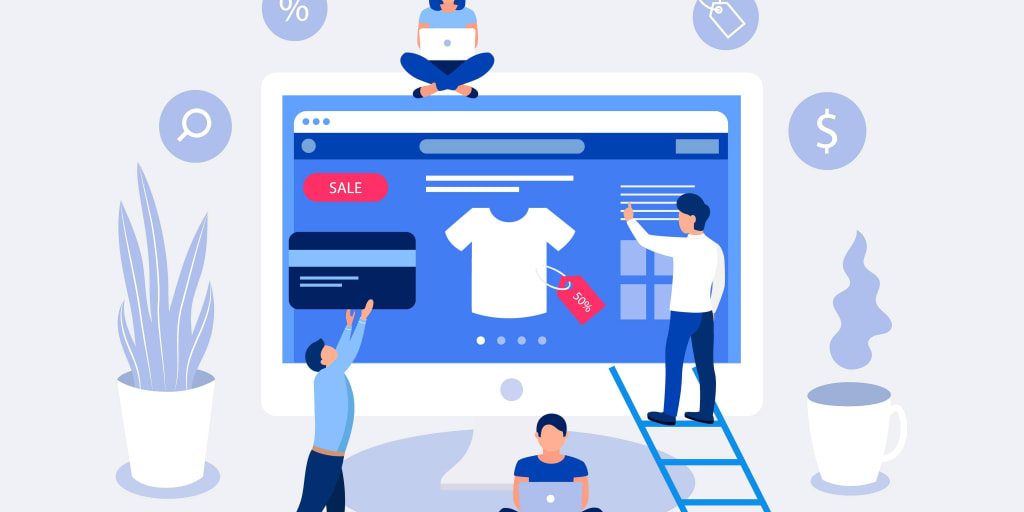
How to create your own E-Commerce Store Online and sell things
We could all do with a little extra money here and there – and building an online store is the perfect way to bring in some additional income.

A Step-by-Step Guide to Creating an Online Store
We could all do with a little extra money here and there – and building an online store is the perfect way to bring in some additional income. In fact, ecommerce sales are expected to make up 17.5% of retail sales worldwide by 2021!
Despite this stunning statistic, nearly half of American businesses still don’t have a website – which means now is the perfect time to sit down, power up, and get building.
Whether you already own a brick-and-mortar store and you’re looking to expand online, or you’re taking your first steps into the world of ecommerce with your first ever store, this guide will walk you through how to build an online store from start to finish.
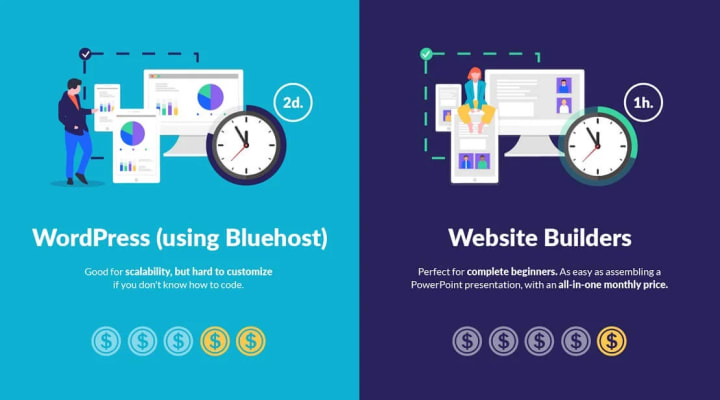
Building an online store has never been easier with ecommerce builders like Shopify and WordPress plugins like WooCommerce. Web hosts such as Bluehost are also making building with WordPress faster and more beginner-friendly. This guide will help you decide which method is best for you, and show you how to create an online store using either one.
Are you ready to build an online store? If you’re a tech novice, we recommend checking out our website builder guide first – and if you’re after total control and customization, then skip to the WordPress guide to see if it’s right for you!
Option 1: Use an Ecommerce Website Builder
How to Build an Online Store in 9 Steps
- Find your perfect ecommerce website builder.
- Choose the best plan for you.
- Get a domain name for your store.
- Pick your ecommerce template.
- Customize your ecommerce template.
- Add your products.
- Set up payment methods.
- Sort out your shipping settings.
- Preview, test… and publish your online store.
Step 1: Find Your Perfect Ecommerce Website Builder
An ecommerce builder is an online software which lets you build your very own online store, without needing advanced tech skills, coding knowledge, or a dozen computer screens. All you need is an internet connection and a great business idea!
When starting an online store, the first step is choosing the right online store builder.
There are loads of online store builders out there. Some are cheap, some are expensive, some are reliable, and some… aren’t.
With so many options to choose from, we thought we’d make it a little easier to pick the right one for you. We’ve listed our two top-recommended ecommerce platforms below. We recommend Shopify for large online stores, and Wix for smaller ones:
Ecommerce website builders are incredibly ease to use. Our recent survey found that despite some initial doubt, 83% of you would be capable of using a website builder.
Which Ecommerce Website Builder Should You Choose?
We know the choice can feel overwhelming, but it all comes down to the purpose and size of your online store.
Having researched each ecommerce website builder thoroughly, we’re in a great position to tell you a little bit more about which platform matches your needs.
For Small Stores
If you’re planning to build a small online store, then we recommend Wix. It’s super easy to set up, the sales tools are excellent, and the designs look great.
- Plans: $23 – $49/month
- Designs: Over 500 stylish themes
- Features/Tools: A fantastic range of features including integration with ShipStation, selling on Instagram, abandoned cart recovery emails, printable shipping labels, and much more.
- Commission: None
For Large Stores
If you’re planning to create a fully-fledged ecommerce store, sell 10+ products, and have a turnover of $1000+, we’d recommend Shopify.
- Plans: $29 – $299/month
- Designs: Over 50 modern themes
- Features/Tools: Strong inventory management, email marketing, and sales tools. Basically anything you’d need for a fully-functioning store.
- Commission: 2.9-2.6%, plus a 30¢ transaction fee (unless you’re using Shopify Payments)
Test Your Ecommerce Website Builder
If you’re serious about building a successful online store, then you need to test out your ecommerce website builder before launching your business site.
The best way to do this is with a free trial – or a few!
Don’t just try one – you can experiment and compare different online store builders to find the best fit for you and your business.
Follow the links below to sign up for a free trial:
- Wix – try a premium plan free for 14 days
- Shopify – try a 14-day free trial
When playing around with ecommerce website builders, ask yourself:
- Is it easy to choose a template/theme and make custom changes?
- Are the templates suitable for your business?
- Is it easy to add products and categorize them?
- Can you edit the navigation to include sub-menus and new pages?
You want to find a platform that’s not only easy to use, but offers everything you require. Once you’ve decided what you need, spend some time looking over our comparison chart to find a builder that ticks all your boxes.
After that, take it for a spin! The key is to work out which builder you find to be the most natural to use, and which is the best fit for the type of store you want to build. Take a few for a test drive and see which suits you best.
Before you move on to the next step, make sure you have:
Step 2: Choose The Best Plan For You
Once you’ve tested a few builders and are happy with your choice, you need to sign up to the right plan so you can get building.
Different levels of plans come with different features. As you’d expect, the more you pay, the more you get. Which plan suits you best depends on the size of your business and your growth ambitions.
If you’re looking to create an ecommerce store, you will need a paid plan. Uploading and selling products requires more complicated software than building a normal website.
Plans start at just $12 per month (Square Online’s Professional Plan). That’s less than a large pizza from Domino’s!
How Many Products Do You Plan On Selling?
If you’re not planning to sell a lot of products, a simpler plan with lower rates may be suitable. There’s no product limit on any of Shopify’s main plans.
However, the more products you sell, the more upgrading to an advanced plan makes financial sense.
This is because of transaction fees. If you’re generating a lot of dollars in revenue, even a slight drop in fees can boost your bottom line.
How Much Do You Want To Pay?
To start an online store, you’ll need an ecommerce plan.
Shopify Basic costs under $29 a month, whereas Wix eCommerce starts at $23. If products are flying off your virtual shelves, these sums seem very trivial.
Don’t worry if you’re not sure which pricing plan to sign up to. Speak to an advisor at your store builder and they’ll be able to help.
What Features Do You Need?
Remember, different stores have different needs. Shopify may be more expensive, but it’s designed to help you build large online stores. On the other hand, Wix eCommerce is better suited to building smaller online stores.
The more you pay, the more you get, as this table of Wix’s features shows:
Can You Build An Online Store For Free?
Yes! We already talked about Square Online, which lets you sell online without paying a single cent. This is the best free ecommerce builder around, but it’s not the only one.
Big Cartel’s free plan currently allows you to sell online without having to pay any monthly fees. Be warned, though – its free plan is incredibly limited.
When we tested Big Cartel, it scored very poorly compared to other ecommerce builders like Shopify and BigCommerce, with people finding it the hardest online store builder to use. In fact, Big Cartel trailed in last in our research with a lowly 2.9 stars out of 5!
Even on a paid plan, we don’t recommend Big Cartel unless you’re selling single, one-off items like artworks. You need coding skills to use Big Cartel and it really lacks serious features.
On the free plan you can only sell 5 products with one image displayed for each. It’s fine if you want a really basic online presence to sell through, but if you have ambitions to grow, you’ll want to upgrade to a premium plan.
The Upside of Upgrading
The truth is, you get what you pay for. Basic plans are great for starting out, but you unlock more advanced features when you upgrade. This chart looks at three of the most important ecommerce features: multi-channel integration, abandoned cart recovery, and SSL certificates.
Once you’ve chosen an ecommerce website builder and picked your perfect premium plan, the next steps are:
- Pick an ecommerce template
- Customize your store’s template design
- Add products to your store
- Set up payment methods
- Sort out shipping settings
- Preview, test, and publish your online store
Before you move on to the next step, make sure you have:
- Compared the features offered by your ecommerce website builder to find the right match for your store. If in doubt, start on a cheaper plan and upgrade at a later date
Step 3: Get A Domain Name For Your Store
A domain name is the bit in a URL that identifies your store’s name.
A good domain name is key to launching a successful online store. It builds trust with customers and helps establish your brand.
Let’s say you’re Nike (we can all dream). Below is Nike’s URL, with the domain name in bold:
https://www.nike.com
This is the primary domain. It’s what customers see in the address bar and Google searches. Think of your domain name like the sign that hangs above a real-life high street store.
You can buy a domain name through Shopify or Wix for around $10 to $20 per year. Alternatively, you can use a domain name registrar such as Domain.com to purchase a domain, and link it to your online store builder.
Our tip: Once you’ve registered your domain name for the year, set a calendar reminder to renew it before the expiry date.
Already Own A Domain Name?
If you already own a domain name, don’t worry. You can transfer the name to your online store builder and cancel the agreement with your original provider.
Or, if you want to stay with your domain provider, you can link your domain to your builder page. To do this, contact your current domain provider.
For ease of use, we’d recommend sorting out a domain with your builder. It makes learning how to build an online store from scratch even more straightforward!
Before you move on to the next step, make sure you have:
- Chosen your ideal domain name (remember to pick the right country code, avoid other brand names, be unique and memorable, and add a keyword)
- Checked your domain name is available (and within budget)
- Purchased your domain name
- Set a calendar reminder to renew it before the expiry date – otherwise you risk someone else snapping it up and selling it back to you at an inflated price!
Step 4: Pick Your Ecommerce Template
With templates (sometimes known as themes), you can make your site look good without being a design expert, or touching any code!
Selecting themes in Shopify is easy. All you have to do is select a template from your builder’s marketplace.
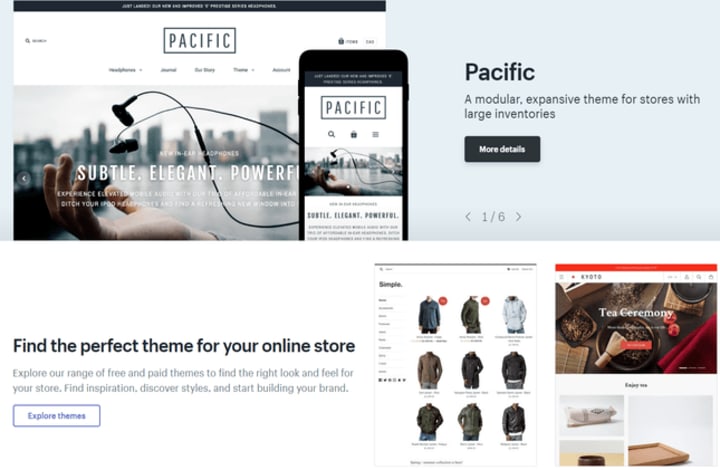
With Wix, it’s very similar. You’ll start by choosing a template, which are split into different categories. Each category represents a different industry. For example, you’ll have templates for Blogging, Business Services, and Online Stores.
How Do You Pick The Right Template?
Ask yourself these three questions to find out which template is right for you:
What features do you want your store to have?
What style of homepage do you want?
How do you want customers to move around your store?
Let’s look at these in more detail…
What Features Do You Want Your Store To Have?
Features are a key part of how to build an online store. Ask yourself what’s important to your online store: do you need maps, galleries, or an about us page? What about videos on your homepage?
Some templates come with more features than others. Think about what features your store needs, then make a list.
When searching for a theme in your builder’s marketplace, filter by features. Narrowing down the options can help you find the theme that best suits your needs.
What Style Of Homepage Do You Want?
Your homepage is the first thing your customers see. It’s like your shop window.
Customers should be able to tell from one glance exactly what type of business you are.
Your homepage could be a simple image, a slideshow or a video. Decide which to choose based on your business goals.
For example, stores selling luxury products should let stylish images do the talking. Stores selling more complicated products might want a simpler image, accompanied by more text.
How Do You Want Your Customers To Navigate Your Store?
Most shoppers will leave a website after 10-20 seconds. It’s crucial they can find what they’re looking for without any hassle.
A smooth navigation bar is integral. It lets your customers move around your site easily and will reward you with more sales.
A clunky navigation is like a road with loads of potholes and no street signs. Customers will get frustrated because they won’t be able to find what they’re looking for.
Lay your pages out left to right, starting with the most important page. Don’t include pages that aren’t important to your business – include them as dropdown menu items.
Your navigation bar should also be easy to read. Internet users scan a page in an “F” shape, so stores that have a distinctive header and sidebar on the left of the page work best.
When it comes to color, you want something that’s inoffensive and that fits your industry. Read our guide on picking the perfect color here.
Before you move on to the next step, make sure you have:
- Asked yourself the following three questions to help you choose the right template for your site: what features do you want your store to have, what style of homepage do you want, and how do you want customers to move around your store?
- Found and tested a few suitable templates from the selection your website builder has on offer, before settling on your favorite – some builders don’t let you change your template once your site has gone live, so make sure you find out if this is the case for yours
Step 5: Customize Your Ecommerce Template
Once you’ve selected a template/theme, head to your store’s admin tool to start customizing.
Customizing is easy, and you can change just about anything. This includes your:
Text Size and Font
Color Scheme
Images
Positioning of Products
Features
Embedding Social Media
The list goes on.
Most online store builders will also allow you to embed apps. These are found in the app market, and can be used to cover any features you need that the platform may not already have inbuilt.
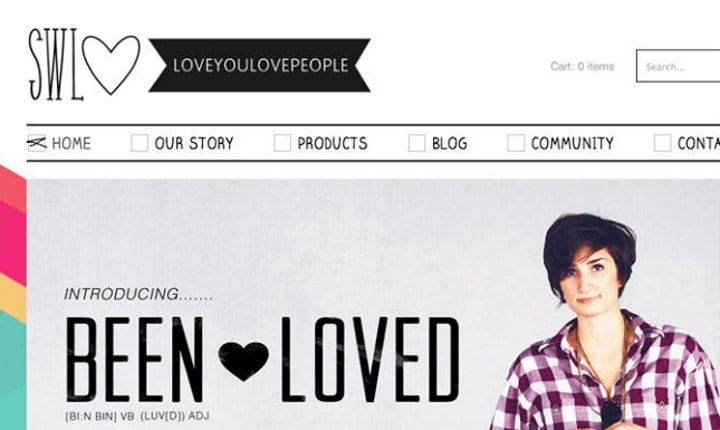
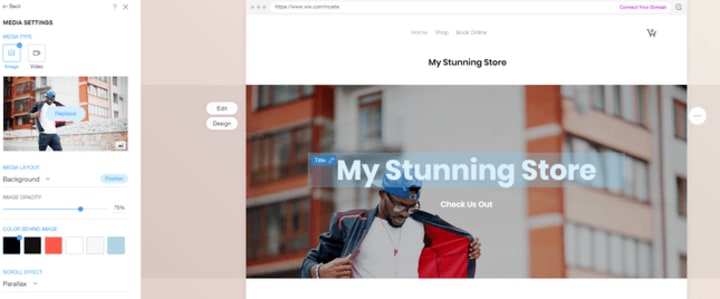
Want to see an example of a good ecommerce store theme in action?
This online store was built using Wix ADI (Artificial Design Intelligence) in just a few minutes. Here, you can see how easy it is to edit and customize the template – simply replace images, text, add videos or change the color scheme to suit your own branding and design:
Before you move on to the next step, make sure you have:
- Replaced all the default template content (text, images etc.) with your own
- Added extra functionality to your store by installing apps from the builder’s own app store (but remember you can add or remove these at any time, so there’s no pressure to do it all before you launch your site)
Step 6: Add Your Products
Now you’ve created a stylish online store using a template, you need to add your products.
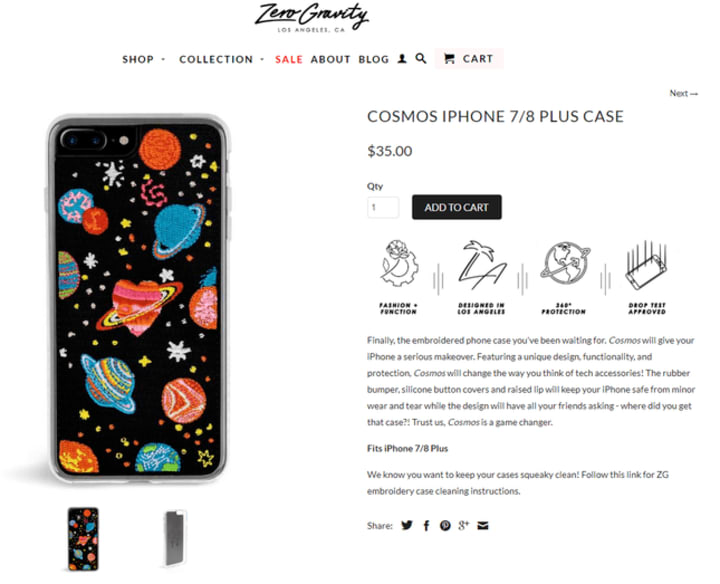
Using an online store builder, you have great control over your product pages. The image above shows how you can combine style with minimalism to create a unique look.
The main things you need to add a product are:
Name
Price
Category
Weight (for physical products)
File (for downloadable products like ebooks).
Different ecommerce website builders have different limits on:
The number of products you can upload
The number of options for each product (the same product but in a different size or color)
The number of product variants (a combination of two options: for example, a blue t-shirt in size medium)
Make sure you check that each builder’s limit meets your business’s needs.
Shopify lets you sell unlimited products on its cheapest pricing plans, but other ecommerce website builders may limit you on lower-tiered plans.
Three key ingredients to uploading great products are:
- Product descriptions
- Product images
- Product categories
How Do You Write Winning Product Descriptions?
Your product descriptions need to be convincing, but here are three things to avoid:
Complex jargon
Clichés
Long sentences
Here’s an example of a good product description:
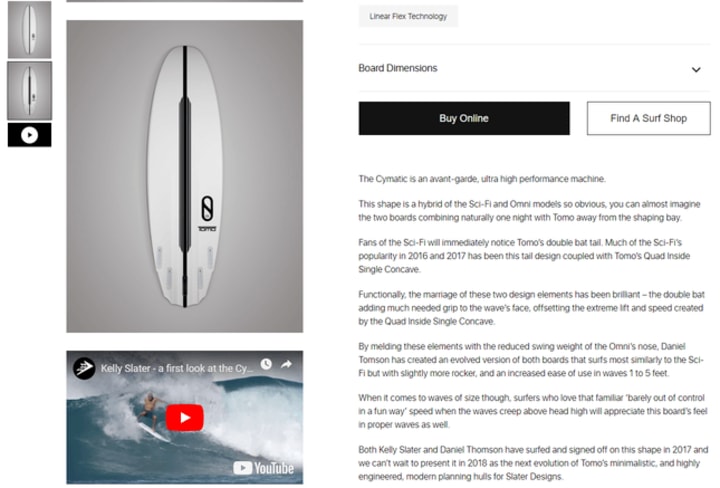
A detailed product description can be the difference between making a sale and not.
The retailer presents the technical features of their tool box, then explains its benefit to the shopper.
Another thing to keep in mind when writing product descriptions is SEO (Search Engine Optimization). This is where you will rank in Google when customers search for products like yours. The higher you rank, the more traffic you get.
The more traffic, the more sales. Include some of the keywords relating to your product when writing descriptions. Say you’re selling vintage trainers – include ‘vintage’ and ‘trainers’ in the description.
How Do You Take The Best Product Images?
Like the description, your images should accurately reflect what you’re selling.
Here are a few pointers when learning how to make an online store that looks good and sells.
- Use high-quality images – never select images that are blurry or too small
- Make sure each image is the same size – Use a tool like Photoshop to resize your images to the same dimension
- Take your own photos – Use a good smartphone (like an iPhone X) to take your own photos, if you can
- Provide a 360-degree option – make sure customers can view your products from all angles
- Add product variation images – make sure shoppers can look at the product in the full range of colors
- Add a zoom option – give your customers the chance to view your product’s detail (This is a feature you’ll want to check your chosen builder provides)
Last – but by no means least – ask: are your product images optimized?
You can easily optimize images using a free online compressing tool. This basically reduces the file size of your image without affecting the quality too much, and can do wonders for your site speed!
Images are a great way of showing off your products. But the more images your store has, the longer it can take to load, so optimizing is super important.
Finding the right balance between top-quality images and site speed is crucial.
What About Building Product Categories?
Product categories are different areas your products can sit in, which make it easy for customers to find what they’re looking for on your store. Examples of categories include men’s, women’s, accessories, new in, and sale.
The easiest way to create category ideas is to ask yourself: what would you want if you landed on your site?
We recommend no more than five categories. Any more and you risk confusing your shoppers with too much choice.
Here are the key things to consider when building your product category page:
Price Range – displaying price ranges on your category page adds clarity and prevents customers browsing products they can’t afford
Featured Products – a good way of leading your customers down your preferred shopping path
Filtering Options – let your customers filter by size, price or brand name. The more options you can give them, the happier they are and the more money they will spend
Give Extra Product Information – your customer has navigated to a specific section of your store. It’s fair to assume they want more information about the products they’re viewing
Before you move on to the next step, make sure you have:
- Followed our tips for writing great product descriptions, and taking useful product photos
- Decided on the best way to categorize your products, and added relevant product categories
- Uploaded your products to your site!
Step 7: Set Up Payment Methods
Next, you need to set up your payment method. This is a crucial part of converting a browser into a buyer.
Ecommerce website builders make this easy for you. They optimize the process so you can hit the ground running with the best (and most effective) payment options.
Ecommerce website builders help by connecting you directly to multiple different payment options, such as PayPal, Visa, Apple Pay and Mastercard.
What Payment Options Can I Add?
The three most popular ways to accept payments on your ecommerce store are:
Merchant account and payment gateway – you partner with a bank, then they accept payments for you and channel the money into your business bank account
Payment gateway packages – you use all-in-one software, which will connect your store’s shopping cart to the card processing network
Simplified credit card payment processing – you use a service that integrates with your store’s checkout, such as Shopify’s own payments gateway. Your shoppers won’t have to leave your site to complete a purchase
How Do I Choose The Best Payment Method?
Work out how many sales you expect to make and what type of person will be buying your products.
Find out where your customers are from. If you have customers from different countries, make sure you meet each nationality’s needs. Shoppers in Canada, for example, have different payment preferences from shoppers in Texas.
Don’t pick a payment method without working out your store’s needs first.
What About Security?
Security is a big worry for online shoppers. But you can take all their worries away if you make your site secure. And it’s easier than you think!
Online store builders sort this out for you with SSL certificates.
SSL stands for Secure Socket Layer. It encrypts your users’ data, making their online shopping experience with you totally secure.
Most ecommerce platforms include this in their plans, but if they don’t, they will have it as an add-on.
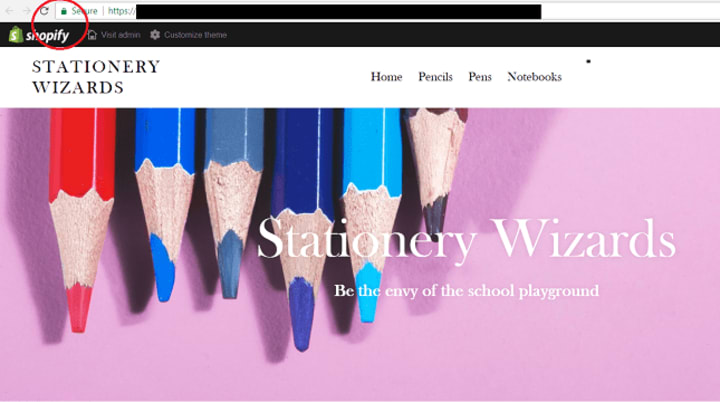
So, what does this look like? Have a look at the homepage for this store we made using Shopify. You can see the green padlock circled in the top left corner:
This has two important benefits for your business:
Customers will feel safe shopping on your store.
Google will reward your store with higher rankings.
Shopify, for example, comes with inbuilt SSL Security and gives you access to over 100 payment gateways. These include Visa, PayPal, Amazon and Apple Pay.
How Much Are These Payment Options Going To Cost?
Different payment methods come with different fees and charges.
Fees are often rolled together, so take time to untangle them. Make sure you’re clear on exactly how much you’ll be paying and what you’ll be paying for.
Credit card fees are unavoidable. They’re levied by the card provider (Amex, for example) and then passed on by the builders.
The general charge for using payment processors varies, typically from around 1% + 10p per transaction to 3% + 30p per transaction.
If you use Shopify’s own processor, Shopify Payments, all transaction fees are waived on their end.
This means if you were to accept a credit card payment of £100, you’ll only pay the rate of 2.2% + 20p on that payment, direct from the individual payment processor.
Before you move on to the next step, make sure you have:
- Decided which of the three payment options would work best for your store by comparing the different fees and logistics
- Checked whether your site is already secured with an SSL certificate, and purchased one separately if it’s not already included
Step 8: Sort Out Your Shipping Settings
You’ve added products and payment options for customers to buy them. Next up is making sure you can deliver those products.
To understand how to build an online store, you need to understand how shipping options work.
Different ecommerce website builders come with different shipping options. See the table below for more info on which options each ecommerce website builder provides:
What Is Your Shipping Origin Address?
This is important if you ship products from an address that’s not your office. You should input a separate shipping origin to ensure shipping rates and taxes are correct.
Once you’ve added your address, you can print shipping labels and get quotes.
What Shipping Zones Do You Want To Ship To?
Shipping rates vary between the countries and regions (zones) you ship to. Online store builders let you charge different rates to customers depending on which zone they’re in.
If you’re a US based store, for example, you can charge cheaper shipping to customers in a state closer to your distribution center.
Your store builder admin page will show which zones you ship to, along with all of your individual shipping rates.
What Are The Different Shipping Options?
Once you’ve set up where you want to ship products, you can decide how you deliver them.
Shipping Services
By using online store builders, you can offer customers different levels of shipping.
If a customer wants, they can pay more to have their order delivered faster.
You’ll need to pick a courier to deliver your products safely to your customers. Popular couriers include:
- USPS
- Canada Post
- FedEx
Ecommerce website builders like Shopify have partnerships with popular and reliable couriers. This makes your life much easier, as it gives you access to shipping discounts and real-time shipping rates.
Before you move on to the next step, make sure you have:
- Added a shipping origin address
- Partnered with a courier (Fedex, for example)
- Entered package weights
- Selected a shipping option (free shipping, for example)
Step 9: Preview, Test… And Publish Your Online Store
You should now have added your products, customized your store’s template, set up your payment and shipping, and sorted out your store’s settings.
You’re very nearly there…
But there’s one important step to go before you’ve finished creating your online store: testing it.
Ecommerce website builders make it very easy to test and preview your online store before publishing.
Testing your store is the best way to make sure you’re satisfying your customers’ needs.
When previewing and testing your store, here’s the key things to check:
Finally, Sort Out Your Store’s Settings
Before you hit publish, the last thing to do is double check your store’s settings! Without proper settings, your store won’t be able to run properly.
Head to the Store Settings section of your platform and fill out your preferences for each of the following:
- Language: select the language your customers will see onsite
- Currency: choose your preferred currency
- Timezone: setting the right timezone helps track your orders
- Address: display your contact information
- Store Name: as it’ll appear on your store’s emails, homepage and online searches
- Contact Details: a public phone number and a customer-facing email address
- Order settings: set whether to add tax to your product price or not
- Product settings: you can decide which information to display to the customers, like product weight or rating
If you’re not sure what these and other more obscure settings mean, ask your online store builder’s support team.
Before you move on to the next step, make sure you have:
- Tested your checkout process (with all payment options), checking that all the tax and shipping rates calculate correctly, the right items appear in your cart at the right prices, and any extra discounts/promotions can be applied
- Navigated around your site thoroughly to check for errors
- Tested all of the above on a variety of devices
- Checked your site’s settings
- And once you’re happy with everything, hit ‘Publish’!
Source: Websitebuilderexpert.com
About the Creator
Keep reading
More stories from Student Matters and writers in Journal and other communities.
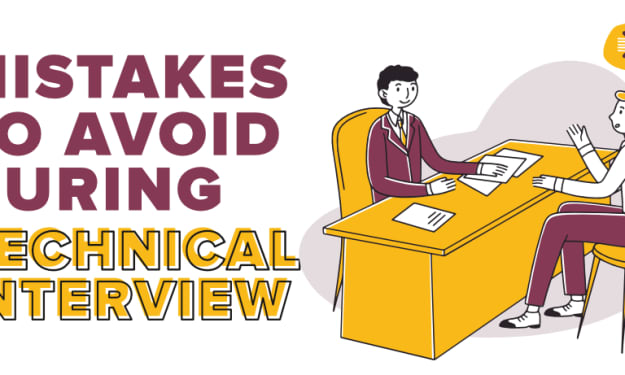
13 Mistakes To Avoid During Technical Interview
1. Dressing Sense & Arriving on time While going to interview please pay attention to your dressing sense as your first impression will be created by your dressing itself. Try to look professional and polished. Although your attire must be according to the position you are applying for. Prefer wearing formals and casual clothing with warm colors.
By Student Matters3 years ago in Journal
Sabotage
Lately I’ve been in a funk where everything can be going right. You know I’m in a happy place talking to who knows, I’m at peace and feel like everything is just going great you know. But once I start seeing that everything is going great for some reason I need to sabotage it. I need to sabotage my happiness and what I have going on in my life so no one else is able to do it for me. Does that make sense? Am I the only one who gets this way?
By Merjaunie Lena11 days ago in Journal


Comments
There are no comments for this story
Be the first to respond and start the conversation.