diy
Do it Yourself; Tips and ideas for DIY projects to give a gift that your significant other won't return.
Your Ultimate Health Companion: Meet Home Doctor- Brand New !
If you're looking for a reliable and efficient medical kit to keep in your home, then the Home Doctor is definitely worth considering. Here are just some of the outstanding features that make this product stand out:
By lamminhtriet3 years ago in Humans
Mastering Productivity: Unleashing Your Full Potential for Success and Fulfillment
Introduction: In today's fast-paced world, being productive is a key factor in achieving success and maintaining a balanced lifestyle. However, with numerous distractions and competing demands, staying focused and maximizing productivity can be challenging. This comprehensive article serves as a practical guide, offering valuable insights and actionable tips on how to be more productive. From setting priorities to managing time effectively and avoiding common pitfalls, we explore the essential strategies that can help individuals unlock their full potential and achieve greater results in their personal and professional lives.
By Pepe Magic3 years ago in Humans
The Art of Tiling: Beginner's Guide
The Art of Tiling: Beginner's Guide Tiles have long been used as a practical and stylish solution for floors, walls, and backsplashes. They not only protect surfaces from moisture and wear but also add an aesthetic appeal to any space. If you're a beginner looking to venture into the world of tiling, this guide is for you. In this article, we'll explore the art of tiling and provide you with valuable tips to help you get started on your tiling journey. 1. Choose the Right Tiles: The first step in tiling is choosing the right tiles for your project. Consider the purpose of the space, the desired style, and the level of durability you require. There is a wide variety of tiles available, including ceramic, porcelain, glass, and natural stone. Each material has its own unique characteristics and maintenance requirements. Research different tile options and select the one that best suits your needs and preferences. 2. Plan and Measure: Proper planning and accurate measurements are crucial for a successful tiling project. Before you begin, carefully measure the area you want to tile and calculate the number of tiles you'll need. It's advisable to purchase extra tiles to account for any breakages or mistakes during the installation process. Create a layout plan to visualize how the tiles will be arranged and ensure a balanced and aesthetically pleasing result. 3. Prepare the Surface: The key to a long-lasting tile installation is a properly prepared surface. Ensure that the surface is clean, dry, and free of any debris. If necessary, repair any cracks or unevenness in the substrate before proceeding with the tiling. Applying a suitable primer or sealer can also help create a better bond between the tiles and the surface. 4. Gather the Right Tools: Having the right tools at hand will make your tiling project much easier. Some essential tools for tiling include a tile cutter, notched trowel, grout float, tile spacers, and a sponge for cleaning. Invest in quality tools that will provide precise cuts and smooth application of adhesive and grout. 5. Start with Small Projects: If you're new to tiling, it's best to start with small projects to gain confidence and experience. Consider tiling a bathroom backsplash or a small area of the floor before tackling larger areas like a kitchen or a full bathroom. This will allow you to practice your tiling skills and learn from any mistakes without feeling overwhelmed. 6. Focus on Tile Layout and Spacing: Proper tile layout and spacing are essential for achieving a professional-looking result. Use tile spacers to maintain consistent and even gaps between tiles. Pay attention to the tile pattern and ensure that the tiles are aligned and symmetrical. Take your time to adjust and reposition tiles as needed to achieve the desired look. 7. Master the Art of Grouting: Grouting is the final step in tiling and plays a significant role in the overall appearance of the project. Choose a grout color that complements your tiles and follow the manufacturer's instructions for mixing and applying the grout. Use a grout float to spread the grout evenly and remove any excess. After the grout has set for a while, wipe away the haze with a damp sponge. 8. Practice Patience and Precision: Tiling requires patience and precision. Take your time to ensure that each tile is properly positioned and level. Double-check your measurements and make adjustments as necessary. Rushing through the process can result in costly mistakes and an unsatisfactory outcome. 9. Seek Inspiration and Guidance: Don't hesitate to seek inspiration from design magazines, online resources, and tile showrooms. Look for ideas that align with your personal style and project goals. Additionally, there are numerous video tutorials and forums available where experienced tilers share their tips and techniques and provide guidance. Learning from experienced individuals can give you valuable insights and help you avoid common pitfalls. 10. Embrace Creativity: Tiling is not just about functionality; it's also an opportunity to express your creativity. Explore different tile patterns, color combinations, and textures to create a unique and visually appealing design. Mix and match tiles to add visual interest or create a focal point. Don't be afraid to think outside the box and experiment with unconventional layouts. 11. Take Care of Maintenance: Once your tiling project is complete, it's important to maintain your tiles properly to keep them looking their best. Follow the manufacturer's guidelines for cleaning and maintenance, and use appropriate products and techniques. Regularly clean the tiles and grout to prevent the buildup of dirt and grime. Taking care of your tiles will ensure their longevity and preserve the beauty of your installation. 12. Learn from Experience: The more you practice tiling, the more confident and skilled you will become. Each project will present its own unique challenges and learning opportunities. Take note of what worked well and what could be improved upon for future projects. Over time, you'll develop your own techniques and preferences that will contribute to your growth as a tiler. Tiling is an art that requires a blend of skill, precision, and creativity. With the right materials, tools, and techniques, you can achieve stunning results that enhance the beauty and functionality of your space. Remember to start small, focus on proper preparation and layout, and seek inspiration and guidance when needed. Embrace the process and enjoy the satisfaction that comes with transforming a surface with your own hands. So, get ready to dive into the world of tiling and unleash your creativity one tile at a time!
By Eze Shedrack3 years ago in Humans
Transforming Your Basement into a Functional Space
Transforming Your Basement into a Functional Space The basement often remains an overlooked and underutilized area in many homes. However, with a little imagination and effort, it has the potential to become a functional and inviting space that adds value to your home and enhances your lifestyle. Whether you're looking to create a cozy entertainment area, a home office, a gym, or even a guest suite, transforming your basement can provide you with the extra space you need. In this article, we'll explore some creative ideas and practical tips to help you turn your basement into a functional and remarkable area. 1. Assess the Potential: The first step in transforming your basement is to assess its potential. Look beyond its current state and envision the possibilities. Consider the layout, the natural light sources, and the existing infrastructure such as plumbing and electrical connections. This evaluation will help you determine the best use of the space and identify any limitations or modifications needed for your desired functionality. 2. Plan the Layout: Once you have a clear vision of how you want to use the basement, it's crucial to plan the layout. Divide the space into different zones based on their intended purpose. For example, designate an area for a home theater, a separate corner for a home office, and a section for a gym or storage. Planning the layout ensures that each area is well-defined and optimized for its specific function. 3. Adequate Lighting: Basements often suffer from limited natural light, so it's essential to incorporate appropriate lighting solutions. Consider a combination of ambient lighting, task lighting, and accent lighting to create a well-lit and welcoming atmosphere. Recessed lights, pendant lights, and wall sconces can provide ample illumination. Additionally, mirrors strategically placed across the basement can reflect light and make the space appear larger and brighter. 4. Flooring Options: Choosing the right flooring is crucial for transforming your basement into a functional space. It needs to be durable, moisture-resistant, and comfortable. Depending on your budget and style preferences, options such as vinyl, laminate, or carpet tiles can be suitable choices. These materials are easy to maintain and can withstand the challenges of a basement environment. 5. Storage Solutions: Basements are often used for storage purposes, so incorporating effective storage solutions is essential. Utilize wall-mounted shelves, built-in cabinets, or freestanding storage units to keep the space organized and clutter-free. Consider multifunctional furniture pieces with hidden storage compartments to maximize the use of space. 6. Climate Control: Basements can be susceptible to temperature fluctuations and excess moisture. To ensure a comfortable and healthy environment, invest in proper insulation, dehumidifiers, and ventilation systems. This will help regulate the temperature and prevent issues like mold and mildew growth. 7. Personal Touches: Adding personal touches to your basement will make it a unique and inviting space. Choose a color scheme that aligns with your style and complements the function of the area. Incorporate artwork, decorative accents, and comfortable furniture to create a cozy and personalized atmosphere. 8. Flexibility and Adaptability: Consider the future needs of your family when designing the basement. Opt for versatile and adaptable elements that can easily be modified or repurposed as your needs evolve. This will ensure that your basement remains a functional and relevant space for years to come. Transforming your basement into a functional space requires careful planning, creativity, and attention to detail. It's an opportunity to unleash your imagination and create a customized area that suits your lifestyle. Whether you envision a home theater, a playroom, a home office, or a combination of different functions, the possibilities are endless. By following these tips and incorporating your unique style and preferences, you can turn your basement into a remarkable space that enhances the functionality and enjoyment of your home. So, roll up your sleeves and get ready to transform your basement into a functional and remarkable space! 9. Soundproofing: If you plan to use your basement for activities that involve noise, such as a home theater or a music studio, consider incorporating soundproofing elements. This will help minimize sound transfer to the rest of the house and create a more enjoyable experience in your basement space. Soundproofing materials like acoustic panels, soundproof curtains, and insulation can significantly improve the acoustics of the room. 10. Incorporate Natural Elements: Even though basements typically lack natural light, you can still bring in elements of nature to create a more welcoming and vibrant atmosphere. Consider adding indoor plants or installing a living wall to introduce greenery into the space. You can also use natural materials like wood or stone for accents or feature walls to add warmth and visual interest. 11. Create Zones: If you have a large basement, dividing it into different zones can help maximize functionality. Create separate areas for activities such as a lounge area, a game zone, a hobby space, or a guest suite. This division will not only make the space more organized but also allow multiple activities to take place simultaneously. 12. Consider Safety: Safety should always be a priority when transforming your basement. Ensure that you have proper lighting in staircases and hallways to prevent accidents. Install smoke detectors and carbon monoxide detectors for added safety. If you plan to have a bedroom in the basement, make sure it meets the legal requirements for egress windows or other means of escape in case of an emergency. 13. Home Bar or Kitchenette: If you entertain frequently or enjoy hosting gatherings, consider adding a home bar or a small kitchenette in your basement. This will provide convenience and allow you to entertain guests without having to constantly go upstairs to the main kitchen. You can include a sink, mini-fridge, and even a small countertop or seating area for a stylish and functional space. 14. Technology Integration: Embrace the latest technology trends by incorporating smart home features into your basement. Install smart lighting systems, sound systems, and temperature control devices that can be easily controlled through your smartphone or voice commands. This will enhance the functionality and convenience of your basement space. 15. Seek Professional Help: If you're not confident in your DIY skills or if you have complex requirements for your basement transformation, don't hesitate to seek professional help. Hiring a contractor or an interior designer specializing in basement renovations can ensure that your vision is brought to life efficiently and with expertise. In conclusion, transforming your basement into a functional space requires careful planning, creativity, and attention to detail. By assessing its potential, planning the layout, incorporating adequate lighting and storage solutions, and adding personal touches, you can create a basement that meets your specific needs and reflects your style. Remember to prioritize safety and consider future adaptability. With the right design choices and a little effort, your basement can become a remarkable space that adds value and enjoyment to your home. So, get ready to unleash your creativity and embark on the journey of transforming your basement into a functional and remarkable part of your living space.
By Eze Shedrack3 years ago in Humans
Tips for Choosing the Right Countertop Material
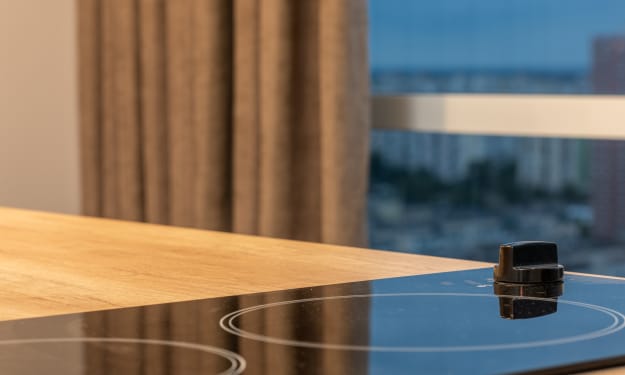
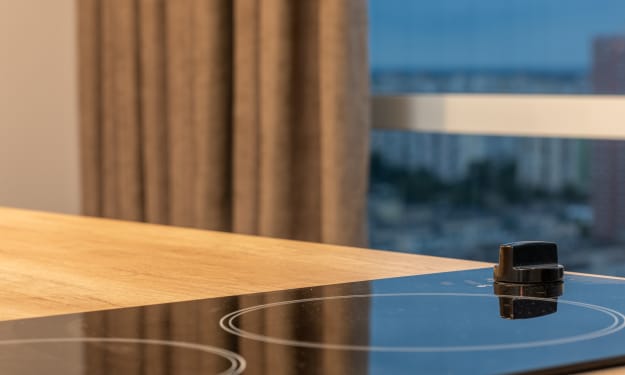
Tips for Choosing the Right Countertop Material When it comes to kitchen renovations or designing a new home, choosing the right countertop material is a crucial decision. Countertops not only serve as functional surfaces but also play a significant role in the overall aesthetics of your kitchen. With a wide range of options available, selecting the perfect countertop material can feel overwhelming. But fear not! In this article, we'll provide you with some valuable tips to help you make an informed decision and find the ideal countertop material that suits your needs, style, and budget. 1. Consider Your Lifestyle: Before diving into the world of countertop materials, take a moment to evaluate your lifestyle and how you use your kitchen. Are you an avid cook who spends hours in the kitchen? Do you have young children who may be prone to spills and stains? Understanding your lifestyle will guide you towards the right countertop material. For instance, if you want a low-maintenance option, consider quartz or solid surface countertops that are non-porous and resistant to stains. On the other hand, if you love the natural patina and character that comes with time, materials like marble or butcher block may be more suitable. 2. Assess Durability and Maintenance: Countertops endure daily wear and tear, so it's essential to choose a material that can withstand the demands of your kitchen. Some materials, such as granite and quartzite, are highly durable and resistant to scratches and heat. Others, like laminate, may be more susceptible to scratches and require careful maintenance. Consider how much time and effort you're willing to invest in upkeep. If you prefer a low-maintenance option, materials like engineered quartz or porcelain are excellent choices as they require minimal maintenance and are highly durable. 3. Evaluate Aesthetics: Your countertop should complement the overall design and style of your kitchen. Take into account the color scheme, cabinetry, and flooring to ensure a cohesive look. If you have a modern kitchen, materials like stainless steel or concrete can add an industrial edge. For a classic and timeless appeal, natural stone materials like granite or marble are popular choices. Each material has its unique patterns and textures, so it's essential to see samples and visualize how they will harmonize with your kitchen design. 4. Set a Budget: Countertop materials vary significantly in terms of price. It's important to establish a budget and determine how much you're willing to spend. While high-end materials like natural stone or stainless steel may be more expensive, there are also budget-friendly options available. Laminate, for instance, provides a cost-effective solution without compromising on style. Keep in mind that investing in a durable and long-lasting countertop material can save you money in the long run, as it will require fewer repairs or replacements. 5. Seek Professional Advice: Consulting with professionals in the industry can provide valuable insights and guidance. Kitchen designers, contractors, or countertop specialists have extensive knowledge and experience working with different materials. They can offer recommendations based on your specific requirements and budget. Additionally, visiting showrooms or attending home improvement expos can give you a hands-on experience with various countertop materials, helping you make a more informed decision. 6. Consider Environmental Impact: If sustainability is a priority for you, explore eco-friendly countertop materials. Materials like recycled glass, bamboo, or reclaimed wood offer environmentally conscious options that reduce the carbon footprint. Additionally, some manufacturers offer certified green products that meet specific sustainability standards. In conclusion, choosing the right countertop material requires careful consideration of your lifestyle, durability, aesthetics, budget, and environmental impact. By evaluating these factors and seeking professional advice, you can make an informed decision that aligns with your needs and personal style. Remember, your countertop is a long-term investment, so choose a material that not only stands the test of time but also brings joy and functionality to your kitchen. It's important to keep in mind that trends come and go, but a well-chosen countertop material can endure for many years. So, while it's tempting to opt for the latest fad, consider timeless options that will remain stylish even as trends change. Classic materials like granite, marble, and quartz have stood the test of time and continue to be popular choices for their durability and elegance. When making your final decision, don't forget to factor in the installation process. Some countertop materials require professional installation, while others can be tackled as a DIY project. Be honest with yourself about your skill level and the amount of time and effort you're willing to invest in the installation process. If you're unsure, it's best to consult with a professional to ensure a seamless and professional-looking result. Lastly, don't be afraid to think outside the box and consider unconventional countertop materials. With advancements in technology and design, there is a wide range of innovative options available. From recycled materials to concrete and glass, the possibilities are endless. These unique materials can add a touch of personality and make a bold statement in your kitchen. In conclusion, choosing the right countertop material requires careful consideration of your lifestyle, durability, aesthetics, budget, and environmental impact. By evaluating these factors and seeking professional advice, you can make an informed decision that aligns with your needs and personal style. Remember, your countertop is not just a surface for food preparation; it's the centerpiece of your kitchen, where memories are made and meals are shared. So take your time, explore your options, and select a countertop material that will not only enhance the functionality of your kitchen but also bring beauty and joy for years to come.
By Eze Shedrack3 years ago in Humans
DIY Patio Furniture: Upcycling Ideas
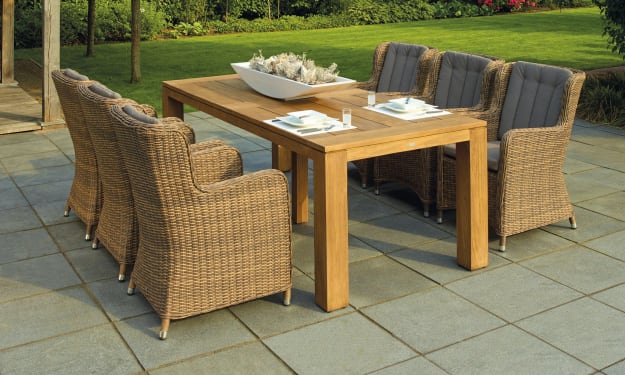
DIY Patio Furniture: Upcycling Ideas When it comes to creating a stylish and inviting outdoor space, patio furniture plays a crucial role. However, buying brand-new furniture can be expensive and may lack the character and charm you desire. That's where DIY upcycling comes in. Upcycling is a fantastic way to breathe new life into old or discarded items, transforming them into unique and eye-catching patio furniture pieces. In this article, we'll explore some creative and inspiring upcycling ideas for DIY patio furniture that will add a touch of personality and sustainability to your outdoor oasis. 1. Pallet Sofas and Coffee Tables: Pallets are versatile and readily available, making them an excellent material for upcycling into patio furniture. With a little creativity and some basic woodworking skills, you can turn pallets into comfortable sofas or stylish coffee tables. Sand and paint the pallets to match your outdoor decor, and add cushions or upholstery for comfort. The rustic and eco-friendly appeal of pallet furniture will make your patio stand out. 2. Tire Ottomans: Give old tires a new purpose by transforming them into stylish ottomans. Clean and paint the tires in vibrant colors that complement your patio's color scheme. Add a cushion or upholstered top, and you'll have a unique and functional piece of furniture. Not only does this upcycling idea reduce waste, but it also adds a playful and eclectic touch to your outdoor space. 3. Vintage Chair Planter: Instead of discarding old chairs, repurpose them into beautiful planters. Remove the seat and backrest, leaving only the frame. Paint the chair in a color that suits your style and place a planter pot in the seat area. Fill it with vibrant flowers or cascading greenery for a charming and whimsical addition to your patio. 4. Wine Barrel Table: Old wine barrels can be repurposed into stunning and functional patio tables. Clean the barrels thoroughly and sand them to remove any rough edges. Add a glass or wooden tabletop, and you'll have a unique conversation piece for your outdoor gatherings. The natural wood and rustic charm of wine barrel furniture will add warmth and character to your patio. 5. Upcycled Bench Swing: Transform an old wooden bench into a delightful swing for your patio. Add chains or ropes to the bench and hang it from a sturdy overhead structure, such as a pergola or tree branch. Sand and paint the bench to match your outdoor decor, and you'll have a cozy spot to relax and enjoy the outdoors. This upcycling idea not only adds functionality but also brings a touch of nostalgia and charm to your patio. 6. Suitcase Side Table: Give vintage suitcases a new life as stylish side tables. Clean and paint the suitcase or leave it in its original condition for a vintage appeal. Attach legs to the bottom or use it as is, and you'll have a unique and functional table for your patio. This upcycling idea adds a touch of nostalgia and wanderlust to your outdoor space, making it a perfect conversation starter. 7. Outdoor Bar Cart: Transform an old serving cart or trolley into a practical and stylish outdoor bar cart. Clean and paint the cart in a color that complements your patio decor. Add hooks or shelves to hold glasses, bottles, and other bar essentials. With a mobile bar cart, you can easily entertain guests and enjoy refreshing drinks in the comfort of your outdoor space. When upcycling furniture for your patio, it's important to use materials and finishes suitable for outdoor use. Consider weather-resistant paints, stains, and sealants to protect your creations from the elements. Additionally, ensure that any structural modifications maintain the stability and safety of the furniture pieces. Upcycling not only adds character and uniqueness to your patio but also reduces waste and promotes sustainability. By repurposing old items, you're giving them a second life and keeping them out of landfills. Upcycling also allows you to express your creativity and create one-of-a-kind pieces that reflect your personal style. When sourcing materials for your upcycling projects, keep an eye out for local thrift stores, flea markets, or even your own attic or garage. You never know what hidden gems you might find that can be transformed into stunning patio furniture. One of the benefits of DIY upcycled patio furniture is the sense of accomplishment and pride that comes with creating something unique and functional. Each piece will have its own story and add a personal touch to your outdoor space. Plus, you'll have the satisfaction of knowing that you've contributed to a more sustainable lifestyle. Not only are these upcycled furniture ideas budget-friendly, but they also offer the opportunity to showcase your individuality and creativity. Instead of settling for mass-produced patio furniture that lacks character, you can create a space that reflects your style and values. Remember, upcycling is all about thinking outside the box and seeing the potential in everyday objects. With a little imagination and some basic DIY skills, you can transform discarded items into beautiful and functional patio furniture pieces that will make your outdoor space truly unique. Before starting your upcycling project, make sure to properly clean and prepare the materials. This may involve sanding, priming, or repairing any damaged parts. Use appropriate tools and safety precautions to ensure a successful and safe transformation. In conclusion, upcycling is a fantastic way to breathe new life into old items and create stunning patio furniture. From pallet sofas and tire ottomans to vintage chair planters and wine barrel tables, there are endless possibilities for transforming discarded objects into functional and stylish pieces. Embrace your creativity, reduce waste, and make your outdoor space a true reflection of your personality with these DIY upcycling ideas. So, grab your paintbrushes, repurpose those forgotten treasures, and get ready to enjoy a patio that's as unique as you are.
By Eze Shedrack3 years ago in Humans
Outdoor Paint Projects: Transforming Your Space
Outdoor Paint Projects: Transforming Your Space When it comes to home improvement, we often focus on the interior, forgetting the potential of our outdoor spaces. However, with the right outdoor paint projects, you can transform your backyard, patio, or garden into a vibrant and inviting oasis. Painting is an easy and cost-effective way to refresh your outdoor space, add personality, and create a unique atmosphere. In this article, we'll explore some creative and inspiring outdoor paint projects that will help you reimagine and revitalize your outdoor living area. 1. Colorful Front Door: Your front door is the gateway to your home and sets the tone for your entire property. Adding a fresh coat of paint in a bold and vibrant color can instantly boost curb appeal and make a memorable first impression. Consider hues like deep red, vibrant yellow, or turquoise blue to add a pop of personality to your entryway. Don't be afraid to experiment with unique colors that reflect your personal style and make a statement. 2. Revamped Furniture: Give your old outdoor furniture a new lease on life by painting it. Whether you have wooden chairs, metal tables, or wicker benches, a fresh coat of paint can transform them into eye-catching pieces. Opt for weather-resistant paint and choose colors that complement your outdoor surroundings. For a cohesive look, consider coordinating the colors of your furniture with your exterior house paint or the natural elements in your garden. 3. Statement Walls: Just as an accent wall can transform an indoor space, a statement wall can create a focal point in your outdoor area. Choose a wall, fence, or even a section of your patio to paint in a bold and striking color. This can instantly elevate the aesthetics of your space and provide a backdrop for outdoor gatherings and activities. Consider shades like deep green, vibrant orange, or rich navy blue to create a sense of depth and visual interest. 4. Outdoor Rugs: If you're looking to add pattern and texture to your outdoor space without breaking the bank, consider painting an outdoor rug. Start with a plain canvas or jute rug and use stencils or painter's tape to create a unique design. Whether you opt for geometric shapes, floral motifs, or a bohemian-inspired pattern, the result will be a custom rug that adds style and charm to your outdoor seating area. 5. Creative Planters: Unleash your creativity by transforming ordinary planters into works of art. Choose terracotta pots, wooden barrels, or metal buckets and paint them in vibrant colors or unique designs. You can experiment with geometric patterns, hand-painted motifs, or even a ombre effect. These colorful planters will not only showcase your favorite blooms but also add a touch of whimsy and personality to your garden. 6. Playful Pathways: Upgrade your garden pathways by painting them with a creative design. Use stencils or freehand techniques to create patterns or images that reflect your personal style. Whether you opt for a mosaic-inspired pattern, stepping stones with painted motifs, or a vibrant checkerboard design, your pathways will become a delightful feature that guides visitors through your outdoor space. 7. Refreshed Fences: A well-maintained and freshly painted fence can instantly elevate the appearance of your outdoor area. Choose a color that complements your home's exterior and adds visual interest to your backyard. A painted fence can act as a backdrop for your plants, provide privacy, and create a cohesive look throughout your outdoor space. 8. Outdoor Art: Treat your outdoor space as an extension of your indoor living area by incorporating art. Use outdoor paints to create murals or decorative wall art on exterior walls or fences. Embrace your artistic side and showcase your creativity through unique paintings or sculptures that withstand the elements. These art pieces will add a touch of elegance and whimsy to your outdoor space, making it a true extension of your personality. 9. Pergola Transformation: If you have a pergola or outdoor structure, consider painting it to give it a fresh and updated look. Choose a color that complements the surrounding elements and enhances the overall aesthetics of your outdoor space. A painted pergola can create a focal point, provide shade, and add a touch of elegance to your patio or garden area. 10. Outdoor Accents: Don't forget to paint smaller outdoor accents to tie everything together. Consider painting your mailbox, outdoor light fixtures, or even your garden pots to match the color scheme of your outdoor space. These small details may seem insignificant, but they contribute to the overall cohesiveness and visual appeal of your outdoor area. Before you embark on any outdoor paint projects, it's essential to choose the right type of paint that can withstand the elements. Look for high-quality exterior paints that are specifically formulated for outdoor use. These paints are designed to resist fading, peeling, and cracking, ensuring the longevity of your painted surfaces. Additionally, proper surface preparation is crucial for a successful paint project. Clean and prime the surfaces before applying the paint to ensure proper adhesion and longevity. Follow the manufacturer's instructions and use the appropriate tools and techniques for each specific project. In conclusion, outdoor paint projects offer a unique and creative way to transform your outdoor space into a personalized oasis. From adding a pop of color to revamping furniture and creating statement walls, there are endless possibilities to unleash your creativity. By embracing these outdoor paint projects, you can elevate the aesthetics of your outdoor area, create a welcoming ambiance, and make a lasting impression on family and friends. So, grab your paintbrushes, let your imagination soar, and embark on a journey to transform your outdoor space into a vibrant and inviting haven.
By Eze Shedrack3 years ago in Humans
Installing a Programmable Thermostat for Energy Efficiency
Installing a Programmable Thermostat for Energy Efficiency In today's world, where energy conservation and sustainability are top priorities, finding ways to reduce our energy consumption is essential. One effective method is by installing a programmable thermostat in our homes. Not only does it provide convenience and comfort, but it also offers significant energy-saving benefits. In this article, we'll explore the advantages of installing a programmable thermostat and how it can contribute to a more energy-efficient lifestyle. 1. Customized Temperature Control One of the main advantages of a programmable thermostat is the ability to customize temperature settings based on your schedule and preferences. Traditional thermostats require manual adjustments throughout the day, which often leads to energy waste. With a programmable thermostat, you can set different temperature levels for specific times of the day. For example, you can program it to lower the temperature during the night or when you're away from home. This customized control ensures that you're only using energy when needed, resulting in significant energy savings. 2. Energy Efficiency By automatically adjusting the temperature according to your programmed settings, a programmable thermostat helps optimize energy usage. It prevents unnecessary heating or cooling when you're not home or during periods when you're asleep. This energy-efficient feature ensures that you're not wasting resources and reduces your carbon footprint. Over time, the energy savings can be substantial, leading to lower utility bills and a greener lifestyle. 3. Cost Savings Installing a programmable thermostat can lead to significant cost savings on your energy bills. By conserving energy through optimized temperature settings, you can reduce your heating and cooling expenses. According to the U.S. Department of Energy, homeowners can save up to 10% per year on heating and cooling costs by using a programmable thermostat. The initial investment in the thermostat is quickly recouped through these savings, making it a worthwhile and cost-effective upgrade for your home. 4. Smart Home Integration With the rise of smart home technology, programmable thermostats have become even more advanced. Many models now offer Wi-Fi connectivity, allowing you to control and monitor your thermostat remotely through your smartphone or other smart devices. This feature provides convenience and flexibility, enabling you to adjust the temperature even when you're not at home. For example, if you're coming home earlier than expected, you can remotely set your thermostat to ensure a comfortable environment upon your arrival. This integration with smart home systems enhances energy efficiency by giving you greater control over your home's temperature and energy usage. 5. Health and Comfort Benefits In addition to energy efficiency, a programmable thermostat offers health and comfort benefits. By maintaining consistent and optimal temperatures, it helps create a comfortable living environment. You can wake up to a warm home in the morning or come back to a cool space on hot summer days. Additionally, programmable thermostats often include features such as humidity control and air filtration options, which can contribute to better indoor air quality and respiratory health. 6. Environmental Impact Reducing our energy consumption is not just about personal savings—it's about protecting the environment. By installing a programmable thermostat and optimizing our energy usage, we can make a positive impact on the planet. Conserving energy reduces greenhouse gas emissions, decreases the demand for fossil fuels, and helps mitigate climate change. By taking a small step towards energy efficiency with a programmable thermostat, we contribute to a more sustainable future for generations to come. In conclusion, installing a programmable thermostat is a practical and effective way to enhance energy efficiency in your home. By customizing temperature settings, optimizing energy usage, and enjoying the convenience of smart home integration, you can reduce your carbon footprint, lower your utility bills, and create a more comfortable living environment. Investing in a programmable thermostat not only benefits your wallet but also plays a significant role in promoting a sustainable lifestyle and protecting the environment. When choosing a programmable thermostat, consider the following factors: 1. Compatibility: Ensure that the thermostat is compatible with your HVAC system. Check the specifications and consult with a professional if needed. 2. Programming Options: Look for a thermostat with flexible programming options. Some models offer daily or weekly programming, while others allow for more advanced scheduling. 3. User-Friendly Interface: Opt for a thermostat with an intuitive interface and easy-to-use controls. A clear display and simple programming features will make it more convenient to set and adjust temperature settings. 4. Energy Usage Reports: Some programmable thermostats provide energy usage reports, allowing you to track and monitor your energy consumption. This feature can help you identify areas for improvement and further optimize your energy efficiency. 5. Smart Features: Consider whether you want a thermostat that integrates with smart home systems or offers Wi-Fi connectivity for remote access. These features provide added convenience and control over your home's temperature settings. Once you've selected the right programmable thermostat, it's time to install and set it up. If you're comfortable working with electrical systems, you can install it yourself by following the manufacturer's instructions. However, if you're unsure or prefer professional assistance, consult an HVAC technician to ensure proper installation. During the setup process, take the time to program your desired temperature settings for different times of the day. Consider your daily routine and schedule, adjusting the temperature to conserve energy during periods when you're typically away from home or asleep. Remember to periodically review and update your programming to reflect any changes in your schedule or seasons. By regularly optimizing your temperature settings, you'll continue to reap the benefits of energy efficiency and cost savings. In conclusion, installing a programmable thermostat is a smart investment that promotes energy efficiency, cost savings, and environmental sustainability. With its customizable features, remote access capabilities, and advanced integration options, a programmable thermostat provides a unique perspective on controlling your home's temperature and energy usage. By harnessing the power of technology and conscious energy management, you can make a positive impact on both your wallet and the planet. So, take the leap and install a programmable thermostat today to enjoy the benefits of energy efficiency and a more comfortable, sustainable home.
By Eze Shedrack3 years ago in Humans
Affordable Flooring Options for Any Room
Affordable Flooring Options for Any Room When it comes to home renovations, flooring plays a crucial role in setting the tone and style of a room. However, finding affordable flooring options that don't compromise on quality or aesthetics can be a challenge. Fortunately, there are plenty of cost-effective choices available that can transform your space without breaking the bank. In this article, we'll explore some affordable flooring options for any room, giving you the opportunity to upgrade your floors on a budget. 1. Laminate Flooring: Laminate flooring has come a long way in recent years and is an excellent affordable alternative to hardwood flooring. It mimics the look of wood or stone at a fraction of the cost. Laminate flooring is durable, easy to install, and resistant to stains and scratches, making it ideal for high-traffic areas. With a wide range of colors and styles available, you can find laminate flooring that suits your aesthetic preferences and enhances the overall look of your room. 2. Vinyl Plank Flooring: Vinyl plank flooring has gained popularity for its affordability and versatility. It replicates the appearance of hardwood flooring while offering greater durability and resistance to moisture. Vinyl plank flooring is available in various designs, including realistic wood grains, and can be installed easily with adhesive or as a floating floor. It's an excellent choice for kitchens, bathrooms, and basements, where water resistance is essential. 3. Engineered Wood Flooring: If you love the look of hardwood but have a limited budget, engineered wood flooring is worth considering. It consists of a thin layer of real hardwood on top of layers of plywood or high-density fiberboard. Engineered wood flooring is more cost-effective than solid hardwood and provides a similar aesthetic appeal. It's also more resistant to moisture and can be installed in areas where solid hardwood might not be suitable. 4. Cork Flooring: Cork flooring is an eco-friendly and budget-friendly option that offers unique benefits. It's made from the bark of cork oak trees, which naturally regenerate, making it a sustainable choice. Cork flooring provides a cushioned and comfortable surface, ideal for areas where you spend a lot of time standing, such as kitchens or home offices. It's also resistant to mold, mildew, and pests. With its natural warmth and acoustic properties, cork flooring adds a cozy and quiet ambiance to any room. 5. Carpet Tiles: If you're looking for an affordable and versatile flooring option, consider carpet tiles. They are cost-effective, easy to install, and come in a variety of colors, patterns, and textures. Carpet tiles are ideal for adding warmth and comfort to bedrooms, playrooms, or home offices. The best part is that if a tile gets damaged or stained, you can simply replace that tile instead of the entire carpet. 6. Porcelain or Ceramic Tiles: Porcelain or ceramic tiles are budget-friendly options that offer durability and endless design possibilities. These tiles are resistant to water, stains, and scratches, making them suitable for bathrooms, kitchens, and entryways. They come in a wide array of styles, colors, and sizes, allowing you to create a custom look that suits your taste and complements your room's decor. 7. Concrete Stained Floors: For an industrial or modern aesthetic, consider concrete stained floors. This option is not only affordable but also offers a sleek and minimalist look. Concrete staining involves applying a stain to the existing concrete floor, resulting in a unique and visually appealing finish. You can choose from a variety of stain colors to match your desired style. Additionally, concrete floors are highly durable and easy to clean, making them a practical choice for high-traffic areas. 8. Luxury Vinyl Tile (LVT): Luxury Vinyl Tile (LVT) is a budget-friendly flooring option that replicates the appearance of natural materials such as stone or wood. It's crafted from multiple layers of vinyl, which provides durability, moisture resistance, and easy maintenance. LVT comes in a wide range of styles and finishes, including realistic textures and patterns. The installation process is straightforward, with options for glue-down or floating installation. Whether you want the look of hardwood in your living room or the elegance of stone in your bathroom, LVT offers an affordable solution. 9. Painted Concrete Floors: If you have a concrete floor that you want to transform on a tight budget, consider painting it. Painting concrete floors allows you to add color, patterns, or even create the illusion of a different type of flooring. With the right concrete paint and proper preparation, you can achieve a stylish and cost-effective flooring option. This is a great choice for basements, garages, or utility areas where functionality takes priority over luxury. 10. Reclaimed or Salvaged Wood: For a truly unique and eco-friendly flooring option, consider using reclaimed or salvaged wood. You can find reclaimed wood from old barns, factories, or even wine barrels. While the cost of reclaimed wood may vary, it offers character, history, and a rustic charm that can't be replicated with new materials. Installing reclaimed wood flooring requires some additional effort, but the end result is a one-of-a-kind floor that adds warmth and personality to your space. When it comes to affordable flooring options, there are numerous choices available to suit different budgets and design preferences. From laminate and vinyl plank flooring to engineered wood and concrete staining, each option offers its own benefits and unique aesthetic appeal. By exploring these cost-effective alternatives, you can transform your rooms without overspending. Before making a decision, consider the specific requirements of the room, such as moisture resistance, durability, and ease of maintenance. Additionally, take into account your personal style, the existing decor, and the overall ambiance you want to create. Remember that affordable flooring doesn't mean compromising on quality or style—it's about finding the right option that fits your budget and meets your expectations. In conclusion, updating your flooring doesn't have to be a costly endeavor. With a wide variety of affordable flooring options available, you can enhance the beauty and functionality of your rooms without breaking the bank. From laminate and vinyl plank flooring to cork, carpet tiles, and concrete staining, there's a solution for every room and every budget. So, get creative, explore the possibilities, and enjoy the process of transforming your space with these budget-friendly flooring options.
By Eze Shedrack3 years ago in Humans