art
The best relationship art depicts the highs and lows of the authentic couple.
Energy-Saving Home Upgrades: Where to Start
Energy-Saving Home Upgrades: Where to Start In a world where energy conservation and sustainability are becoming increasingly important, upgrading your home to be more energy-efficient is not only beneficial for the environment but also for your wallet. Making energy-saving upgrades can significantly reduce your energy consumption, lower your utility bills, and create a more comfortable living environment. If you're wondering where to start on your journey towards an energy-efficient home, this guide will provide you with a unique perspective and practical tips to get you on the right track. 1. Conduct a Home Energy Audit: Before diving into upgrades, it's essential to understand how your home is currently performing in terms of energy efficiency. Consider conducting a home energy audit, which can be done by a professional or even as a DIY project. An energy audit will identify areas where energy is being wasted and provide you with a roadmap for improvements. It will highlight insulation issues, air leaks, inefficient appliances, and other factors contributing to energy loss. 2. Focus on Insulation: Insufficient insulation can result in significant energy loss. Therefore, it's crucial to prioritize insulating your home properly. Start with the attic, as it is one of the primary areas where heat escapes during winter and enters during summer. Adding insulation to the walls and floors can also help regulate the temperature inside your home. Insulated doors and windows are another worthwhile investment, as they prevent drafts and heat transfer. 3. Upgrade to Energy-Efficient Appliances: Appliances such as refrigerators, dishwashers, washing machines, and air conditioners consume a significant amount of energy. Consider replacing old, inefficient models with energy-efficient ones. Look for appliances with the ENERGY STAR label, as they meet strict energy efficiency standards. While the initial cost may be higher, the long-term energy savings and reduced environmental impact make them a wise investment. 4. Invest in Smart Thermostats: A smart thermostat is a game-changer when it comes to energy savings. These devices allow you to program and control the temperature of your home remotely, optimizing energy usage. They learn your heating and cooling preferences and automatically adjust settings to save energy when you're away. With advanced features like geofencing and learning algorithms, smart thermostats provide precise temperature control, maximizing comfort while minimizing energy waste. 5. Harness the Power of Natural Light: Maximize the use of natural light in your home by strategically placing windows and skylights. This reduces the need for artificial lighting during the day, saving electricity. Consider installing energy-efficient windows with low-emissivity coatings, which help control heat transfer. Additionally, using light-colored curtains or blinds can allow natural light to enter while maintaining privacy and reducing heat gain during the summer. 6. Upgrade Lighting: Replace traditional incandescent light bulbs with energy-efficient alternatives like LED or compact fluorescent bulbs. LED bulbs consume significantly less energy, last longer, and provide better lighting quality. Although the upfront cost may be higher, the energy savings and extended lifespan make them a cost-effective choice in the long run. 7. Consider Renewable Energy Sources: If you're ready to take your energy-saving efforts to the next level, consider harnessing renewable energy sources. Solar panels are an excellent option for generating clean, renewable electricity. By installing solar panels on your roof, you can generate your own power and potentially even sell excess energy back to the grid. While the initial investment can be substantial, the long-term savings and environmental benefits are substantial. 8. Unplug and Control Energy Vampires: Many devices and appliances continue to consume energy even when they're not in use. These energy vampires can contribute to wasted electricity and increased utility bills. Combat this by unplugging devices when they're not in use or using power strips with switches to completely cut off power. Smart power strips are another option, as they automatically turn off power to devices when they are not in use or during designated times. Taking control of energy vampires can result in significant energy savings over time. 9. Seal Air Leaks: Air leaks in your home can cause drafts, temperature inconsistencies, and energy loss. Inspect windows, doors, and any other potential sources of air leakage. Use weatherstripping, caulk, or foam sealants to seal gaps and cracks. This simple and inexpensive step can improve the energy efficiency of your home and enhance comfort. 10. Optimize Water Usage: Saving energy also involves being mindful of water consumption. Install low-flow faucets and showerheads to reduce water usage without sacrificing water pressure. Insulate your water heater to prevent heat loss. Fix any leaks promptly, as they not only waste water but also increase energy usage if hot water is being wasted. Consider investing in energy-efficient appliances like washing machines and dishwashers that use less water. 11. Landscaping for Energy Efficiency: The way you design and maintain your outdoor space can also contribute to energy savings. Planting trees strategically around your home can provide shade during hot summer months, reducing the need for excessive cooling. In colder climates, planting windbreaks can help block cold winds, reducing heat loss. Additionally, choosing native plants that require less watering can conserve water resources. 12. Educate Yourself and Involve Your Family: Energy-saving upgrades are most effective when everyone in the household is involved and understands the importance of conservation. Educate yourself and your family about energy-saving practices and encourage everyone to adopt energy-conscious habits, such as turning off lights when leaving a room, using appliances efficiently, and minimizing water waste. By working together, you can maximize the impact of your energy-saving efforts. Embarking on the journey towards an energy-efficient home doesn't have to be overwhelming. By following these tips and prioritizing upgrades based on your specific needs and budget, you can start making a meaningful difference in your energy consumption. Remember, every small change counts, and the long-term benefits of energy savings and environmental sustainability are worth the initial investment. So, take the first step today and transform your home into an energy-saving haven that benefits both your wallet and the planet.
By Eze Shedrack3 years ago in Humans
Repairing Drywall: Common Problems and Solutions
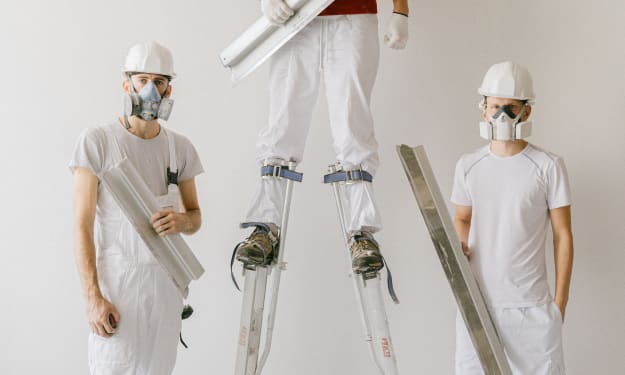
Repairing Drywall: Common Problems and Solutions Drywall is a versatile and widely used material in modern construction, known for its durability and ease of installation. However, even the sturdiest drywall can encounter issues over time. From small cracks and holes to water damage and uneven surfaces, these problems can detract from the aesthetics and functionality of your walls. In this article, we'll explore common drywall problems and provide unique perspectives and practical solutions to help you restore your walls to their former glory. 1. Cracks: Cracks are a common issue in drywall and can occur due to various factors such as settling, temperature fluctuations, or structural movement. To repair small cracks, start by cleaning the area with a damp cloth to remove any loose debris. Next, apply a thin layer of joint compound over the crack, smoothing it out with a putty knife. Once dry, sand the area lightly and apply a second coat if necessary. For larger cracks, consider using self-adhesive mesh tape before applying the joint compound. 2. Nail Pops: Nail pops are small bumps or cracks that occur when the drywall nails or screws push through the surface. This often happens due to the settling of the house or improper installation. To fix a nail pop, first, use a hammer to drive the nail or screw back into the wall, making sure it's slightly below the surface. Then, apply joint compound over the area, feathering the edges to blend with the surrounding wall. Sand the area smooth and repaint if needed. 3. Holes: Whether caused by accidental impacts or doorknob collisions, holes in drywall can be unsightly. For small holes, such as those left by nails or picture hooks, use a lightweight spackle or joint compound to fill the hole. Apply the product with a putty knife, feathering the edges for a seamless repair. For larger holes, consider using a drywall patch kit, which typically includes a self-adhesive mesh patch and joint compound. Follow the manufacturer's instructions for a professional-looking repair. 4. Water Damage: Water damage is a common problem in areas prone to leaks or high humidity. It can cause the drywall to become discolored, swollen, or even crumble. To address water damage, first, identify and fix the source of the water issue. Once the area is dry, remove any loose or damaged drywall. Cut out a clean square or rectangular shape around the damaged area, ensuring the edges are straight. Install a new piece of drywall or use a drywall patch kit, securing it with screws or nails. Apply joint compound and finish with sanding and painting. 5. Texture and Surface Irregularities: Uneven surfaces or texture inconsistencies can make your walls appear unprofessional or unfinished. To fix these issues, start by sanding the area lightly to smooth out any bumps or ridges. Then, apply a thin layer of joint compound with a trowel or drywall knife, feathering it out to blend with the surrounding wall. You can also consider using a texture spray or roller to match the existing texture. Experiment on a small area first to achieve the desired result. 6. Peeling Paint: Peeling paint is often the result of moisture or poor paint adhesion. Begin by removing any loose or peeling paint with a scraper or sandpaper. Repair any underlying issues, such as water leaks or moisture problems, before proceeding. Once the surface is smooth and dry, apply a primer to promote better paint adhesion. Finally, repaint the area, ensuring proper coverage and consistency with the surrounding wall. 7. Preventative Measures: To minimize future drywall problems, take preventative measures such as using drywall anchors or toggles when hanging heavy items, regularly inspecting your walls for signs of wear or damage, and addressing any water leaks or moisture issues promptly. Additionally, maintaining consistent humidity levels in your home can help prevent excessive expansion or contraction of the drywall. 8. Seek Professional Help: While many drywall problems can be resolved with DIY techniques, there are instances where professional assistance may be necessary. If you encounter extensive damage, structural issues, or if your repair attempts are not successful, it's advisable to consult a professional drywall contractor. They have the expertise and experience to handle complex repairs and ensure a flawless finish. 9. Embrace Creative Solutions: Repairing drywall doesn't have to be solely about fixing problems. It can also be an opportunity to add unique character and style to your walls. Consider incorporating creative solutions, such as textured wallpapers, decorative panels, or wainscoting, to enhance the visual appeal of your space while addressing any underlying drywall issues. 10. Learn from Mistakes: As you navigate the process of repairing drywall, don't be discouraged by mistakes. Mistakes happen, and they provide valuable learning experiences. Embrace them as opportunities to improve your skills and techniques. With each repair, you'll gain confidence and knowledge, making future repairs more efficient and effective. Remember, repairing drywall is a skill that can be learned and mastered over time. By addressing common problems promptly and utilizing the right techniques and materials, you can restore your walls to their original condition or even enhance them with creative touches. Take a proactive approach to maintenance, seek professional help when needed, and embrace the process of learning and improving. With patience and perseverance, you can transform your drywall into a flawless canvas that enhances the beauty and functionality of your living space.
By Eze Shedrack3 years ago in Humans
5 Must have Tools for Household Purpose
Introduction: Whether you're a seasoned DIY enthusiast or a novice homeowner, having the right tools can make all the difference in maintaining and improving your living space. From simple repairs to creative projects, having a set of essential tools at your disposal ensures that you're ready to tackle any task that comes your way. In this blog, we'll explore the top five must-have tools for household purposes that will empower you to handle various projects efficiently and effectively.
By Omar Farooque3 years ago in Humans
How Music Shapes Our Lives
Introduction: Music has an undeniable impact on our lives, transcending cultural boundaries and touching the deepest recesses of our souls. From the catchy tunes that get stuck in our heads to the poignant lyrics that resonate with our emotions, songs have a unique ability to shape our experiences and evoke powerful memories. In this article, we delve into the transformative power of songs and explore the ways in which music influences our lives.
By theycalmewaj3h3 years ago in Humans
Exploring the Timeless Beauty of World-Famous Art
Exploring the Timeless Beauty of World-Famous Art Introduction: Art is a universal language that transcends boundaries and captures the essence of human creativity. Throughout history, certain artworks have achieved global recognition, becoming icons of cultural heritage and sources of inspiration for generations to come. In this article, we embark on a journey to explore the breathtaking world of world-famous art, delving into masterpieces that have left an indelible mark on the collective consciousness of humanity.
By Motivational Bucks3 years ago in Humans
Discover the Magic of Best Handmade Furniture Products
Introduction: Step into a world where craftsmanship meets artistry, where every piece of furniture tells a story, and where quality reigns supreme. Welcome to "Best Handmade Furniture Products," a haven of exceptional craftsmanship and exquisite designs. In this blog, we invite you to embark on a journey into the realm of handmade furniture, where passion and skill blend seamlessly to create timeless masterpieces.
By Omar Farooque3 years ago in Humans
Love across time
Amelia and Benjamin had embarked on a love that defied the boundaries of time, their connection growing stronger with each passing day. But as their love blossomed, they soon found themselves facing numerous challenges that tested the depths of their commitment and the resilience of their hearts.
By johnson ngula3 years ago in Humans
"Love Across Time"
Love Ignited Amelia and Benjamin's chance encounter in the bustling city of the past marked the beginning of a love story that would transcend time itself. As they continued to explore the enchanting streets together, their connection grew deeper with each passing day.
By johnson ngula3 years ago in Humans
How to Post on Instagram: A Step-by-Step Guide. Content Warning.
Introduction: Posting on Instagram is a great way to share your creativity, connect with others, and build an online presence. Whether you’re a seasoned Instagram user or a beginner, this step-by-step guide will walk you through
By tushar bhojak3 years ago in Humans