
Halloween Memories and Epic Costumes Using Papier-mâché
I made my first papier-mâché mask at age five, but my artist spouse elevates the craft to an entirely different level!


One of my favorite memories from Halloween past involves making papier-mâché masks with my dad & brother when I was a kindergartner. Looking back, it’s really impressive that my father undertook such an ambitious project with his children who were only five and two years old. Instead of taking us to the store to buy some of those flimsy plastic cape and mask combos that passed as “costumes” for children in the mid-1970s, dad took on the daunting task of engaging his young children in a creative activity that spanned several days.

We were country kids in the frigid Midwest, so I’m sure that the idea was for us to each make a large mask that would fit over our head, and could comfortably pair with a snowmobile suit and boots. While the project wasn’t grandiose, my brother and I were both involved in the design and creation of our masks and provided much of the “labor” involved with crafting our costume heads.
My brother wanted to be an astronaut, and I don’t recall the slightest bit of parental pressure for me to be an alien or to create a matching theme. Instead, I was given free reign with my creation, and I insisted that I wanted to be an apple. Specifically, I wanted to be a red apple with a green worm sticking out.
My father prepped all the materials – using a paper-cutter to slice three grocery bags full of newspaper into 1” X 2” strips, then taping a plastic cover over our dining table, and filling our biggest popcorn bowl with a mixture of flour and water. Using our heads as guide, he blew up two large balloons and gently set them atop a pair of saucepans so that the gluey balloons wouldn’t roll away while we were working.
With extraordinary patience, dad showed us how to dip the strips into the paste mixture, then layer them on the balloon until none of the latex was showing. Because we needed to let everything dry, this project lasted for about a week, until finally dad cut the eye holes out of our mask-helmet hybrids, after which we painted them. My brother’s “space man” helmet was grey with red and white accents; my apple was red with a smiling green worm sticking out. We probably only went to five or six houses to trick-or-treat, and our creations were primitive at best, but we had so much fun making them! We used our masks to play dress-up for the next several weeks, and when they started to fall apart, we had fun smashing them and throwing them in a fire.

While this is a cherished memory, those first papier-mâché masks were not my last, nor were they even my favorites. My husband made two incredible papier-mâché masks as part of our couple’s costume a few years ago.
When my husband and I conceptualized costumes, my artist spouse suggested that he could build mask “heads” using foam and paper, and we floated some ideas. I thought that since we are big fans of the Seattle Seahawks, it would be fun to dress up as “bobbleheads” of our favorite players. We could dress in their jerseys, wear the big heads, and “bobble” our way through Halloween. Thankfully, my guy pointed out that dressing as Marshawn Lynch or Russell Wilson might be a questionable choice and seen as a type of blackface parody. Not cool.
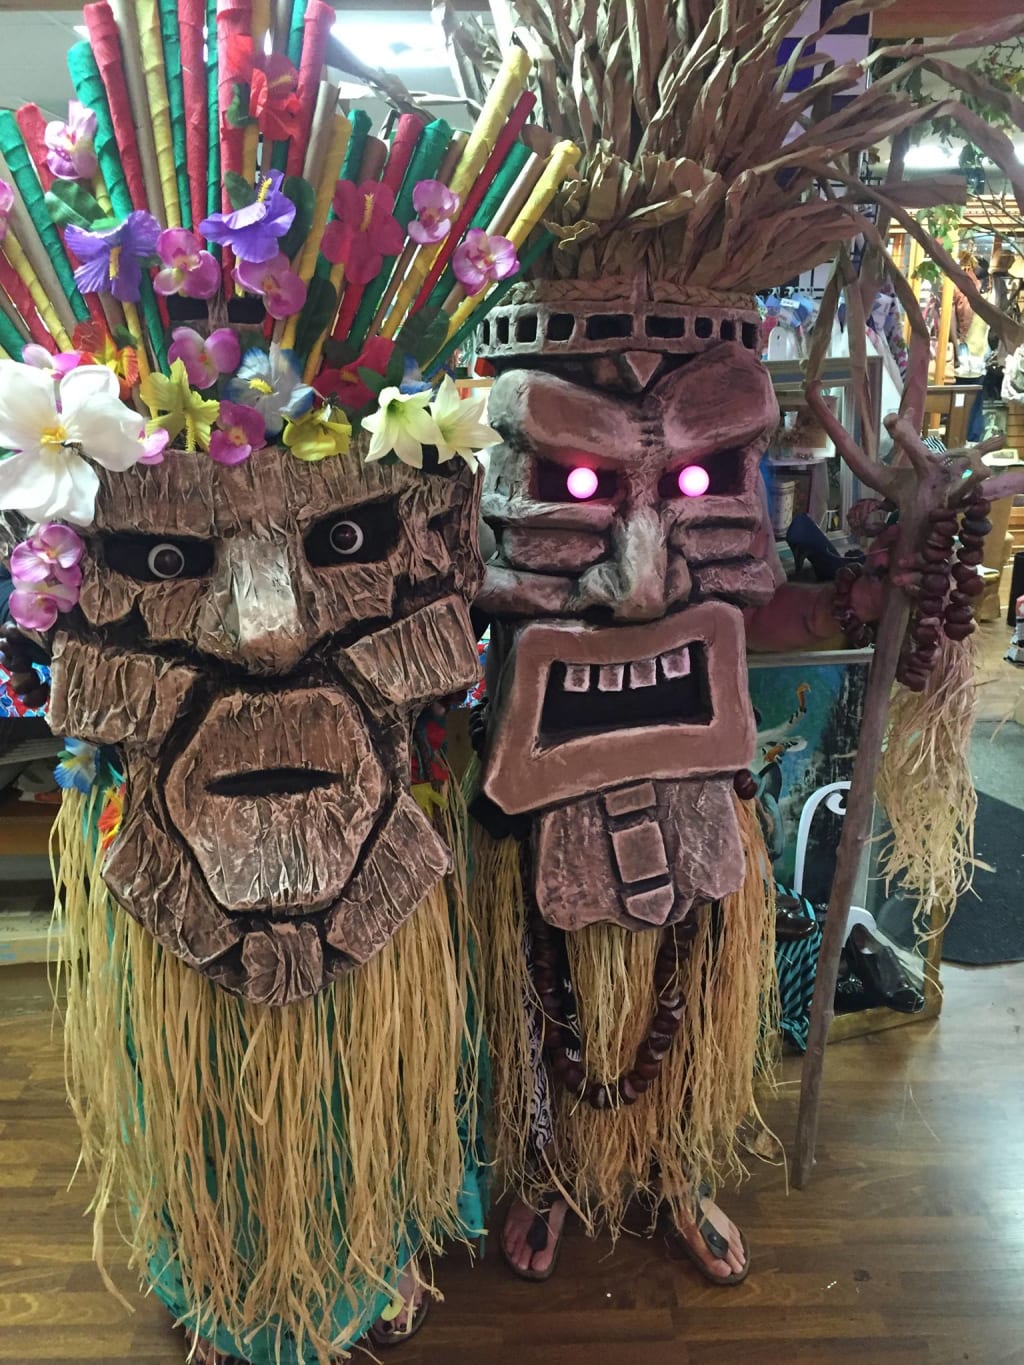
He came up with the idea of Tiki idols and, after we made general plans, he quickly got busy. He decided that his mask would look like a stone idol while mine would look like a carved wood totem. I suggested ways to make mine a little bit “feminine” with a floral headpiece and full lips. The headpiece also provided camouflage for hiding my eye holes. His would be “carved” out of the stone crown and then the fake eyes would be much lower. (It was truly weird to have people making "eye contact" a foot below my actual eyes when they spoke to me!)
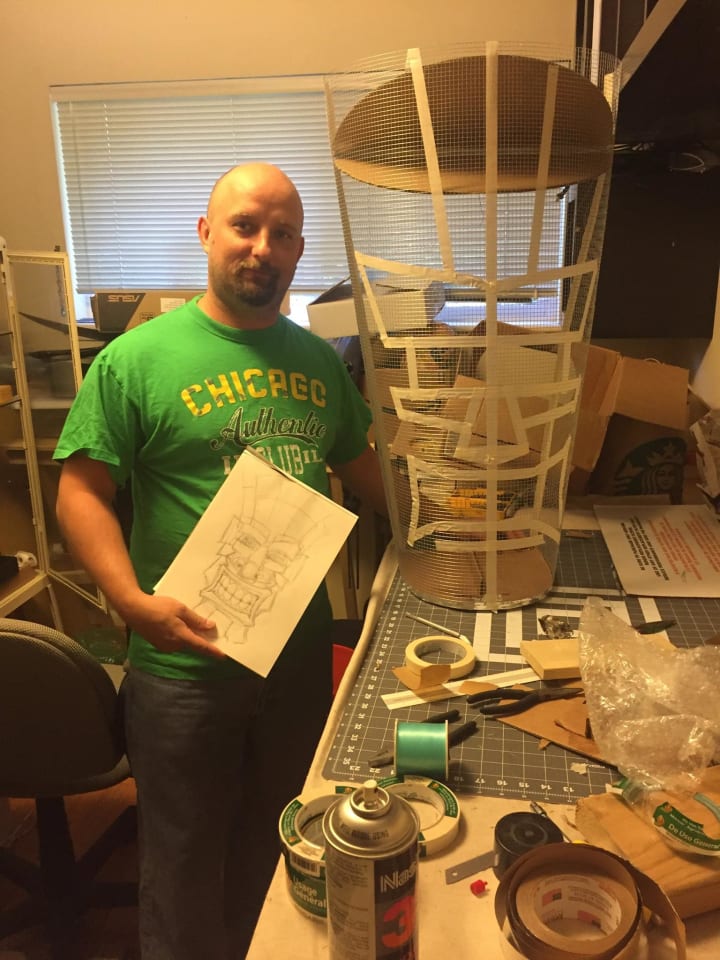
First, he sketched out his designs, then created a metal framework from chicken-wire type material. He attached a dowel across the back of each mask to use as a handle for the wearer to hold the mask upright, and also for structural integrity. Then he used masking tape to outline the design on the front.
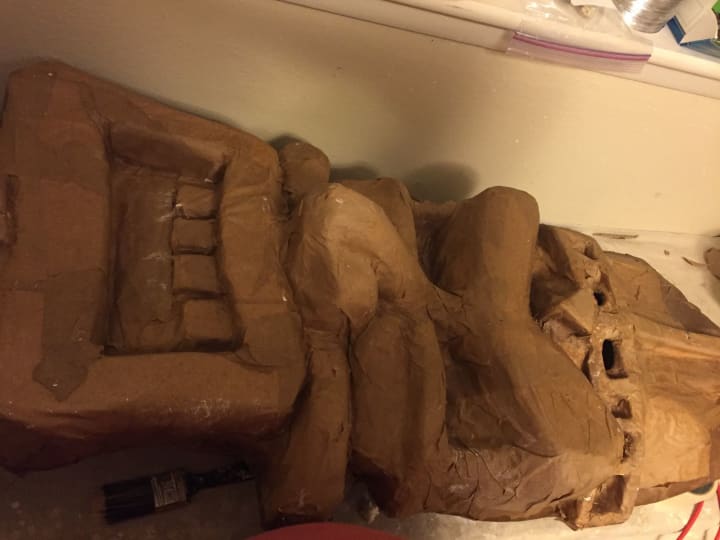
Next, he carved foam to attach to the piece.

Bit by bit, he added more foam – including spray foam.

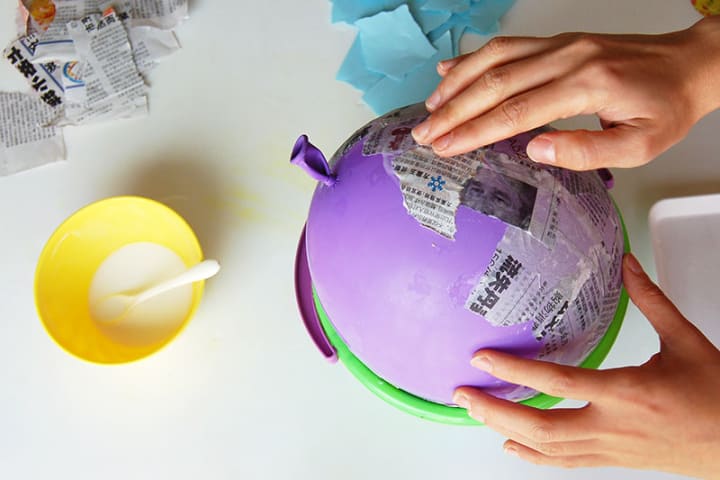
Eventually, he used brown paper dipped in a mixture of glue and water to add texture and detail.
This project took several weeks to complete because each mask needed to dry multiple times after each coat of foam, papier-mâché, and paint. He put fans and a space heater in his workshop to speed the process, but it was still very time-consuming. While we waited for everything to dry, we worked on the rest of our costumes. Both costumed included grass skirts, tropical sarongs, and sandals. My husband also used a drill press to make holes in buckeyes that we gathered, and strung them together to make what looked a lot like Hawaiian Kukui nut necklaces and bracelets.
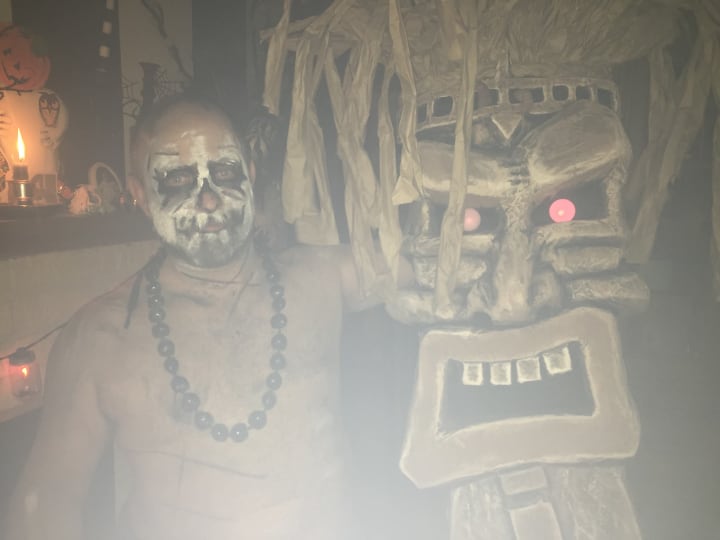
When the pieces were dry, we added the finishing touches: silk flowers, paper headdresses, and best of all – the eyes!
The “stone” Tiki had glowing red eyes made by cutting a Ping-Pong ball in half, coloring the inside red with a sharpie marker, then attaching a small LED flashlight to the inside of each eyeball.

The “wooden” Tiki had moving eyes that had people fascinated all evening. Numerous people asked if there was some sort of device controlling their movement, but it was all analog! My husband again used Ping-Pong balls, but this time he used a marker to draw pupils on the outside, then drilled through the top, straight through to the bottom. Then he filled each eyeball partway up with rice to add weight. Finally, he strung each ball with fishing line and attached it to the mask. Voilà! Moving eyes.
The first place that we went in our costumes was my father-in-law’s house, where my brother-in-law did not recognize us, and gave us candy before we revealed ourselves. He didn’t believe that our costumes were homemade until we showed him the back with the wire framework and carry bar. Late in the evening, we crashed the party at my son’s house and stymied his roommate who tried to guess who we were for about 10 minutes. Wherever we went, nobody recognized us.
We won every costume contest that we entered that year, and I wish that we had entered more!
This year’s Halloween plans are not nearly as elaborate, but if we decide to “go big” again in the future, I think that papier-mâché is an inexpensive and versatile medium for creating amazing props and masks!
*******************
Thank you for reading! If would like to find more of my stories, please subscribe, visit my profile, or follow me on my Facebook writer's page.
More pictures of my husband's Tiki mask project.
The Tiki masks featured within this piece were designed and created by Erik John Rice, and used with permission of EJ Artworks.
About the Creator
Allison Rice
Finalist 2022 V+ Fiction Awards, Allison Rice is a work in progress! Author of 5 previous Top Story honors including “Immigrants Among Us” "Pandemic ABCs" and a piece about Inclusion, Alli is an avid reader, and always has a story to tell!
Keep reading
More stories from Allison Rice and writers in Horror and other communities.
Underwater, Nobody Can Hear You Scream.
Blowing out an exasperated sigh, Elli threw back the light sheet that was covering her body, sat up, and kicked her legs over the side of the bed. As she rose, sweat trickled down her naked back, forming a pool at the base of her spine before disappearing into the already-damp sheet. It was another sleepless, hot August night. Two months ago, Elli had turned 16. Two days ago, her mother had finally succumbed after a long battle with cancer. Two hours ago, Elli had (apparently) broken up with her boyfriend of nearly a year. The same boyfriend that she’d tenderly shared her virginity with had decided that being an emo douchebag was more important than being present for his girlfriend during “this difficult time.” She’d called him – long distance even – and told him that her mom had died. His response?
By Allison Rice2 years ago in Horror
The awesomeness of Aokigahara city, Japan
Aokigahara isn't actually a city, but a vast and captivating forest nestled at the foot of Mount Fuji in Japan. While it has gained some notoriety for a different reason, Aokigahara's true awesomeness lies in its beauty, mystery, and unique natural wonders. Let's delve into the magic of this enigmatic place.
By Moharif Yuliantoabout 17 hours ago in Horror
Reaching Out
I promise her. I'd do anything for her. She's my mom. Even as Lanie and Deanna are flying home, Mom is scrappy fighting dying. She lays too still in that too-big bed with all the toasty white hospital blankets, in the south tower, at the broad end of a long slow-turning corner that delivers me again to her private room with the view she can't see through, with the beeping that tells us nothing new, and all these ice chips she can't swallow, and a flood of well-intentioned nurses who cannot do a damned thing all the same.
By Christy Munson3 days ago in Fiction


Comments
There are no comments for this story
Be the first to respond and start the conversation.