
Make Your Own Medieval - Dolls
A Re-enactment DIY


I've been considering writing an article on this for a while.
Medieval re-enactment is basically my second life, and I fully recommend it for anyone who is disappointed that they're expected to stop playing or dressing up as soon as they hit High School.
Dolls made from fabric were rare in the medieval period, since fabric was expensive, and dolls were more commonly made from wood or other inexpensive materials. Fabric dolls were very much the purview of the upper classes and extra-wealthy.
I don't know how many people are actually interested in how to make dolls, but when I shared a photo of the one I made my niece for her next birthday (six weeks away at the time I published this), a surprising number of people asked me how I'd made it, so I figured I might as well write it up.
While it looks like a daunting challenge, it's actually quite simple. Start to finish, you can probably complete one in a few hours.

You Will Need...
- Fabric for the doll. Calico or Broadcloth are best, and a pre-cut square from your local craft store will yield two dolls.
- Sewing machine, needle and thread. You can do the sewing by hand, but it will take a LOT longer.
- Wool for the hair.
- Fabric for the clothing. You don't need much, maybe a yard/0.25m in total, unless you're planning a Rennaissance Outfit.
- Paper. A few sheets of A5 notebook paper will do.
Method
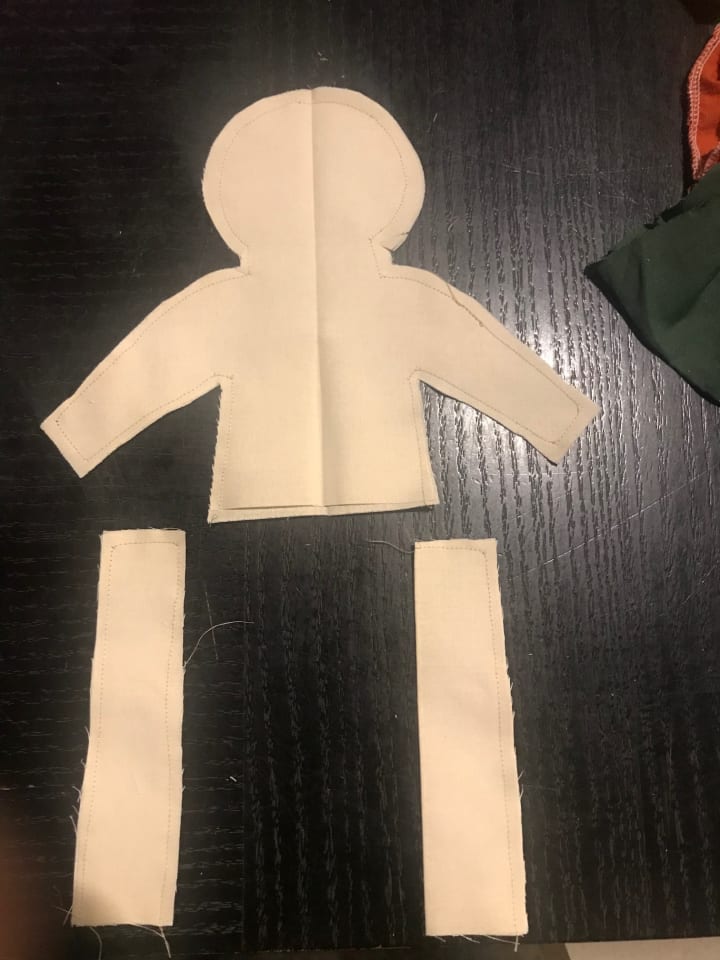
First, fold your fabric into quarters and trace the pattern on the fold. This will keep both sides mostly even.
A pre-cut 50 cm square will yield two dolls per square, with some fabric left over.

Next, cut out the pieces. Resist requests from small children to help, no matter how well intentioned.
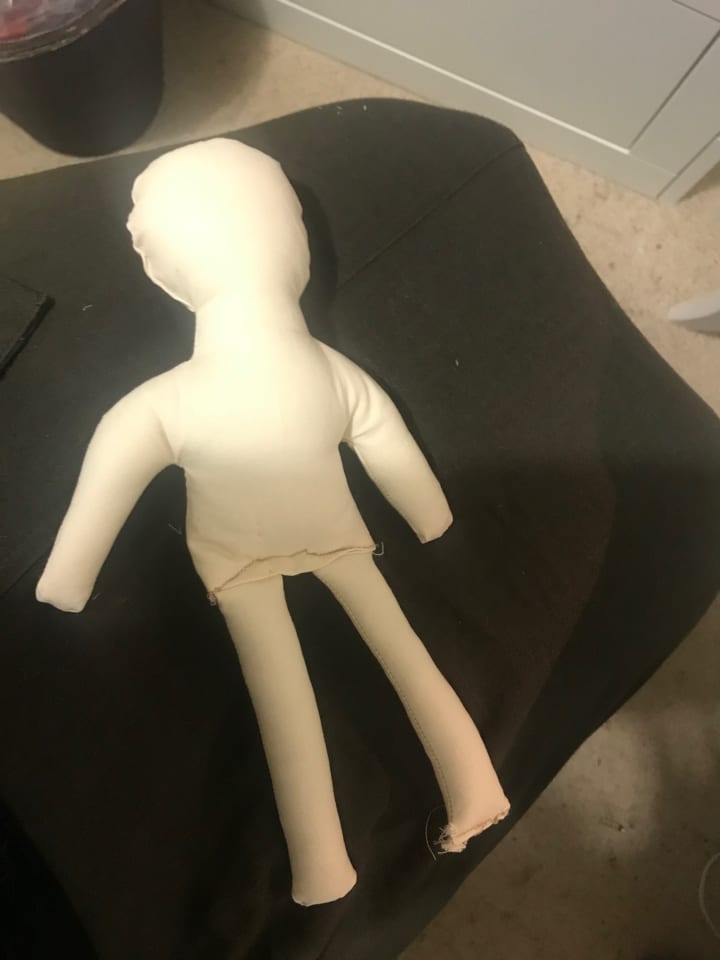
You should end up with two vaguely person-shaped pieces, and three rectangles (one will twice the size of the other two).
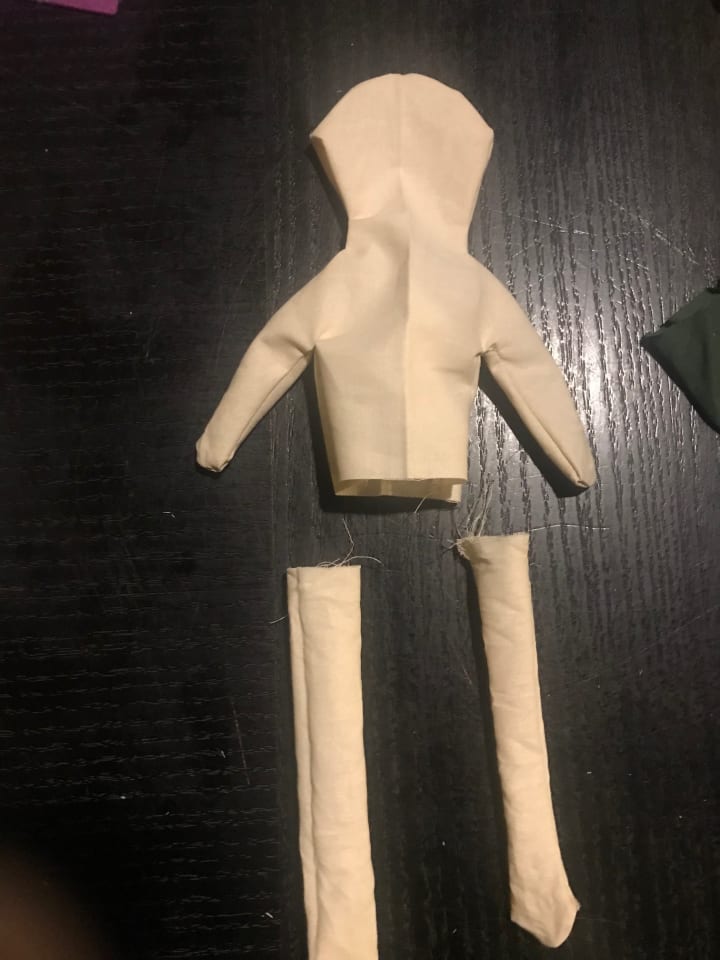
Sew around the edges, leaving an opening at the top of the legs and bottom of the torso. This is for the stuffing.
Make a small cut at corner seams to avoid fabric bunching.
Turn the pieces inside out. This may get a bit tricky, but the blunt end of a pen or pencil will come in handy.
You can use any fiber or wadding for the stuffing. I tend to use unspun wool, if I can find it, or cushion stuffing from my nearest craft store.
Do it bit by bit, rather than trying to shove a huge wad in all at once.
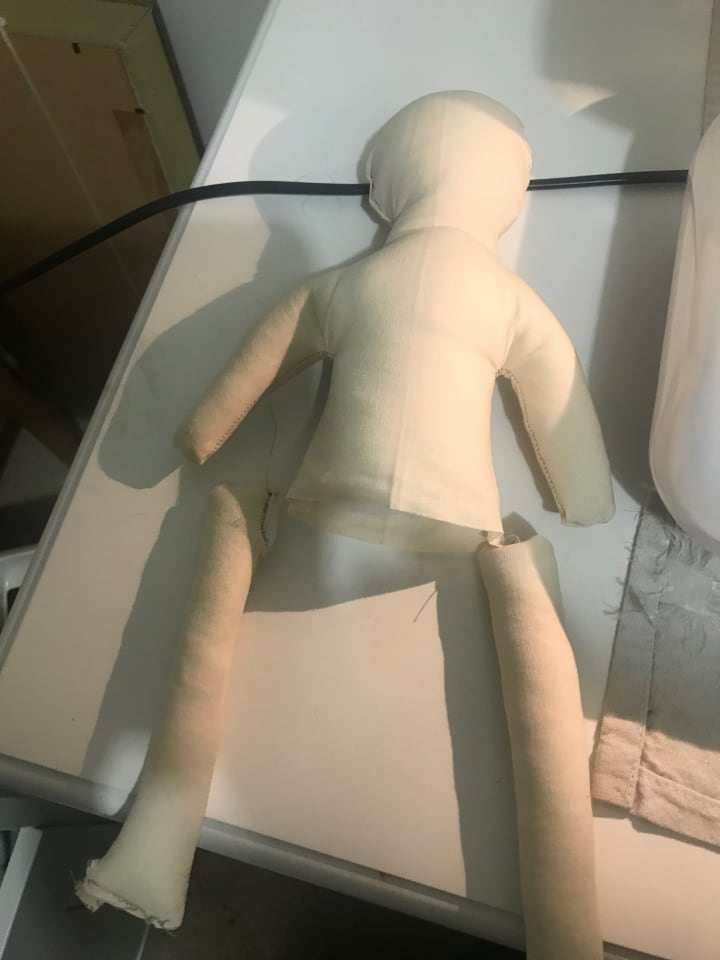
Fold the open edge of the torso under, and fit the open ends of the legs in.
Pin them in place.
Use a jagged or zig-zag stitch to sew over the join.
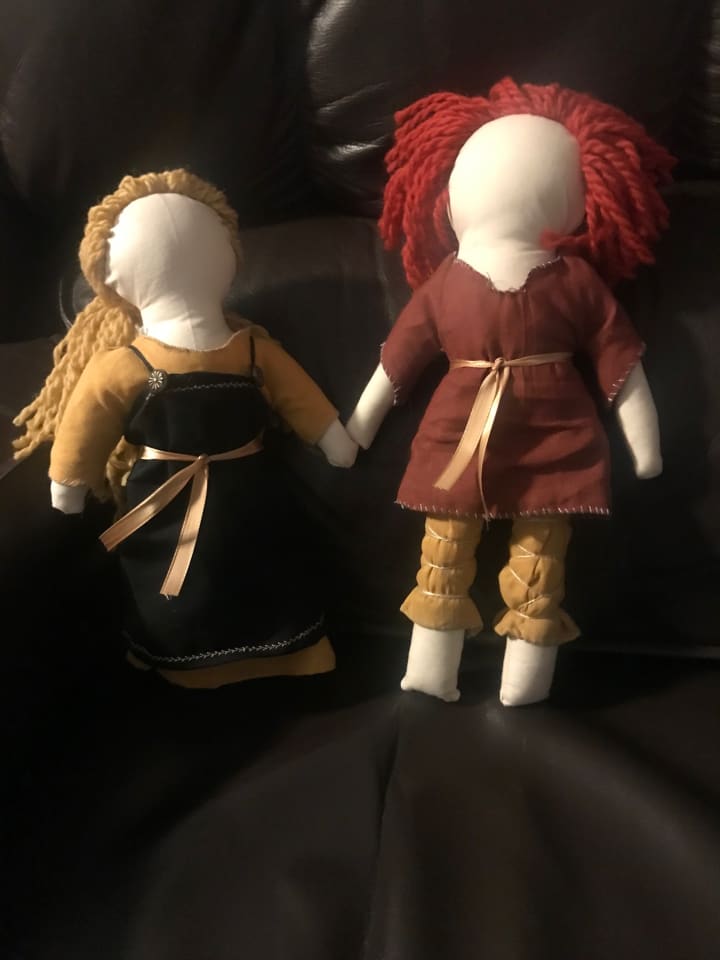
Doll Clothes
Unless you're doing High Rennaissance or Tudor, medieval clothing was fairly simple. You can even use the doll pattern that you already have for most of it.
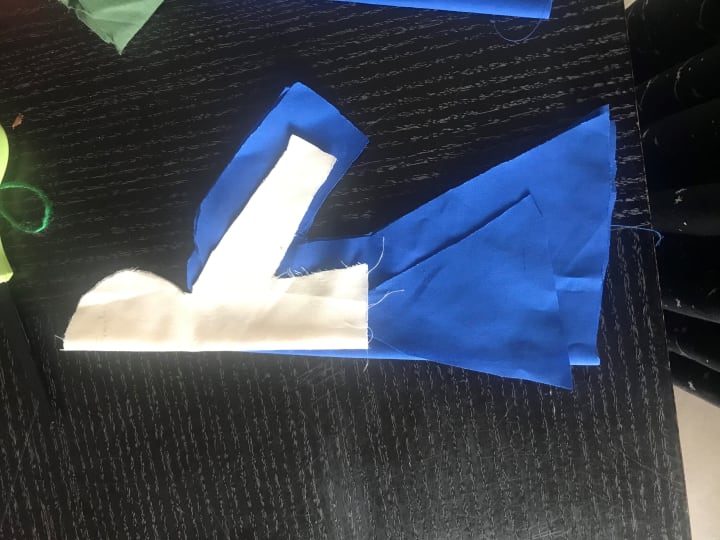
Sew along the seams like you did for the doll, leaving leg-, arm- and neck-holes open.

You can machine-hem the bottom of the dress, but I recommend hand-hemming the neck and sleeves.
Doll clothes are a bit too fiddly for a sewing machine when you get to the small bits, and the sewing foot might not even fit inside.
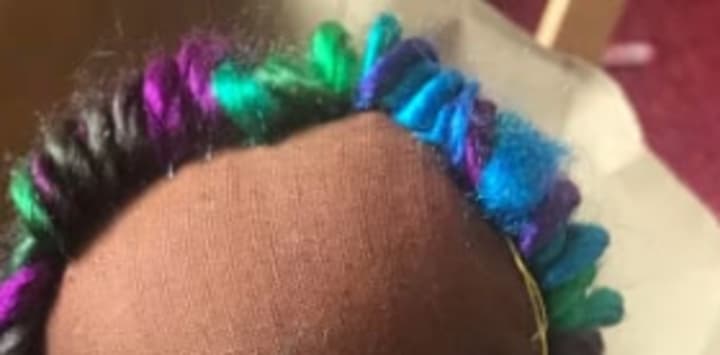
Hair
This is the part that looks the hardest, but is actually the easiest.
- Grab a ball of knitting wool and measure into even lengths
- (The easiest way to do this is to wind it like you would a long extension cord, then cut at both ends. Wrist-to-elbow makes for a decent length for female doll hair, and you can cut in half again for male dolls)
- Lay the wool lengths out over a piece of paper. (Notebook paper is probably easiest
- Using a straight stitch, sew the wool to the paper, leaving a tail at both ends.
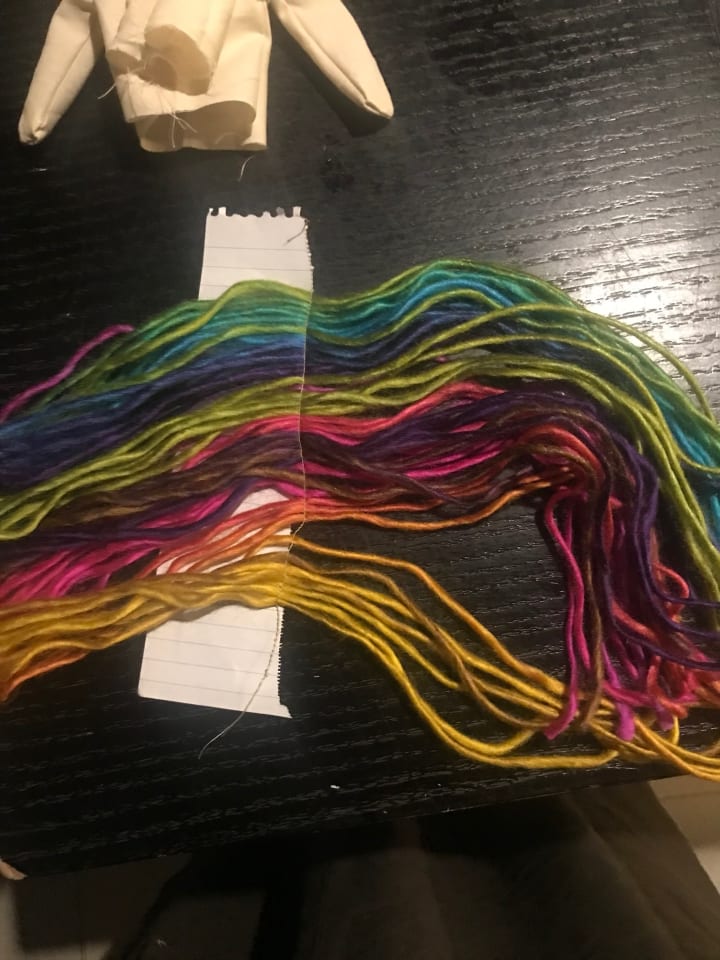
- Tear away the paper (this will be easy, thanks to the needle holes made by sewing)
- Using a needle and thread, sew the hair onto the doll head.
- Depending on how you want to style the doll's hair, this can be done in a number of ways, but the easiest is either in horizontal rows, or a circle around the 'hairline' for a braid or bun.
- For twin tails or braids, sew the hair in two circles, corresponding to the 'part'.
- For cornrows, sew the hair in ovals corresponding to the number of braids, or sew in rows and braid normally.
Variations
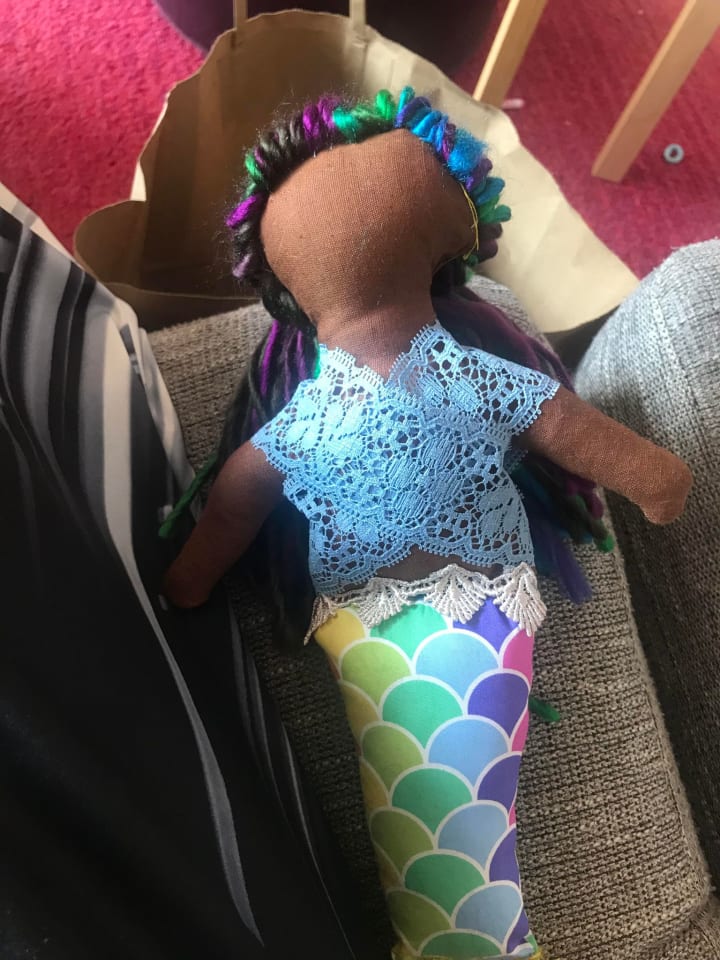
You can make your human doll a mermaid with some scale-print fabric cut in an isosoles triangle (plus whatever tail fin shape you want) shape instead of legs.
If you liked this story, leave a heart, a comment or a tip and share it around, and check out my other work on Medium and Amazon.
About the Creator
Natasja Rose
I've been writing since I learned how, but those have been lost and will never see daylight (I hope).
I'm an Indie Author, with 30+ books published.
I live in Sydney, Australia
Keep reading
More stories from Natasja Rose and writers in History and other communities.
Corpse, Changeling or Asylum?
it’s always fun to imagine who you might be if you were born in a different time. A princess, perhaps, or a noted scholar. One of the decadent gentry, waited on hand and foot. A bold explorer? Someone sure to go down in the history books, obviously.
By Natasja Rose11 months ago in History
The Snake-Worshipping, Fur-Wearing Woman Who Made Alexander Great
What do you know about the mother of Alexander the Great? It's not a trick question. The woman who gave birth to one of history's military greats has been much obscured by the long, dark shadow of history. Short of a few awkward caricatures in film, little has been brought into focus about the infamous Olympias of Molossia.
By E.B. Johnson 19 days ago in History
Unraveling the Rich Tapestry: Antigua and Barbuda History Through the Ages
Antigua and Barbuda, a captivating duo of islands nestled in the heart of the Caribbean Sea, boast a storied history spanning millennia. Their journey from ancient indigenous settlements to a modern sovereign nation is a tapestry woven with threads of conquest, colonization, and resilience.
By Luminara Scribeabout 6 hours ago in History
The problem with being a nice person
Who would have thought that being a nice person could be problematic. The majority of people would tell you that’s what they want to be or at least want those around them to be, but as it turns out, what we want and what we say we want are worlds apart. I won't stress or ramble on about how I would like things to be, but I’ll just analyze why this is, I am not sure either if a solution is even possible.
By real Jemaabout 7 hours ago in Confessions


Comments (5)
This style of making a doll won't be bad to put it into practice ! Nice one .
I love this! I really want to try it!
it's a nice tutorial. I couldn't try sowing but god bless you creative types that can.
Thank you for sharing. I love the the step by step pictures that was included in the story. These dolls would be great to sell at a renaissance festival, it would make the festival authentic. 👌
Terrific how to!! Loving it!!!💖💖💕