
MW3 Zombie: How to better kill Greylorm to unlock legendary schematics?
MWZ Schematics Guide
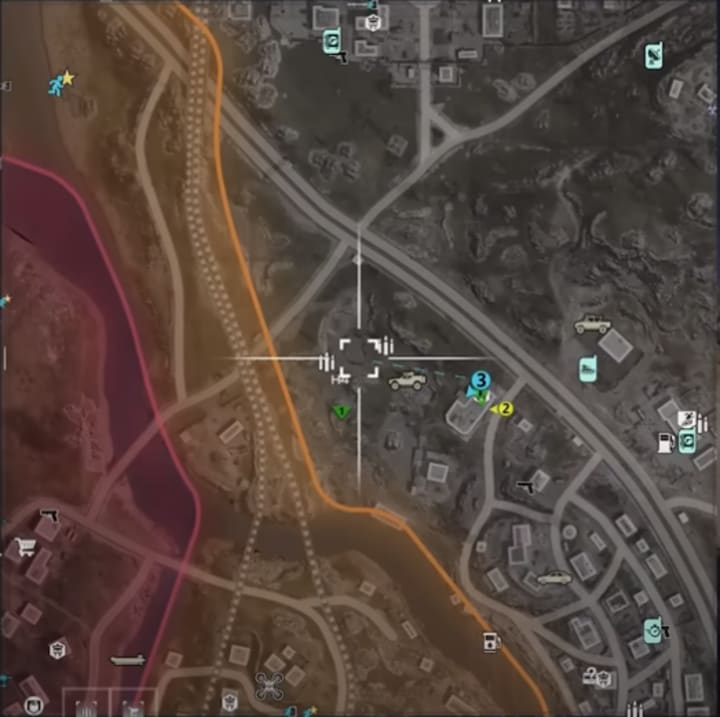
If you want to kill Greylorm and unlock the legendary schematics, you must first complete the prerequisite tasks of collecting USBs. Once you're done, open the map and find the storm. Zoom in and search the area around the storm for two adjacent ammunition depots. This is where you need to go. In the game you can find two specific locations where ammunition depots are clearly visible. Near these ammunition depots you will find several stations. Approach these sites and you will see a message stating "Refractor needs to activate Eepa Storm".
How to collect USBs faster please refer to - How to collect All USBs?
Upon activation, you will be asked to wait until the in-game timer reaches zero before continuing. Using this time to farm MW3 CP, complete contracts, and acquire necessary perks, Pack-a-Punch upgrades, and Rarity upgrades is highly advisable.
Preparation before battle
1. Gas Mask
Make sure you have a durable gas mask, as the entire boss fight will take place in the middle of a storm. Without a powerful gas mask, you will be unprotected and take damage from the storm, making it impossible to survive and defeat the boss. This boss fight is considered to be the hardest Worm boss fight in MWZ to date, even more challenging than the Worm in the Act 4 story.
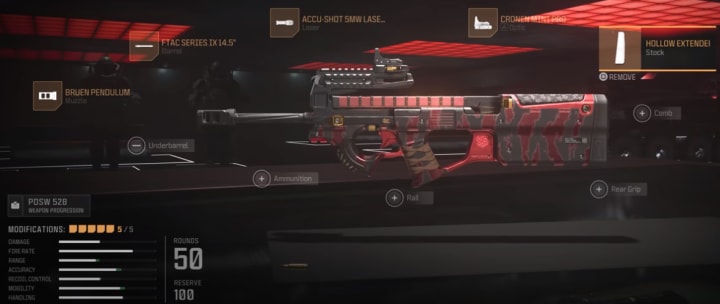
2. Weapons with large ammunition capacity
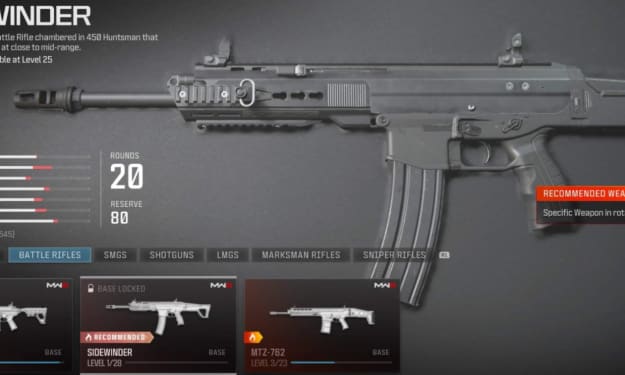
- It is recommended that players bring a weapon with a large ammunition capacity like an assault rifle or LMG. This will allow you to continuously shoot the worms and cause significant damage to the worms.
- The upgraded P90 is also a good choice. After the upgrade, its ammunition capacity will reach 400 rounds.
For more assault rifle or LMG upgrades & accessories, please refer to - MWZ Weapon Tips.
3. Be prepared to heal and revive
- This battle is very difficult, and players need to prepare enough healing items before the battle begins, including the Healing Aura.
- You also need to prepare Dog Bone Classified Schematics to summon a friendly hellhound that can resurrect fallen team members at any time.
4. Aether Blade and gas grenades
- If you have an Aether Blade, don't forget to bring it. It can effectively kill zombies wandering around.
- It is recommended to use experimental gas grenades, which can do a fair amount of damage to the worm.
Proper use of battlefield advantages
One of the advantages of this boss fight is having two ammo caches. Not only do they refill your tactical equipment, but they also replenish your gas mask. When your gas mask durability is low, interact with the ammo cache to restore it immediately.
Greylorm battle tips
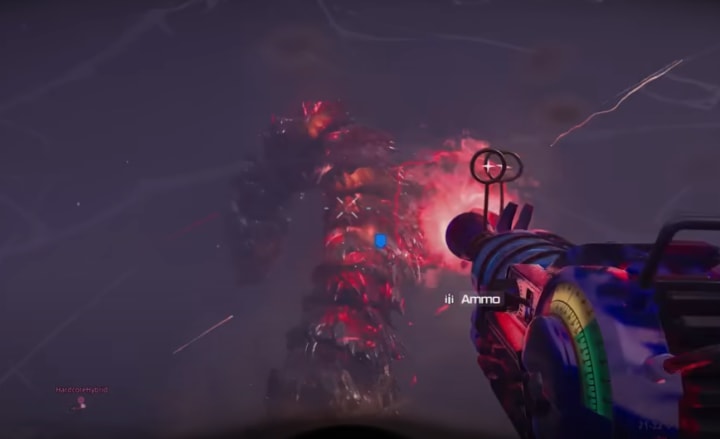
This boss has an incredibly high amount of health compared to previous worm bosses. Its weakest point is the red shards on its body, replacing the blue shards from previous bosses. Gray retains the same attacks as the bosses from Act 3 and Act 4, including shooting out flying purple orbs that continuously damage you over time. It is important to eliminate these orbs. Additionally, numerous elite enemies, such as manglers and cpol mimics, will spawn, making the battle even more challenging.
Keep in mind that this fight is a race against the clock. Once the worm appears, you only have about 10 minutes to defeat it. While it may seem like a long time, the worm has an incredible amount of health, so it's essential for the entire team to focus on dealing as much damage as possible. There's no time to waste.
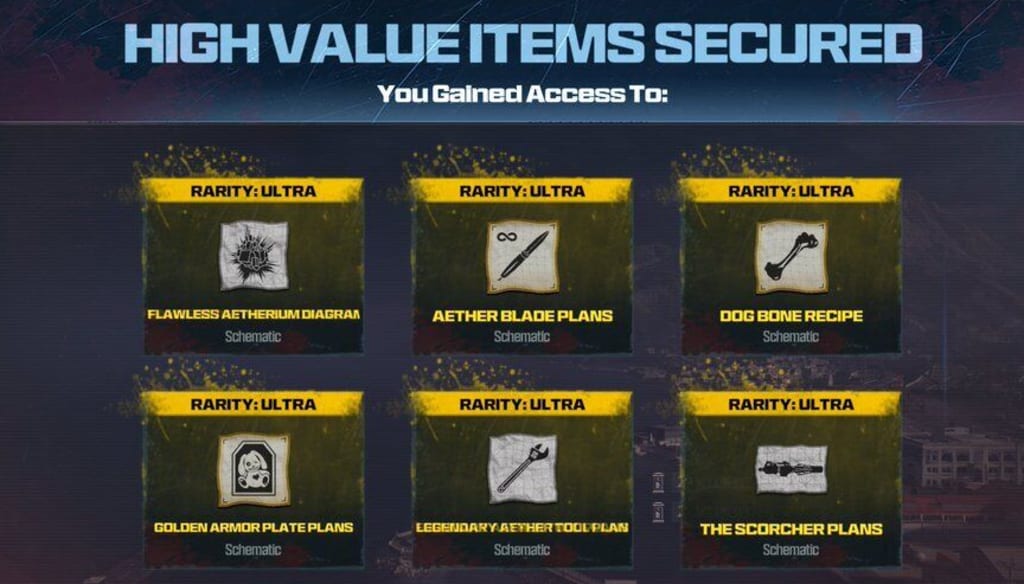
Once you defeat the worm boss, it will drop loot such as rare EA tools, Ether Crystals, kill streaks, and ammo mods. Additionally, it will spawn a reward Rift, which guarantees a chance to obtain brand-new rare schematics. Someone obtained the Flawless Ethereum Diagram, which allows them to craft a Tier Three Pack-a-Punch Crystal. Completing this also gives you a chance to obtain the Scorcher Blueprint Weapon Case, so you can craft the Scorcher in future games. There is also a chance to get the VR1 as a weapon case, although it cannot be crafted at the moment.
Fortunately, once you defeat this boss, you don't have to rush to a final exfil point to leave in time. The boss spawns its own personal exfil portal that immediately extracts you. The interesting thing about taking down this boss is that it requires dedicating a whole hour of your time for a single boss fight run. You have to complete this multiple times in order to collect every possible schematic in the game, allowing you to craft super overpowered items that were not available until Season 1.
About the Creator
Keep reading
More stories from PattonVast and writers in Gamers and other communities.
mobile gaming in the gaming industry
Introduction: In the modern era of technology, mobile gaming has become a ubiquitous form of entertainment that has revolutionized the way we engage with games. With the powerful capabilities of smartphones, players now have access to a vast library of games right at their fingertips. In this article, we will delve into the world of mobile gaming, exploring its rise in popularity, the unique advantages it offers, and the diverse experiences it delivers. Get ready to unlock the limitless potential of gaming on the go.
By Mohamed Mahmoud4 days ago in Gamers


Comments
There are no comments for this story
Be the first to respond and start the conversation.