
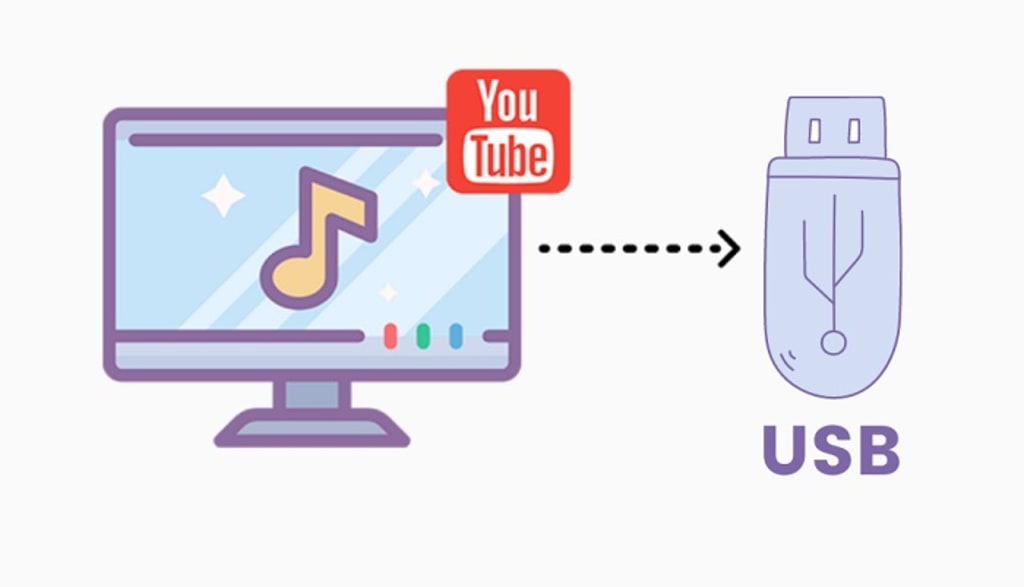
How to Transfer YouTube Music to USB
In this article, we'll walk you through transferring YouTube Music to a USB drive for offline use.
Part 1. Download YouTube Music to USB with TunePat YouTube Music Converter
Part 2. How to Transfer YouTube Music onto a USB Flash Drive
Related Articles: How to Transfer YouTube MVs to USB Drive
Part 1. Download YouTube Music to USB with TunePat YouTube Music Converter
In general, the compatible audio formats via the USB device must be MP3, WMA, AAC, M4A, and M4B. Therefore, to get YouTube download music to a USB drive, you will need to use a third-party tool, which can help you download YouTube songs to USB-supported audio formats. TunePat YouTube Music Converter is one of the best tools you cannot miss.
TunePat YouTube Music Converter works for both YouTube free and Premium users to download music from YouTube to USB at up to 10X faster speed. It is specialized in converting YouTube tracks, albums, and playlists to common audio formats, including MP3, AAC, WAV, FLAC, AIFF, and ALAC with lossless audio quality. Thus, you can easily move the downloaded YouTube songs to USB. After that, you can enjoy YouTube Music on any device that supports a USB port, like a vehicle, game console, smart TV, etc.
Key Features of TunePat YouTube Music Converter
- Download songs, music videos, albums, playlists, and podcasts from YouTube Music.
- Convert YouTube Music to MP3, AAC, WAV, FLAC, AIFF, or ALAC.
- With tools available for changing output format, burning CDs and editing ID3 tags.
- Download YouTube Music with a free account without ads.
- Keep ID3 tags and lossless output quality after conversion.
- Suitable for multiple scenarios, such as use on the Apple TV, import to various DJ programs, etc.
How Does TunePat YouTube Music Converter Work?
Step 1: To begin using TunePat YouTube Music Converter, you will be presented with two pages: the main interface and the embedded YouTube Music web player within TunePat. If the web player does not automatically appear, you can manually open it by clicking the "Open the web player window" button on the Home page. Next, click the "Sign in" button in the YouTube Music web player to successfully log in to your YouTube Music account, granting you access to the YouTube music library.

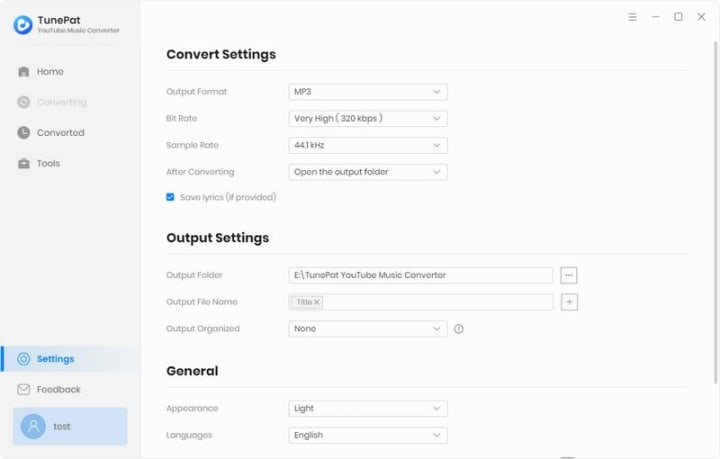
Step 2: Once you have successfully logged in, please navigate back to the Home page and click on the "Settings" option located at the lower left side of the menu bar. This is where you can customize your output and conversion parameters. Depending on your preferences, you can modify various settings such as output format (A, MP3, AAC, FLAC, WAV, AIFF, ALAC), bit rate (ranging from 128kbps to 320kbps), sample rate (from 44.1 kHz to 192 kHz), output path, output file name, appearance, language, and more.
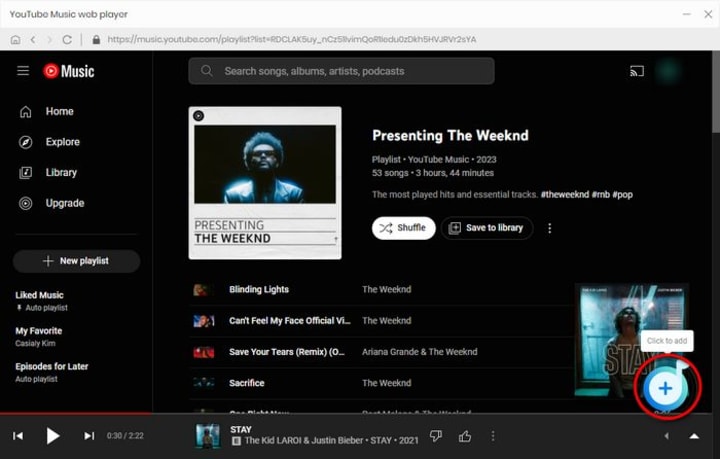
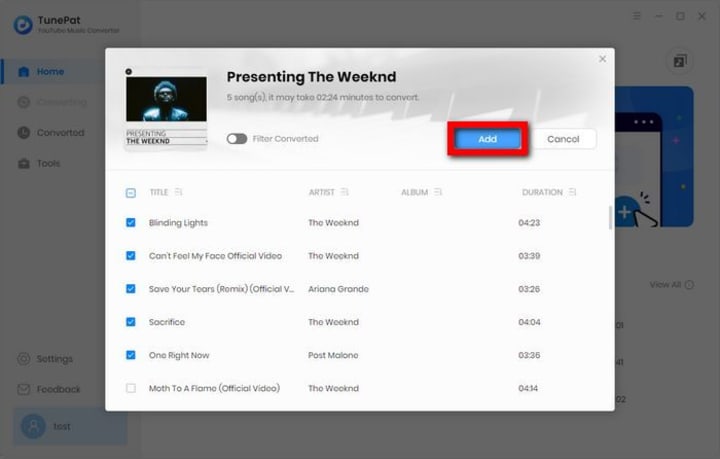
Step 3: Now, proceed to the YouTube Music web player window. Open the desired song, album, artist, or playlist that you wish to convert. Click the blue "Click to add" button located in the lower right corner. This button will prompt TunePat to automatically identify and display all available titles on the current page within a pop-up window. Manually select the titles you want and choose the "Add" option to include these songs in the conversion list on the Home page.
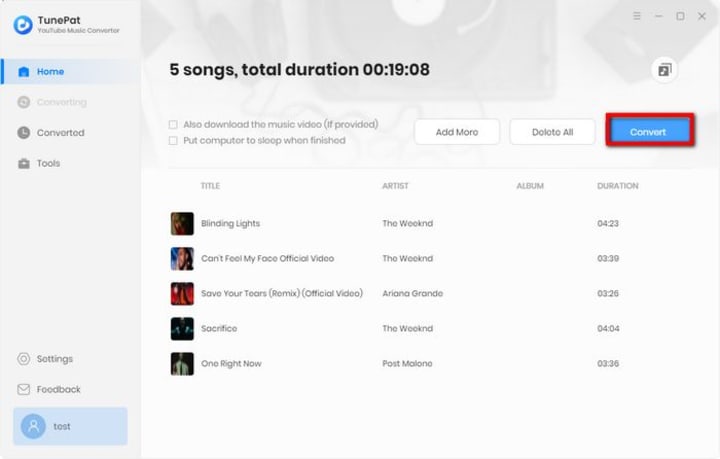
Step 4: On this page, click "Convert" to initiate the conversion process for your selected songs. If you wish to add songs from other albums or playlists for one-time conversion, you can select the "Add More" button instead.
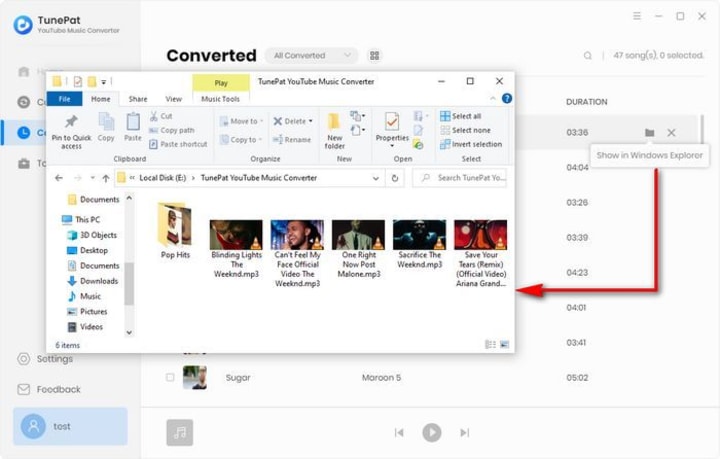
Step 5: Once the conversion is complete, you can find the converted YouTube songs by clicking the "Converted" icon. Additionally, you can easily locate the saved files in the local folder and perform various operations such as editing, transferring, and more.
Part 2. How to Transfer YouTube Music onto a USB Flash Drive
Now that you have downloaded tracks from YouTube Music and saved them to MP3 on your computer, here are the main tips to move the downloaded YouTube Music songs to your USB drive.
- Simply plug your USB flash drive directly into an available USB port of your computer.
- Navigate to the folders containing the downloaded YouTube Music you want to transfer.
- Right-click on the file you want to transfer to your USB flash drive. Click "Send To" and select the USB drive. Plus, you can also double-click on the drive, then drag and drop those YouTube Music tracks to your USB flash drive directly.
Download the powerful TunePat YouTube Music Converter:
About the Creator
Keep reading
More stories from Alexis Kayeo and writers in Beat and other communities.
Frankie's Rediscovery: Paulo Nutini- Radio
Ok I'm obsessed again, or should I say RE obsessed?! April has been a cruel mistress writing wise which means my lyric writing and poetry has dwindled somewhat, however do not fear I'm working on something so normal service will resume again soon. In the mean time are you ready for me to introduce you to an awesome tune again?....of course you are! This time in the form of Radio by Paulo Nutini
By Frankie Martinellia day ago in Beat
Final Call
She flings her arms around my neck and squeezes me like she’s never going to let me go. My head spins as her lips brush against my cheek. She must be able to feel my heart thumping in my chest. I shuffle backwards and ram my hands into my coat pockets, watching her reach down and heave the rucksack across her shoulders.
By Caroline Cravena day ago in Fiction


Comments
There are no comments for this story
Be the first to respond and start the conversation.