
How to Upscale Images without Losing Quality using Waifu2x (Arch Linux/ Windows)
A tutorial about upscaling images without quality loss using Artificial Neural Networks.

There are multiple way upscale images. You could Photoshop, GIMP or Krita to upscale images with their respective transformation tools but there will be loss in quality. Thanks to Artificial Neural Networks (ANN), that problem is solved. You don't need to know any coding to use this tool either. That’s the best part.
In this tutorial, I will teach you how to upscale images without losing quality using ANN like a boss.
Before we get into the details, you may want to know the quality of the results that we will achieve with this piece of software.
Input image:
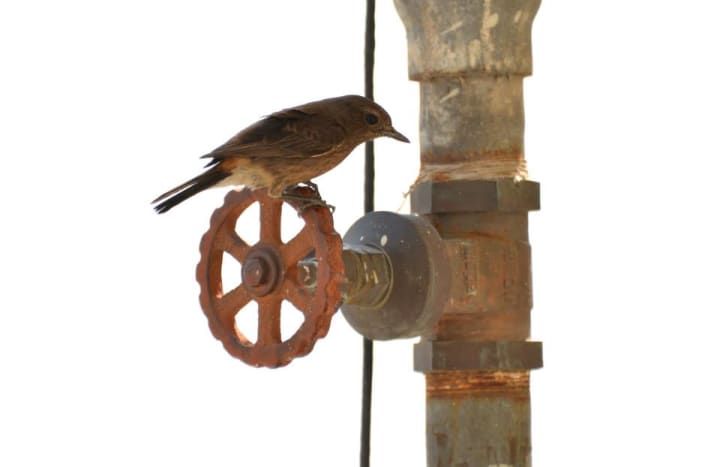
This is an image that I captured back in 2013 which I uploaded to my Facebook page. I lost the original image. Its the image I used for my test.
Output image after processing:

Look at that. It works well, isn't it?
This result is obtained using the Waifu2x-NCNN-Vulkan project created by Nihui.
How to install Waifu2x-NCNN-Vulkan on Arch Linux/Manjaro?
The installation package for waifu2x-ncnn-vulkan can be found on the Arch User Repository. So it is quite easy to install it.
Run the following commands on the terminal:
cd ~/Downloads
git clone https://aur.archlinux.org/waifu2x-ncnn-vulkan.git
cd waifu2x-ncnn-vulkan
makepkg -si
The installer will ask you for your password to install the above packages after the download is completed. After the package is installed, it is ready to be used. All the dependencies are also installed with makepkg command.
If you want to check whether the installation is successful, run the following command:
which waifu2x-ncnn-vulkan
The which command will show you where the binary for the program is located.
How to use Waifu2x-NCNN-Vulkan to upscale images?
Open up your terminal if you don't have one opened already and run the following command:
waifu2x-ncnn-vulkan -i input_file.jpg -o output_file.png -s 2
The above command will upscale your image to double its original resolution. The option “-s 2” will tell the program to scale it to 2x. The program accepts 3 image formats as inputs including png, jpg and webp. While the output format has two variants i.e., png and webp. I like using png.
It has various other options as well.
If you want to see all the options, run the following command:
waifu2x-ncnn-vulkan -h
Two of the most helpful options to use are:
-n for selecting de-noise level.
It determines how much de-noise it needs to apply. The acceptable values for ‘-n’ are -1/0/1/2/3. The default is zero.
-x enables tta mode
Enabling TTA mode or Test-Time Augmentation mode makes the result better but it also takes longer to process. In TTA mode, the program rotates the input image 8 times and generates 8 different outputs which will be then combined to produce the final output. It is quite helpful but it takes 8x longer to process.
To upscale the bird image and produce the output that I included at the beginning of this article, I used the following command:
waifu2x-ncnn-vulkan -i ~/Pictures/bird.jpg -o ~/Pictures/bird_s2_n2_x.png -s 2 -n 2 -x
How to install Waifu2x-NCNN-Vulkan on Windows?
The program is written in C with portability in mind. There is no need to install anything. You can just download the zip file from here and extract it wherever you want.
After extraction, use command prompt and change the working directory to the folder where the Waifu2x executable is located.
Then run the following command:
waifu2x-ncnn-vulkan.exe -i input_file.jpg -o output_file.png -s 2 -n 2
For help or more options:
waifu2x-ncnn-vulkan.exe -h
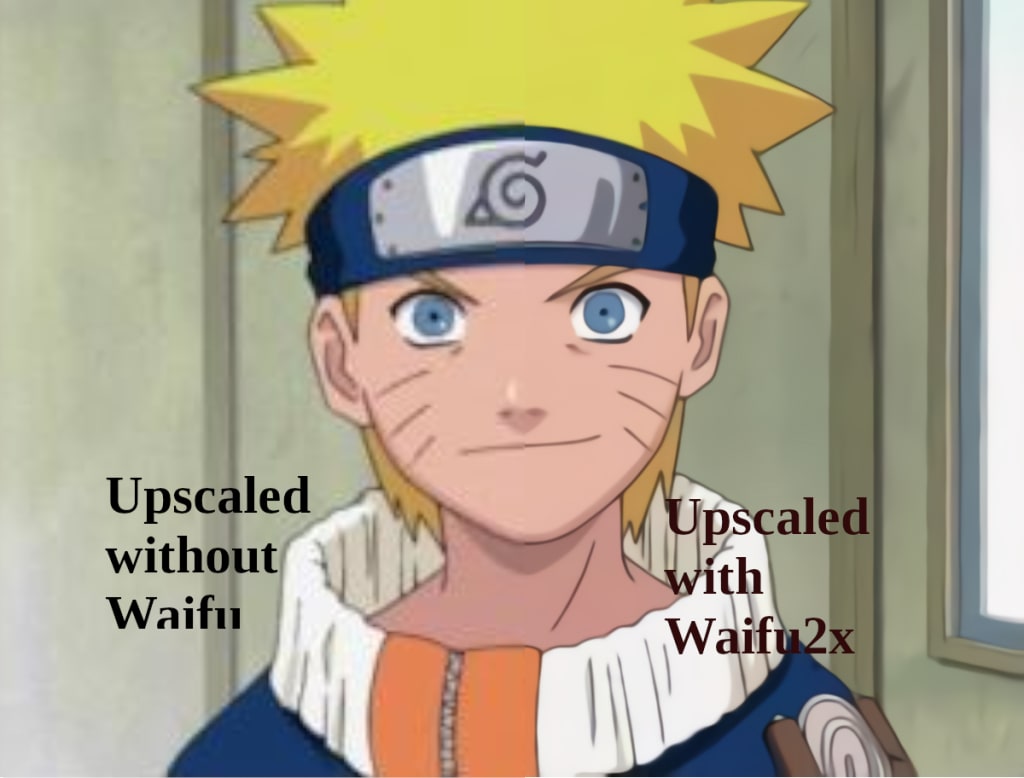
More tests
This program works even better on animated images or cartoons.
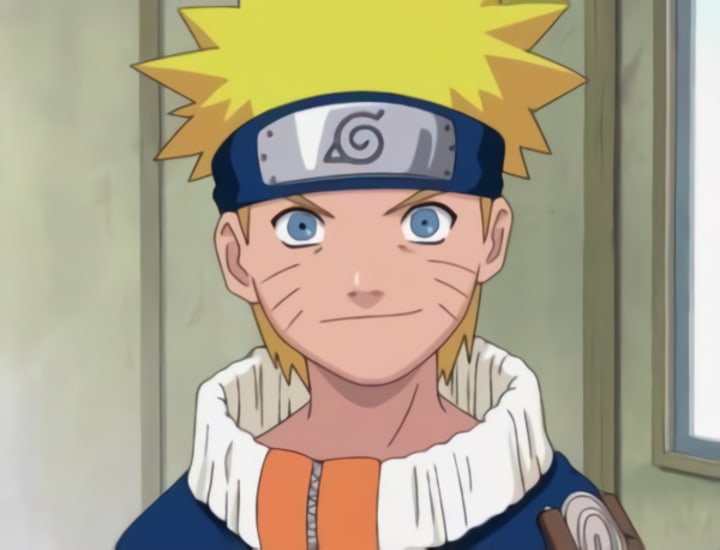
Input:

Run the following command:
waifu2x-ncnn-vulkan -i naruto.jpg -s 2 -n 2 -x -o naruto_s2_n2.png
Output file:
Run the upscaler again to make it 4 times the original resolution to produce:
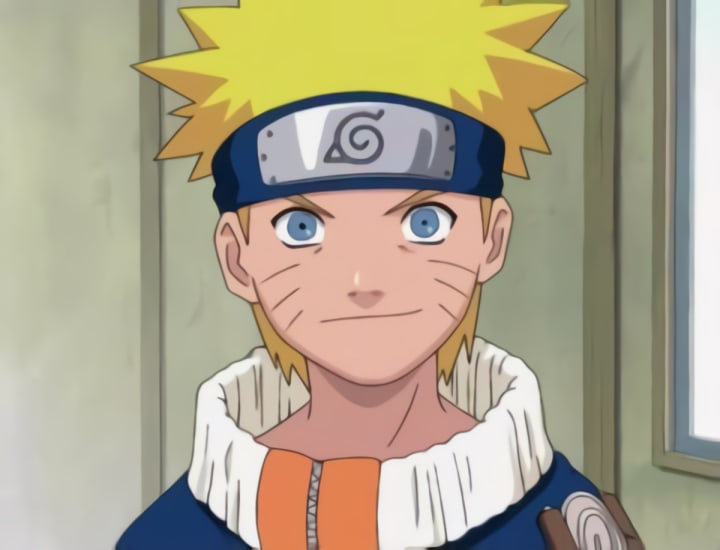
As you can see, the programs works very will with animated or cartoon images. Although I upscaled it four times its original resolution by running the command twice, the program managed to make the final output better than the original. All thanks to artificial neural networks.
I hope this tutorial helped you find a better way to upscale your images.
About the Creator
Enjoyed the story? Support the Creator.
Subscribe for free to receive all their stories in your feed. You could also pledge your support or give them a one-off tip, letting them know you appreciate their work.
The Art of Work: Valuing Time in the Age of AI
Artificial intelligence isn't going away. You might be excited about that. You might be anxious. Whatever you're feeling, though, AI has become a permanent fixture in our society. As long as there's profit to be made, advancements in AI will shape the next wave of technology.
By Addison Horner17 days ago in 01
Expert Veterinary Services In The Heart Of Los Angeles
When it comes to the health and well-being of your beloved pet, finding the right veterinary services is crucial. In the bustling heart of Los Angeles, our expert veterinary team offers comprehensive care to meet all your pet’s needs. With a combination of cutting-edge technology, compassionate care, and extensive experience, we ensure your pet receives the best treatment possible.
By BeWell ANIMAL HOSPITAL13 minutes ago in 01


Comments
There are no comments for this story
Be the first to respond and start the conversation.