
How to Quickly Make an Animated Short Film
I chose to write an essay describing each step of the process of producing a 3D animated short film because I recently finished one, Tasteful. And I'll make every effort to be as clear as I can. so that you may comprehend the process involved in making an animated movie.

Start with an engaging story
You can make animated movies even if you're not in the animation or visual effects fields. I'll give you a rundown of the procedure in this story, describing each stage.
The first and most important element in creating any movie is a good story. Even if a movie is visually stunning, if the plot isn't interesting and well-told, people won't like watching it. Make sure your story is airtight before continuing. And trust me, even if you think it works now, it will change significantly as production continues.
The Use of an Animatic
An "animac" is the name for your storyboard's movie adaptation. A storyboard is more similar to a comic book than an animatic is to a movie. Each board is imported into an editing program, and precise timing is used during editing. Just enough temporary music and sound effects should be used to convey the various character beats.
The first draught of your film is finished when you're done and is accessible for viewing. An animatic truly gives you the first glimpse of what your finished film will look like, even though storyboards are great too. Show the film to others if you are entirely comfortable with how it functions, receive their feedback, and make any necessary changes to the boards, timing, and pacing. The next step is to move into three dimensions.
How to Rig Your Models
Building a digital skeleton with a variety of motion controls is known as "rigging" a model. Prior to rusting, our models resembled statues. Though with considerably more delicate motions, they now more closely resemble action figures.
The rigger makes sure we have separate controls for each part of the body and face so we can create whatever motion or expression we need. Then we import our rigged models into the 3D program and start creating our shots. You set up each component in its proper location and construct a 3D camera to capture the image. Just like if you were filming a live-action movie, you place the cameras and performers in the appropriate places.
The photographs will then need to have animation added to them in order to come to life. But before I start the final animation, there's one more important step I must take to make sure the story holds together.
Create a Previz
The previz you create often called a pre-visualization is what holds your story together. This is the next iteration of our animation. This time, use your 3D models. Every image was created using a 3D program then the final camera angles moved to give the characters a basic level of motion. Exactly enough to make it clear what they ought to be doing.
We then import all of these photos into the editing program, the same as we did with the animatic. We now have a previz of our film that includes the relevant 3D models and camera motion. This is actually the last point in which you may still change aspects of your movie because animation takes a very long time and it would be a huge waste if we had to change the story after that. I'll thus show it to more people this time, get more feedback, and make sure the film is flawless before it is released.
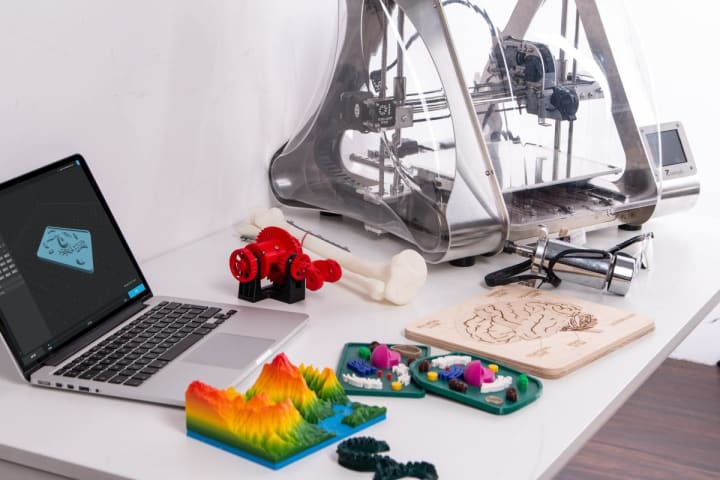
Modeling
We start with modeling. In essence, we created all of the computer models for the film, including the locations, sets, objects, and naturally, the actors. Based on the concept art and model sheets created earlier, we build a model. The initial capabilities of the models are relatively constrained.
They can be put in our situations, but they won't move until we rig them.
Is there a script?
It's crucial to express your idea as soon as you can in order to find any issues with your plot before you start production. You can use a variety of tools to write your scripts, like Final Draught and Celtx. I personally use Scrivener, which is arguably the best all-purpose writing program on the market, but it doesn't really matter which writing program you use.
I worked hard to make as much concept art as I could after finishing my script in order to start creating the visual style for the movie. I truly mean my amazing concept art team, who came up with all of the movie's ideas, when I say I.
The first time you get to witness scenes from your movie come to life on paper makes this process incredibly enjoyable. The key is exploration and experimentation.

How to Make a Storyboard
Making a storyboard is the next and possibly most important phase in the preparation of your movie. By using a storyboard, you may analyze your film as a whole and spot pace and narrative issues. Making one also provides you something to show others when you ask for input.
In contrast to a script, a storyboard often inspires greater reactions from spectators. I now tweak my storyline and make changes until I'm satisfied with the storyboards and ready to start making the animatic.
Time for Animation
Animation is one of my favorite aspects of making movies. At that time, we give the movie its main spark. The core of the film emerges in front of our eyes as the characters start to move. Witnessing it is amazing. However, it takes a lot of time, and if you don't do it well, your movie could suffer.
Lousy acting is similar to lousy animation. People won't watch it even if the material and plot are top-notch if the delivery is subpar. To animate the characters, we move the controls we created when we rigged the models. We use those controls to position our characters accurately, then we create a keyframe that stores that position in the computer. The controls are then moved to the following position, and so on.
Technically speaking, there is undoubtedly a lot more to it; this is merely a description of the procedure.
Then, before exporting our photos, we must texture our models.
Giving Your Models Texture
This requires creating a variety of materials, which we then allocate to the different parts of the models. Some of them look like metal, some like plastic, and a couple even look like flesh. We give them the right colors and use virtual lights to brighten our images in order to precisely mimic how real lights work.
As on a movie set, a single main light that mimics sunshine illuminates the whole scene while a few spotlights are focused on our primary places of interest. After our shots are accurately lit and detailed, we start rendering.
Making Music and Sound Designs
I've been working with my musician to make sure the music enhances the film's overall theme ever since the first day of filming. Most of the time, the music is in charge.
Typically, you can't just turn on some music at the conclusion. I want to move it around while filming so that it has a big role in the story. The final audio for the film is then mixed and mastered by the sound designer, along with all of the sound effects, including voices, ambiance, and follies.
Adding to Your Editing Timeline by Importing
Now that they are available, we import them back into our outputs and results, replacing the previous, unfinished images with the new, finished ones, just as we did with the animatic frames. We can now watch our finished movie on the editing timeline for the first time. However, it is not yet complete.
Correction and Colour Grading
The colors need to be graded and adjusted. Color correction ensures that each shot's colors are consistent with those of the shots before and after it. We also make certain that no part of a shot is too black or white.
Essentially, we want to make sure that the color is true and consistent across the entire movie.
We grade the movie, which is the most entertaining and imaginative aspect of the process. Here, we're going to create a color scheme that will be used throughout the entire film to give it a distinctive look. I really wanted to accentuate the pinks and purples in this movie, so I chose pastel colors to create a washed-out look that I really love.
Then, before we wrap up, there are two crucial problems that must be addressed.
Compositing and rendering
The process of rendering is how the computer examines all the data in our scenes and creates still images. After gathering the necessary data and images, we combine them in a compositing program like Nuke or AfterEffects to create the final products.
Unfortunately, it would be hard for me to go into great length in this essay about the specifics of the rendering and compositing process. Nevertheless, if you're curious, you may find some in-depth lessons on the procedure by looking for these two terms on YouTube. So, let's return to the images.
This was a rather brief summary of the steps required to create an anime short film.
Finally, learning how to create an animated short film rapidly can be a difficult but rewarding task. Aspiring animators can produce high-quality animated shorts that successfully represent their artistic vision while adhering to a strict deadline by utilizing contemporary software tools and techniques as well as following a well-planned production process. Anyone may realize their creative ambitions and bring their ideas to life on screen with effort and dedication.
About the Creator
Ahamed Thousif
🌟 Welcome to the realm of exploration, where communities come alive through the power of words! 📚✨ Join me as we embark on a journey to discover the vibrant tapestry of stories and Poems.
VISIT - "MY FOOD BLOG"
Keep reading
More stories from Ahamed Thousif and writers in 01 and other communities.
How to make your Instagram account look great in 5 minutes with Chat GPT
Once upon a time, a young woman by the name of Emily had just launched her own online jewelry store. She had heard from friends and other business owners that having a significant social media presence was essential for developing brand awareness and establishing connections with potential clients, particularly on Instagram. But with little time and money, Emily felt overwhelmed by the idea of setting up and maintaining an aesthetically beautiful Instagram account.
By Ahamed Thousifabout a year ago in 01
Plesk vs. cPanel: Comparing Control Panel Solutions for Web Hosting
Plesk and cPanel are of the maximum famous manage panel answers for internet web website hosting, every providing a lot of capabilities and functionalities. Let`s evaluate them throughout numerous key aspects:
By Casper LAWRENCE5 days ago in 01


Comments
There are no comments for this story
Be the first to respond and start the conversation.