
A Step-by-Step Guide to Setting Up a WooCommerce Store
One of the most popular and profitable options for making money online is starting a WooCommerce store. You can set up a WooCommerce store quickly and easily with WordPress but in order to really succeed you'll need to have some basic knowledge about how these stores work.


WooCommerce is a free WordPress plugin that can help you turn your WordPress site into an eCommerce store. It’s compatible with virtually all WordPress themes and you can set up your store in under an hour! It’s easily the most popular WordPress plugin out there, so if you want to launch a new store, WooCommerce is an excellent choice.
This post will walk you through everything, from setting up your first product listing all the way through managing your inventory, so that you can start making money as soon as possible!
What Will You Need Before You Begin?
There are a few prerequisites that you will need to fulfill before you start setting up your WooCommerce store. First comes a domain name and hosting. The domain shall serve as the unique address for your store on the web. Ideally, you should choose WooCommerce hosting to ensure fast page load times.
Once you have a domain name and hosting, you will also need to install WordPress. This is essential because WooCommerce is a WordPress plugin. Without WordPress as your CMS, WooCommerce won’t work. If you choose eCommerce website hosting from Cloudways, you could install WordPress with one click.
The 5 Steps to Follow to Setup Your WooCommerce Store
Once you have WordPress installed (which is free), you just need to follow the steps below to set up your WooCommerce store.
Step 1: Install The WooCommerce Plugin
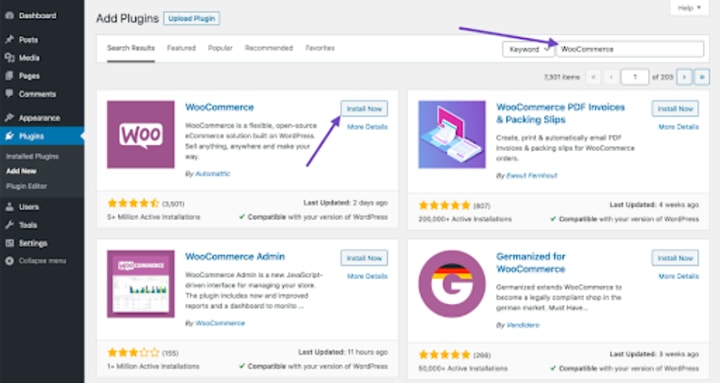
To install WooCommerce on your WP website, you just need to:
Go to Plugins and click on Add New.
Write WooCommerce in the search bar.
Click Install Now.
You can Activate the plugin if you want access to the Wizard.
Step 2: Creating Your Store
After activating the plugin, select the “WooCommerce” option that appears in your sidebar. As soon as you do, you’ll be taken to a page where you can set up your WooCommerce store. This is the first screen:
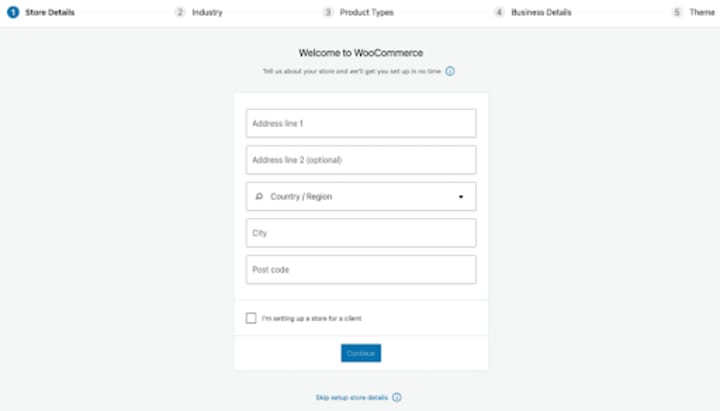
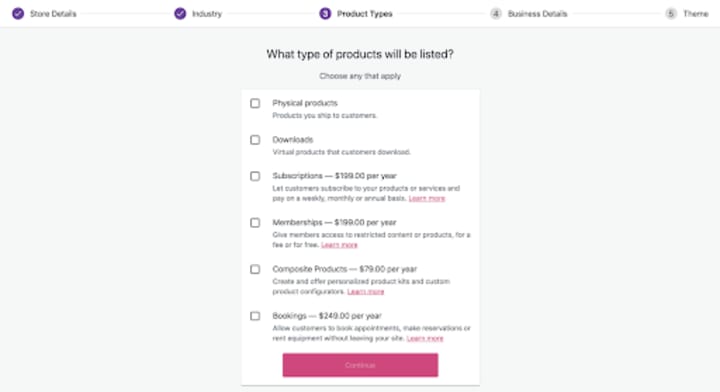
You can fill out all the details, such as where your store is located, the services you offer, the industry you operate in, and the type of products that will be listed In your store.
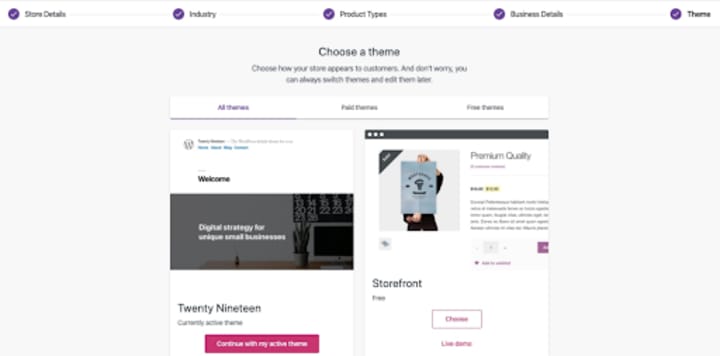
Step 3: Select a Theme
You also need to decide how your store looks to customers. Don’t go for the same old generic designs that have been seen a hundred times. Thankfully, WooCommerce gives you a plethora of themes and options to choose from. If you already have a theme, you can go along with that.
However, you can also choose from a bunch of paid or free options on WooCommerce. If you have a theme of your own, you can upload that as well.
Improve Processing Times with Shipping and Tax Information
WooCommerce recommends that you install Jetpack and WooCommerce Shipping & Tax to ensure that taxes are calculated automatically, and shipping labels are printed out at checkout. Of course, since these are extensions, you can activate or deactivate them as you wish.

Step 4: Payment Processing and Shipping
One of the most important things when setting up your WooCommerce store is to select the right eCommerce payment processing option. Thankfully, WooCommerce offers support for a whole bunch of payment gateways, including popular processors like PayPal and Stripe. You can also accept payments via cash or check if you prefer.
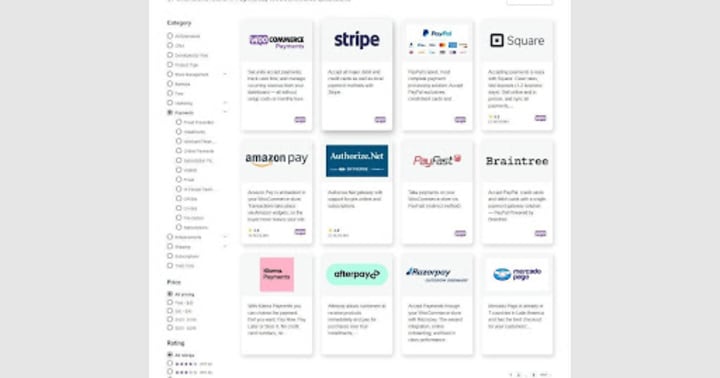
There are a lot of payment integrations available for WooCommerce, so you really don’t have to worry about a lack of options.
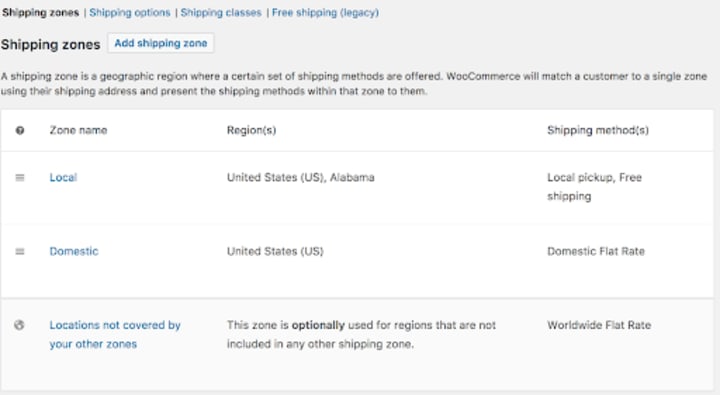
One of the best advantages of WooCommerce is that it allows you to set up shipping zones and decide how each customer will be charged for shipping. You can set a specific rate for each zone, or choose another for customers in different locations. You can also create your own zones and set the rates. If you want to offer free shipping, that’s possible too!
Step 5: Adding Products
Now that you are done with setting up your store, it’s time to add products. This is very simple, and it’s just like writing a post on WordPress. Go to WooCommerce, then select Products. From there, click on Add Product.
Just add the Title and Description, and select the type of product: physical or digital. You can add comprehensive information about the product in general:
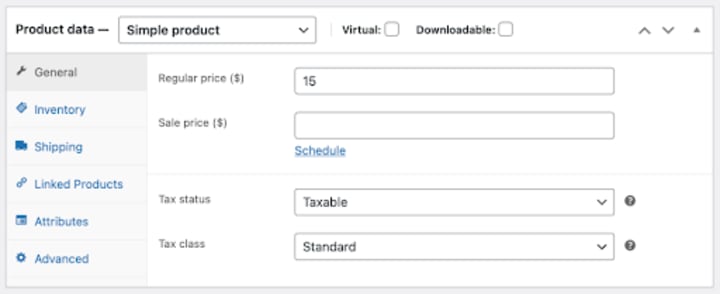
The inventory section allows you to easily manage the stocks available for each product, and allows for backorders too. It’s a fairly intuitive interface. You can also link products to convince users for up-sells. WooCommerce offers both upsells and cross-sells to its customers, and you can easily upload pictures for each product on the platform.
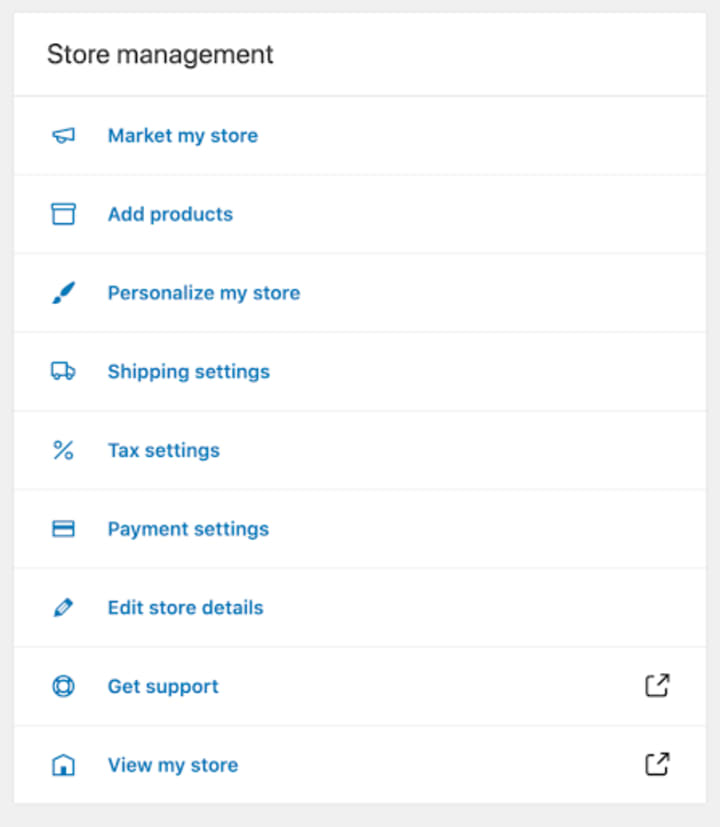
Finally, you will have the Store Setup Checklist to run through.
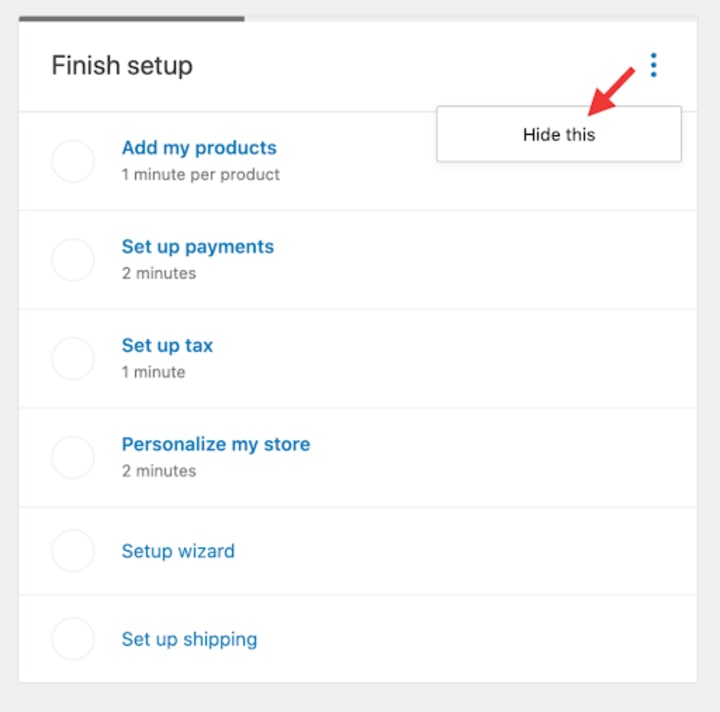
Once you complete the Store Setup Checklist, this will be replaced with the Store Management widget. The widget allows you to easily move from one section to another and make changes to your eCommerce store as you see fit.
Setting Your WooCommerce Store is Easy!
These 5 steps are all you need to take in order to quickly set up your store and launch your products online. Of course, setting up your store is just the first step. You will have to constantly optimize it and work on improving the SEO and marketing to improve brand visibility and store performance.
About the Creator
Armen Baghdasaryan
Armen Baghdasaryan is an experienced digital marketing specialist who is always keen to keep up with the latest updates in the industry and come up with the best marketing solutions.
Keep reading
More stories from Armen Baghdasaryan and writers in 01 and other communities.
iPod dreams
I wish Apple still made iPods. I regret not buying one when they started to discontinued these amazing devices. In my opinion it was a bad business move. I’m sure there is a market for people who still would buy a iPod device to keep in their car or in their gym bag to use solo at the gym or on a walk or a for a hike to escape the everyday hustle of life and its over connectivity.
By Theartistjoskoabout 10 hours ago in 01


Comments
There are no comments for this story
Be the first to respond and start the conversation.