
Using a Continuous Light for Photography
Using the Colbor CL220R in 3 Different Ways


Studio photography is something that I struggled with for the first part of my career. It can be difficult to learn how to shape lights when you don't have access to them or to the spaces to use them, but one of the things that I've found over the years of working as a photographer is that this problem can be simplified when you realise that you can achieve a lot with just one light. Further, using continuous lights, as we will do in this shoot, can be a great way to get to grips with shaping lighting in a way that feels more natural and much easier than using strobes.
The light in question that we'll be using is the COLBOR CL220R, a continuous light that can be used for both video and photography, can be controlled with an app on your phone, and has RGB capabilities.

We're going to explore how we can use this light, or one similar, to achieve different lighting setups: two setups using just one light, and a third setup that introduces a second light.

Setup 01: Overhead Softbox
The first setup that we'll be looking at is a really easy setup that can be replicated with any light, strobe or continuous, and is a great method of creating evenly spread light that's perfect for everything from e-commerce shoots to fashion editorials. It is simply to attach a large modifier (such as a large softbox, in this case) to the light and rig it on a C-stand with a boom arm so that the direction of the light comes from above.

The COLBOR CL220R utilises a Bowens mount, which is great as most studios will stock Bowens-compatible modifiers, such as this softbox, that you can then attach to the light.
The COLBOR studio app that is compatible with the CL220R also gives the added benefit of being able to easily customise the settings of the light even when it’s rigged in difficult-to-reach places, meaning that once we got the light into position, we could keep it there until we decided we were done with this look.

The brightness of the light also means that it’s okay for us to rig the light further away from the model, and also makes it more compatible when shooting with film and predetermined ISOs.

For example, we shot a couple of frames using Polaroid film, on the Polaroid I-2, which has an approximate ISO of 640. I didn’t shoot any other film on this shoot, but the light is bright enough for you to be able to easily shoot with an 800 speed film or maybe even a 400 speed.

Setup 02: Mixing Two Lights
Setup number two used two lights, one being the COLBOR CCL220R and the second light was a Bowens XMS 500 strobe light with a beauty dish. For this look, we placed the COLBOR behind Kolade without a modifier but behind a sheet of plastic, and set it to the RGB mode, meaning that we could quickly customise the look by altering the colour of the light.

The light being behind and to the side of Kolade and behind a sheet of plastic gave the illusion of a background colour whilst also adding a side light to Kolade.
We shot this lighting set up in two different ways.
For the first, we used the strobe as a flash that light the front side, opposite to the COLBOR light, of Kolade. We utilised a slow shutter speed to help the colour of the continuous light come through and also to get some images where we dragged the shutter.

For the second approach to this setup, we kept the strobe light where it was but disconnected the camera from the trigger so that it would only act as a modelling light, giving us a soft light on the front of Kolade. We were then able to achieve a split lighting look, with a warm neutral light coming from the Bowens light and a colour light coming from the Colbor light.

Setup 03: Hard Light
In the final setup, we attached a reflector dish to the COLBOR light and utilised a direct light, harsh look, making use of a coloured wall in the bathroom of the studio.
Using a hard light look can give a really different vibe to using diffused light and using a reflector dish is the perfect modifier to help achieve this look.

The possibilities of using the CCL220R or another RGB light with a Bowens mount can be endless when you consider all of the different modifiers you can pair it with and all of the different colours across the spectrum you can use with it. As someone who shoots film a lot in my practice, having a strong continuous light is an instrumental part of my kit, but it's also a great way to see the changes to your lighting setups in real-time, making it easier to adjust and find the perfect solution.
About the Creator
Sophia Carey
Photographer and designer from London, living in Manchester.
sophiacarey.co.uk
Reader insights
Outstanding
Excellent work. Looking forward to reading more!
Top insights
Easy to read and follow
Well-structured & engaging content
Expert insights and opinions
Arguments were carefully researched and presented
Heartfelt and relatable
The story invoked strong personal emotions
Masterful proofreading
Zero grammar & spelling mistakes
On-point and relevant
Writing reflected the title & theme
Keep reading
More stories from Sophia Carey and writers in Photography and other communities.
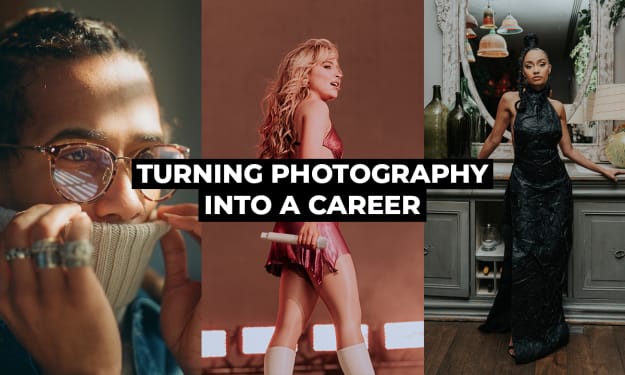
How I Turned Photography into a Career
Like a lot of photographers will probably be able to say, photography has been a big part of my life since I was a kid. But from playing around with my parent's cameras, to finally being able to call myself a full-time, professional photographer, there have been a lot of steps in between.
By Sophia Carey8 months ago in Photography
Capturing Magic
In the world of photography, timing is the key to everything. While skilled compositions and technical proficiency are undoubtedly crucial, the perfect lighting can create the perfect photo. Nowadays, we can determine any light ourselves and are no longer dependent on any natural light source, thanks to the developed technology. We can turn every day into a night by using the right filters. And we can illuminate every night to be seen as a day. A typical process, especially in the film industry.
By Krishan Mubashar10 days ago in Photography
Taobao, PandaBuy the Giant Marketplace of China: A Comprehensive Exploration
In the bustling landscape of e-commerce platforms, few names resonate as profoundly as Taobao, especially within the Chinese market. Launched in 2003 by Alibaba Group, Taobao has evolved from a modest online marketplace to a sprawling digital ecosystem that shapes the retail landscape of China.
By Abdul Haseeb Kamal4 days ago in Photography
When the Robots Took My Job
This is for RM Stockton's Write Club prompt for the month of April: AI Please allow me to vent. For "college," I went to a scam school that is now closed. We were promised internships that were never spoken of again after admissions, and we were promised help finding jobs. The first time I went to the career counselor's office, she was completely frazzled. She had no idea what to do with us, the film majors. The second time I visited her office, I let her know that I'd found myself a job, and she was visibly relieved.
By Rebekah Conard6 days ago in Journal


Comments (8)
Hi we are featuring your excellent Top Story in our Community Adventure Thread in The Vocal Social Society on Facebook and would love for you to join us there
These photographs are amazing. I love how the light has been positioned to achieve various effects and the angles used to add much character to Kolade's poses. Your model looks fantastic!
Congratulations to TS
Back when I studied photography, I was always reminded that light is the most important thing within a photo! Loved this ❣️
Congratulations 🎉🎉🎉
Very informative and nice images.
This was so well put together and informative. Amazing presentation. I’d love to see more content like this on the front page! Congrats on your Top Story. 🥂
Dazzling job! Keep up the outstanding work—congrats!