
Photo Finish
Basic Photoshop Techniques for Bringing Out the Best in Your Photos


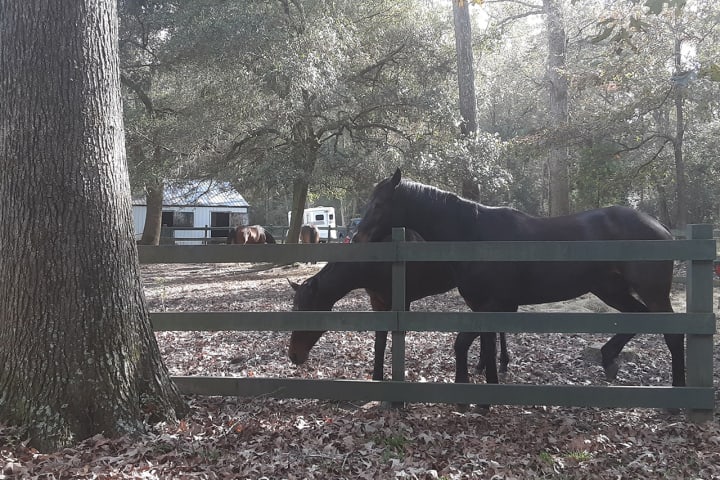
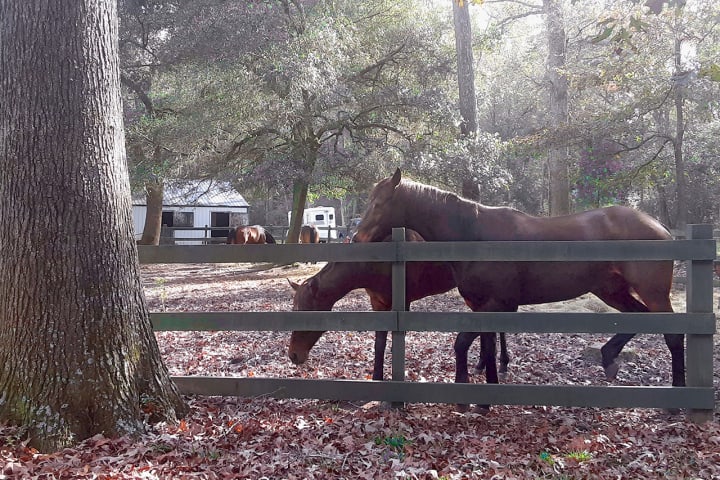
Above is an unedited photo I captured with my phone this past Thanksgiving. The day had been primarily overcast and drizzly, but my niece’s horses were kind enough to strike a pose just as the clouds broke and the sun’s beams slanted through the trees. The resultant picture came out underexposed and drabber than desired; it would take my access to and working knowledge of Adobe Photoshop to combat the deficiencies in my phone’s less-than-stellar camera. The following brief tutorial will outline the steps taken to better bring out this scene’s natural beauty.
Tip: Before editing any of your photos, save a version of your original just in case you mess up the working version and want to start over. (I always save my original unedited photos in a separate directory.)
Step 1: Cropping
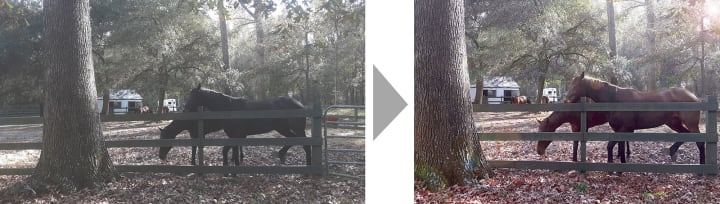
I wanted a closer view of the equine beauties in the foreground while still capturing the alluring background. I also needed to bring down the widescreen aspect ratio (16”x9”) to a 3:2 ratio (12”x9”). As a personal preference, I use elements in the photo to create natural edgings when I can, such as the tree on the left. The aluminum gate on the right was also cropped out to lend a more organic look.
Tip: Once you have finished cropping your photo, do not resize it until you're all done editing. The resampling process (i.e., the blending of neighboring pixels together when sizing down a photo) will aid in covering your editing tracks.
Step 2: Color Correction and Contrast
Although the gossamer feel of the photo was somewhat appealing, I decided the image would benefit from a lusher look. However, the overall greenish cast presented the challenge of accenting the verdant trees without greening up everything else. To tackle this, I used the following image adjustment options:
Image > Adjustments > Hue/Saturation: First I increased the photo’s saturation to add some vividness to the colors. While this gave the photo a richer background, it also added some unwanted blues and greens where they didn’t belong (i.e., on the horses). I played with the different hue and light levels of the different colors in the pulldown menu until the pigments in the photo were close to where I wanted them.

Image > Adjustments > Curves: Using this adjustment, I was able to increase the photo’s red tones and pull down the blue tones, which helped balance the cooler color temperatures and bring out the lovely rust in the ground cover. Curves can be a tricky option to master but is invaluable in color correction and worth experimenting with. Simply select from the pull-down menu which of the color channels you want to tweak (red, green, or blue if working in RGB mode) then select the center of the diagonal line and move it left to enhance or right to mute. Just remember that a little adjustment goes a long way – a lot of adjustment can give some truly funky effects (see bottom photo below).
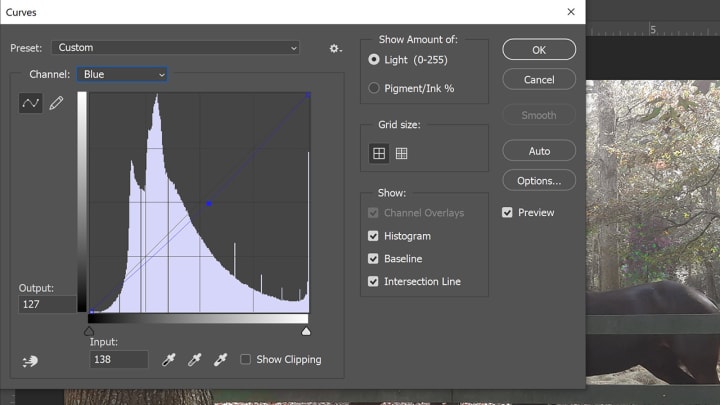
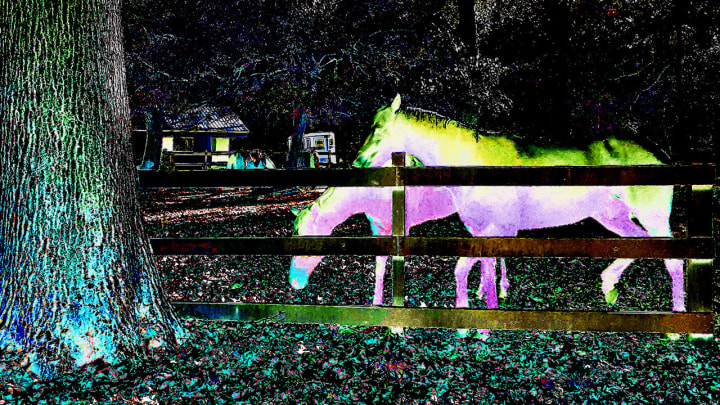
Image > Adjustments > Levels: I then used the “levels” option to lighten the light areas and darken the dark areas, giving the photo more contrast and greater depth. Unfortunately, for color photos, this can add oversaturation where you don’t want it, in this case, too much purple in the horses.
To recolor the horses and bring out their sheen and chestnut highlights without affecting the rest of the photo, I used the magnetic lasso tool to draw a rough selection around them. (For magazine-quality prints, I recommend using the pen tool for a more precise selection.)
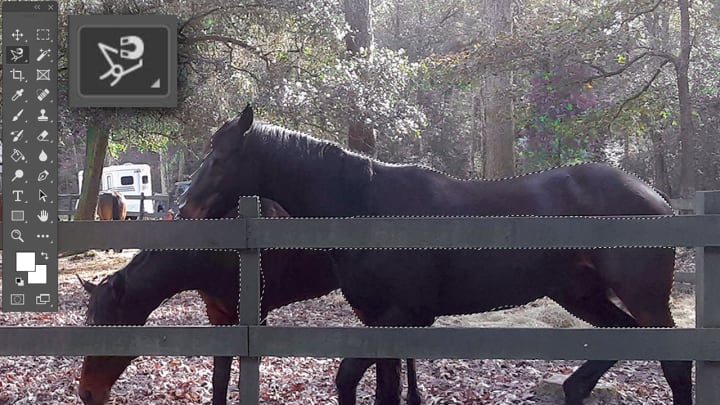
I then modified the selection by ‘feathering’ it (i.e., blurring the selection edges to smooth the transition between the edited object and the rest of the photo). You can increase or decrease the fuzziness of the selection by increasing or decreasing the number of pixels in the feather radius – for this selection, I used a feather radius of five pixels. With just the horses selected, I repeated the options above (hue/saturation, curves, and levels) until they looked just the way I wanted them.
Step 3: Resizing
Ideally, the resolution of your photo at its final dimensions will be at least 300 dpi for print, and 144 ppi for multimedia. I had no issues sizing this one down, as it was twice as large as needed, but be aware that enlarging too-small photos can cause a blurry or pixelated result. If you must enlarge, I suggest doing it in multiple steps (a quarter- to a half-inch at a time) – the application’s resampling process works better that way.
Bells & Whistles
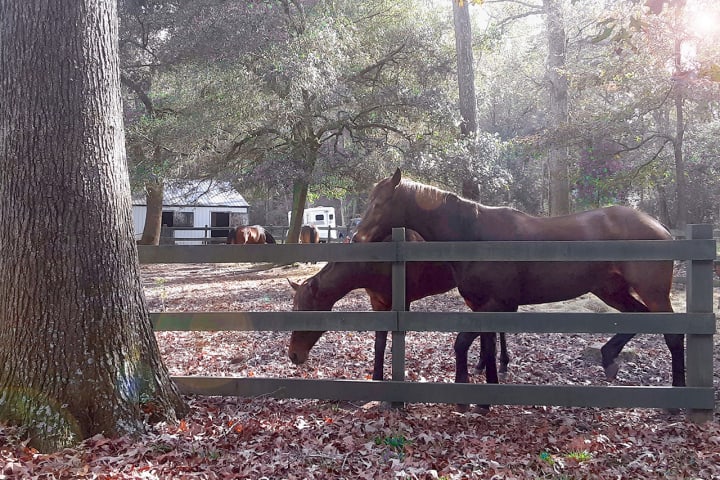
If you’re in the mood to get fancy, Photoshop offers multiple filters to play with. I decided to add a subtle bit of flare to this photo with the Filter > Render > Lens Flare effect applied to the upper right-hand corner.
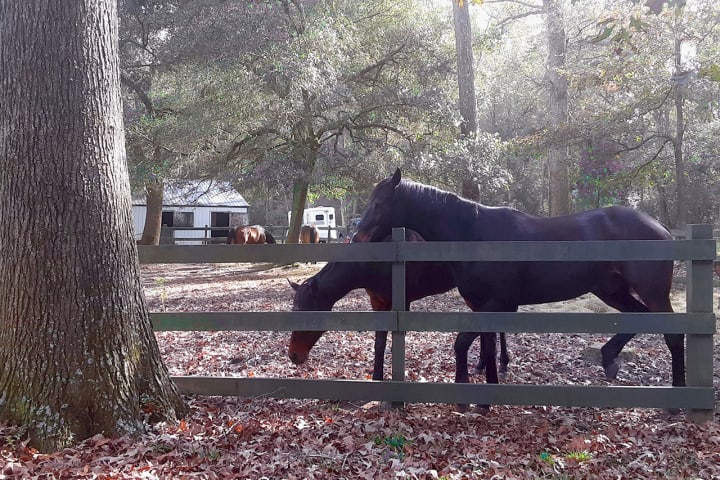
And there you have it – my general technique for photo finishing. It may seem like an arduous process to the novice photo editor, but with practice and a developed eye, it can be accomplished in mere minutes and is well worth the effort for stunning photos you can proudly show off.
About the Creator
Karin Kaltofen
A designer of litigation exhibits by profession, writer by passion.
Enjoyed the story? Support the Creator.
Subscribe for free to receive all their stories in your feed. You could also pledge your support or give them a one-off tip, letting them know you appreciate their work.
Keep reading
More stories from Karin Kaltofen and writers in Photography and other communities.
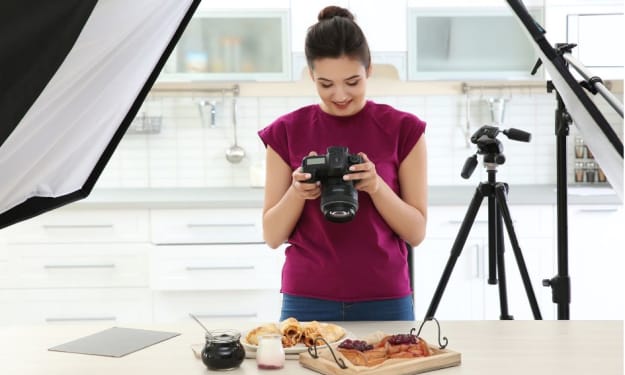
Elevate Your Brand with Professional Food Photography Services
Introduction to Food Photography Services In today's visually-driven world, high-quality images play a crucial role in attracting and engaging customers. This is especially true in the food industry, where mouth-watering visuals can make or break a customer's decision to dine at your restaurant or order your products. Professional food photography services are designed to capture the essence of your dishes, showcasing them in the best possible light and making them irresistible to potential customers.
By Khaana Photography6 days ago in Photography
Techniques of Image Enhancement in the Spatial Domain
We are aware that flawless pictures are required to run the business. Whatever appears to be appealing tends to be sold fast. But at times even after trying, the camera fails to capture the perfect pictures.
By David Carter3 days ago in Photography
Confessions of an Empath
The birds are chirping, and the sun is shining in a cloudless July sky. The vibrancy promises a beautiful day, but the cooing of the Mourning Dove perched on the powerlines seems to be more fitting than the lively songs of the robin flitting through the trees. The melancholic calls of the dove cloak the world in a sadness that hangs like tattered drapes.
By Alyssa Nicole2 days ago in Confessions


Comments
There are no comments for this story
Be the first to respond and start the conversation.