
In the natural world, everything moves, right down to the atomic level. Plants grow, the planet turns, tides rise and fall with the rise and fall of the sun and the moon, insects crawl, birds fly, light changes. Nothing stays still in it's entirety.
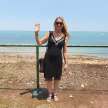
As a painter and avid photo taker of the things around me, my iPhone 6s has been my pocket recorder that quickly captures life and ideas around me to use later either as reference for paintings, or to purely enjoy.
I sometimes edit these images using a range of photo editing apps like the now unsupported Enlight, which was my absolute favourite, currently replaced by Photofox Enlight which is still good, but not such a fave of mine as the original Enlight app.
Having apps at my fingertips has been a godsend and a joy. The speed at which I can change a photos’ saturation, contrast, quickly look at a scene in black and white for tonality, crop, layer, add a caption among other things, is the value that photo-editing apps offer. There are many editing apps out there that do a fantastic job and I have tried quite a few, however, the choice is yours.
Many of these have replaced Photoshop when I just want to create a social media image. I do use Photoshop as well and love it, but it takes so much more time. I find Photoshop useful for a variety of things which I am not going to go into here, but a key use is to resize images to spec for further use in other areas.
However this is not about the range of other apps available, this is a short intro into the Plotagraph app, created by Plotaverse suite of apps - the world of motion art which is a suite of motion graphic applications for digital creators.
Plotaverse was founded by CEO Troy Christopher Plota and co-founder Sascha Scheider. What attracted me to the app initially was that Troy Plota is a renowned photographer who has shot many high profile personalities including Heidi Klum, Usher, Mariah Carey, Hillary Clinton, Donald Trump, and many more. He also delivers for many high profile magazines.
Troy is top of his game and I appreciate artists and photographers who strive to get the best out of themselves and the tools they choose to use. Troy didn’t just use the tools he had available, he worked to create the tools that he wanted to use.
Not only that, Troy is based in Hawaii and I have had a strong calling to Hawaii, although I have never been there yet. My father went to Hawaii on his way to Australia as a young man, and my sister and I used to love putting on the grass skirt that dad brought back. We had fun dancing like the Hawaiian dancers in the Elvis Presley movies of old.
My old boss’s wife is Hawaiian and many years ago we had a Hawaiian night during a work event in which I and another colleague wore grass skirts. My boss’s wife told us that they wore Muumuu’s over there and that the grass skirts were pretty much the Hollywood version of Hawaii. Also, in recent years many other Hawaiian connections have surfaced, but that is not the drift of this article.
So, between this app being developed by another creative looking for ways to move his stills, and the Hawaiian connection, the adoption of Plotagraph to my creative process was a no-brainer. These kind of ‘signs’ are things that influence my decision-making processes on a regular basis. After all, I believe the universe puts things in our paths, and when they seem to align, well it’s time to jump.
I have been using the Plotagraph app on my iPhone since 2019. I originally started using it to make my social media posts more interesting and eye catching. I had seen some images that were moving stills and they captured my imagination. As a creator and artist, making images move and adding effects became another form of art. Originally my posts were created to promote my ecommerce business, which is currently going through a total overhaul. It wasn’t long before I started using Plotagraph for my personal Instagram page to make some of my paintings and photographs move.
I should also mention that Plotagraph runs a daily challenge which is a great way to learn the application and to connect with the Plotaverse community. The creative community that Plotaverse has attracted is a vital and interesting, caring bunch of creators worldwide, and we tend to follow each other on our other social media pages, particularly Instagram. Another time I may highlight some of my favourite creators and people that I have met through the platform. The Plotagraph app also allows us to post our images to a variety of our social media platforms directly which is useful when it comes to the speed of dissemination.
I happened to join a couple of zoom meetings run by Troy and became an ambassador for the platform by default. Thank you Troy! Sorry I've been a bit of an absentee lately as life is busy and my phone is slow. One of these days I'll get a replacement. Writing this article is one way I can give back to the community and to something that I believe in and love to use.
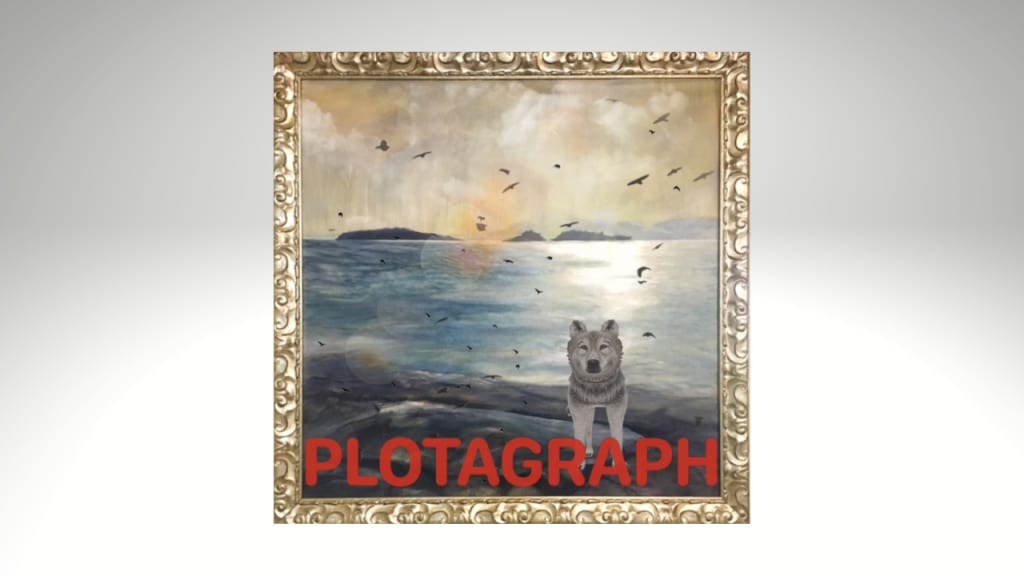
Now I will lead you through the digital editing process on a painting of mine I did a few years back now called Big Speck, Little Speck. The painting is of some islands in Tasmania where I grew up that have significance to my family history. My father was shipwrecked in a 12-foot yacht many years ago when I was about one years old, Dad and his friends ended up in the water and then on Big Speck island. That is quite a story and one where sadly his friend lost his life due to the coldness of the Tasmanian waters. By brother and his family now live close to the islands and a short walk reveals the view that I painted. I am ever reminded of our connection to place through this location.
To start, I took a quick pic of my painting with my iPhone. I did not crop it directly with the iPhone facility because it destroys the original image. Therefore I used Enlight which still functions although is no longer updated or probably available to buy. Also Enlight allows me to undo previous moves and save a copy whereas the iPhone does not.
First I straightened the image within the frame by less than 1%. Then I cropped the image to the outer frame of the painting and removed the wall. The tick in the top right saves corrections. Note: even though Plotagraph has some straight photo editing tools I stayed in Enlight as they offered a subtle range of adjustments which are useful for my art images to adjust them to be as true as possible to the original.
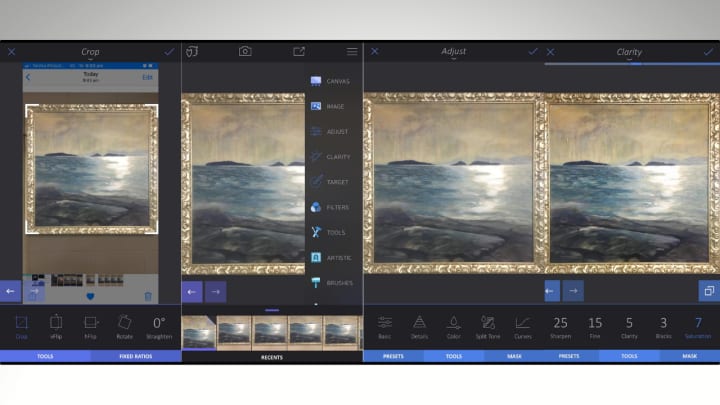
Next using Enlight I went to Image> Tools. I did not use the presets for this job, but went to Tools. There I adjusted the Contrast +12, Exposure +1 and Brightness +1. Adjustments are made through sliding my finger across the lower bar to raise or lower the strength of adjustments.
Then under the Images tab, I used the Clarity tool where I also used tools instead of presets. Here I adjusted Sharpen +25, Fine +15, Clarity +5, Blacks +3 and Saturation +7. After this I exported and saved to camera roll for manipulating in my Plotagraph app on my phone.
Upon opening Plotagraph, I uploaded the image by choosing image animator at the top left found by clicking the Plotagraph icon. Then selected the image from my camera roll.
Firstly I used the Mask tool. I can adjust the size of the mask brush by sliding my finger left or right of the midway point. Using the mask tool allows me to keep areas of the image stable and unaffected by the animation tool when I get to that. I can also zoom in or out of the image by spreading two fingers on the screen. I can also move the image up and down using two fingers when it is in zoom mode.
I firstly masked out the frame. Note where the mask intrudes on the image. I did this on purpose so I can show you the erase tool, also In the masking bar. I used two fingers to zoom in on the image to clean up the borders inside the frame and then erased the overflow of the mask. If I am unhappy with the mask I can press reset which will take me back to the original image.
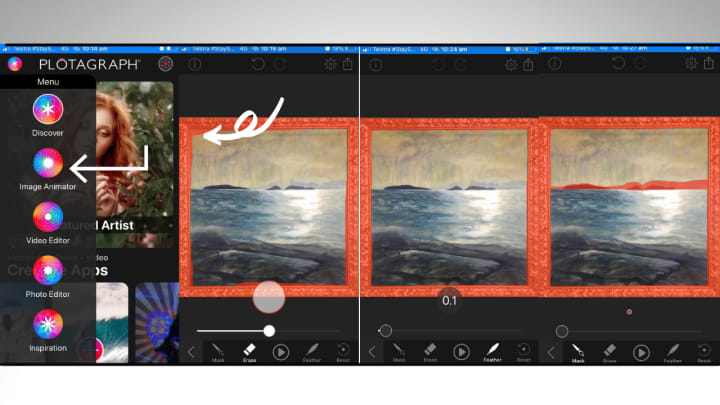
I set the feather tool to 0.1 to remove the hard edge of the mask. I don't want the islands to move and so I masked them including the mainland areas in the background and the horizon.
I then moved out of the mask tool by clicking on the arrow at the left of the bar to return to the main menu where I then clicked on animation. I used the infinity tool and my finger to create my own tracks rather than use any presets. This way I have total control over the movement of my image.
Using my fingers and sliding across the surface of my screen, I created my animation tracks. The longer the arrows are the faster the area moves and the shorter, the more subtle.
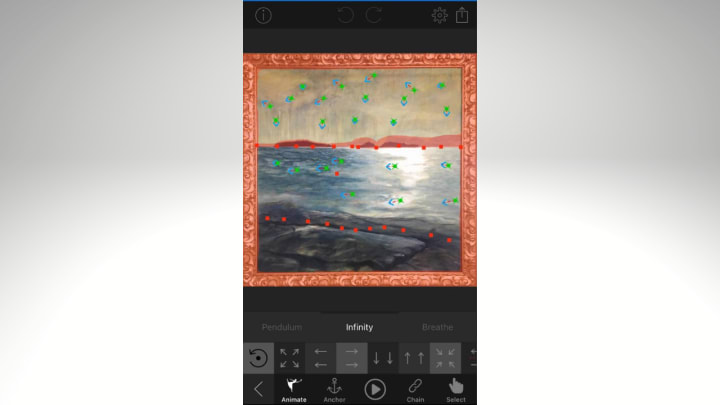
If I want to change the direction of the length of these tracks or the direction, I can choose select and click on the track directly. A number of tracks can be changed at the same time if I circle around the tracks to group them, or click on a number of them to highlight them all at once. This means any changes made will affect the other highlighted tracks
I used anchor points to stop the motion at certain points. Notice I put some down on the inside of the rocks and not on the direct edge of the rocks as i wanted the water to lap gently over the rock forms. If I had the arrows moving away from the rocks instead of towards, I would have place the anchor points directly at the edge of the rocks so the rocks didn't move into the water, which would have looked wrong.
Note: The chain tool in the animation bar can be used to link the end of one track to another which is particularly useful for stairs or closed circular motion. Plotaverse has video tutorials on how to use their tools available which are created by Troy.
This is another thing I love about Plotaverse and Plotagraph. Troy is not just an unknown developer, he is a talented photographer, artist and personality and he is personally involved in promoting his product.
Now I'm pretty happy with the movement and I am going to move on to adding effects. So clicking on the arrow at the left takes me out of animation and back to the main bar once again. Next I am going to the FX tab to add special effects.
Note: Different effects using videos, plotagraphs, design and elements that can be added to the image. I use a mixture of all of them, however I find myself using the video effects most. The tab 'more FX' is where you can find the library of effects for downloading to your device. I don't download them all, but the ones that I want to use at the time. It is easy to forget that there may be an effect hidden in this area that you haven't seen or have forgotten about, so it pays to check from time to time to see what you might want to add to your repertoire.
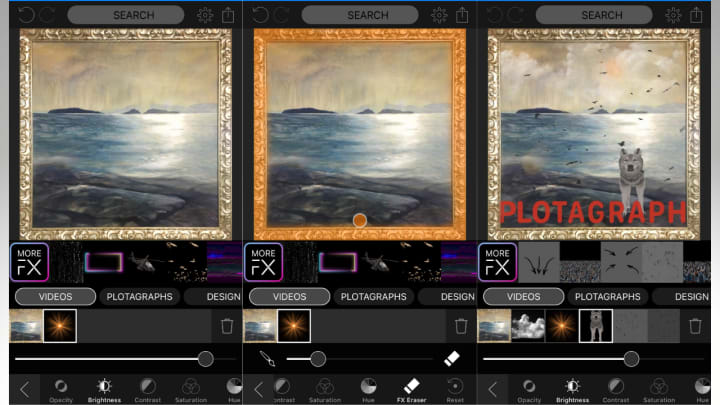
The image above is a glimpse into the FX tool. Here image opacity, brightness, saturation, contrast and hue can be altered to suit your image. I suggest reducing the opacity at least slightly for an even image blend. The rest is up to you.
Notice the middle frame. Here I have used the masking tool within the FX program to block the FX from moving over the frame. You can erase or add your effects using this, however the zoom facility available with the masking tool is not functionable here and so it can be tricky getting into tight spots using only a finger on the phone. I am sure a decent iPad might solve this problem as you would have a larger working space, however mine is too old for the Plotagraph app to work.
I used video effects for this piece and a design effect which was the Plotagraph animation. Before I put in the wolf it was a relatively serious animation, but I couldn't help having a bit of fun, and it shows how an image can be changed from serious to fun in an instant. Also when I lived in Tassy I had a dog that looked rather wolf-like, so it is an homage to him.
There were other things I could have done, and I kept effects to a minimum in this image, however this should give you a taste of what you could possibly do using the Plotagraph app.
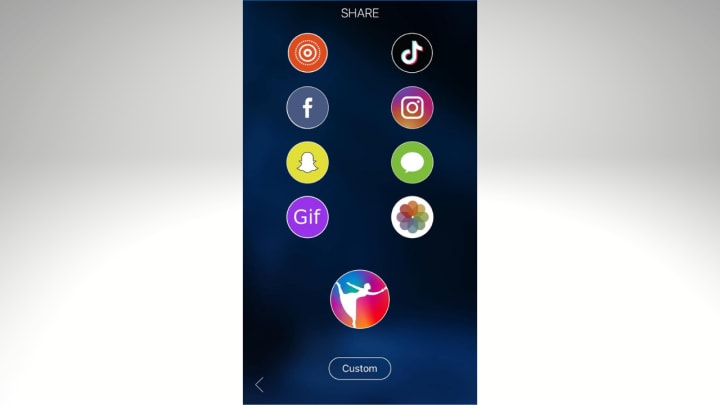
Finally you can send your motion graphic to the following platforms directly through the Plotagraph app. Here is a link to the motion graphic on my Facebook page.
If you enjoyed this article please consider giving it a like below. It would be very much appreciated.
About the Creator
jacki fleet
I am an artist. A painter, designer and creator who likes to write. I live in the Northern Territory of Australia. Writing is something I enjoy, usually for myself. I decided it's time to start sharing.
Keep reading
More stories from jacki fleet and writers in Photography and other communities.
Capturing Magic
In the world of photography, timing is the key to everything. While skilled compositions and technical proficiency are undoubtedly crucial, the perfect lighting can create the perfect photo. Nowadays, we can determine any light ourselves and are no longer dependent on any natural light source, thanks to the developed technology. We can turn every day into a night by using the right filters. And we can illuminate every night to be seen as a day. A typical process, especially in the film industry.
By Krishan Mubashar8 days ago in Photography
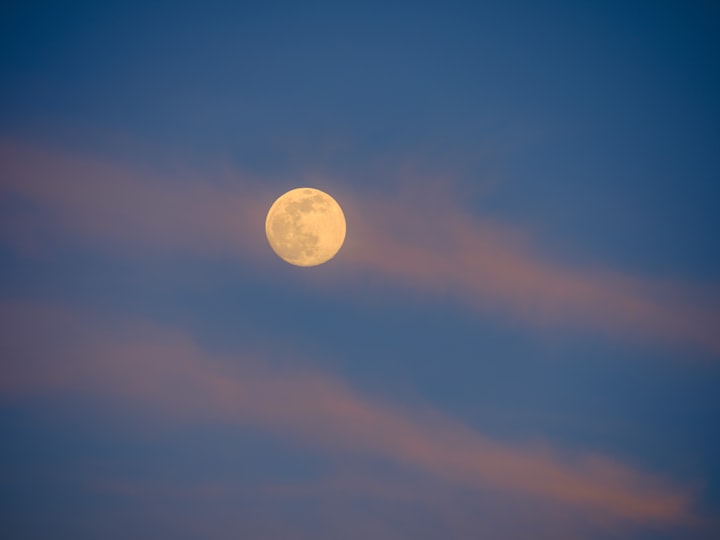
Enchanting Views, Full Pink Moon Photos from April 2024
The Full Pink Moon, a celestial spectacle that captivated hearts and minds for centuries, graced the night skies in April 2024. As it adorned the heavens with its mesmerizing hue, photographers and skygazers alike marveled at its beauty.
By SIMORa day ago in Photography
Frankie's Song of the Week: Espresso - Sabrina Carpenter
A little something different from me while I deal with the strain of writers block. I thought I'd do a song of the week, because I have been surely annoying my neighbours and my friends with this absolute musical GEM. I am of course talking about Espresso by Sabrina Carpenter.
By Frankie Martinelli7 days ago in Beat

Comments
There are no comments for this story
Be the first to respond and start the conversation.