
Mistakes Beginner Filmmakers (and Photographers) Make...#4
Tip #3 Lighting for Video: When and How to use it

Lighting for video takes some skill. It’s not an easy task. It took me a while to figure out what looks right, what looks natural, and what the heck I actually wanted when I was given a script or wrote my own script with specific settings.
To start this off, I’m going to say what you see with your own eyes may not be what the camera is going to see. Like I have stated in a previous post is that the camera doesn’t see light the same way we do, and since most videos are lit with artificial light you're going to need lights that seem "too bright" to your naked eye.
Of course, the camera settings will help with what the camera sees which depends on what your scene is supposed to look like. The lower your f/stop number, the wider your apertures going to be, thus letting in the most light. Having the right shutter speed will tell the camera how much of that light is hitting the sensor in between pictures, and the ISO controls the sensitivity of the light. 100 ISO tells the camera there's a lot of light here, you don't need to work as hard to see the subject whereas 6400 ISO tells the camera: dude, it's dark out here, do something about it!
Word of advice: try to stay within the 100-400 ISO range when shooting video. The higher the ISO the more grain or noise you're allowing in your quality. I've seen people bump up their ISO saying/think "oh this looks fine on the playback" and then regret it when they look at the results on their laptop (I'm guilty of doing this as well).
The main thing is understanding your camera and it's settings which will help you understand lighting and how to use it with your camera to get the best quality and what you are hoping to capture in your scenes.
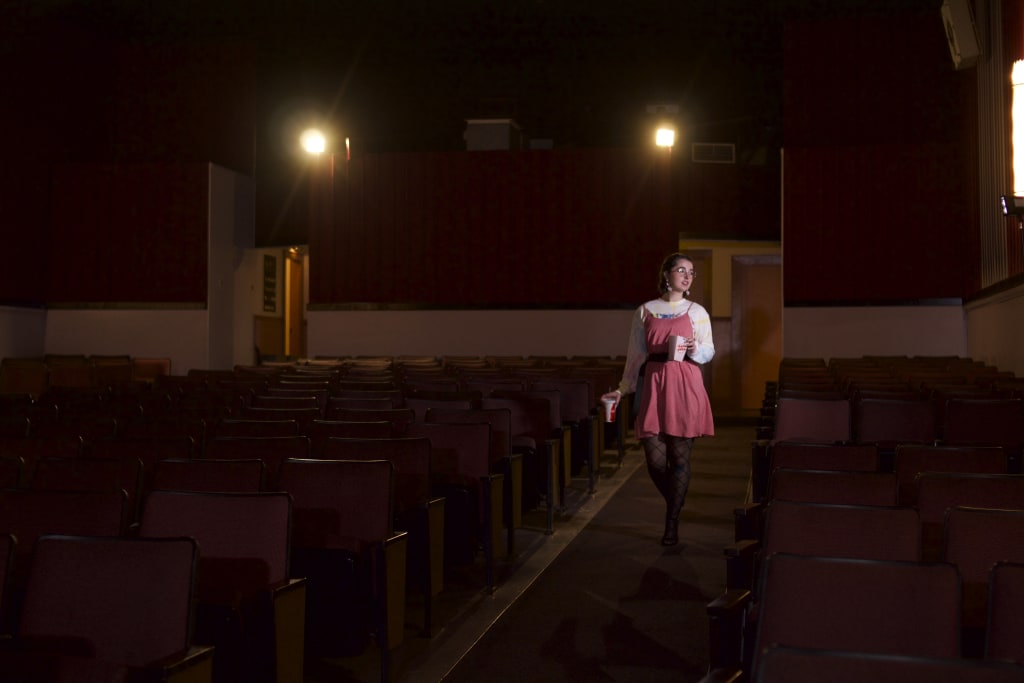
The video above "The Double Agent" was a school project for my audio class. (Fancy Fox Productions was the name my friends and called our production team while creating these projects.) However, during that project the main focus was audio and not necessarily the video quality which I think is a great example for what I am talking about in this post. I will admit, not my greatest work, and I actually hope to recreate not only this video, but the previous project we did before this one.
The first mistake I made while shooting this video was I used my iPad. No negativity toward iPads and Apple, I love Apple and their products (this is an understatement, all my tech is Apple; it's great for running my editing and design softwares) but the mistake was choosing ease over quality. iPad cameras are not made like DSLR cameras. They're made more like how our eyes see light. You have little to no control over how much light comes into your camera. Understanding the iPad is another post in itself, but I digress.
Lighting for your scene
This is the main focus I want to bring your attention to because the main question is: how do I light my videos to get the shot I want?
and to quote Wilbur Robinson from Meet the Robinsons: "That... is an excellent question."
Sometimes the lighting in the room you're shooting in isn't enough to keep your subject in focus or even make it look like there's light at all. A lighting tip I learned from experimenting for getting the "let's make this room look like there's actually lights on" look.
A couple months ago I had the privilege of shooting a music video for my good friend Quinn Dorian. She's a singer songwriter who just released her first album in February. One of the scenes we shot was in the bedroom where the light from the ceiling fan was, well, horrible. Horrible in the term of lighting for the video.
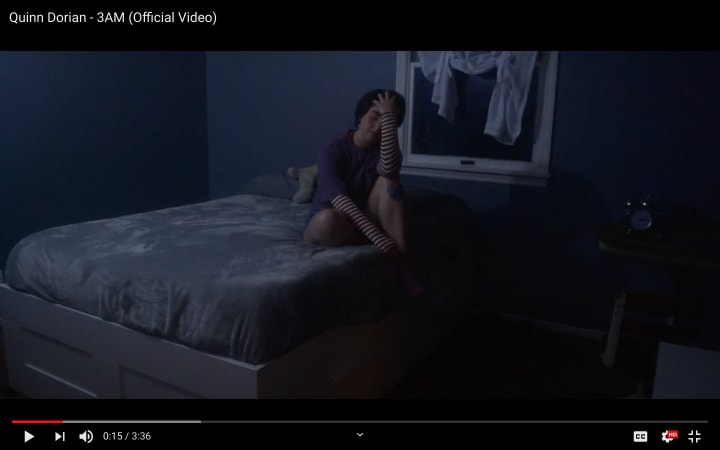
Overhead lighting wasn't what I was looking for in this scene, no, it was the look of moonlight/exterior coming through an implied second window. I used two lights for this scene, one on the left out of frame and one just to the left of the camera. One to diffuse light on the subject and one to shine light onto the ceiling. The technique of pointing the light source to the ceiling helps brighten the room to give it a natural look and feel instead of all the light being directed on the subject. Since the main focus of this scene isn't just Quinn, it's the whole room; the soft lighting allows the viewers' eyes to circle the frame with no "obvious" focal point. Try this for your videos and see how it changes the mood and the focus of the scene.
Lighting is used to convey feelings. Give the audience a glimpse into what's coming up, what a character's means or intentions are, or when something is changing or representing time going by.
For example, when you're watching a horror movie. The main character is up stairs and they hear a sound in the kitchen... you know where I'm going with this... they grab a baseball bat and start heading down the stairs and the only light is coming through the windows, and it's spooky. Imagine a horror movie where all the lights in the house are turned on... it wouldn't give you the same tension in your stomach that something was wrong. All because the lighting wasn't right.
Some lighting techniques to use when lighting for a scary or horror scene:
- Silhouette lighting: lighting the object of choice to display their shadow in the frame to hide their appearance, but to give the illusion that they're mysterious or object is lit from behind (light source not seen) to give a halo effect around the object, but they're still seen as mysterious because they're features are hidden and the only thing that can be determined is the outer shape of the figure.
- Under lighting: This is probably the most well-known lighting technique, because we all did it as kids when telling spooky stories around the campfire. This technique gives the normal shadows a different light, so to speak.
- Hatchet lighting: Lighting that is at a 90 degree angle from the front of the object, so in other words its directional light coming from either side of the subject creating half shadow and half lit. The human nose creates the perfect block for the lighting to make the face half in shadow.
- Low Key Lighting: Low key lighting, at first mention, may not be what you think it is. Low key lighting creates high contrast in your scene or on your subject creating hard shadows. It's a single light source
These techniques are also used for Noir films. If you're a fan of old black and white films, then you have probably watched a noir film. Psycho? Touch of Evil? The same lighting techniques were commonly used in the Film Noir era in the 1920s through the 1950s. Film Noir will be discussed in a later post! Be on the lookout for it!
The last thing I am going to talk about is lighting for an interview video. The simplest thing to do is a key and a fill light. My most recent project was with my friend Quinn as she answered her fans' questions about her and her music. I will be writing a new post about the project itself and what all I did to make it happen, but right now I am going to be talking about the lighting used to create a well-exposed composition.
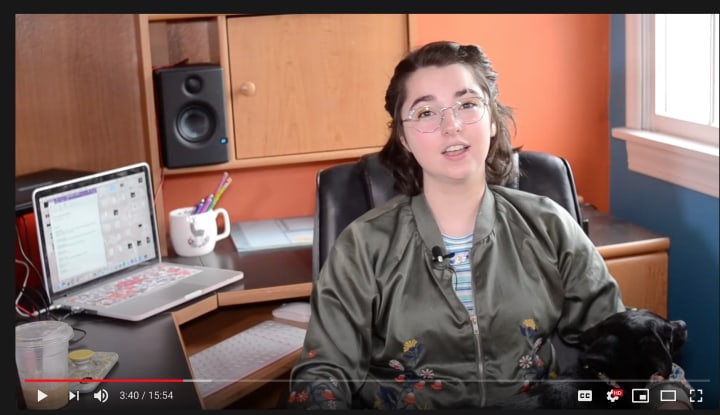
This also being along the fact that I was taught "know the rules before you break the rules." For this project, I didn't necessarily break those rules but took creative license being a one-woman producer and all. It turned out more or less like I planned it to be lighting wise. It was overcast outside which gave me a nice smooth natural light through the windows which created the back and background lighting, then I added a light on top of my main camera, one off to to the left of frame and one to the right of frame.
The functions these lights played:
- The windows (back/background): this gave me the back and background light needed to separate my subject from the background. Although I was not using a drop down background this still helps to keep your subject separated and provides some depth and dimension. This also gave me a nice high key soft light to work with.
- Light on top of camera (Key/flat): this provided me with a flat light for her face and flatten out the shadows on her face a little more, however this left me with her shadows being cast onto the desk behind her.
- Left of frame (fill/bounce): this was used as a fill light to the opposite of the high key to fill in some of the shadows on her face but also to help lessen the shadows in the background caused by the light on top of the camera.
- Right of frame (fill/bounce): this light was a last minute decision I made because it was going to be hard to set up my reflector below the camera without getting it in frame and still getting the bounce light I needed. This light sat on the chair beside me to shine some light on her neck to lessen the shadows that would be made while she was talking and moving.
Be on the lookout for the interview video coming out soon. New article will be out about the process I went through to create the setting, set up of cameras, and lighting in more depth.
Check out my website saraauldsphotography.com to see more of my blog posts, photography, and video projects.
About the Creator
Sara Aulds
I am a photographer and videographer from Cincinnati, Ohio. I write as a hobby and capture reality as a profession.
Keep reading
More stories from Sara Aulds and writers in Photography and other communities.
Mistakes Beginner Filmmakers (and Photographers) Make... #3
Lighting is key (no pun intended) to having great photos and videos. If you have no light, then all you’re going to see is darkness. The camera doesn't see light like we do. What you may think is too much light might not even be enough to get the look you want in your shot; and the most common thing I hear from people (and sometimes myself) is “I’ll fix it in post.”
By Sara Aulds4 years ago in Photography
Capturing Magic
In the world of photography, timing is the key to everything. While skilled compositions and technical proficiency are undoubtedly crucial, the perfect lighting can create the perfect photo. Nowadays, we can determine any light ourselves and are no longer dependent on any natural light source, thanks to the developed technology. We can turn every day into a night by using the right filters. And we can illuminate every night to be seen as a day. A typical process, especially in the film industry.
By Krishan Mubashar8 days ago in Photography
Taobao, PandaBuy the Giant Marketplace of China: A Comprehensive Exploration
In the bustling landscape of e-commerce platforms, few names resonate as profoundly as Taobao, especially within the Chinese market. Launched in 2003 by Alibaba Group, Taobao has evolved from a modest online marketplace to a sprawling digital ecosystem that shapes the retail landscape of China.
By Abdul Haseeb Kamal2 days ago in Photography


Comments
There are no comments for this story
Be the first to respond and start the conversation.