
Mastering Manual Mode
A Step-by-Step Guide

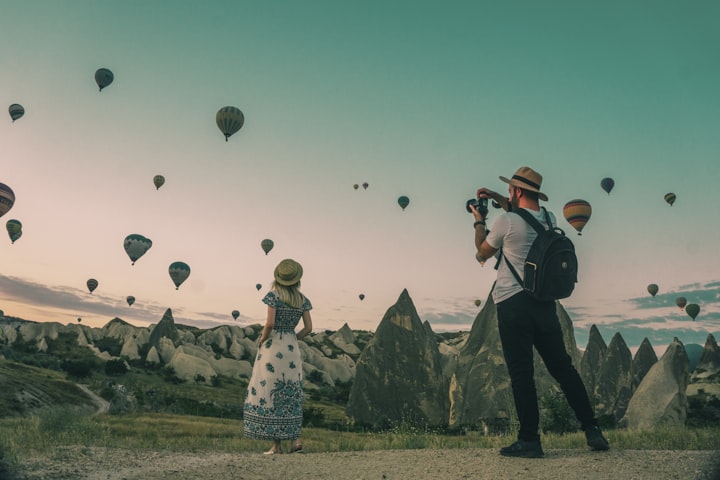
In the world of photography, the manual mode of a camera is often seen as the pinnacle of control and creativity. It allows photographers to have complete authority over their images, enabling them to capture scenes with precision and artistry. However, mastering manual mode can seem daunting, especially for beginners. In this comprehensive guide, we will break down the intricacies of manual mode, explaining settings like aperture, shutter speed, and ISO in an easy-to-understand manner.
Manual mode grants photographers the power to control three fundamental aspects of their photographs: aperture, shutter speed, and ISO. These settings are collectively referred to as the exposure triangle, as they work together to determine the final exposure of an image.
1. Aperture: The Gateway to Depth of Field
Aperture, measured in f-stops (e.g., f/1.8, f/5.6), is the opening through which light enters the camera. It has a significant impact on the depth of field in your photographs. A low f-stop (e.g., f/1.8) results in a wide aperture, creating a shallow depth of field where only the subject is in sharp focus while the background blurs out. This is ideal for portraits, emphasizing the subject and creating a beautiful bokeh effect. On the other hand, a high f-stop (e.g., f/16) yields a narrow aperture, resulting in a greater depth of field, suitable for landscapes and architecture where you want everything in the frame to be sharp.
2. Shutter Speed: Freezing or Blurring Motion
Shutter speed, measured in seconds or fractions of a second (e.g., 1/500, 2s), controls the duration for which the camera's sensor is exposed to light. A fast shutter speed (e.g., 1/1000) freezes motion, making it perfect for capturing fast-paced action like sports or wildlife. Conversely, a slow shutter speed (e.g., 1/4) creates motion blur, which can be creatively employed to convey a sense of movement, such as in a flowing waterfall or a bustling cityscape at night.
3. ISO: Balancing Sensitivity and Noise
ISO determines the sensitivity of the camera's sensor to light. A low ISO (e.g., ISO 100) is used in bright conditions to maintain image quality and reduce noise. As you increase the ISO (e.g., ISO 1600, ISO 3200), the sensor becomes more sensitive to light, allowing you to shoot in low-light environments. However, higher ISO settings can introduce digital noise, which degrades image quality. Finding the right balance between ISO and other settings is crucial for obtaining clear and noise-free images.
Now that we've covered the individual settings, let's explore how they interact in manual mode:
Imagine you're photographing a landscape during golden hour, where you want both the foreground flowers and the majestic mountain range in the background to be in focus. To achieve this, you would choose a mid-range aperture (e.g., f/8), which provides enough depth of field to keep both elements sharp. Since the scene is relatively static, you can opt for a slower shutter speed (e.g., 1/60) to allow more light to reach the sensor. To compensate for the longer exposure, you might need to raise the ISO slightly (e.g., ISO 200) if the lighting conditions are dim.
Conversely, if you're capturing a fast-moving subject, such as a sprinter crossing the finish line, you'll need a fast shutter speed (e.g., 1/1000) to freeze the action. In this scenario, you may need to open up the aperture (e.g., f/2.8) to allow more light into the camera. However, since the scene is well-lit, you can keep the ISO low (e.g., ISO 100) to avoid noise.
As you gain experience, you'll develop an intuition for how these settings interact and influence the final image. Practice and experimentation are key to mastering manual mode. Don't be afraid to experiment with different combinations of aperture, shutter speed, and ISO to achieve the desired creative effect.
Mastering manual mode is a rewarding journey that empowers photographers to take full control of their images. Understanding how aperture, shutter speed, and ISO work together is essential for creating captivating photographs that reflect your artistic vision. By manipulating these settings, you can achieve a wide range of effects, from capturing stunning portraits with creamy bokeh to freezing action in dynamic scenes. Remember, practice makes perfect, so don't hesitate to venture into manual mode and explore the endless possibilities it offers.
About the Creator
Keep reading
More stories from Judith Akabs and writers in Photography and other communities.
Photography Tips For Beginners
Photography is an art form that allows us to capture moments, express creativity, and tell stories through images. If you're just starting on your photography journey, it's essential to build a solid foundation. Here are ten crucial tips to help beginners embark on their photography adventure with confidence.
By Judith Akabs9 months ago in Photography
Capturing Magic
In the world of photography, timing is the key to everything. While skilled compositions and technical proficiency are undoubtedly crucial, the perfect lighting can create the perfect photo. Nowadays, we can determine any light ourselves and are no longer dependent on any natural light source, thanks to the developed technology. We can turn every day into a night by using the right filters. And we can illuminate every night to be seen as a day. A typical process, especially in the film industry.
By Krishan Mubashar11 days ago in Photography
Offbeat Places in Malaysia: Travel Secrets
Malaysia is most popular for stunning urban areas like Kuala Lumpur and George Town. In any case, there are such countless odd spots in Malaysia anticipating nature sweethearts and travelers. We've assembled a rundown of 10 mystery objections that make us need to book a pass to Malaysia this exact instant!
By prashant soni7 days ago in Photography


Comments
There are no comments for this story
Be the first to respond and start the conversation.